[100% Working] How to Smooth Edges in Blender
While clicking the images on any camera or mobile device, having some shortcomings in the images is common. For Instance, you can struggle with the annoying edges of the images and would love to make them smoother for a better viewing experience.
You can look at various ways to smooth the edges of the images, but opting for the Blender smooth edges has great benefits. If you aren't aware of the credentials of Blender and would love to smooth edges in Blender, you can dive into the exciting guide.
Part 1. What is Blender, and Why is it Used?
Blender is an immaculate open source and free 3D computer tool for generating animated films, virtual reality, visual effects, and more. Although the software is mainly used to edit videos, you can adjust the various parameters of the photos in this remarkable tool.
Hence, if you want to smooth edges in Blender, you can opt for it without breaking the sweat. Many people opt for the Blender edge smoothing because it doesn't tinker with the resolution of the images while making their edges smooth. Although the interface of Blender could be tricky for people who do not know Blended, it is worth trying if you want quick and precise results.
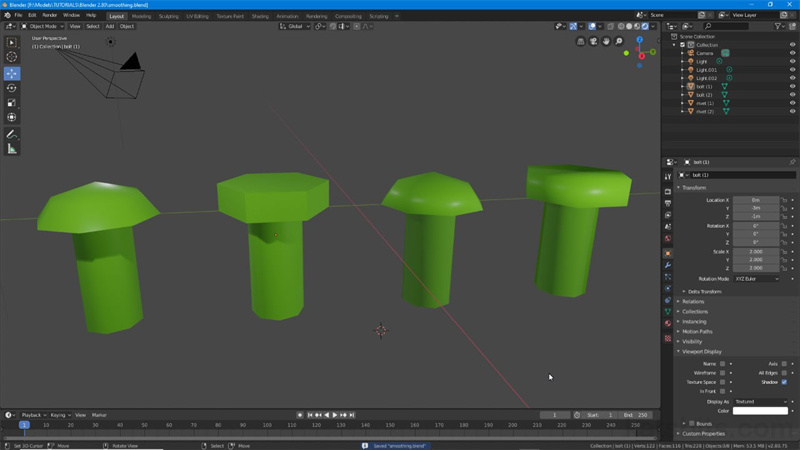
Part 2. How to Use Blender Smooth Edges?
Using the Blender smooth edges is simple; you'll only need to follow a few simple steps to complete the job. Here's the step by step guide to learn how to smooth edges in Blender.
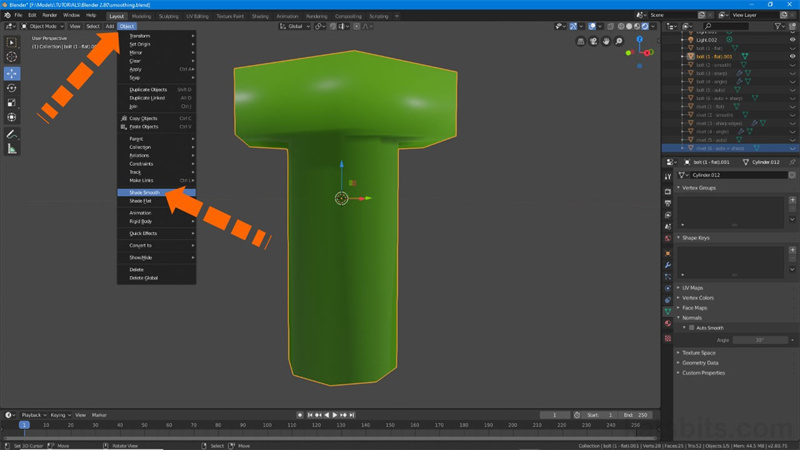
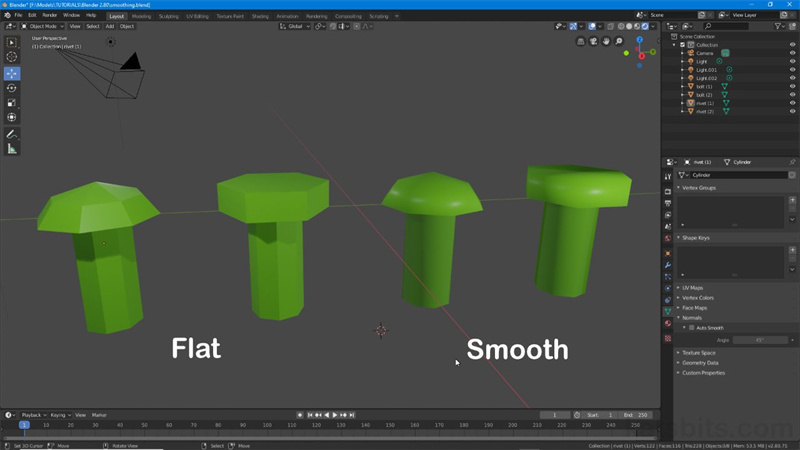
1.Launch the Blender tool after getting it installed from the official website. Next, you'll need to upload the photo into the timeline. Now, you'll need to go for the smooth shading effect to make the edges smooth and wonderful. Click on the Object menu and choose the Shade Smooth. Next, you must click the Shade Smooth button after hitting the Object icon.

2.Now, you can select the edges you want to smooth on the image. The biggest advantage you carry with the Blender is that it will assist you in making the edges of the images softer effortlessly, and you don't have to make much effort to put things in order.

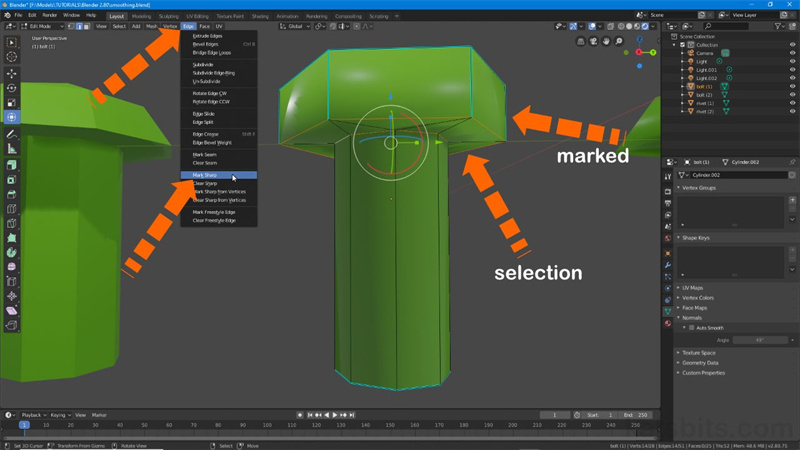
3.If the smoothing is done to the entire photo object and you'd love to control it, you can use the Mark Sharp. It would help to press the Edit mode after choosing the objects you want to make smoother. You navigate to the Edge Select to select the edges where you can see the hard or sharp break in your surface.
After visiting the Edge menu, you must choose Mark Sharp before hitting the Edge and Mark Sharp buttons.
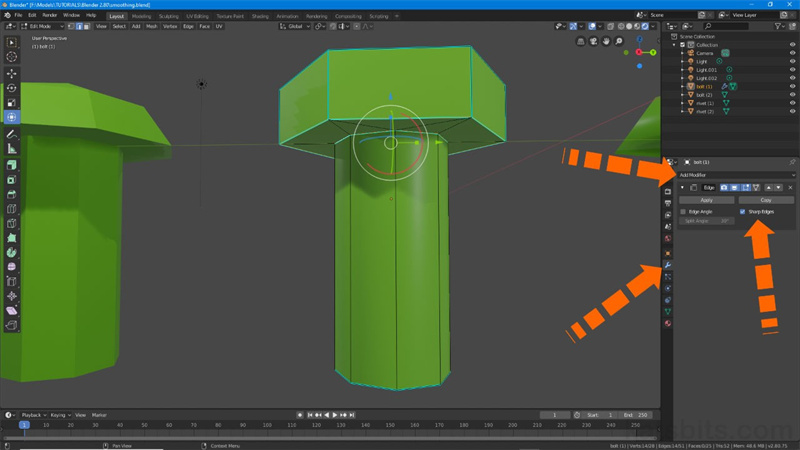
4.After marking the edges, you must tap the Add Modifier button after accessing Modifiers. Tap the Add Modifier button and select the Share Edges from the Edge Split button. This way, you'll be able to make the edges of the image smooth in no time.

Part 3. The Best Tool to Enhance Photos with HitPaw FotorPea
After using the blender smooth edges, you might look for a photo quality enhancer to upscale the image quality. Luckily, you don't have to explore multiple options when you've got the HitPaw FotorPea. With the 6 amazing AI models and eye catching features, HitPaw FotorPea makes it look effortless to improve the quality of the images. The best thing about the HitPaw FotorPea is that it is powered by AI technology, which implies that all you need to do is import the photo into the tool's timeline and let it do the rest.
Features- Doesn't come up with the watermark
- Allows you to upscale and enlarge the pictures automatically
- Doesn't affect the quality of the pictures
- Comes up with a simple user interface
- Lets you eliminate the blur and noise from the images automatically
- Allows you to explore the 6 commendable AI models
- Enables you to colorize the black-and-white images
- Allows you to resize the images automatically
- Helps you to upscale multiple images simultaneously
Here's the step by step guide to learn how to upscale the images through HitPaw FotorPea.
Step 1:Start the HitPaw FotorPea on your computer and click the Choose File button to upload the photo you'd like to improve the quality. HitPaw FotorPea supports importing images from multiple photo formats, including TIFF, WEBP, JPG, JPEG, etc.

Step 2:Now, you can click on any AI model you'd like to as HitPaw FotorPea blesses you with 6 stunning AI models to select from. For Instance, you can use color calibration, colorize, general, face, denoise, and more.

Step 3:Click on the Preview button after getting satisfied with the changes; you'll need to press the Export icon to download the photo.

Part 4. FAQs of Smoothing Edges in Blender
Q1. How do I get rid of jagged edges in Blender?
A1.
Getting rid of the jagged edges in Blender is quite simple, as you'll only need to act upon a few simple steps to get the job done. Here's how to fix the jagged edges in Blender.
1. Launch the Blender on the PC and import the photo you'd like to edit. Click on the Edit Mode and choose the Smooth icon.
2. Choose the area you'd like to smooth and press the Smooth button.
3. Hit the left mouse button to smooth the selected area.
Q2. What is the shortcut for smooth vertices in Blender?
A2. If you can't put a lot of hard yards smoothening the vertices in Blender, you can press the Ctrl+V Shortcut for smooth vertices in Blender. Doing so will assist you in making the edges of the images in Blender smooth and highly impressive.
Final Words
If you're worried about the jagged or annoying edges in the images, you can use the Blender smooth edges. We have listed the step by step guide to help you learn how to smooth edges in Blender.
HitPaw FotorPea is the most recommended way to enhance the quality of the images as it allows you to make the ugly and bad photos look impressive. You can use the 6 eye catching AI models the HitPaw FotorPea provided to take the quality of the images to the next level.



 HitPaw Watermark Remover
  HitPaw VikPea (Video Enhancer)


Share this article:
Select the product rating:
Daniel Walker
Editor-in-Chief
My passion lies in bridging the gap between cutting-edge technology and everyday creativity. With years of hands-on experience, I create content that not only informs but inspires our audience to embrace digital tools confidently.
View all ArticlesLeave a Comment
Create your review for HitPaw articles