Comparing 300 DPI and 600 DPI Detailed Guide
When printing or scanning pictures, among the most important things to decide on is resolution. You'll basically come across the usage of two big terms, the 300 DPI and the 600 DPI. They represent DPI, or dots per inch-measurement that signifies the quality of the print or scan. You can decide the choice you make of either based on the specific information of the given project, if you know what lies between the resolutions of 300 DPI and 600 DPI. Here, we will explain in detail the difference between 300 vs 600 DPI, discuss where each is best suited, and provide an example of software to update your scans for improved quality.
Part 1: DPI Explained - What It Means for Print and Scan Jobs
DPI is an abbreviation for Dots Per Inch and is a measure of resolution used for both printed and scanned images. In plain language, it is how many ink dots or pixels per inch an image contains. The higher the DPI, the sharper and more details the image will be. DPI is an important factor while scanning pictures, photographs, or any image because it has a direct influence on the final output's image quality. When it comes to printing, the difference between 300 vs 600 DPI can significantly impact image detail-600 DPI offers higher quality, especially when magnified.
DPI in Printing
In printing, DPI is applied to identify how many ink dots can be placed on a page. Finer print quality and more support for detail in the image are made by higher DPI, especially when it is working with detailed graphics or texts. Printers that have higher DPI are ideal to make professional-level prints, e.g., brochures, photos, and artwork prints.
DPI in Scanning
For scanners, DPI refers to the dots that can be read by the scanner from the picture. The higher DPI is better suited to scan images when you want them for archiving, digital editing, or copying. It reads more pixels and more information, so you can zoom in or enlarge an image without losing anything.
Part 2: Exploring 300 DPI - Standard Quality for Everyday Use
300 DPI is the common resolution for all general-purpose printing and scanning needs. It is a perfect middle ground between picture quality and file size and will be sufficient for many purposes, including scanning documents, photos for personal use, and printing documents or images for general purposes.
Pros of 300 DPI
- Standard Quality: 300 DPI is adequate for most general day-to-day printing requirements. It is acceptable for printing text documents, photographs, and general images for private or company use.
- Efficient File Size: With a resolution of 300 DPI, file sizes are acceptable, and it is simpler to process, store, and use system resources.
- Sufficient Detail: For photographs that do not need high-level detail, 300 DPI gives clear and crisp prints that are good enough for general purposes, including home printing and office printing.
Cons of 300 DPI
- Limited Detail: While 300 DPI is fine for general purposes, it lacks the detail needed for professional-grade prints, including quality photograph printing and large poster printing.
- Not Ideal for Enlarging: If you make enlargements of images that were scanned or printed at 300 DPI, you'll begin seeing pixelation or loss of detail.
Best Use Cases for 300 DPI
- Personal Documents: Good for home-office printing, personal photos, or text papers.
- Non-Professional Photography: Good for printing snapshots of the family or casual photos where great detail is not required.
Part 3: Stepping Up to 600 DPI - When Detail Matters More
600 DPI is usually reserved, however, for situations where more detail is required. The resolution is suited best by graphic design firms, digital photography, and print businesses, where accuracy and clarity are the issues.
Pros of 600 DPI
- Superior Detail: The greatest advantage of 600DPI is its ability to capture more detail. Scanning artwork, photographs, or high-quality papers, the extra resolution preserves fine details that would otherwise be lost with lower DPI settings.
- Better for Enlargements: Printed or scanned images at 600 DPI remain clear and sharp even when enlarged. That is perfect for big prints like banners or posters, where minute details have to be preserved.
- Professional-Grade Output: For professional-level prints like art print or commercial photography, 600DPI would typically be a more appropriate choice.
Cons of 600 DPI
- Larger File Sizes: The higher the DPI, the higher the resulting file size. Scans or prints at 600 DPI are more storage-intensive and use more processing time.
- Slower Processing: Larger DPI scans or prints take longer to process as more data is being captured.
- Not Necessary for Simple Tasks: For day-to-day printing and scanning activities that don't demand excessive detail, 600 DPI is overkill, causing undue storage and processing requirements.
Best Use Cases for 600 DPI
- Professional Photography: Perfect for scanning high-quality photographs or artwork that needs to be copied to the letter.
- Archiving Documents: 600 DPI is ideal for archiving historical documents, particularly where the preservation of fine detail or making high-quality copies is the main concern.
- Large Prints: Best suited for printing large photographs like posters, banners, and similar photographs that need to retain their details even if they are made larger in size.
Part 4: 300 DPI vs 600 DPI: Which DPI Setting Works Best for You?
Selecting between 600 DPI and 300 DPI is largely based on the type of your project and whether you will be utilizing the image in print or not. The following comparison can help you make your choice:
When to Choose 300 DPI
- Casual Projects: If you're just printing run-of-the-mill documents, home portraits, or laid-back portraits that don't have to be enlarged or formalized, 300 DPI is adequate.
- Smaller Prints: For normal photo prints or papers, 300 DPI will typically suffice to produce a good-quality output.
- Efficient Storage and Processing: If you're willing to trade resolution for file size and storage needs, 300 DPI is an acceptable compromise.
When to Choose 600 DPI
- Professional Use: If you're a professional creative (graphic design, photography, etc.), 600 DPI is more suitable for close-up work, so you can take and print out every little detail.
- Enlarging Images: If you're enlarging an image a lot, 600 DPI will make sure that the resolution remains crisp even when printed big.
- Archiving or Reproducing Old Documents: When you require accurate reproduction or archiving of earlier documents, 600 DPI makes sure that you get each and every detail.
Part 5: Bonus Tip - Improve Any Scan with HitPaw FotorPea Photo Enhancer
No matter how good your printers and scanners are, you'll have some moments when your scanned or printed photos lack detail, especially when comparing 300 vs 600 dpi settings. That is when HitPaw FotorPea Photo Enhancer steps in. HitPaw FotorPea is a cleverly intelligent AI-assisted solution that enhances the resolution and image quality of your photos without having to rescan them. It's perfect for those times when you've scanned something at a lower DPI (like 300 DPI) but need to improve the quality for a specific project.
Features of HitPaw FotorPea
- One-Click Enhancement: Improve the resolution and quality of your image with just a single click, and it's so simple to optimize your pictures in a snap.
- Blurry Image Fixing & Noise Reduction: Repair blur and noise from your photographs and make them sharper and cleaner-looking.
- Enlarge & Upscale Without Quality Loss: Upscale images without any quality loss, i.e., you can double the size of an image and maintain it clear and detailed.
- AI Face Swap, Object Removal & More: Utilize advanced AI capabilities to exchange faces and erase unwanted objects from your photos, allowing you more control over your photos.
Step 1: Download and Install HitPaw FotorPea
Head over to the official HitPaw FotorPea website or click the download button below. Download the installer and follow the instructions to set it up on your computer.
Step 2: Upload Your Photo
Launch the app after installation. Click "Enhance Photos Now" to upload your image. HitPaw FotorPea supports multiple formats, including PNG, JPEG, JPG, WEBP, and TIFF.

Tips
You can preview features using one of the sample photos provided.
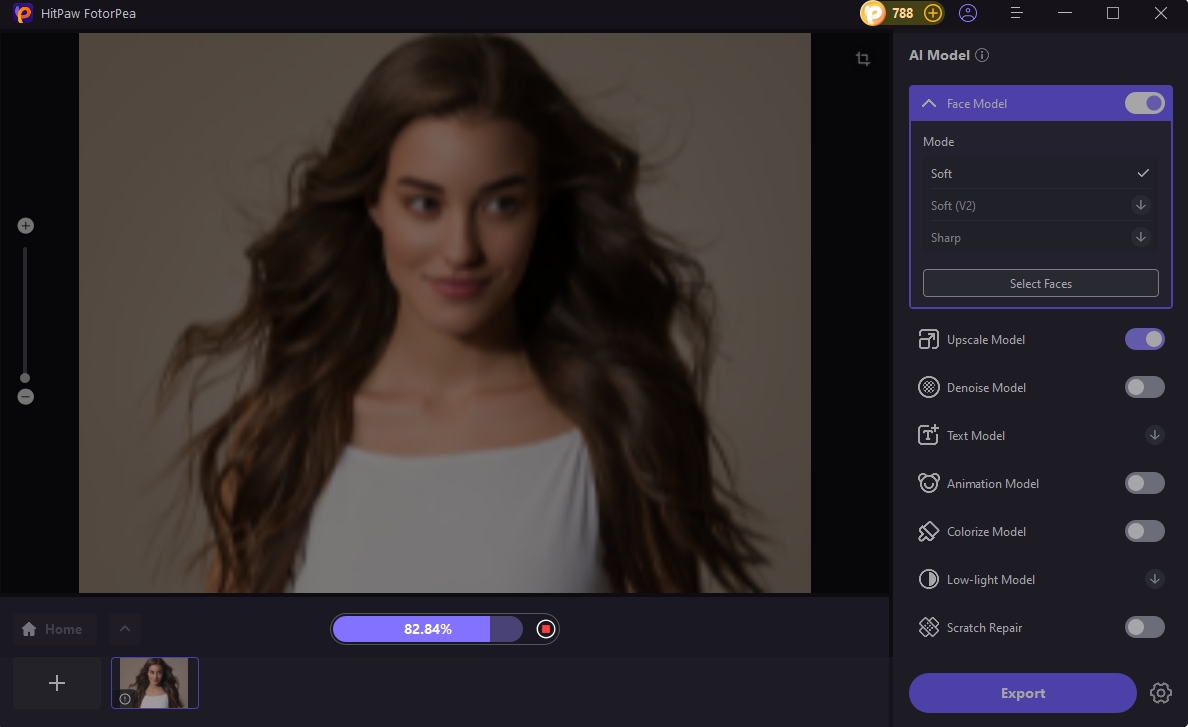
Step 3: Choose an AI Model
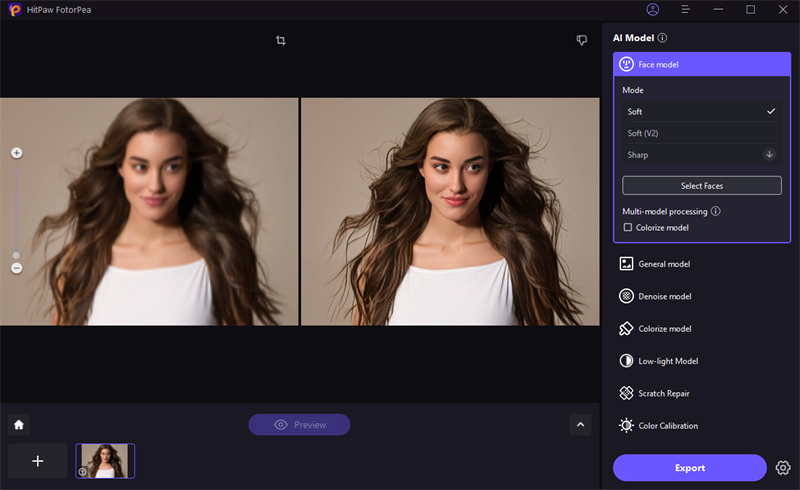
Once uploaded, hit Preview to let the AI process your image. Choose from 9 advanced models like Face, Denoise, Text, or Animation based on your image needs. Combine models to maximize results.

Step 4: Preview and Export
Review the improved image in real-time. When ready, click Export to save it to your device.

FAQs - 300 DPI vs 600 DPI
Q1. Is 600 DPI always superior to 300 DPI when printing?
A1. Not necessarily. 600 DPI is superior for professional-level prints where maximum detail is required, but for everyday printing, 300 vs 600 DPI show that 300 DPI is acceptable and cheaper.
Q2. Can I enhance a 300 DPI image without rescan it?
A2. Yes, you can use programs such as HitPaw FotorPea to enhance the image quality and resolution without rescan it.
Q3. What is the best DPI to scan old photos?
A3. To scan old photos, you can usually hold at 600 DPI, particularly if you are going to save all the details and make first-class reproductions.
Conclusion
How to know if 300 vs 600 DPI are what your project needs it all based on the true requirement of your task. 300 DPI is generally adequate for general use, striking a balance between quality and cost-saving efficiency. However, for serious work, high-end scans, or enlargements, 600 DPI is better. And if your photo needs a little help, HitPaw FotorPea Photo Enhancer is the ideal tool to increase the resolution and enhance the quality of your scans without breaking a sweat.


 HitPaw Univd (Video Converter)
 HitPaw VoicePea
  HitPaw VikPea (Video Enhancer)


Share this article:
Select the product rating:
Daniel Walker
Editor-in-Chief
My passion lies in bridging the gap between cutting-edge technology and everyday creativity. With years of hands-on experience, I create content that not only informs but inspires our audience to embrace digital tools confidently.
View all ArticlesLeave a Comment
Create your review for HitPaw articles