How to Screen Snip on a MacOS Computer
Missing the Snipping Tool on Mac when you switch from Windows? Don't worry, macOS has built-in tools for snipping, screen recording, and editing. You can use them to grab screenshots of the entire screen, specific windows, and specific areas. However, you won't find a dedicated tool to access screenshot feature. Instead, these tools are baked into the OS and can be accessed using shortcuts only. So, you need to learn all the shortcuts for taking and managing the screen snips on your Mac devices. We'll give you some clever tricks and tips for easily managing your screenshots and screen recordings on macOS.
Part 1. 3 Ways to Screen Snip on A Mac
Way 1: Screen Snip on Mac using Shortcuts
These are the direct shortcuts to get screenshots on macOS instantly:
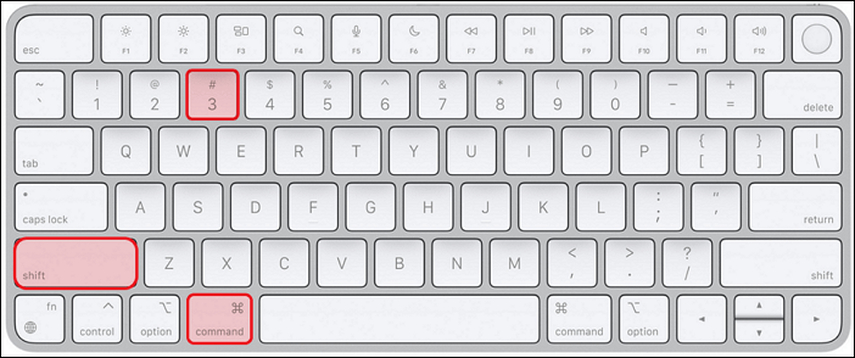
1. Capture the Entire Screen
Step 1:Press "Shift + Command + 3" at the same time.

Step 2:When a thumbnail preview appears at the bottom right corner of your screen, click on it to preview and edit the screenshot, or let it save to Desktop automatically.
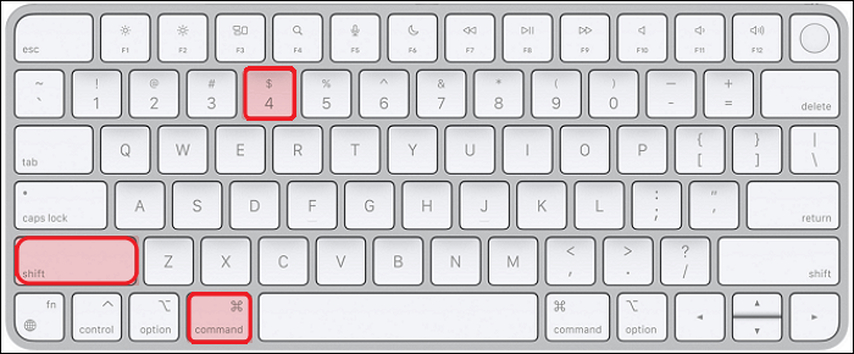
2. Capture a Selected Portion
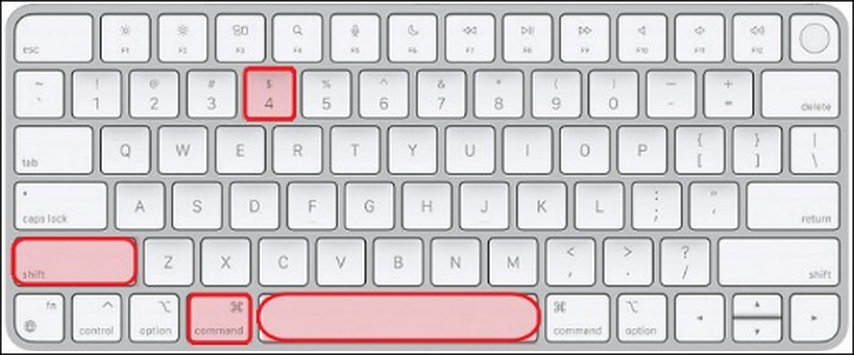
Step 1:Press "Shift + Command + 4" at the same time. It activates the crosshair tool to select the screen portion you wish to capture.

Step 2:Click and drag the crosshair tool to create a rectangle of the screen's portion you wish to capture. Once you release the mouse or touchpad, the screenshot gets saved to your desktop.

3. Capture a Specific Window
Step 1:Press "Shift + Command + 4 + Space" to turn your cursor to a camera icon.

Step 2:Drag the camera icon to the window you wish to capture and click on it. The screenshot of the window will be saved on the desktop.
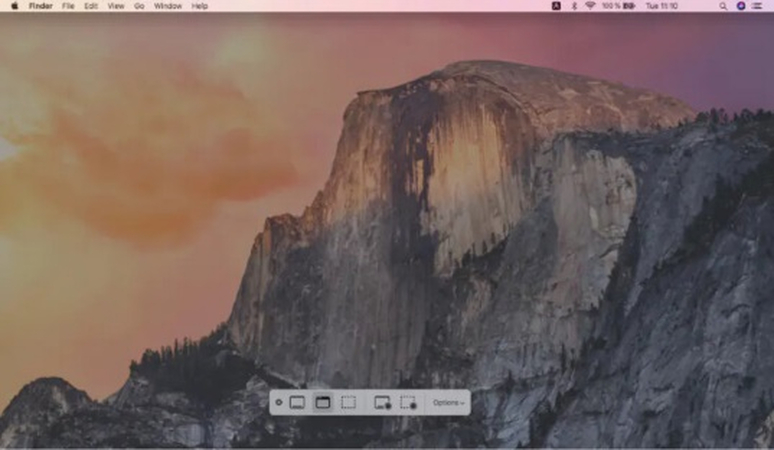
Way 2: Snip on a Mac via Screen Toolbar
- Step 1:Activate the Toolbar on your desktop by clicking "Command + Shift + 5" simultaneously.
- Step 2:Use the options to capture screengrabs of Selected Portion, Window, Entire Screen, and Desktop icons to get what you need. Clicking on these buttons immediately saves the respective screenshot to your desktop.

Way 3: Snip on MacBook with Touch Bar
- Step 1:Activate the Touch Bar on your desktop by clicking "Command + Shift + 6" simultaneously.
- Step 2:Click on Selected Portion, Window, Entire Screen, and Desktop icons to get the screengrab of what you need. The images are stored on your desktop.
Part 2: Guide to Add the Snipping Tool to the Touch Bar
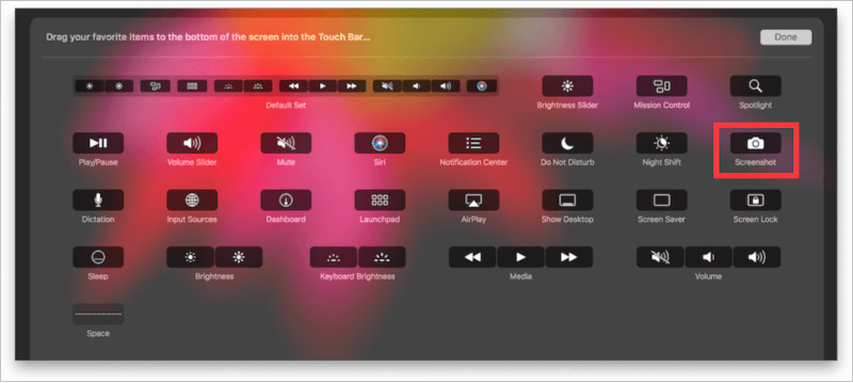
Do you love the snipping tool but hate the shortcuts? You can simplify your life by adding the Snipping Tool to your customizable Touch Bar on your desktop. It gives you quick access and makes the screen-grabbing experience that much more convenient. Here's how you do it:
- Step 1:Go to "System Preferences" on your desktop >> Select the "Keyboard" option.
- Step 2:Find the "Touch bar" dropdown under "Keyboard Settings" >> Select "App Controls" >> Hit the "Customize Control Strip" button.
- Step 3:Drag the camera button (Screenshot) and place it on the Touch Bar >> Click "Done".
Part 3: The Easy Way to Record Screen on a Mac
There are multiple ways to record a screen on a Mac, but the simplest and easiest way is with HitPaw Univd for Mac (HitPaw Video Converter for Mac). It's a powerful media editing tool that you can use to capture screenshots, record screens, and perform an extensive range of edits. With this one tool, you'll unlock a high degree of productivity with anything that has to do with media, be it creating, editing, managing, or converting media like images, audio, and videos. HitPaw Univd makes screen recording easy and hassle-free.

HitPaw Univd - All-in-one Video Solutions for Win & Mac
Secure Verified. 254,145 people have downloaded it.
- Highly Versatile: Capture the entire screen, specific windows, or specific portions with ease
- Built for the Internet Age: Built-in tools for recording sound, voiceover, and webcam activation
- Extensive Editing: Crop, cut, trim, add effects and filters, and do much more with your recordings
- Lossless Conversion: Convert to any other video format for uploading, storing, and sharing
- Unbeatable Converter: Make it internet-friendly by converting it to any format, as desired by social platforms
- Powerful Compression: Cut down the size of the recording without losing its quality drastically
Secure Verified. 254,145 people have downloaded it.
Guide to Record Screen on A Mac
- Step 1: Enter Screen Recording Mode
- Step 2: Set Screen Recording Area
- Step 3: Customize Recording Options
- Step 4: Record
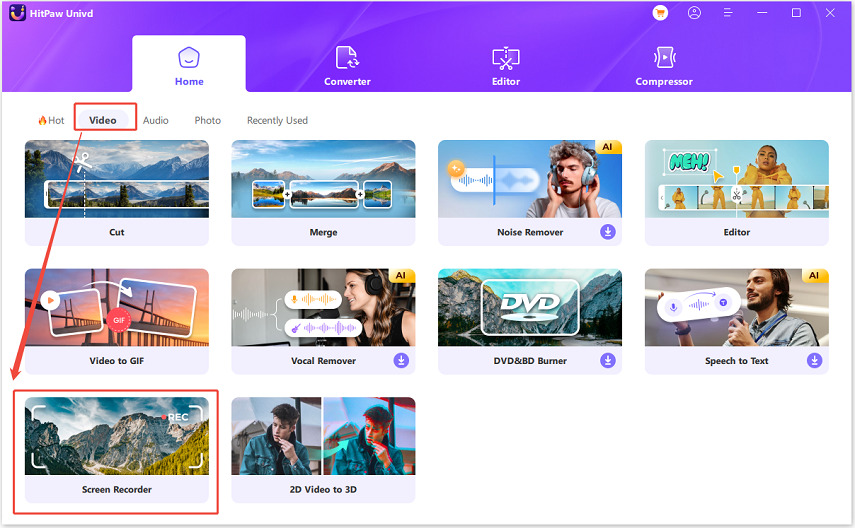
Launch HitPaw Univd >> Go to "Video" >> Select "Screen Recorder".
When the "Screen Recorder" feature is activated, a cropping rectangle appears on the screen. To record the entire screen, click "Spacebar." Alternatively, you can rearrange the rectangle to select specific areas of the screen to record.
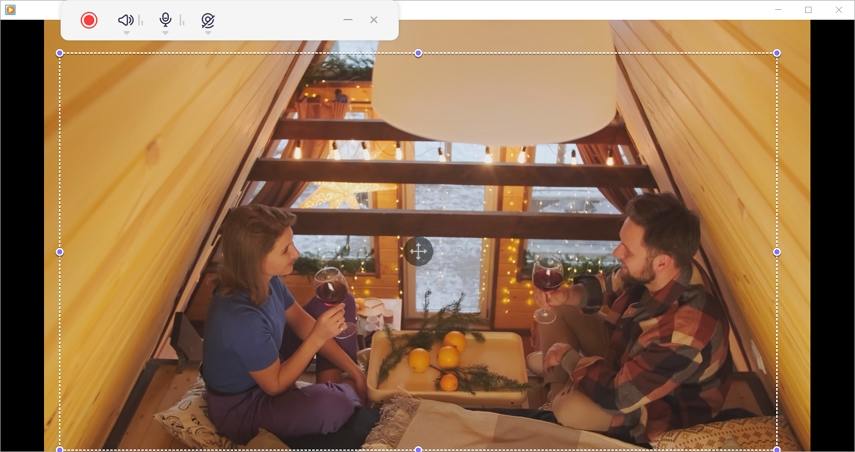
Turn on or off the Sound, Microphone, and Webcam buttons at the top of the window.
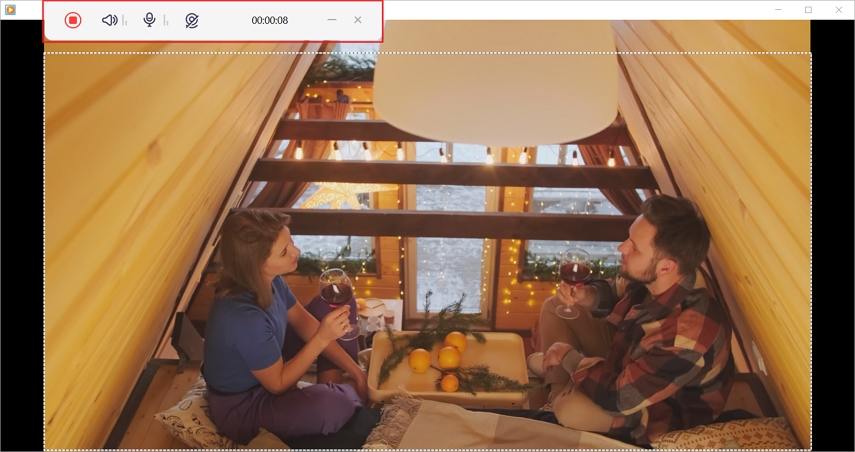
Click the Red button to start or pause recording the chosen area >> When finished recording, click the "x" button at the top.
FAQs about Screen Snip on Mac
Q1. How to access screenshot files on Mac?
A1.
All screenshot files on Mac are saved on the Desktop by default unless you've changed the destination. You can access these saved files every time you take a screenshot simply by clicking "Command + Shift + D."
You can use the Toolbar or Touch Bar (if it's available) to change the storage destination of the screenshots to a folder that's more convenient to you.
Q2. How to change the screenshot formats on Mac?
A2.
Mav saves screenshots in PNG format by default. However, you can use the terminal to change the default format to something else like JPG, TIFF, etc. It's a bit complicated for casual users, though, and you'll have to change the default format setting to other formats whenever you need the screenshots in different formats.
A smarter way to do this is with HitPaw Univd. With Univd, you can convert the screenshots from one image format to any other image format. So, your Mac can keep churning out screenshots in its default format, and you can convert them to JPG, Webp, TIFF, and other formats you like.
Q3. How do you snip and paste on a Mac?
A3. You already know how to use various shortcuts to capture screenshots. All you need to do is add the "Control" button to the screenshots to capture the screengrab directly to your clipboard. For instance, "Shift + Command + 3 + Control" captures the entire screen directly to your clipboard. Now, open the app where you wish to paste the screenshot and press "Command + V." The screenshot would be pasted into the app.
Q4. Why can't I snip on my Mac?
A4.
There could be several reasons behind your Mac not letting you snip. If you're using the shortcuts correctly and still find yourself unable to do it, then you can try some quick fixes. The simplest solution is a system restart. If that doesn't work, you can update your operating system in "System Preferences."
If these methods do not work, you might want to check whether privacy settings are preventing the screenshot feature from activating under "Security & Privacy" in "System Preferences." More advanced users can try using the "killall SystemUIServer" command in Terminal.
Conclusion
Mac's snipping tool is an excellent feature that lets you capture your screen quickly and effortlessly. While shortcuts are the easiest way to do it, you can also use the Touch Bar or Toolbar to capture your screen.
If you also frequently record screens for your work or hobby, the built-in Mac tool is woefully inadequate. For that, you would need a powerful tool like HitPaw Univd, which records your screen in high quality and lets you convert it to any other format for compatibility with different video platforms and devices. Check it out today.



 HitPaw VoicePea
  HitPaw VikPea (Video Enhancer)
 HitPaw FotorPea



Share this article:
Select the product rating:
Daniel Walker
Editor-in-Chief
My passion lies in bridging the gap between cutting-edge technology and everyday creativity. With years of hands-on experience, I create content that not only informs but inspires our audience to embrace digital tools confidently.
View all ArticlesLeave a Comment
Create your review for HitPaw articles