Detailed Guide on How to Print a Photo on a Mac in 2025
In this age, we all love to capture our photos on mobile cameras. But you will agree that there's something undeniably special about holding a physical photo in your hand. No matter whether you want to gift it to someone or just want to print out your favorite photo to hang on the wall, it will allow you to cherish the memory in a tangible way.
So, if you are a Mac user wondering how to print a photo on mac, you're in the right place. This comprehensive guide will walk you through three easy methods to print photos on your Mac so that you get the best result every time.
Part 1: How to Print a Photo from Photos on Mac
Mac users know that the Photos app is a one-stop shop for managing and editing photos on Mac. To print directly from here is a pretty straightforward process, and all you need to do is follow these steps:
Step 1: Access the Photos Application
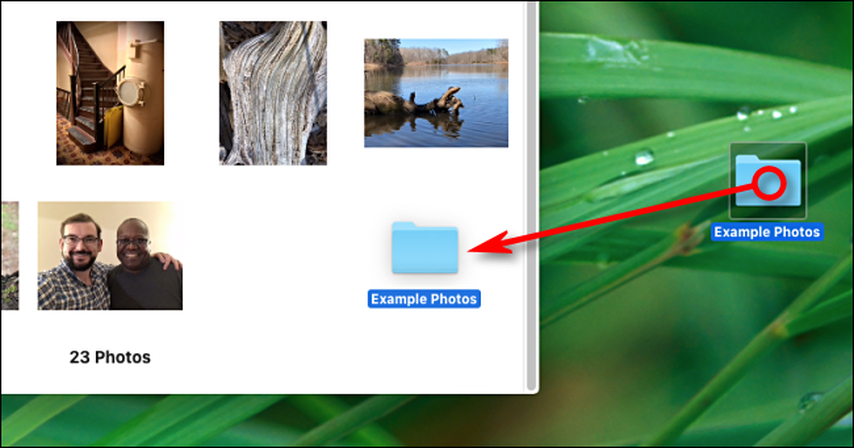
Open the Photos app on your Mac. You can find it in the Applications folder or by using Spotlight Search (Command + Space, then type "Photos").
Step 2: Select Your Desired Photo
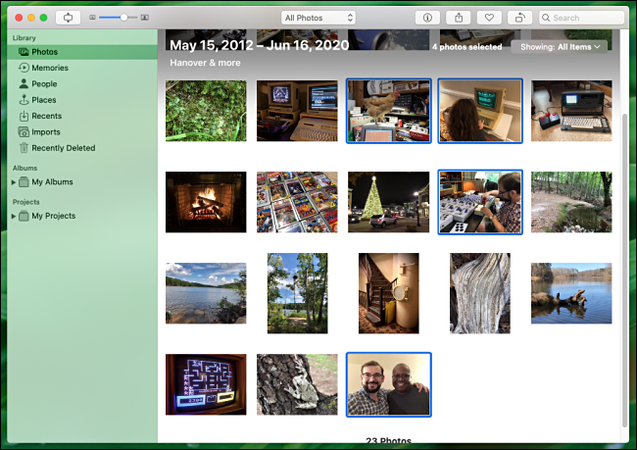
Next, browse through your library and click on the photo you want to print. You can also select multiple photos by holding down the Command key while clicking on each image.
Step 3: Adjust Photo Settings
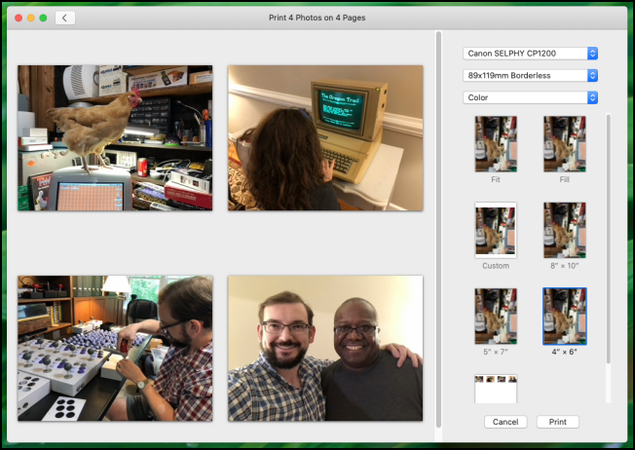
While not always necessary, you can adjust some settings before printing. With your photo(s) selected, click on "File" in the top menu bar, then choose "Print." A print dialog box will appear, offering various options to customize your print job.
Here, you can adjust:
- Print size: Choose from standard sizes like 4x6, 5x7, or 8x10.
- Paper type: Select the appropriate paper for your printer.
- Border: Add a white border if desired.
- Theme: Apply a theme to your print for a stylized look.
Step 4: Initiate the Print Command
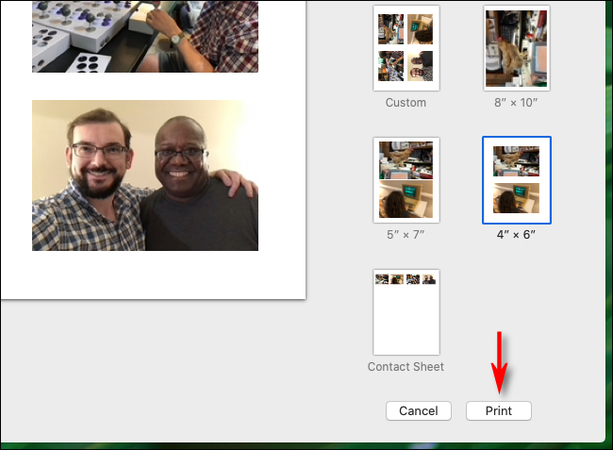
After adjusting your settings, click the "Print" button in the bottom right corner or Or, you can hit Command+P. Then select your printer from the drop-down menu if it's not already chosen.
Part 2: How to Make a Photo Print on Multiple Pages on Mac
If you don't want a simple print and are looking to create a larger-than-life print by spreading your photo across multiple pages, the Preview app on Mac offers this functionality. To print a single photo across multiple pages using the Preview app, follow these steps:
Step 1: Open the photo in Preview
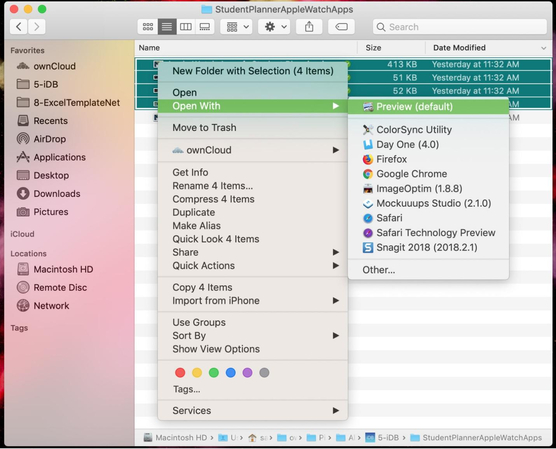
Right-click on the photo you want to print and choose "Open With" from the context menu. Select "Preview" from the list of applications.
Step 2: Explore Print Settings
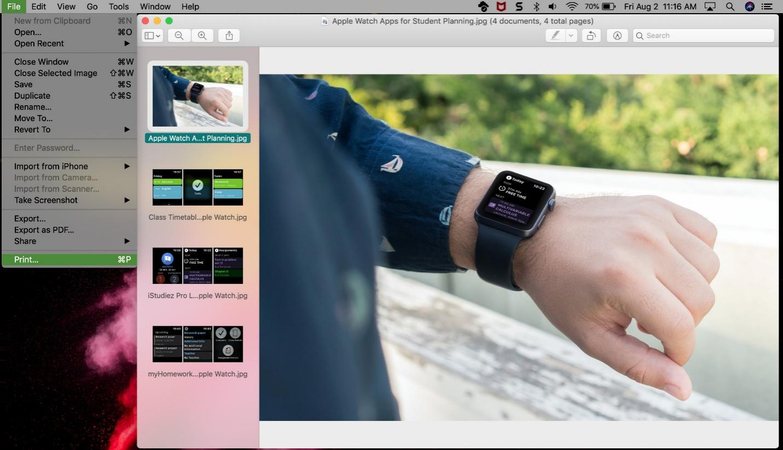
Once you have the photo opened in Preview, click on "File" in the menu bar, then select "Print." This will open the print dialogue in Preview.
Step 3: Customize Print Options
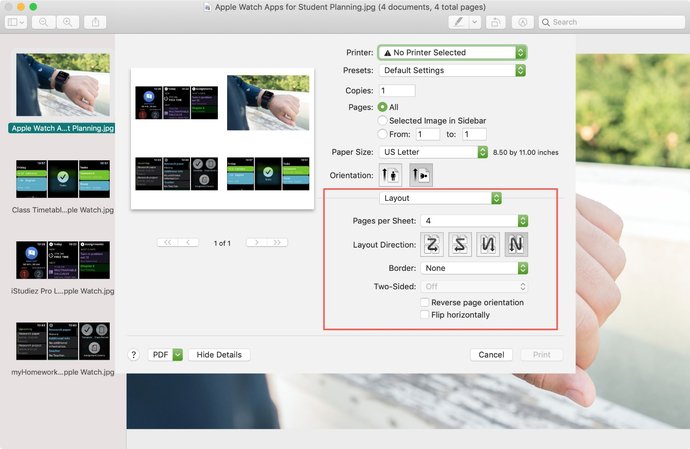
In the print dialog box, look for the “Layout” section. You will see a drop-down menu, and there, make sure to find the option “Scale to Fit” or "Tile." This will cause your image to span multiple pages. You can further customize the layout by adjusting the number of tiles horizontally and vertically.
Additionally, you can:
- Change paper orientation (portrait or landscape).
- Adjust layout direction (how pages are arranged).
- Modify overlap to ensure seamless joining of pages.
Step 4: Finalize the Print Process
Once you are satisfied with the settings, click "Print" to begin the process.
Part 3: How to Print a Photo a Certain Size on Mac via Pages
If you are wondering how to print a photo on mac with more control over the photo's size and layout within a large document, Apple's Pages app is an excellent choice. Although it is primarily used as a world processor, it offers great image handling capabilities.
Step 1: Create a New Document in Pages
Open the Pages app and create a new document. You can do this by either choosing the “Blank document” or a pre-designed template.
Step 2: Import Your Photo
Next, click on “Insert” in the menu bar and choose “Image.” Now browse the image you want to print and select it. Alternatively, you can drag and drop the photo directly into your Pages document.
Step 3: Adjust Layout and Design
Now adjust the layout and design by selecting the image and then dragging it to position it within the document. You can use the corner handles to resize the photo within the document.
For precise sizing:
- 1.Select the image
- 2.Open the Format sidebar (top-right button that looks like a paintbrush).
- 3.In the "Style" tab, you can enter exact dimensions for your photo.
Additionally, you can also add borders, apply effects, or include text captions to create a personalized layout.
Step 4: Print Your Document
When you're happy with the layout, click "File" > "Print". In the print dialog, ensure that "Scale to Fit" is unchecked to maintain your chosen dimensions.
Part 4: Bonus Tips to Improve Mac Photo Quality before Printing
Before you hit that print button, it's crucial to ensure your photos are in the best possible quality. Because sometimes your images might need an extra touch of brilliance to ensure quality. This is where HitPaw FotorPea for Mac comes in. Using the advanced AI algorithm, this powerful photo editing tool can significantly enhance your images with just a few clicks.
HitPaw FotorPea is a versatile photo editor packed with multiple features to elevate your photos. Powered with the advanced AI algorithm, it's designed to help Mac users improve their photo quality effortlessly. And the best thing is, you don't need any technical knowledge to use this, making it accessible to both beginners and experienced photographers.
Key Features of HitPaw FotorPea:
HitPaw FotorPea - All-in-one Photo Editing Tool for Win & Mac
Secure Verified. 212,820 people have downloaded it.
- User Friendly Interface
- AI-powered enhancement for Mac and Win
- Noise reduction and sharpening tools
- Resolution upscaling to fix blurry photos
Secure Verified. 212,820 people have downloaded it.
To enhance your photo using HitPaw FotorPea, follow these steps:
Step 1: Download and Install HitPaw FotorPea
Visit the official website to Download and Install HitPaw FotorPea on your Desktop.
Step 2: Enter AI Enhancer
Once installed, open the software and select “AI Enhancer” from the main interface. Next click on “Choose File” to upload the photo that you want to fix.

Step 3: Select the AI Model
Choose the AI model from the list i.e General, Denoise, Colorize, Low Light Model or Scratch Repair.

Step 4: Click on “Preview”
Next, Click on Preview and the AI will start enhancing the Images.
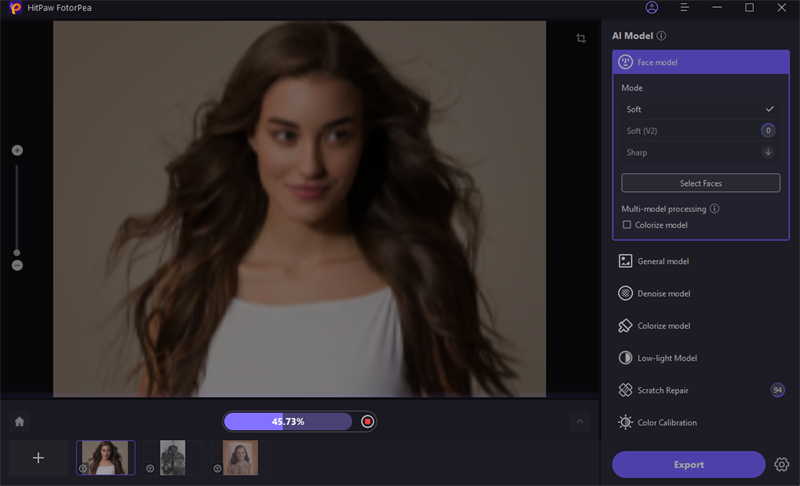
Step 5: Export the image
Once you are satisfied with the result, Click on “Export” and select the destination folder to save the enhanced images.
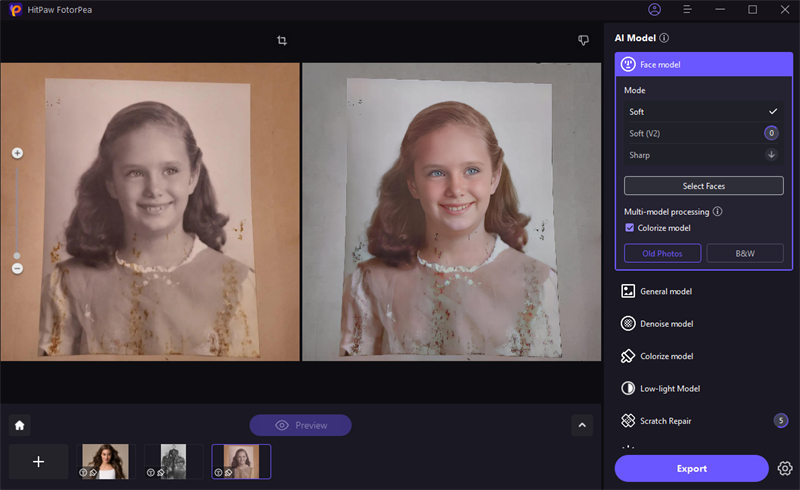
This is the ultimate guide of HitPaw FotorPea for Mac
Conclusion
Printing your favorite photo is a great way to preserve your memories. In this article, we shared a detailed guide on how to print a photo on Mac in 2024. Whether you want a simple print, a multi-page layout, a multi-page spread, or a precisely sized photo, Mac provides the right tool for every requirement.
However, before printing your picture, you need to make sure they are in high quality. To enhance the quality of your images, consider using HitPaw FotorPea. This dedicated photo enhancement tool will evaluate your images, making them crisp and sharp.


 HitPaw Univd (Video Converter)
 HitPaw VoicePea
  HitPaw VikPea (Video Enhancer)
Share this article:
Select the product rating:
Daniel Walker
Editor-in-Chief
My passion lies in bridging the gap between cutting-edge technology and everyday creativity. With years of hands-on experience, I create content that not only informs but inspires our audience to embrace digital tools confidently.
View all ArticlesLeave a Comment
Create your review for HitPaw articles