What is Considered a High-Resolution Image? Understanding High-Resolution Standard for Photos
You may have heard high-resolution images are essential for branding purposes whether you are a photographer, web designer, or media influencer. However, some people still don’t know what is considered a high-resolution picture. Answering this question usually comes down to how well the image maintains its sharpness and clarity over time.
High-resolution images provide resizing and editing flexibility, but you still need an advanced tool and cameras to gain quality results. This article will explain high-resolution photos, along with image enhancement tools that are easy to use.
Part 1. Defining High Resolution & their Values in Different Image Types
Are you wondering what is considered a high-resolution image in the eyes of the photographer, media influencer, or layman person? Generally, high resolution refers to an image that contains a large number of pixels, often measured in terms of pixel dimensions. The higher the pixel count, the greater the image’s ability to display fine details and maintain clarity.
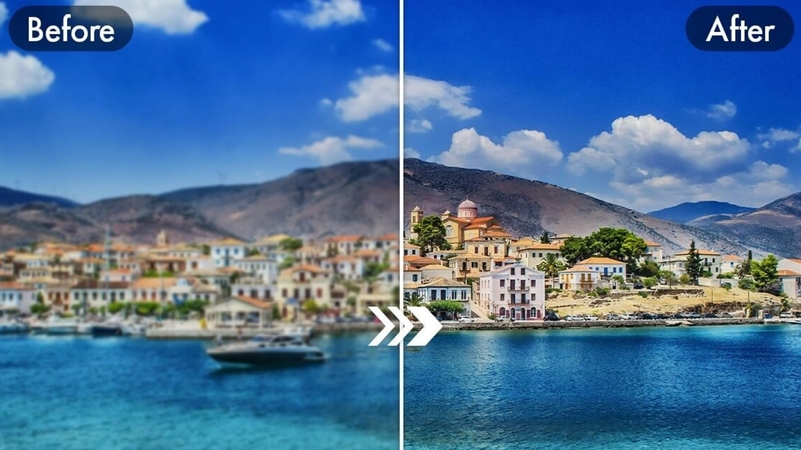
One common misunderstanding is confusing file size, measured in megabytes, with resolution. While file size may increase with higher resolution, it is also influenced by factors like image format and compression. The resolution specifically relates to the pixel count, not the physical file size. The following are some of the major values of such images in different sectors:
1. High Resolution in Pixels: When talking about such images, their pixel count typically starts at dimensions like 3000 x 2000 or higher. For professional work, such as photography or design, even larger dimensions are preferred for capturing intricate details.
2. DPI for Print vs. Web: When printing, resolution is measured in dots per inch. Within this industry, a standard of 300 DPI ensures crisp prints. Conversely, web images are optimized for screens and typically use 72 DPI, which balances quality and faster loading times.
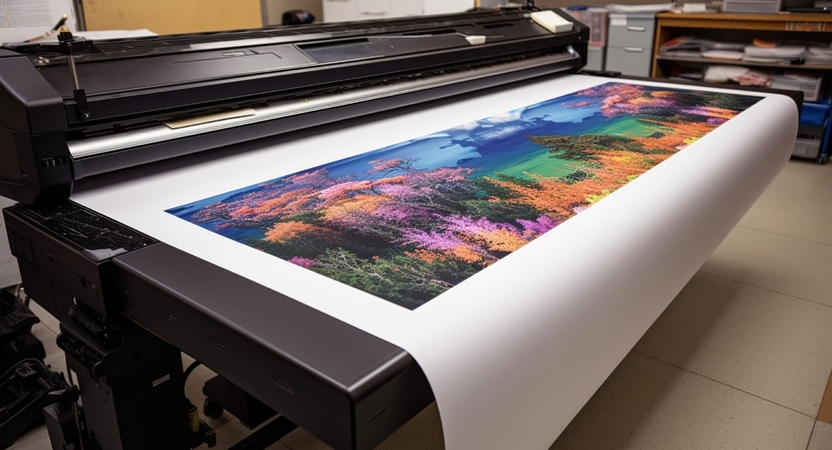
3. Resolution for Large Format Printing: While looking to print posters or billboards, you will need extremely high resolutions, often exceeding 6000 x 4000 pixels. This ensures that the image remains sharp even when viewed up close.
Part 2. Common Applications and Their Resolution Requirements
There are various applications where high-resolution images are used, which will be discussed in the following:
1. Printing Media: As discussed, the print media is one of the places where high-resolution images are essential for posters, flyers, and brochure printing. Moreover, the standard image for efficient printing is 300 DPI with common pixels at 3000 x 2000.
2. Digital Usability: On social media or the web, designers prefer 1080 pixels as a standard requirement for social media posts and 72 DPI for the web. Furthermore, the goal is to achieve visual appeal while avoiding cropping or distorting the image.
3. Rendering and Animation: Artists look for a 4K resolution or higher when they are texturing and modeling something. During animation, this resolution ensures realism and an immersive experience for the creator and the audience.
4. Image Archive: While discussing what is a high resolution, it is important to preserve such images for future reference and use. These images of illustrations, graphics, and more can be used in bigger and more professional projects.
5. E-commerce and Product: If your products are 2000 x 2000 pixels or larger, it allows users to zoom in on the products from different branded websites. You can achieve a larger customer base with an increased sales rate.
Part 3. Tools to Check and Enhance Image Resolution
Now, after understanding what is considered a high-res image, let’s look at the top tools that can help you enhance the image resolution seamlessly:
Tool 1. Adobe Photoshop
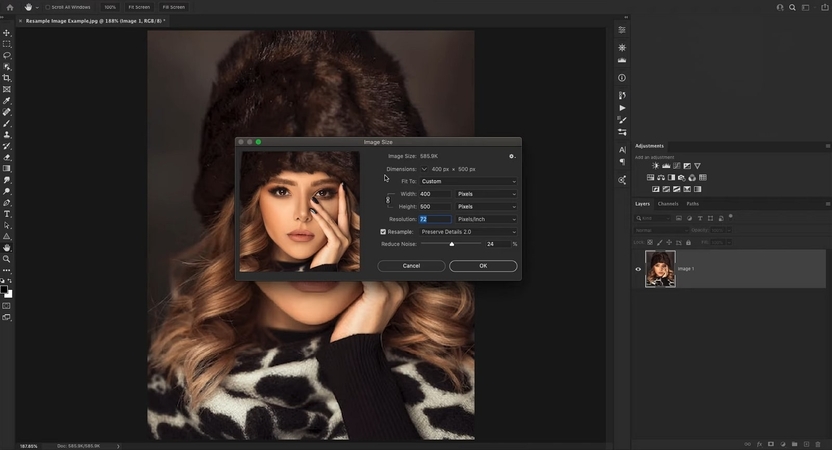
Adobe Photoshop has features that can easily enhance the resolution of images while uploading visual quality. Moreover, its advanced features and customization options are helpful when it comes to enhancing image resolution. You can set the dimensions of the image, as well as its width, height, and length.
Key Features
1. The super-resolution in this tool can dramatically enhance the image pixels.
2. You can reduce the noise of the image while preserving the image quality.
3. Use the high pass feature to make the details pop out more.
Tool 2. GIMP
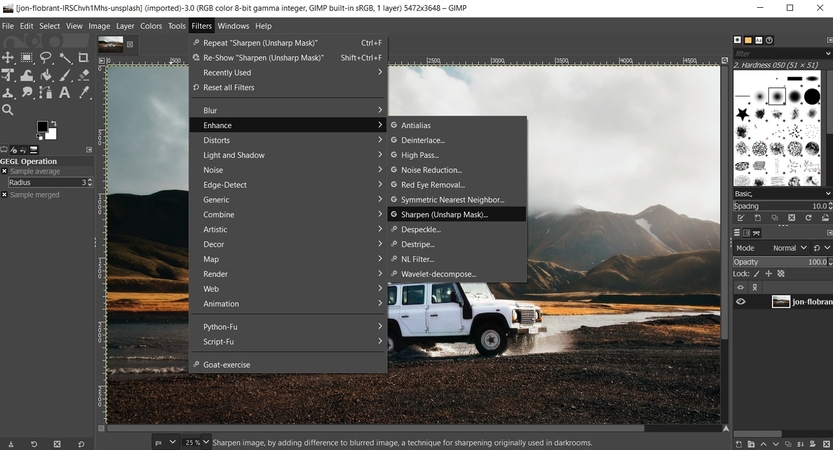
It is a powerful photo editing software with several helpful tools you can utilize to fix any low-resolution images. You can change the image size and dimensions to attain a high-resolution image. Additionally, the sharpening tool can be used to add finer details and enhance the image further.
Key Features
1. With the resynthesize feature, you can enhance and upscale complex pictures.
2. GIMP enhancement options include noise reduction and filtration effects needed to enhance the image.
3. Users can use blend mode and search size to fine-tune the final results.
Tool 3. HitPaw FotorPea
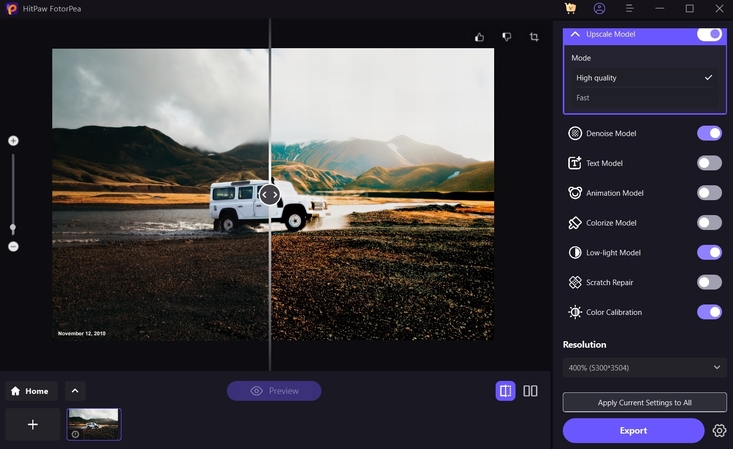
One of the best ways to understand what is considered a high-resolution picture is by using the HitPaw FotorPea. It is an all-in-one AI photo editing software with advanced enhancement and upscaling abilities. Moreover, it produces accurate results with enhanced dimensions of an image that you can post on any social media platform.
Aside from that, with its auto-processing and AI neural networks, you can achieve such stunning images in seconds. Anyone without technical training can utilize this user-friendly tool and navigate to it. If you are stuck in bundles of low-resolution images, add multiple photos, as the HitPaw FotorPea supports batch editing features as well.
Key Features
1. With the Face Model feature, this tool captures and enhances every fine detail of the face without any problem.
2. You can bring back old photos by restoring and colorizing them back to normal, making them seem realistic and vivid.
3. This tool controls the high ISO and lighting of the image to reduce noise and depixelate the image to its original pixelated version.
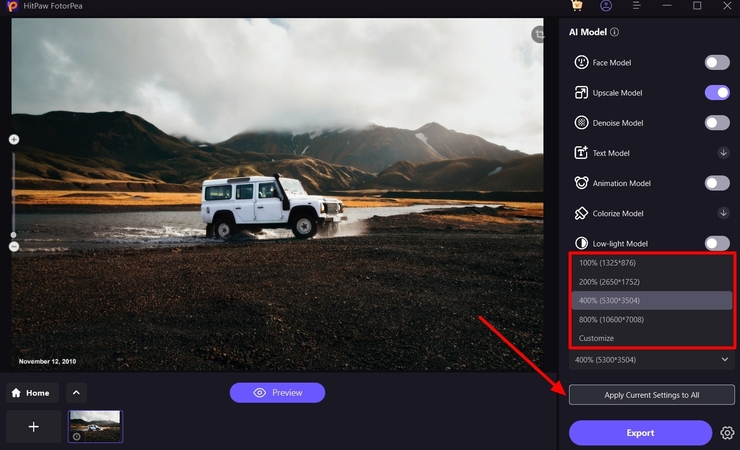
4. You can choose from multiple dimensions to upscale your image from 100% (1325*876) to 800% (10600*7008) dimensions.
Tool 4. LetsEnhance
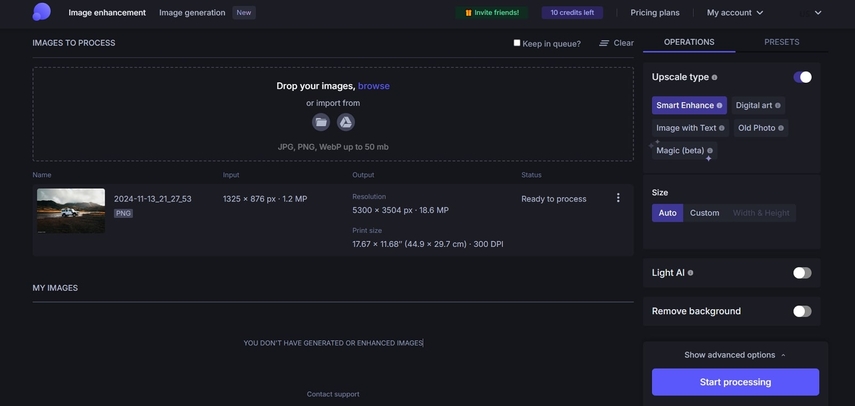
LetsEnhance tool is known for its AI image quality control and resolution, which can be achieved with a few clicks. Users can enhance up to 20 pics in one click and get a compressed and clean version of the image in seconds. Furthermore, you can upload images in different formats, like PNG, JPG, and WebP, up to 50 MB in file size.
Key Features
1. The enhancer can also fix white balance and saturation with the HDR filter.
2. Add details to the photo by converting small photos to HD, 4k, 8k, and higher resolution.
3. It can restore compressed JPEGs and clean them up to make the photo look vivid.
Part 4. How to Improve Image Quality with HitPaw FotorPea?
Moving forward, let’s learn how HitPaw FotorPea can help you improve image quality with the given steps and understand what is considered a high-resolution image:
Step 1. Access the HitPaw FotorPea Photo Enhancer
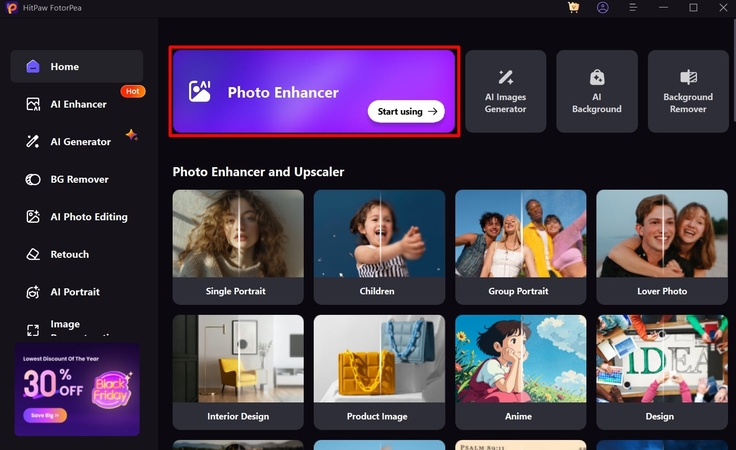
Download HitPaw FotorPea software on your device and access its main interface. From here, click the “Photo Enhancer” to head to the other window. Now, press the “+” box or drag & drop your image from the dialogue box.
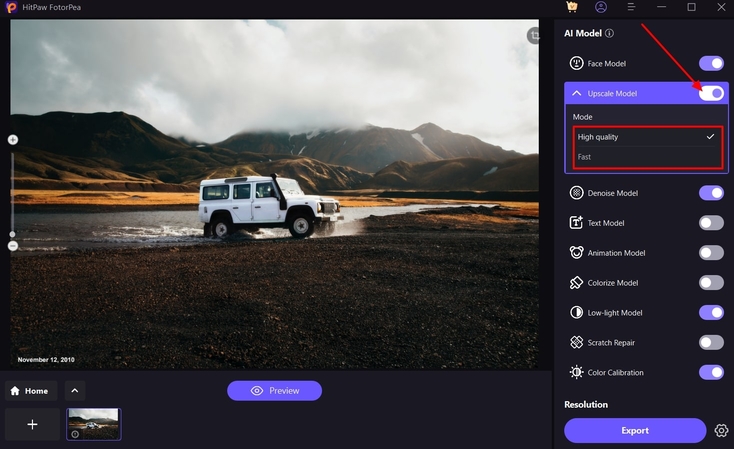
Step 2. Choose a Mode from the Upscale Model
On the main editing interface, go to the right-side panel and toggle the “Upscale Model” option. In the reveal additional options, choose the mode of image quality you want.
Step 3. Select Resolution and Apply Settings
When selected, open the bottom-up menu of “Resolution” and pick the desired image resolution. After that, hit the “Apply Current Settings to All” button to save all made changes to the image.
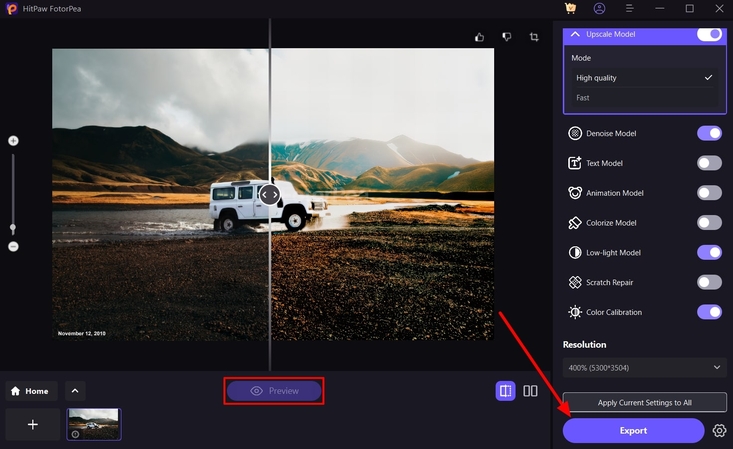
Step 4. Preview and Export the High-Quality Photo
Once that’s done, click the “Preview” button and compare the original with the enhanced image. When satisfied with the image, hit the “Export” button at the bottom right and save it on your device.
Part 5. Tips for Maintaining Quality When Working with High-Resolution Images
When working with high-resolution images, it is important to understand how to maintain the quality in various situations. The following are some tips and tricks that might come in handy for you someday:
1. Choose the Right Format: It is recommended to use a JPEG format, PNG, and more for photography due to their high compression rates.
2. Avoid Over-Compression: Compressing the image can reduce resolution quality and cause pixilation in your image.
3. Use Lossless Editing Tools: Users should not use tools that prevent quality degradation when an editing high-res image is uploaded.
4. Monitor Color Accuracy: Your images need to look natural, so using various color profiles can help ensure colors appear accurately during editing.
Conclusion
This article revolves around the question, what is considered a high-resolution picture? We looked at its definition, common application, and requirements. Moreover, we explored the top 4 tools that can seamlessly help you enhance images without damaging them. Above all, HitPaw FotorPea proved to be the best photo enhancer with its AI models.


 HitPaw Edimakor
 HitPaw VikPea (Video Enhancer)
 HitPaw Univd (Video Converter)


Share this article:
Select the product rating:
Daniel Walker
Editor-in-Chief
My passion lies in bridging the gap between cutting-edge technology and everyday creativity. With years of hands-on experience, I create content that not only informs but inspires our audience to embrace digital tools confidently.
View all ArticlesLeave a Comment
Create your review for HitPaw articles