How to Organize and Store Old Family Photos - Best Tips and Tools
Family photos are treasures that preserve cherished memories and moments. People organize and store these photos to ensure these memories are preserved for years to come. Modern technology has enabled people to take high-quality pictures and save them to cloud storage, allowing them to save their old photos safely. However, sorting physical albums while digitizing them is more complex, and you need to find a proper solution.
Therefore, this guide will show you detailed steps on how to organize and store old photos for more extended periods of time. Additionally, we will share advanced software that will enhance the old photos before you can digitalize them.
Part 1. Why Should You Organize Old Family Photos?
There are many reasons one should organize and digitalize their family pictures. The whole process is about how to preserve the legacy of your loved ones and make those memories easier to enjoy. Before moving on to how to organize old photos, let’s see a few reasons why you should do it:
1. Preserving Family Memories: Such photos are windows into the past as they capture key milestones, celebrations, and everyday moments. Properly storing and organizing them ensures that these irreplaceable memories remain intact for generations to come.
2. Preventing Damage: Without appropriate care, photos can degrade due to exposure to light, humidity, or mishandling. In this way, you can lose your precious memories from childhood with your loved ones.
3. Ensuring Easy Access: An organized photo collection makes revisiting precious memories and sharing them with loved ones easy. Similarly, you can access digitalized photos anywhere, anytime, without having to carry them around in bundles.
4. Digital Legacy: Transferring physical photos to a digital format ensures they remain accessible in an age dominated by technology. Instead of making copies like in the old days, you can share photos through a link.

Part 2. Directions to Follow When Organizing Old Family Photos
After learning the reasons for managing and organizing your picture, let's move on to the process of doing so. By following the tips outlined below, you will be ready to learn how to organize old family pictures:
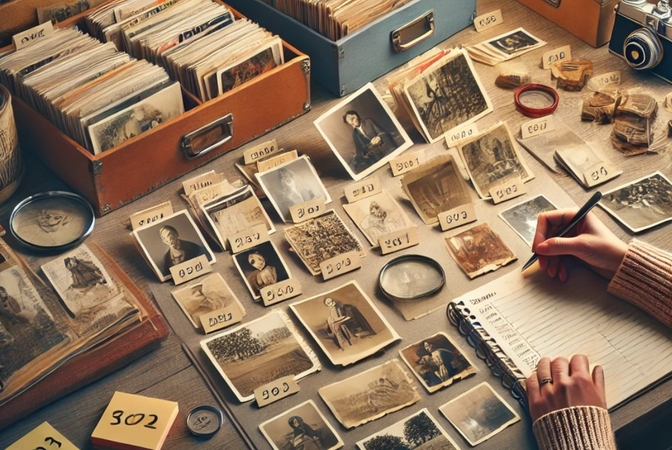
1. Sort by Date: To simplify the whole organization process, you should group photos into logical categories for easy navigation. Usually, it is a good idea to sort them according to the date or event they are taken on.
2. Label Photos Clearly: It is best to label your images to have a clear system of searching the photos. For that, you can adopt digital tags to make the images searchable by member names or locations.
3. Create a Catalog or Index: For large collections, it is a good idea to create detailed catalogs or keep an online index of the photos. These catalogs can be categorized against specific pointers or hierarchical folder systems.
4. Avoid Keeping Duplicates: To avoid redundancy in your photo albums, use proper systems that help delete duplicates.
Part 3. Best Practices to Follow While Digitizing Old Family Photos
While learning how to organize old family photos, it is very important to digitalize the physical versions since they increase their longevity. This process is also important because it improves their quality and makes it easy to share them. While digitizing your photos, you need to keep in mind the following tips:
1. Scanning Photos: For prints, you should use a high-resolution scanner to convert the photos into digital files. While scanning, make sure there aren’t any stains on the pictures and they are clear.
2. Using Smartphone Apps: Mobile applications like Google Photoscan allow you to scan photos directly from your phone, which makes the process quick and convenient. Make sure the photos are in sufficient light and properly angled while scanning them.
3. Choosing File Formats: If you want to save digital photos for compact storage, save them in a JPEG extension. However, if quality is your priority, you should save them in the TIFF extension as they store more image data.
4. Backing Up Photos: After getting the scanned versions on your device, you need to back them on cloud storage for longevity and ease of access. Google and iCloud are two reliable cloud storage options that allow you to save and access your family photos anywhere.
Part 4. Enhancing and Restoring Photos Before Digital Storage With HitPaw FotorPea
Moving on, let's explore how we will use a practical and comprehensive tool to bring old photos back to life. By picking out an effective tool, users can easily enhance their pictures with the help of integrated AI. Knowing how to organize old photos allows people to reconnect with loved ones by sharing enhanced old images.
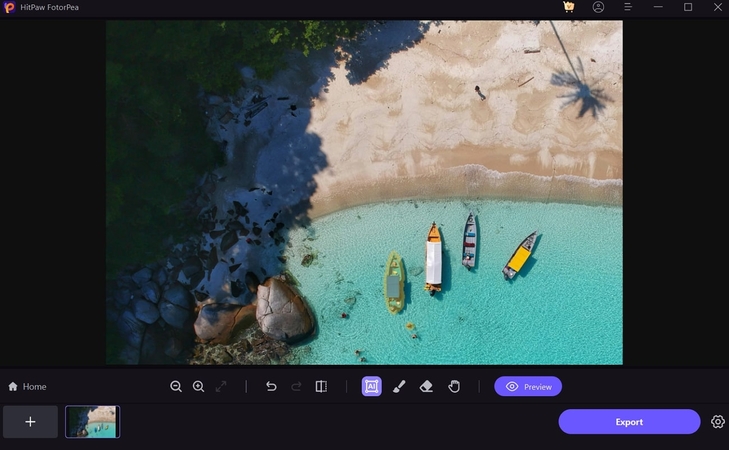
An enhanced photo editor tool like HitPaw FotorPea can help digitize restored images. This makes sharing memories with family and friends easy, especially during reunions or events. Modern restoration techniques can correct imperfections to enhance the overall beauty of the photo. To further understand how this tool works, let's look into the features it provides:
1. Scratch Removal
Using this tool, HitPaw FotorPea can help you revive old scratched-up images. It uses its integrated AI technology and removes any folds or tears in the picture. You can restore historical images without the need for a professional editor.

2. Color Restoration and Correction
The color restoration tool brings life into faded or discolored images that revitalize the original hues. This tool is especially beneficial for old photographs or scanned images that have lost their color over time. It helps restore the emotional essence and detail of the image to make the pictures look fresh.

3. Brightness and Sharpness Enhancement
Adjusting brightness and sharpness can drastically improve an image’s clarity and focus. The brightness tool ensures the photo is evenly lit, enhancing visibility in dark or overly dim sections. The sharpness tool refines details, making edges crisp and clear.

4. Retouch Images
Using this tool helps you be aware of how to organize old family photos by adding the final touches to them. The retouch tool is essential for refining an image by removing imperfections like blemishes, wrinkles, or unwanted objects. It smooths out inconsistencies, creating a polished and flawless finish.
Part 5. Tips on Storing Physical Photos Safely
In addition to the above discussion, let's look into tips for proper storage to ensure your physical photos remain preserved for generations. Here are key tips on how to organize and store old photos safely from damage:
1. Use Materials Free of Acid: To prevent discoloration and deterioration, users must store photos in acid-free albums, sleeves, or storage boxes. They should also avoid adhesives or tapes that can degrade over time and harm the photo.
2. Store Within Controlled Environment: Keep photos in a cool, dry place in a stable condition where you can control the atmosphere and environment.
3. Avoid Direct Light Exposure: Store photos in dark areas away from direct sunlight, as UV rays can cause fading and damage. Use archival-quality storage materials that block or minimize light exposure for added protection.
4. Handle with Clean Hands: Always handle photos with clean, dry hands or wear cotton gloves to prevent oils and dirt from causing stains. You must hold photos by the edges to avoid fingerprints or creases on the image surface.
Part 6. Creating a Backup System for Digital Photos
Even though you are planning to convert your physical photos into digital format, they are still prone to damage. Having a reliable backup system is necessary to avoid such damages and losses. Provided next are some ways one can go when creating a backup for digital content:
1. Use Cloud Storage Services: Store photos on trusted cloud platforms like Google Photos, Dropbox, or iCloud for easy access and automatic syncing. These services offer high-security measures and scalable storage options to fit your needs.
2. Invest in External Storage Devices: To simplify the process of creating local backups of your photo library, use external hard drives or SSDs. You can choose the devices with large storage capacity and regular backup scheduling.
3. Schedule Regular Backups: Set a routine to back up your photos weekly or monthly to protect new files. Use backup software to automate the process and ensure no files are missed.
4. Adopt a Multi-Layer Backup Approach: This reduces the risk of complete data loss from a single failure point. Combine local and cloud backups to ensure your photos are stored securely in different locations.

Conclusion
To summarize this article, we have discussed the best way how to organize and restore old family photos. Following the outlined tips and using recommended tools can effectively bring your photos back to life while safeguarding them for future generations. With tools like HitPaw FotorPea, make sure to enhance your old photos and make them accessible for long-term preservation.


 HitPaw Edimakor
 HitPaw VikPea (Video Enhancer)


Share this article:
Select the product rating:
Daniel Walker
Editor-in-Chief
My passion lies in bridging the gap between cutting-edge technology and everyday creativity. With years of hands-on experience, I create content that not only informs but inspires our audience to embrace digital tools confidently.
View all ArticlesLeave a Comment
Create your review for HitPaw articles