[Complete Guide] Mac Change Photo to Black and White
Despite the technology evolving day by day, black and white photos still come up with magnificent charm. Black and white photos tend to offer timeless quality and composition that tend to engage a wide variety of audiences around the globe.
Although going for the black and white images looks classy, you won't find many cameras clicking the black and white images. Mac users come up with a built-in tool that could help you to make the photos look elegant and exciting. Tune into this guide to opt for the Mac change photo to black and white images.
Part 1. How to Convert Images to Black and White on Mac
Mac comes up with the Photos app and Preview app to help you convert the images into black and white photos. You can look at the detailed guide below to change the photo to black and white images.
Converting the photos to back and white through Photos App
With Photos App, you've got the chance to convert the photos into in couple of simple steps and those steps are listed below.
Step 1: Launch the Photo app on your Mac computer and search for the photo you want to transform. Navigate to the photo library and browse the images before double-pressing the photos to launch the editing window.
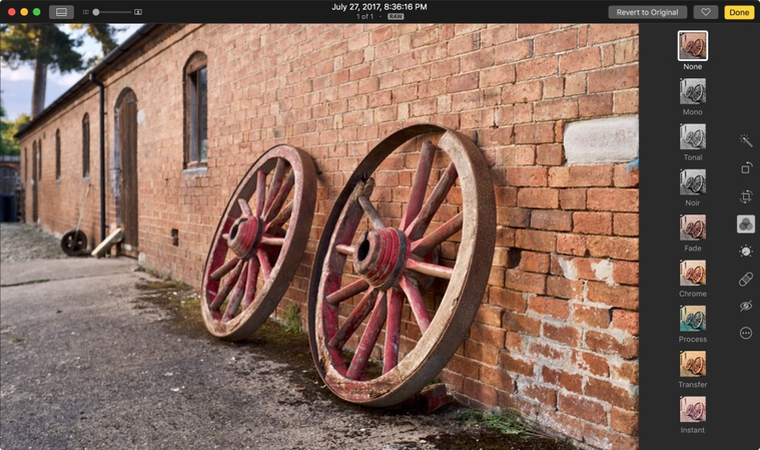
Step 2: Once you're done opening the photo, you'll need to press on the Edit icon as doing so helps you to see the toolbar with various editing options. Search for the filter tab and press on the filter tab to expand your filter options as doing so will help you to see the list of filters.
After getting into the window's right side, you might see the ''None; that's your original'' filter.
Below this aspect, you can see the three outstanding black and white filters including the tonal, mono, and noir. Click on each option to find how they all affect your images. The mono effect will make the colour of the images look great and tonal comes up with similar effects but brings in less contrast. Noir tends to come up with a higher contrast version of the original colour.
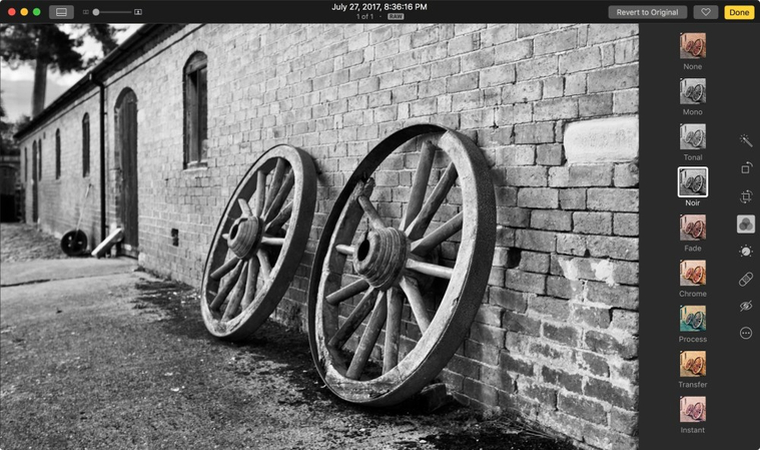
Step 3: Each of the black and white filters listed above comes up with unique characteristics. Thus, you'll need to take your time in deciding which type of filter you can opt for. Once you're done selecting the black and white filter, you'll need to press the done button or press the return icon. Tap on the Adjust button if you wish to fine-tune the images.
You can access the advanced adjustments options where you can explore the options like black point, contrast, brightness, shadow, highlights etc. If you're happy with the overall results of the images, you'll need to hit the Done button to save the edits.
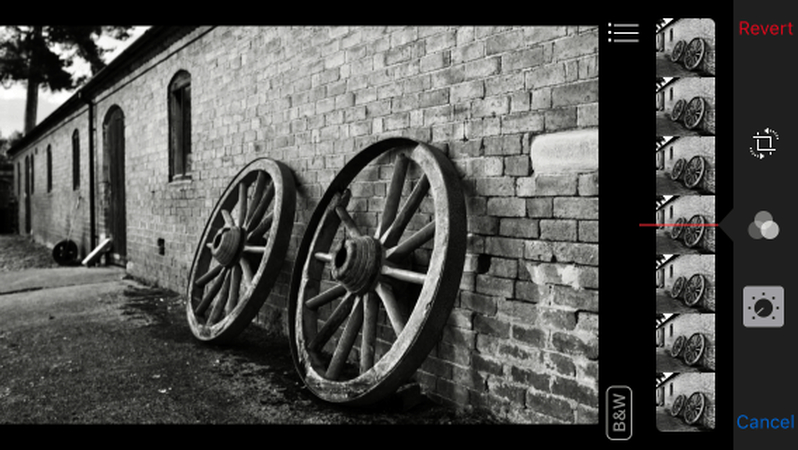
Changing Photos to black and white on Mac via Preview
Mac's preview feature is an appropriate way to convert the colour photos into black and white and since it comes pre-installed, you don't need to install the software to convert the photos into black and white images.
Step 1: To begin with, you'll need to search for the photo you want to edit and choose the Open With button before selecting the ''Preview'' icon.
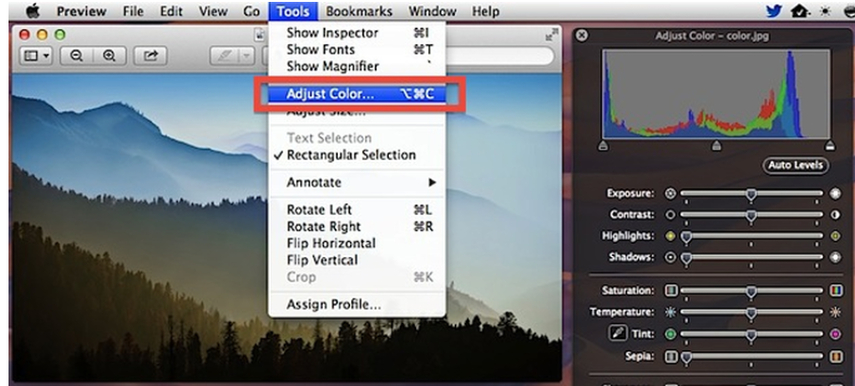
Step 2: Once you're done launching the photo in the Preview icon, you'll need to press the Tools button and select the adjust colour icon from the drop-down menu. Doing so helps you to acess the adjustment panel containing the multiple color adjustment options.
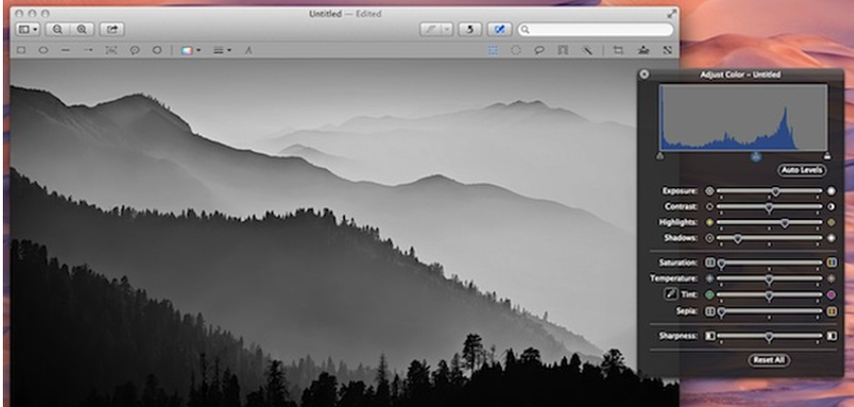
Step 3: Now, you can notice the Saturation labelled slider and all you need to do is slide the Saturation to the left side to turn the images black and White. Although the saturation tool plays the main role in turning the photos into grey in real-time, if you want to refine the images, you can rely upon other tools like level, shadow, highlight and contrast. Now, you'll need to review the outcome turning the images into black and white images.
Part 2. Best Third-Party Tool to Change B&W Photo with HitPaw FotorPea
If you've got black and white images and want to add the much-needed filters to the images to make the photos look stunning, HitPaw FotorPea will come in handy. With this tool, you can add various types of outstanding filters as HitPaw FotorPea blesses you with various types of image editing features.
HitPaw FotorPea allows you to process multiple images simulataneosly and you'll be able to customize the parameters of the various images simulataneosly. While downloading the edited images, you won't see the watermark in the image and the editing speed of the HitPaw FotorPea is also fairly fast depending upon the speed of the internet.
Features
- Lets you apply filters to the pictures.
- Compatible with Mac and Windows
- Doesn't affect the quality of the images while editing the photos
- Allows you to process multiple images simulataneosly
- No watermark was detected in the edited images
- makes it possible to convert the pictures to black and white and vice versa.
How to add filters to images via HitPaw FotorPea?
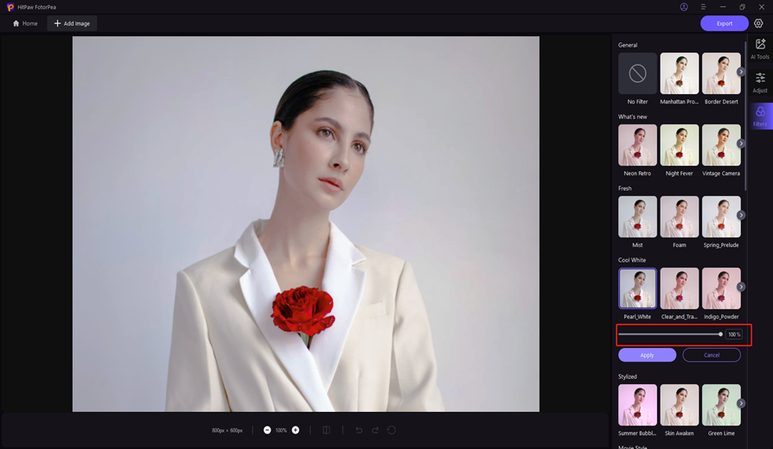
Step 1: Install the HitPaw FotorPea software on your computer after visiting the official website. To upload the image you want to alter in the following step, click the AI Photo Editing button and select the "Select an Image" button.

Step 2: Select the filter you want to apply to the images this process will only take a few moments depending upon the speed of the internet.

Step 3: You must preview the photographs during this phase. Once you are happy with the image quality, you may click the Export button to start downloading the images.
Part 3. FAQs of Mac Change Photo to Black and White
Q1. How can I edit an image in Mac?
A1. You can edit the images on Mac by using a built-in tool like the Photos app. You must find the photo you want to modify in the Photos app and double-press it in order to make changes. Click on the Edit hybrid and explore the available tools to adjust the lighting, apply the filters, and crop or tweak the colours appropriately. If you wish to turn the photos into black and white images, you'll need to click on the Filters button and select the black and white icon afterwards.
Q2. Does Mac have a free photo editor?
A2. Mac comes up with a couple of stunning built-in editing tools. Photos App enables you to explore basic photo editing like simple retouching, filters, colour adjustments, and cropping. Preview is a lightweight app that enables you to customize the colour, and annotate or resize the images appropriately.
Final Thoughts
Opting for the Mac change photo of you in black and white has become a simple courtesy of this insightful guide. We've listed the stunning ways in this post to convert the photos into the black and white images and using the built-in methods of the Mac will assist you to access the remarkable filters to create the black and white images.
If you want to edit the black and white images, you can rely upon the HitPaw FotorPea as it allows you to apply wonderful features to the images to make them look stunning and attractive. HitPaw FotorPea retains the quality of the images while applying reliable image filters and it doesn't insert the watermark in the images while editing the images.


 HitPaw Edimakor
 HitPaw VikPea (Video Enhancer)
 HitPaw Univd (Video Converter)


Share this article:
Select the product rating:
Daniel Walker
Editor-in-Chief
My passion lies in bridging the gap between cutting-edge technology and everyday creativity. With years of hands-on experience, I create content that not only informs but inspires our audience to embrace digital tools confidently.
View all ArticlesLeave a Comment
Create your review for HitPaw articles