How to Remove Vocals in FL Studio
If you're a music producer, remix artist, or simply someone who loves experimenting with sound, knowing how to remove vocals in FL Studio is a crucial skill. In this post, we'll walk you through the best methods to remove vocals from a song in FL Studio, explore techniques for isolating vocals in FL Studio, and discuss how you can delete unused vocals in FL Studio.
Part 1. All You Need to Know About FL Studio
FL Studio, also known as Fruity Loops, is a digital audio workstation (DAW) used by music producers worldwide for composing, arranging, and producing music. It's especially popular in the electronic music scene due to its user-friendly interface and advanced features. With FL Studio, you can create melodies, beats, and full tracks, as well as manipulate audio recordings in countless ways.
When it comes to removing vocals in FL Studio, it offers several tools that help in isolating or suppressing vocals, such as EQs, phase inversion, and dedicated plugins like NewTone. However, the effectiveness of these tools depends on the type of track you're working with and how the vocals are mixed. Fortunately, with the right knowledge and techniques, you can achieve impressive results.
Part 2. How to Remove Vocals from a Song in FL Studio
Removing vocals in FL Studio is a straightforward process once you understand the different techniques available.
Step-by-Step Guide to Removing Vocals in FL Studio 21 (Windows 11)
Make sure you're using FL Studio 21 on a system that meets the following requirements:
- For Windows: Windows 8.1, 10, 11, or later with at least 4GB of RAM and free disk space. It supports both Intel and AMD CPUs.
- For macOS: Version 10.13.6 (High Sierra) or later, also with a minimum of 4GB of RAM and free disk space. Both Intel and Apple Silicon CPUs are supported.
FL Studio 21 also comes with tools like the Fruity Stereo Shaper and Maximus effects that can help adjust vocal intensity and volume, although they do require some manual setup.
Step 1: Import the Song
To get started, open FL Studio 21 and navigate to the Playlist section by double-clicking it on the dashboard. From there, simply drag the audio file you want to work with into the Playlist area.
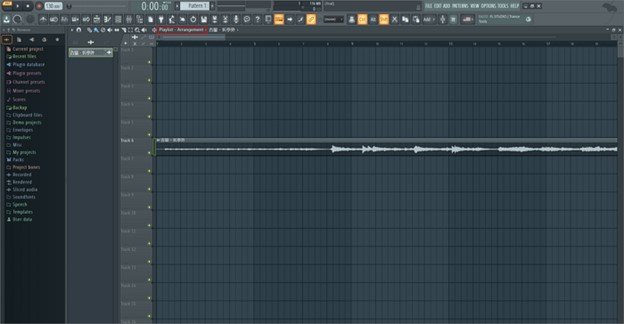
Step 2: Set Up Slot 2 for Vocal Removal
Next, we'll work with the effects that will help remove the vocals:
- Click the Add button at the top right of the window. From the dropdown, select Audio Clip, and deselect the Master Send option.
- Now, in Slot 2, click the down arrow and choose Fruity Stereo Shaper. Rename this slot to Vocal Kill to make it easier to identify. Drag the outermost left and right sliders down to eliminate the stereo signal that is responsible for vocal presence in the mix.
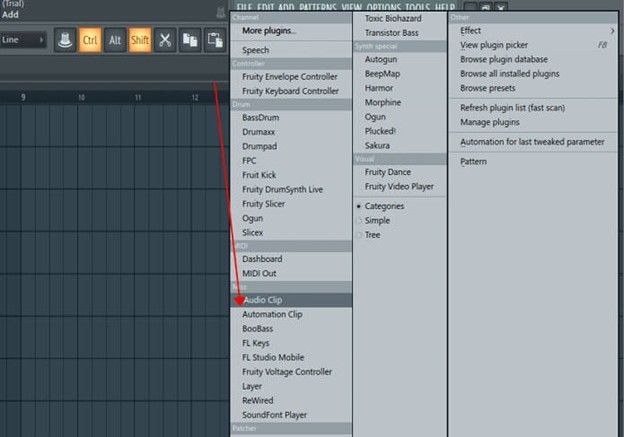
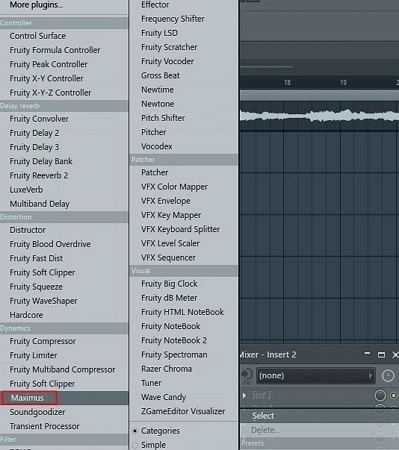
Add the Maximus effect by clicking the down arrow in the same slot. Set it to Default.
Step 3: Configure Slot 3 (Bypass)
In this step, we'll set up a bypass configuration for further fine-tuning:
Right-click on Slot 3 and rename it to Bypass. Click the down arrow and select Maximus, again setting it as Default.
Step 4: Adjust Vocal Kill Settings
Now, let's configure the Vocal Kill settings:
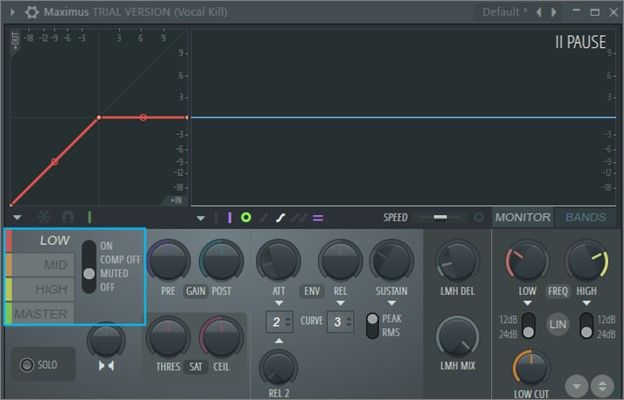
Open the Vocal Kill window in Maximus. For the Low and High bands, click on the Muted option to silence these frequency ranges.
For the Mid band, click on Comp Off to deactivate the compression effect. Finally, click the button to the left of the Monitor to ensure it's not monitoring the audio.
Step 5: Set Up Bypass for Fine-Tuning
The last step involves adjusting the Bypass settings:
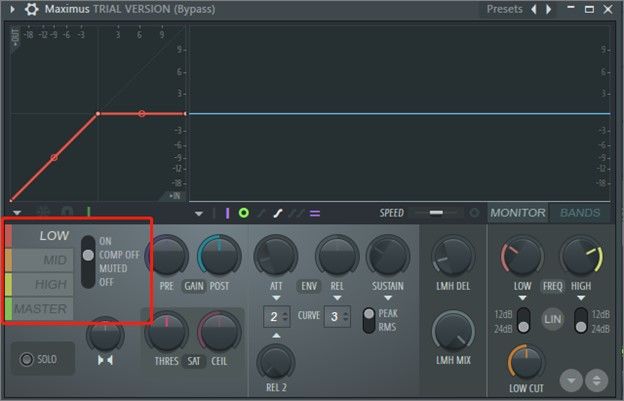
Open the Bypass window in Maximus. For the Mid band, click on the Muted option to silence the mid-range frequencies, which usually contain vocal elements.
Step 6: Set Up the Dashboard
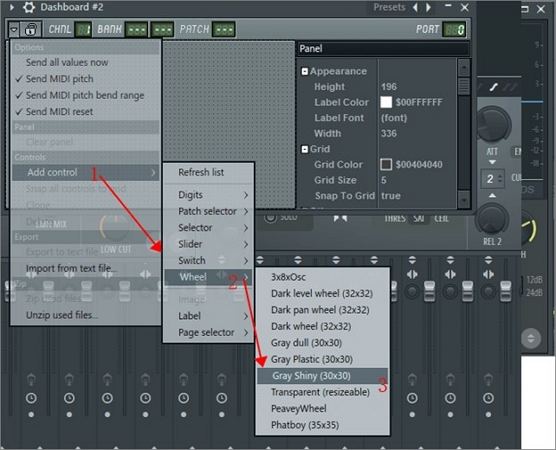
Click on "Add" and select "Dashboard". Then, click the down arrow on the Dashboard and go to Add Control > Wheel > Gray Shiny to add a control knob. Rename it "Low Cut" in the Caption field. Repeat this process for the second knob and rename it "High Cut". After that, click the lock button to save these settings.
Step 7: Isolate the Vocals
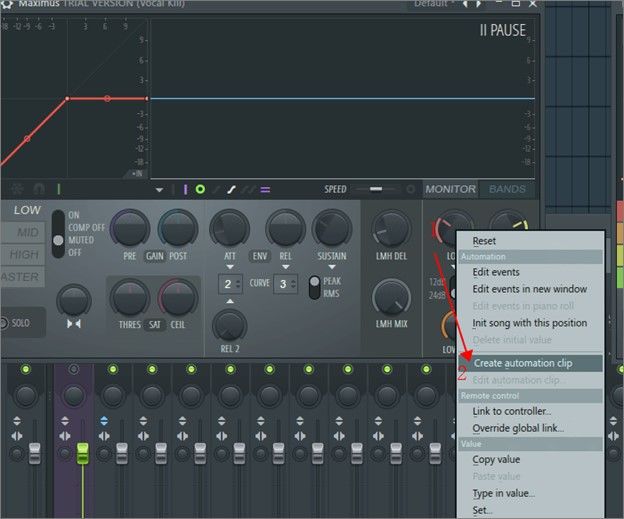
For the Low Cut knob, right-click the "LOW" parameter and select "Create Automation Clip". In the automation window, click the "None" box, choose "Dashboard Wheel 1", and click "Accept".
Repeat this process for the Low setting in the second Maximus window.
Next, right-click the "HIGH" parameter and select "Create Automation Clip". Click "None", choose "Dashboard Wheel 2", and repeat for the High setting in the second Maximus window.
Step 8: Remove the Vocals
Now, while the track is playing, adjust the Low Cut and High Cut knobs on the dashboard. Fine-tune these controls until the vocals are removed, leaving just the instrumental. Make sure to adjust them carefully so that the pitch and overall sound of the track remain balanced.
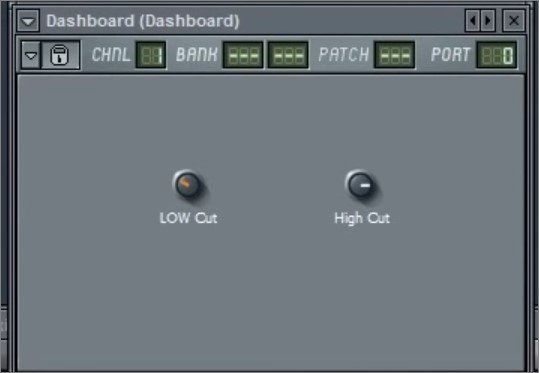
Once these steps are completed, you should notice a significant reduction or removal of the vocals from your track. This process might take some fine-tuning, but with these steps, FL Studio 21 gives you the tools to get closer to a clean instrumental version of your song.
Part 3. Bonus Tip: FL Studio Alternative to Remove Vocals on Windows and Mac
If you're looking for an even easier and more efficient way to remove vocals, consider using HitPaw Univd (HitPaw Video Converter). This tool offers a vocal removal feature that can quickly isolate vocals from any song, even with complicated mixes. It's simple to use and doesn't require in-depth knowledge of FL Studio's technical processes.
With just a few clicks, you can remove vocals from your track and export the instrumental version, making it an excellent alternative for anyone looking to save time and effort.
HitPaw Univd - All-in-one Video Solutions for Win & Mac
Secure Verified. 254,145 people have downloaded it.
- Intuitive design for quick and easy vocal removal
- Removes vocals in minutes without compromising audio quality or clarity
- Works with both audio and video files, ensuring flexibility
- Maintains the integrity of your music while effectively removing vocals
- Allows you to remove vocals from multiple tracks at once, saving time
Secure Verified. 254,145 people have downloaded it.
Step-by-Step Guide to Remove Vocals Using HitPaw Univd
Here's a step-by-step guide on how to remove vocals from a song using HitPaw Univd's Vocal Remover feature:
Step 1: Open Vocal Remover
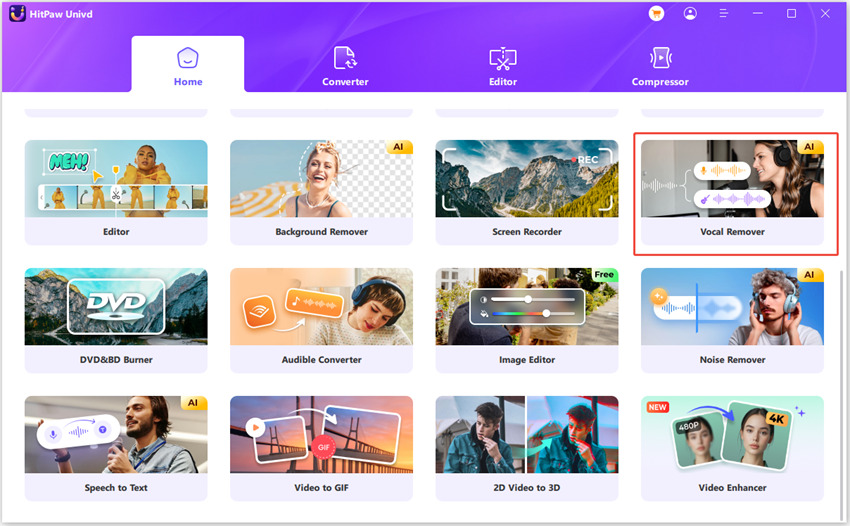
Launch HitPaw Univd on your computer and go to the Toolbox Section. Select the Vocal Remover option.
Step 2: Add Audio/Video Files
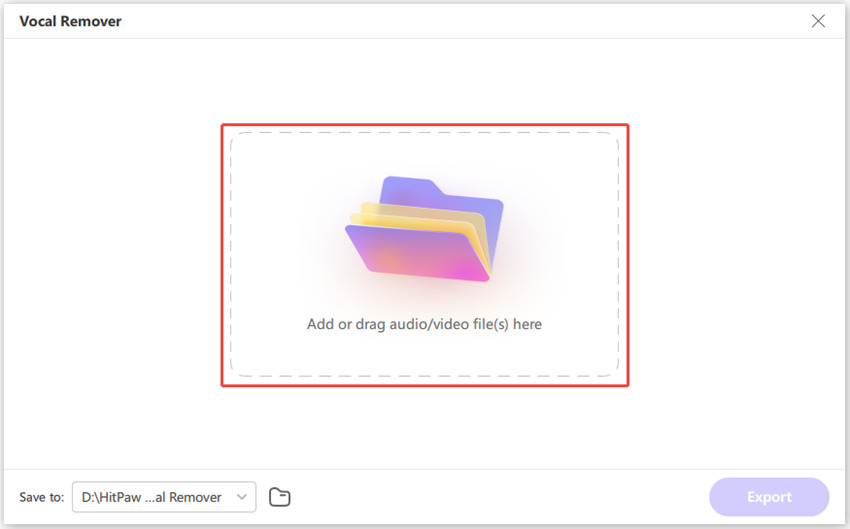
Drag and drop your audio or video file into the Vocal Remover tool, or click the "Add" button to upload your files.
Step 3: AI Analyzing
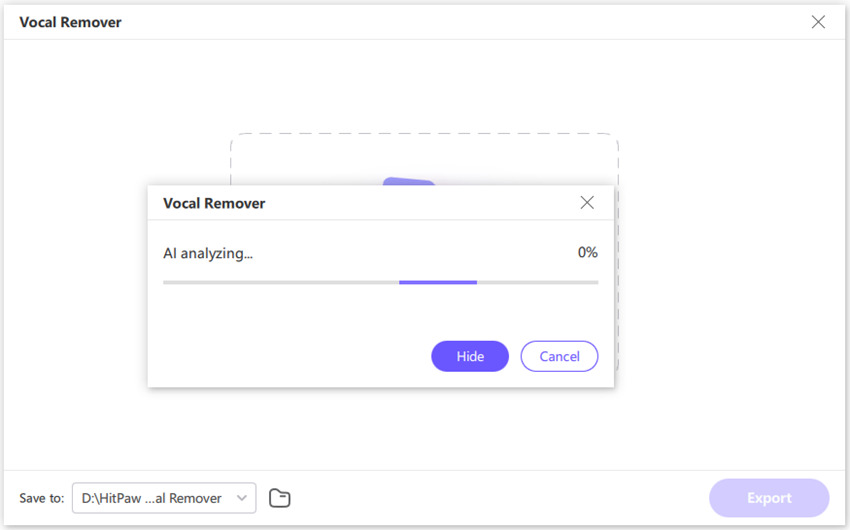
Once the file is added, the AI will automatically analyze it, identifying the vocals and instrumental parts.
Step 4: Separate the Voice from the Music/Video
After the analysis is complete, you'll see two separate tracks: one for the instrumental and one for the vocals. You can then choose to export the instrumental track, the vocal track, or both, depending on your preference. It's a quick and efficient way to isolate vocals and music!
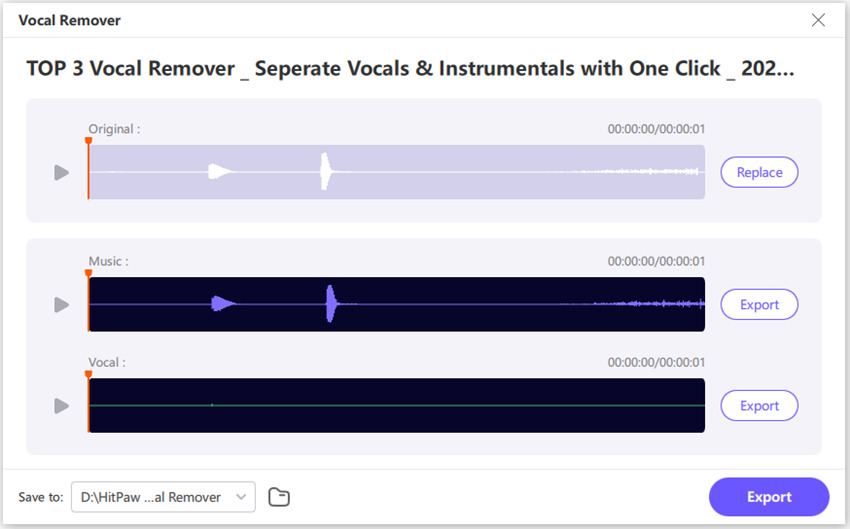
This process is simple and takes much less time than traditional methods, making it a great option for beginners and professionals alike.
Conclusion
Removing vocals from a song is a skill that can elevate your music production capabilities, whether you're creating a remix, karaoke track, or need an instrumental for background music. While FL Studio offers a variety of tools like phase inversion and EQ, it can sometimes require a more hands-on approach to achieve the perfect vocal removal.
For a quicker, more efficient alternative, tools like HitPaw Univd offer an easy solution with just a few clicks. Whether you're using FL Studio or a dedicated vocal removal tool, knowing how to remove vocals from a song in FL Studio will undoubtedly boost your creativity and open up new opportunities for your music projects.


 HitPaw VoicePea
  HitPaw VikPea (Video Enhancer)
 HitPaw FotorPea

Share this article:
Select the product rating:
Daniel Walker
Editor-in-Chief
This post was written by Editor Daniel Walker whose passion lies in bridging the gap between cutting-edge technology and everyday creativity. The content he created inspires the audience to embrace digital tools confidently.
View all ArticlesLeave a Comment
Create your review for HitPaw articles