How to Add Motion Blur in Davinci Resolve: A Complete Guide
Motion blur is a strong tool that improves how your videos look by showing speed and fluidity. This guide will teach you to add motion blur in Davinci Resolve step by step. We will also judge how good the motion blur effect Davinci Resolve is and show another tool to add motion blur. Motion blur can make it look like fast-moving things are blurry or make a movie feel smoother by evening out the motion in your video. Knowing how to apply this tool well can make the visual quality of your work much better.
Part 1: Add Motion Blur in Davinci Resolve in 4 Steps
Davinci Resolve is an expert tool with robust features for video edits. To upload movement blur to films in Davinci Resolve, comply with a few clean steps. Here's a detailed guide on how to upload motion blur in Davinci Resolve.
Steps to Add Motion Blur in Davinci Resolve
1. Open Davinci Resolve and Import Your Video
- Open Davinci Resolve and create a new project.
- Load your video by pulling it into the media pool. You can also press on the "File" menu, choose "Import Media," and go to the place where your video file is saved.
2. Add the Video on the Timeline
- Move your video from the media visible area to the timeline. Most of your editing tasks occur on the timeline, and you must position your video clip there to apply effects.
3. Turn on Motion Blur
- Highlight the clip on the timeline. Click on the video clip to make it stand out.
- Visit the Inspector on the right side of the screen. The Inspector panel has detailed controls for the chosen clip.
- Move down to locate the Motion Effects section. This part has options for various motion-linked effects.
- Tick the Motion Blur box to turn it on. Once on, you will notice the motion blur effect is now on your clip.
4. Adjust Motion Blur Settings
- You can change the settings after turning on motion blur to get the desired effect. The main setting to change is the Shutter Angle.
- Boost the Shutter Angle to produce more blur. A high value will produce more visible motion blur. A shutter angle of 180 degrees is typical for a cinematic look, but you can raise it to 360 degrees to achieve more blur or lower it to achieve less.
- Watch the video to see its effect and make other changes if necessary. You might have to adjust the settings several times to achieve the ideal blur.
By following these steps, you can add motion blur in Davinci Resolve and improve the visual dynamics of your video projects. This effect is helpful for action scenes, with quick-moving subjects, or any video that aims to highlight motion.
Part 2: Is the Motion Blur Effect in Davinci Resolve Good or Bad?
The motion blur effect Davinci Resolve provides is very strong and adaptable. Yet, like every tool, it comes with its benefits and downsides. Here are a few benefits and disadvantages to consider:
Pros
- High Customizability: You can adjust the motion blur settings to fit your needs. Adjusting the shutter angle allows you to control the blur amount.
- Professional Quality: The effect is high precision, which is good for professional projects. Davinci Resolve is common in the film and TV industry, and its motion blur effect meets professional standards.
- Integrated Workflow: The workflow is part of Davinci Resolve and works well with other editing tools in the software. You can use motion blur with other effects without switching programs.
Cons
- Learning Curve: Beginners may struggle to use the settings and get the right effect. Although Davinci Resolve provides strong tools, they are complex and need time to learn.
- Resource-Intensive: Using motion blur requires a lot of your computer's power and can slow the rendering. High-resolution pictures with motion blur require a lot of processing energy, which can be a hassle for weaker structures.
The movement blur function in Davinci Resolve is a powerful device for video editors, but it needs a few exercises to analyze. If you're new to enhancing videos, you may need to exercise with the settings to get the right effect.
Part 3: [Recommend] Best Alternative to Add Motion Blur
If you need a different way to add motion blur, HitPaw Univd (HitPaw Video Converter) provides a simple and effective method. It offers a motion blur effect and an AI Face Blur feature to help keep people's privacy in videos.
Features of HitPaw Univd
- AI Face Blur: Detects and blurs faces to keep them private. This feature is good for making videos where people's identities need to stay hidden, like in public videos or interviews.
- High-Quality Conversion: Works with many video formats and keeps videos looking good. HitPaw Univd makes sure your videos keep their quality when converting.
- Fast Processing: Processes videos fast with little delay. The software is made for speed to let you add effects and change videos fast.
- User-Friendly Interface: The interface is simple to use, which is great for both new and experienced users. The design is clear, so you can use the software right away without much training.
- Batch Processing: This feature lets you apply effects and convert many videos at the same time, which saves a lot of time if you need to edit many videos.
How to Apply AI Face Blur Tool in HitPaw Univd
1. Download and Install HitPaw Univd
2. Launch HitPaw Univd
- Start the software and go to the AI Tools section. This section has many smart editing functions.

3. Import Your Video
- Press the Add Video button to add your video file. You can add more files if you want to do more at once.
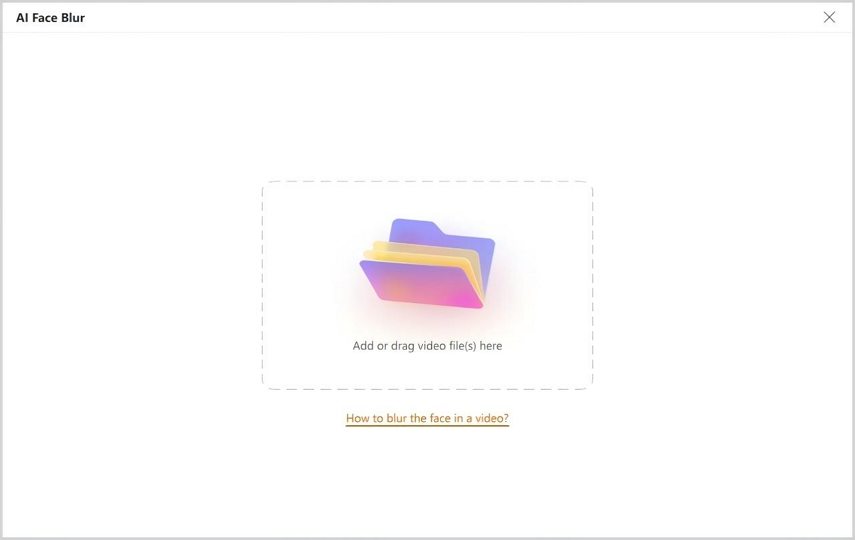
4. Enable AI Face Blur
- Choose the AI Face Blur option. The software will look at the video and find faces that should be blurred.
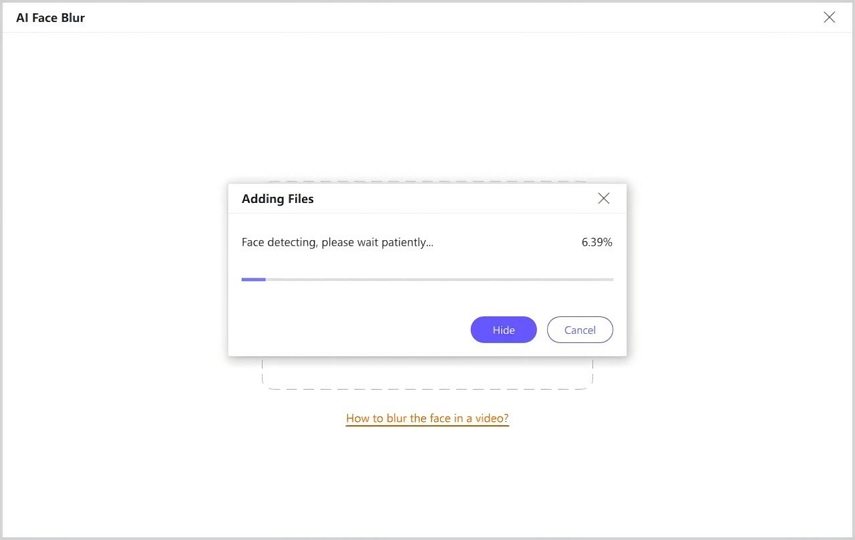
5. Adjust Blur Settings
- Change the strength and reach of the blur as you need. You can make the settings perfect to cover the areas you want without changing the rest of the video.
- Look at the effect to make sure it fits your needs. HitPaw offers a feature that lets you watch the changes right away.
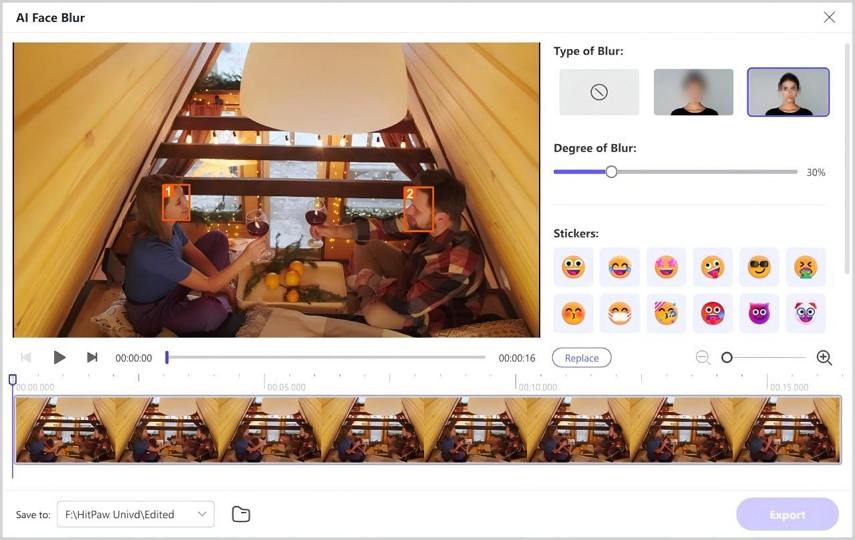
6. Export the Video
- When you are happy with the settings, click on the Export button to keep the edited video. Pick the output format and place to store the file.
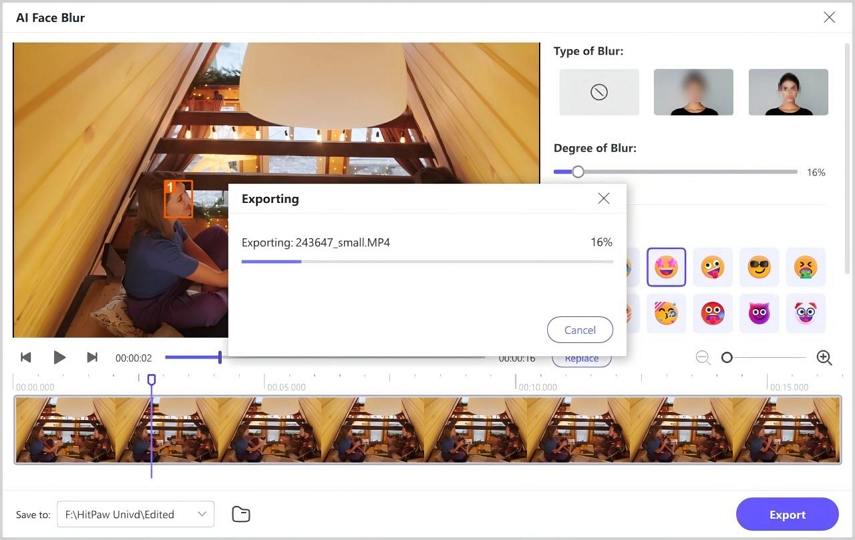
By following these steps, you can use the AI face blur function in HitPaw Univd to include motion blur and other effects in your videos. This tool offers an easy and direct option for users who might find Davinci Resolve's settings too hard.
Conclusion
Adding motion blur to your videos can make them more appealing and engaging. Davinci Resolve offers a strong tool for this, but it might be hard to learn. You can change settings such as the shutter angle for exact control, making it good for expert work. To achieve the same results, the HitPaw Univd is easy to use and offers more options, like AI face blur. You can get professional-quality motion blur effects with either Davinci Resolve or HitPaw Univd.
FAQ
Q1. Is Davinci Resolve free to use?
A1. Davinci Resolve has a free version with several features and a paid version known as Davinci Resolve Studio, which has features for advanced editors. The free version works well for many users, yet those in professional editing might pick the Studio version due to its extra features.
Q2. Can I use motion blur in the free version of Davinci Resolve?
A2. Yes, you can use motion blur in the free version of Davinci Resolve. This edition gives access to necessary tools and effects for professional video editing, like motion blur.
Q3. Does HitPaw Univd support other video effects?
A3. Yes, the HitPaw Univd offers many video effects, filters, transitions, and more. The application has a full set of enhancement equipment that enables you to improve your movies in several ways.
Q4. Is the HitPaw Univd to be had for Mac?
A4. Yes, the HitPaw Univd is ready for use on each Windows and Mac system.
Q5. Can I batch-process videos in the HitPaw Univd?
A5. Yes, HitPaw Univd lets you apply effects and change many videos at the same time, which saves time when editing videos. This feature is especially helpful for users who need to handle large amounts of footage quickly.


 HitPaw VikPea
 HitPaw Watermark Remover

Share this article:
Select the product rating:
Daniel Walker
Editor-in-Chief
My passion lies in bridging the gap between cutting-edge technology and everyday creativity. With years of hands-on experience, I create content that not only informs but inspires our audience to embrace digital tools confidently.
View all ArticlesLeave a Comment
Create your review for HitPaw articles