How to Add Apple Music to iMovie on Mac/iPhone/iPad
Have you ever wished to enhance your iMovie projects with the perfect soundtrack from your Apple Music library? While Apple's native applications don't offer direct integration, there's a simple workaround to add Apple Music tracks to your iMovie creations. In this comprehensive guide, we'll explore two methods to accomplish this task, catering to both Mac and iOS users. Get ready to elevate your video editing experience by seamlessly blending your favourite tunes with captivating visuals!
Part 1. Can I Add Apple Music to iMovie?
Before diving into the solutions, it's essential to understand the file format compatibility between iMovie and Apple Music. iMovie supports importing various audio formats, including AAC, AIFF, BWF, CAF, MP3, MP4, RF64, and WAV. However, Apple Music files are typically DRM-protected, which restricts their usage in certain applications like iMovie. The exception is music purchased directly from the iTunes Store, which comes in an unprotected AAC format compatible with iMovie.
Method 1: Purchase Apple Music from iTunes Store
If you're willing to invest in purchasing individual tracks or albums from the iTunes Store, this method offers a straightforward solution. Purchased songs are delivered in the AAC format, ensuring seamless compatibility with iMovie.
Pros
- Legal and authorized method of obtaining music
- Purchased songs are in AAC format, natively supported by iMovie
- No additional conversion is required, enabling seamless integration
- Metadata (artist, album art, titles) is preserved
- High-quality audio files ensure excellent sound quality
- Convenient and straightforward process through the iTunes Store
Cons
- Can be expensive, especially for building a large music library
- Limited to the catalogue available on the iTunes Store
- Requires purchasing individual tracks or entire albums
- No flexibility in customizing or editing the audio files
- May not be feasible for those with limited budgets or specific musical requirements
Method 2: Convert Apple Music to iMovie Compatible Formats
For those seeking a more cost-effective and flexible solution, HitPaw Apple Music Converter offers a powerful tool to convert Apple Music tracks to iMovie-compatible formats. This versatile software removes DRM protection and allows users to download their desired tracks from the extensive Apple Music library.
Features of HitPaw Univd (HitPaw Video Converter)
Hitpaw Apple Music Converter is a dedicated application that enables Apple Music users to download MP3 music from Apple Music.
- Remove DRM protection from Apple Music
- Convert Apple Music to ordinary formats with lossless quality: MP3, WAV, M4A and FLAC
- Download Apple music with built-in web player
- Batch download songs, playlists, albums or artists from Apple Music
- Preserve ID3 tags after downloading
- Works on both Windows and Mac computers
The Steps to Convert Apple Music to iMovie Format
Here are the steps to convert Apple Music to MP3 so you can add the songs to iMovie projects.
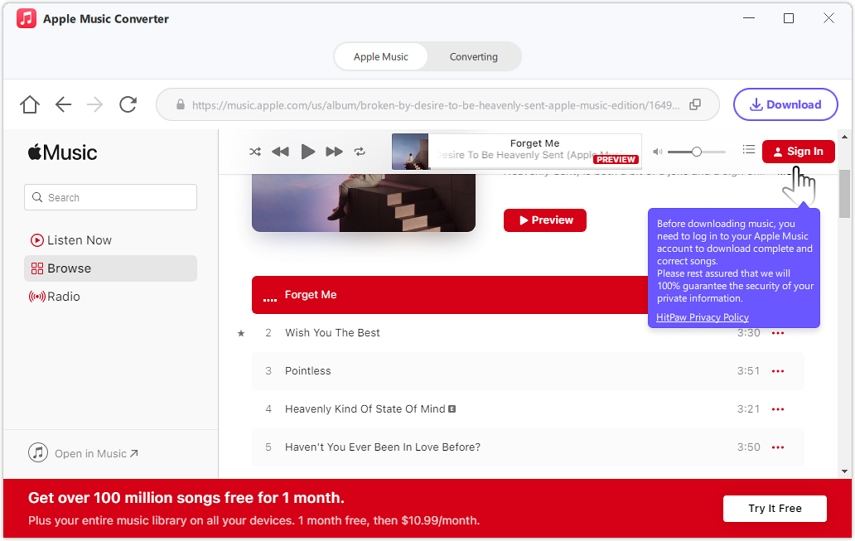
Step 1:Launch the HitPaw Univd software on your computer. From the main interface, navigate to the Music tab and open Apple Music Converter.

Step 2:Before you can access your Apple Music library, you'll need to sign in with your Apple ID credentials. The software will prompt you to enter your username and password to authenticate your account.

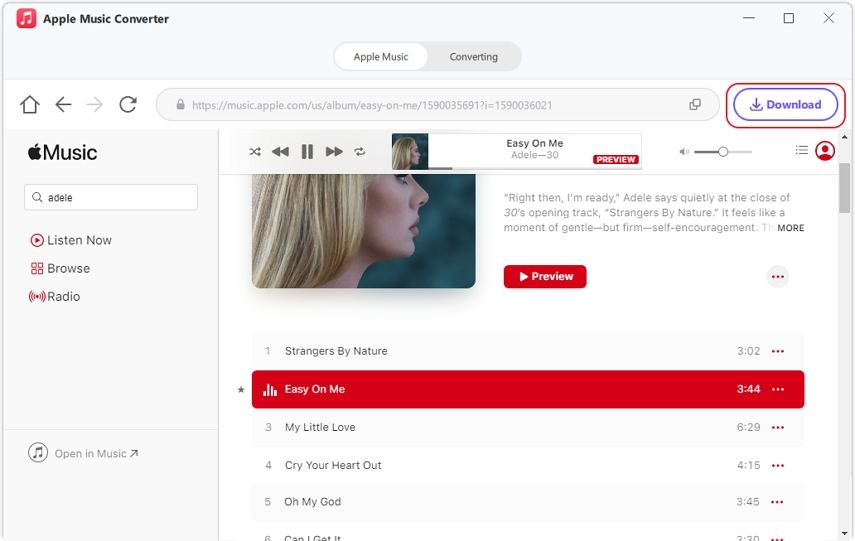
Step 3:Once logged in, you'll have access to your entire Apple Music library within the software. Use the built-in web player to search for and locate the specific songs, albums, or playlists you wish to convert. When you've found the desired tracks, click the "Download" button to initiate the analysis process.

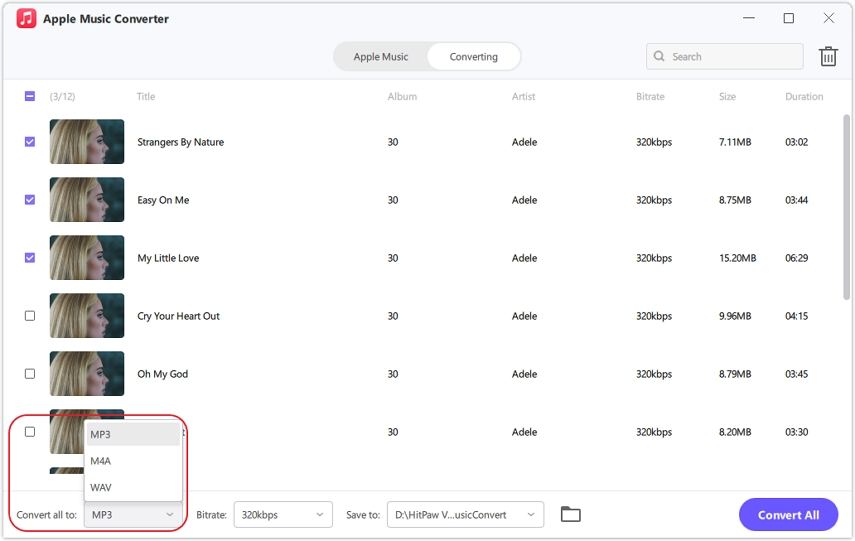
Step 4:After the analysis is complete, switch to the "Converting" tab to view and manage the list of tracks selected for conversion. HitPaw Apple Music Converter allows you to customize the output settings for your converted Apple Music files. Select the desired output format and bitrate.

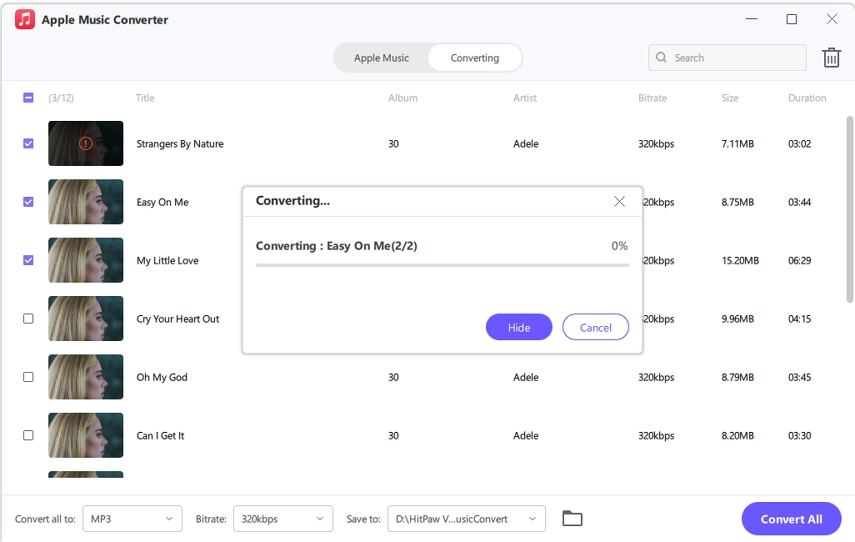
Step 5:With your track list finalized and output settings configured, click the "Convert All" button to initiate the conversion process.

Once the conversion is complete, you can access the converted Apple Music files in the designated output folder specified during the configuration process. These DRM-free audio files can now be used in various applications, including iMovie, without any compatibility issues.
Part 2. How to Import Converted Apple Music to iMovie:
With your Apple Music tracks successfully converted, it's time to incorporate them into your iMovie projects.
For Mac:
Step 1: Add Converted Apple Music to iTunes (Optional)
- 1.Open the iTunes application on your Mac.
- 2.Go to File > Import and navigate to the location of your converted music files or folders.
- 3.Select the desired files or folders to add them to your iTunes library.
Step 2: Import Directly to iMovie
1.Launch iMovie on your Mac and open or create a new project.
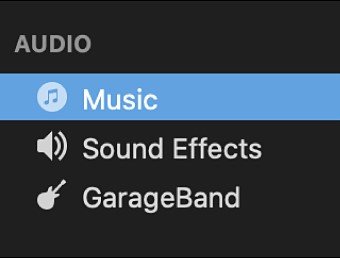
2.Click on "Audio" above the browser section and choose "Music" from the sidebar.

3.Browse and locate the desired converted music clip in the timeline.
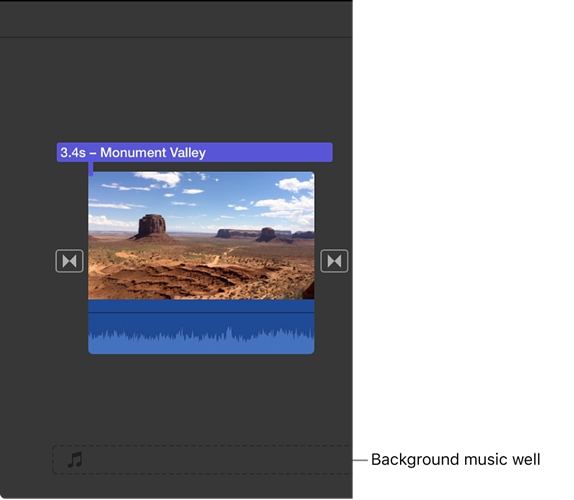
4.Drag and drop the music clip into the background music section below the project timeline.

Step 3: Edit the Background Music Clip
- 1.With the music clip added to your project, you can now position, trim, and edit it as needed.
- 2.If the "Trim background music" option is enabled, iMovie will automatically adjust the audio duration to match the project length.
- 3.To adjust the volume, select the audio clip and use the volume control slider.
- 4.For fade-in or fade-out effects, click on "Audio Adjustments" and choose the respective fade option.
For iPhone/iPad:
Step 1: Sync Converted Apple Music
1.Ensure that the converted music files are added to your iTunes library on your computer.
2.Connect your iPhone or iPad to the computer using a USB cable.
3.In iTunes, select your device from the top sidebar.
4.Go to the "Music" section and enable the "Sync Music" option, choosing "Entire music library".

5.Click "Sync" to start transferring your music library, including the converted files, to your device.
6.Once the syncing process completes, click "Apply" to finalize the changes.
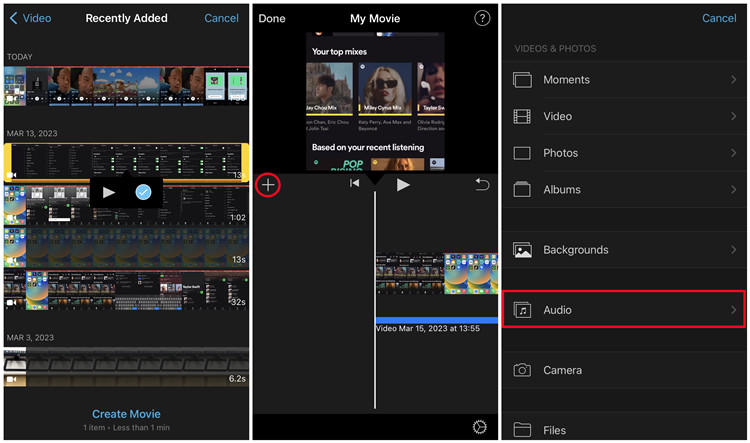
Step 2: Add Apple Music to iMovie Project
- 1.Open the iMovie app on your iPhone or iPad and create or open an existing project.
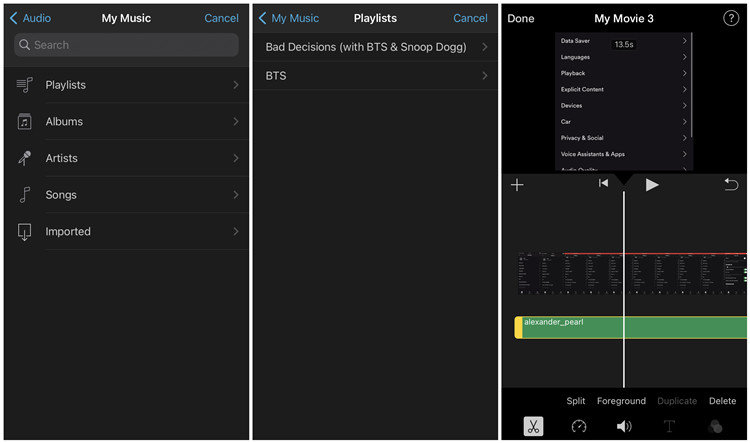
- 2.To add background music, tap "Add Media" > "Audio" > "My Music".
- 3.Browse and select the converted Apple Music files you wish to include.
Step 3: Edit the Background Music
- 1.Tap on the background music clip in the timeline to reveal the editing controls.
- 2.Adjust the clip's length by tapping and dragging the edge handles to your desired duration.
- 3.Modify the volume by selecting the clip and using the volume control to increase or decrease the level.
- 4.If needed, you can add additional audio clips or sound effects by tapping "Add" > "Audio" and selecting more files.
Step 4: Export iMovie Project with Background Music
- 1.When you've finished editing and incorporating your Apple Music tracks, tap the "Share" button.
- 2.Choose your preferred sharing or export option to save or distribute your iMovie project with the added background music.
By following these platform-specific steps, you can seamlessly integrate your converted Apple Music tracks into your iMovie projects, whether you're working on a Mac, iPhone, or iPad.
Conclusion
With the two methods outlined in this guide, you now have the power to seamlessly integrate your Apple Music library into your iMovie projects, whether you're working on a Mac or an iOS device. While purchasing songs from the iTunes Store offers a direct approach, HitPaw Apple Music Converter provides a flexible and cost-effective solution for converting your entire Apple Music library. Unleash your creativity, personalize your videos with your favourite tunes, and elevate your storytelling to new heights!




 HitPaw VikPea
 HitPaw Watermark Remover


Share this article:
Select the product rating:
Daniel Walker
Editor-in-Chief
My passion lies in bridging the gap between cutting-edge technology and everyday creativity. With years of hands-on experience, I create content that not only informs but inspires our audience to embrace digital tools confidently.
View all ArticlesLeave a Comment
Create your review for HitPaw articles