3 Easy Fixes for MOV Audio Out of Sync with Video
MOV is a proprietary video format from Apple and doesn't always play nice with third-party software, devices, or platforms. For instance, you may notice that they work great in iMovie, but the audio is out of sync with the video when uploaded to YouTube. It's not an isolated issue either. The MOV audio out-of-sync issue can pop up on Windows Media Player, VLC, and even video editors like Adobe Premiere Pro. It's a common issue experienced by users worldwide. Thankfully, we've come up with some quick fixes that worked for us across different platforms. So, keep reading to learn about them.
Part 1: Why MOV Videos Often Have Out-of-Sync Audio?
Despite the pervasive nature of the issue, MOV videos having out-of-sync audio is not a single issue. The root causes are often varied, although the issue manifests in the same form. Here are some of the causes behind the issue:
- File Corruption: Files get corrupted for a variety of reasons, and media files are no exception to this phenomenon. If your MOV video somehow got corrupted, the audio and video may be thrown out of sync.
- Compatibility Issues: MOV video format isn't universally compatible. Outside of the Apple ecosystem, it may encounter compatibility issues. It could be that you're using an outdated media player or a video editing tool that doesn't fully support the MOV format.
- Poor Conversion: Perhaps the video has been converted from another format to MOV using a substandard file conversion tool, leaving technical issues at the file level.
- Device Issues: These could range from low-end hardware to outdated software to suboptimal device settings.
- Network Issues: If your MOV video download from an online source was interrupted before completion, the corrupted file may end up with sync issues between audio and video. You may encounter a similar issue even when streaming MOV videos on an unreliable connection.
- Video File Settings: Sometimes, MOV videos feature variable frame rates. It's common for creators to record some segments of the video in higher framerate (fps), while using lower framerate for the rest of the video. In such cases, the audio may go out of sync with the video when the framerate changes during playback.
Solution 1: Try a Different MOV Player
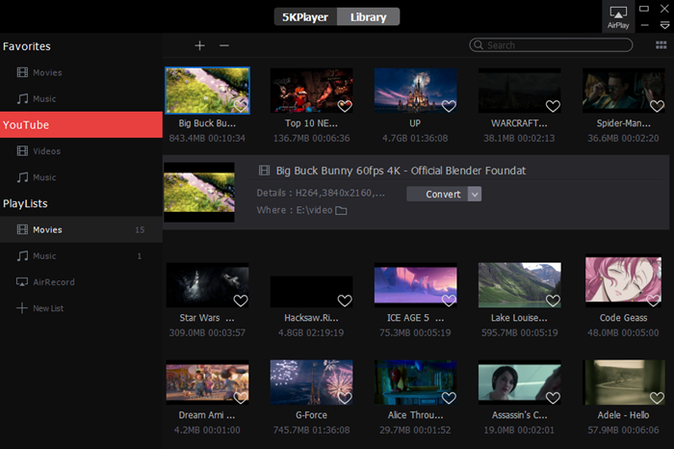
The simplest and easiest solution to the MOV-audio-out-of-sync issue is experimenting with different media players. If you're facing the issue on Windows Media Player, try opening the MOV file in VLC Media Player. If you're seeing the issue in VLC, see if the issue disappears when you play the MOV video in 5KPlayer.
The same goes for video editors. If you're encountering an issue on Adobe Premiere Pro, you can check if the issue persists in another tool like DaVinci Resolve.
Experimenting with one or two different tools besides the default one should give you a pretty good idea about whether the issue is at the file level or the software level. If the issue is software-related, then switching to a different one solves the issue for you.
Solution 2: Resync Audio and Video in Your Video Player
A number of media players offer resyncing options to let users rectify the syncing issues. VLC is one of them. VLC offers broad customizations for users to personalize their media playback experience. One of them is resyncing, and there are two methods to do it on VLC. Let's check out both methods.
1. Permanent Resyncing with VLC
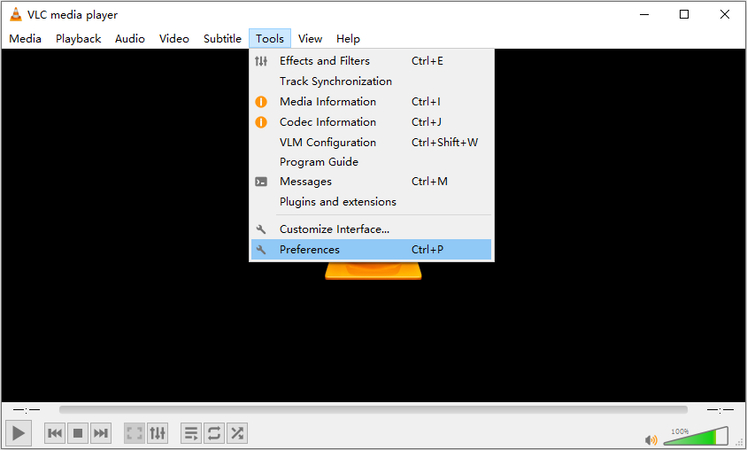
Step 1:Launch VLC Media Player >> Go to 'Tools' >> Choose 'Preferences.'

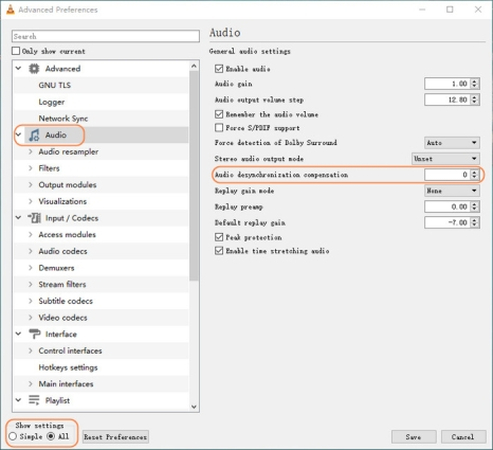
Step 2:Click 'All' at the bottom left corner >> Head over to 'Audio.'

Step 3:Change the 'Audio desynchronization compensation' value by the amount necessary to compensate for the desyncing issue >> Click 'Save'.
This value is measured in milliseconds. So, changing it to '5000' delays the audio by 5 seconds, and changing it to '-5000' advances audio by 5 seconds.
Once you change the sync settings with this method, the effect applies to every video you play with VLC Media Player. So, perfectly synced videos may now become out of sync when played with VLC.
2. Temporary Resyncing with VLC
With this method, you can resync VLC playback only for the duration of the playback of the current video you've opened. Once you close the media player and play another video, the changes would be reset. While it might be inconvenient to resync audio and video for your MOV file each time, the advantage is that the effects do not apply to other videos or audio when you play them.
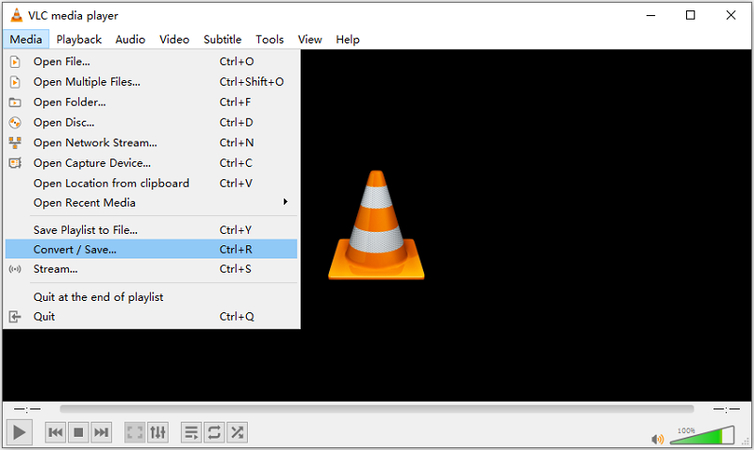
Step 1:Launch VLC Media Player >> Go to 'File' >> Click 'Open' >> Select and open the MOV video in VLC.

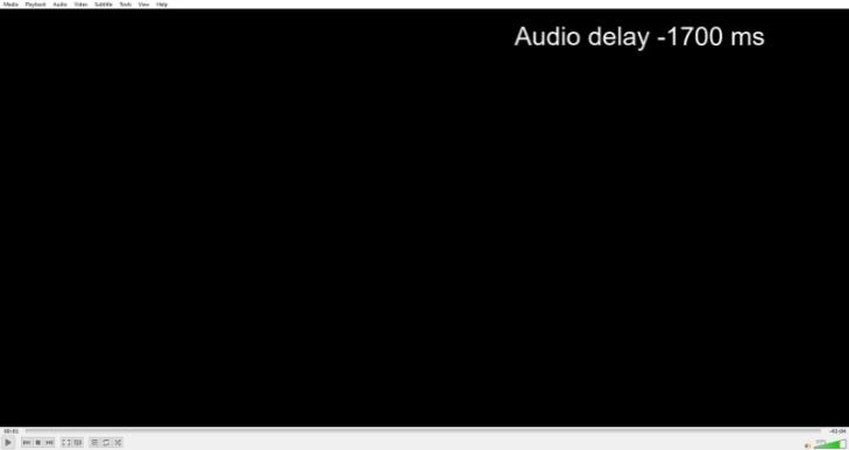
Step 2:Click on the button 'F' on your keyboard to delay audio in increments of 50 milliseconds and 'G' to speed up audio by the same rate. You can adjust the audio delay until you achieve perfect sync between audio and video.

Solution 3: Permanently Resync Audio and Video with HitPaw Univd
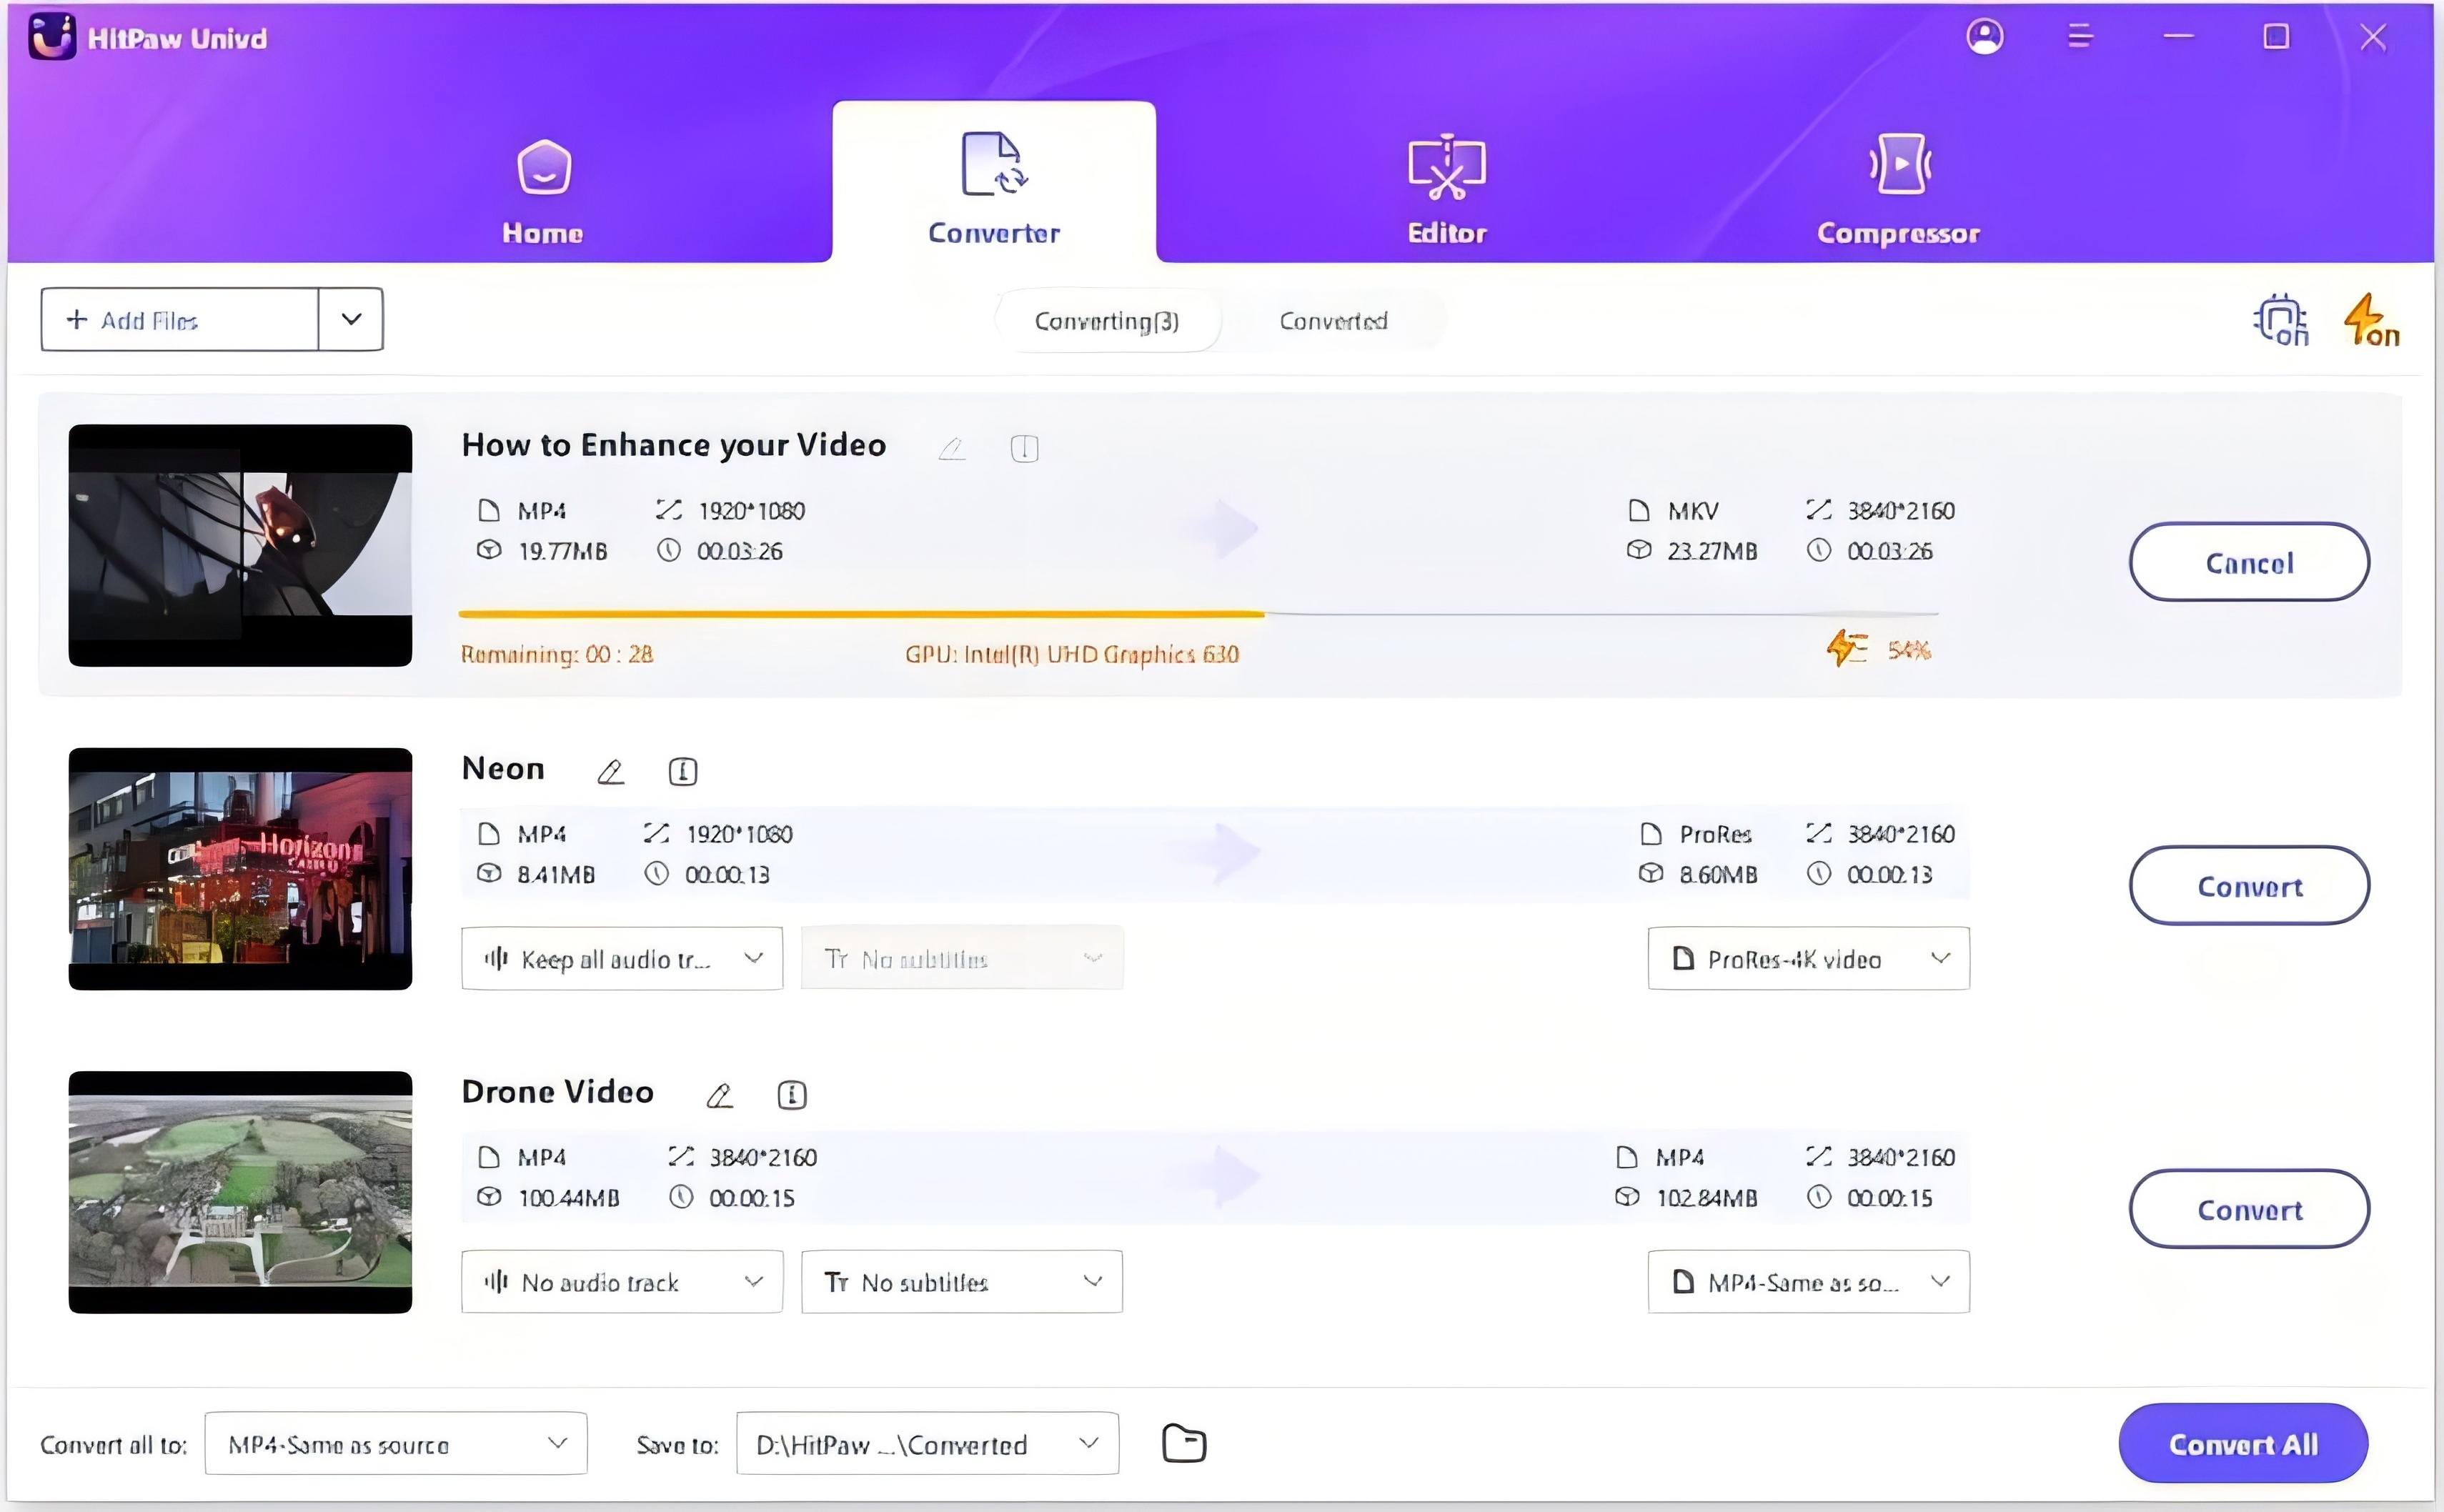
Several video editors like Adobe Premiere Pro have a tough time working with MOV videos with variable framerate. Playing such videos on these tools produces audio-video syncing issues, which can be addressed by standardizing the frame rate across the entire video. Univd Video Converter is best suited for this task. Univd simplifies the standardization of video settings, including framerates, with a few easy clicks.

HitPaw Univd - All-in-one Video Solutions for Win & Mac
Secure Verified. 254,145 people have downloaded it.
- You can resync audio and video on thousands of MOV files per batch.
- Univd can resync videos in any format and also convert resynced MOV files to any format.
- Increase or decrease the quality of your synced MOV videos with AI upscaling.
- No waiting, no delays. Sync all your videos in seconds with Univd.
- Once you sync the audio on MOV videos, it lasts permanently.
- Univd is beginner-friendly. Anyone can use it to sync audio and video.
Secure Verified. 254,145 people have downloaded it.
How to Resync MOV Audio and Video With HitPaw Univd
- Step 1: Import Video
- Step 2: Choose Output Format
- Step 3: Resync Audio and Video
- Step 4: Start Resyncing
Download, install, and launch HitPaw Univd >> Click 'Add Video' to import the MOV video, or drag it directly into the tool.

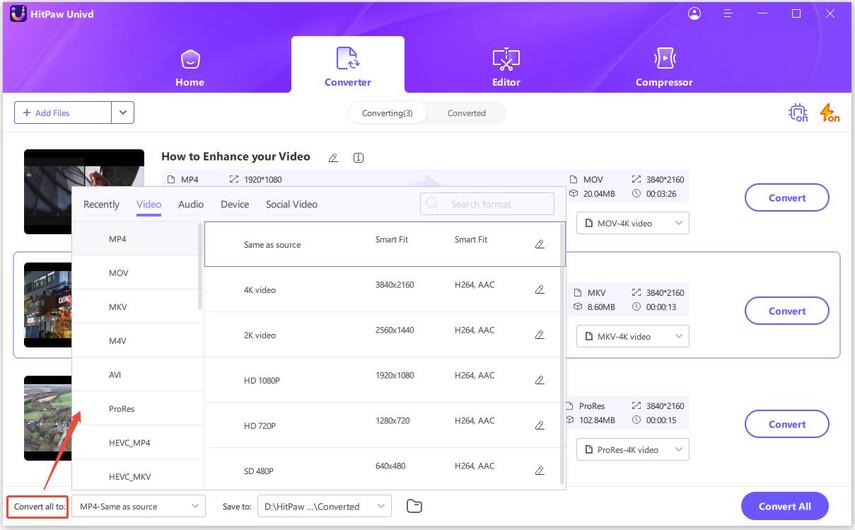
Click the 'Convert all to' menu at the bottom >> In the Video section, select your desired format for the output.
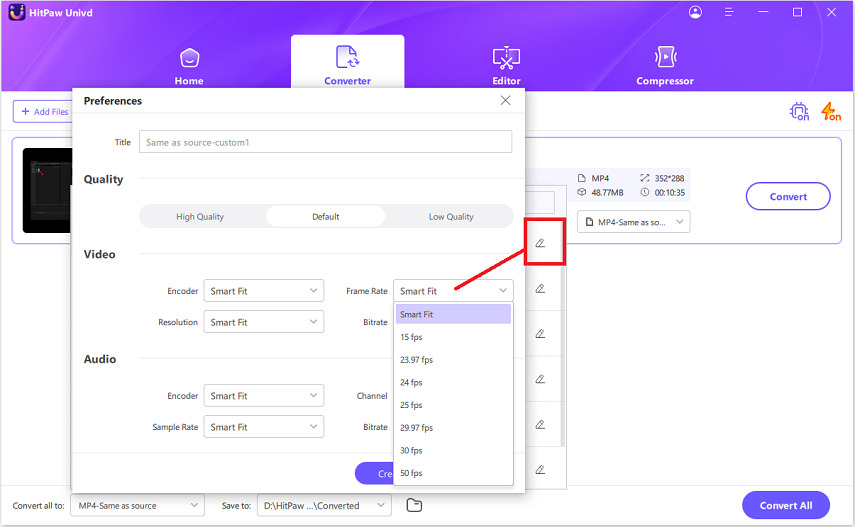
Click the 'Edit' icon next to the selected format >> In the 'Preferences' window, set the framerate to a fixed value, as per your needs >> Click 'Create.'
When you are satisfied with your selection, click Convert or Convert All files to start resync MOV .
FAQs on MOV Audio Out-of-Sync Issue
Q1. Does converting MOV to another format solve audio sync issues?
A1. Yes. Sometimes, converting MOV videos to another format can help address the audio sync issues, especially if it's a compatibility issue between the MOV format and the tool you're using to open it.
Q2. How do I prevent sync issues in the future?
A2. You can minimize the likelihood of encountering the MOV-audio-out-of-sync issue by using a consistent frame rate throughout the video, using trusted software with regular updates, and avoiding disruptions to file download or streaming.
Conclusion
MOV-audio-out-of-sync issues in MOV files can be frustrating, but they're far from unfixable. While there are plenty of easy solutions to try, such as switching to a different media player or video editor, an easier and permanent fix is using HitPaw Univd. You can fix the framerate throughout the video or convert the MOV video to another format like MP4. Try HitPaw Univd today.



 HitPaw VoicePea
  HitPaw VikPea (Video Enhancer)
 HitPaw FotorPea


Share this article:
Select the product rating:
Daniel Walker
Editor-in-Chief
My passion lies in bridging the gap between cutting-edge technology and everyday creativity. With years of hands-on experience, I create content that not only informs but inspires our audience to embrace digital tools confidently.
View all ArticlesLeave a Comment
Create your review for HitPaw articles