Convert MP4 to QuickTime: A Comprehensive Guide & Alternative
MP4 is one of the most popular and widely used video formats in the world. It is compatible with almost all devices and platforms, and it offers high quality and compression. However, sometimes you may need to convert MP4 to QuickTime format, which is the native video format for Apple devices and software. QuickTime format has some advantages over MP4, such as better compatibility with iTunes, iMovie, Final Cut Pro, and other Apple products. But how can you convert MP4 to QuickTime easily and safely?
Part 1: What is QuickTime?
QuickTime is a multimedia framework developed by Apple that supports various formats of video, audio, image, and animation. It is also a media player that can play QuickTime files (.mov) and other formats. QuickTime is integrated with macOS and iOS, and it is also available for Windows.
Features of Quick Time
QuickTime has some features that make it unique, such as:
- Supports high-quality video codecs, such as H.264, ProRes, and HEVC.
- Allows editing and trimming of video files within the player.
- Can record screen and audio from the computer or device.
- Can stream live video and audio over the internet.
Part 2: Is Convert MP4 to QuickTime Safe?
Converting MP4 to QuickTime is safe and legal, as long as you have the right to use the original MP4 files. You can convert MP4 to QuickTime for personal use, such as watching on your iPhone or iPad, or editing in iMovie or Final Cut Pro. However, you should not convert MP4 to QuickTime for commercial use, such as distributing or selling the converted files, without the permission of the original owner or creator. You should also be careful about the source and quality of the MP4 files, as some of them may contain viruses or malware that can harm your computer or device.
Part 3: Why is QuickTime not Working?
QuickTime is a multimedia player developed by Apple that can play various video, audio, and image formats on Mac and Windows computers. However, some users may encounter problems when using QuickTime, such as the player not launching, not playing certain files, or not recording the screen properly.
Sometimes, you may encounter some problems when using QuickTime, such as:
- QuickTime cannot open or play MP4 files or other formats.
- QuickTime cannot convert MP4 files or other formats to QuickTime format.
- QuickTime crashes or freezes during playback or conversion.
- QuickTime has poor performance or quality issues.
There are several possible reasons for these problems, such as:
- The MP4 files or other formats are corrupted, damaged, or incompatible with QuickTime.
- The QuickTime software is outdated, missing, or corrupted.
- The computer or device does not have enough space, memory, or power to run QuickTime.
- The internet connection is slow, unstable, or interrupted.
Part 4: How to Convert MP4 to QuickTime?
To convert MP4 to QuickTime, you need a video converter that can support both formats and offer fast and easy conversion. One of the best tools for this purpose is HitPaw Univd (HitPaw Video Converter). HitPaw Univd is a powerful and user-friendly video converter that can convert any video format to any other format, including MP4 to QuickTime.
Watch the following video to learn more details:
Features of HitPaw Univd
HitPaw Toolkit has some features over QuickTime, such as:
- Supports more than 1000 video formats, including MP4, MOV, MKV, AVI, WMV, FLV, etc.
- Has more than 30 video editing tools, such as cut, trim, merge, split, rotate, crop, adjust, watermark, subtitle, etc.
- Simple and intuitive interface that anyone can use without any hassle.
- Fast and stable performance that can handle large and high-quality video files.
- Friendly and responsive customer support and update service.
How to use HitPaw Univd to convert MP4 to QuickTime?
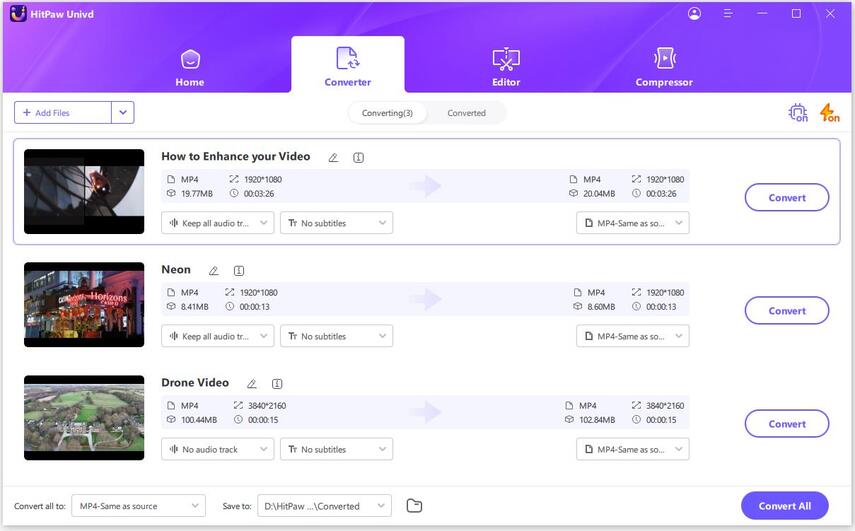
Step 1: Import Your FilesLaunch HitPaw Univd and either click "Add Video" to import your files or simply drag and drop them directly into the program. Your video files will be queued for processing.

Your video files will be queued for processing.
Step 2: Optional Video Info Editing
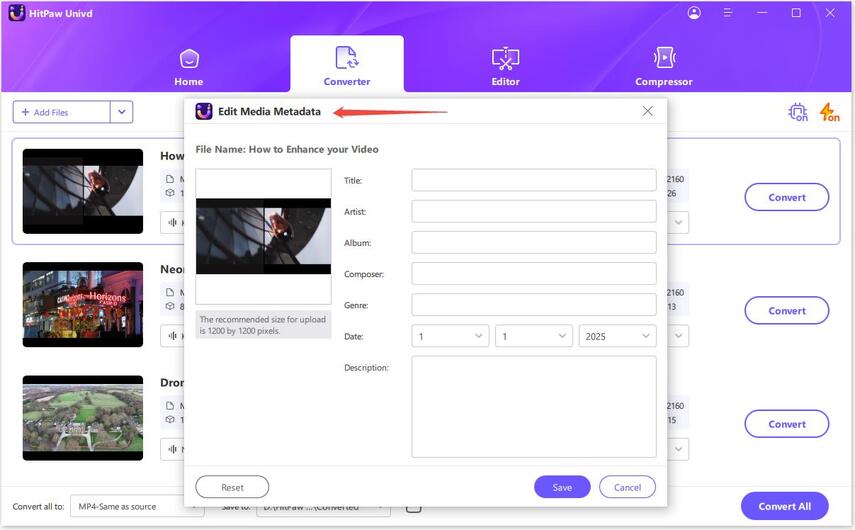
If desired, you can customize your video information by clicking on the file name to edit the title.
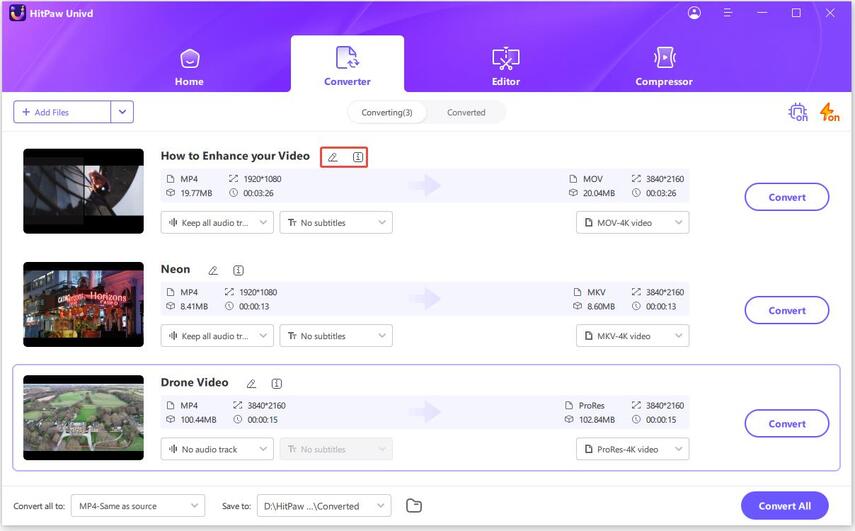
Use the pen or info icon to modify media metadata such as title, artist, album, composer, genre, date, and description.
Step 3: Incorporate Subtitles
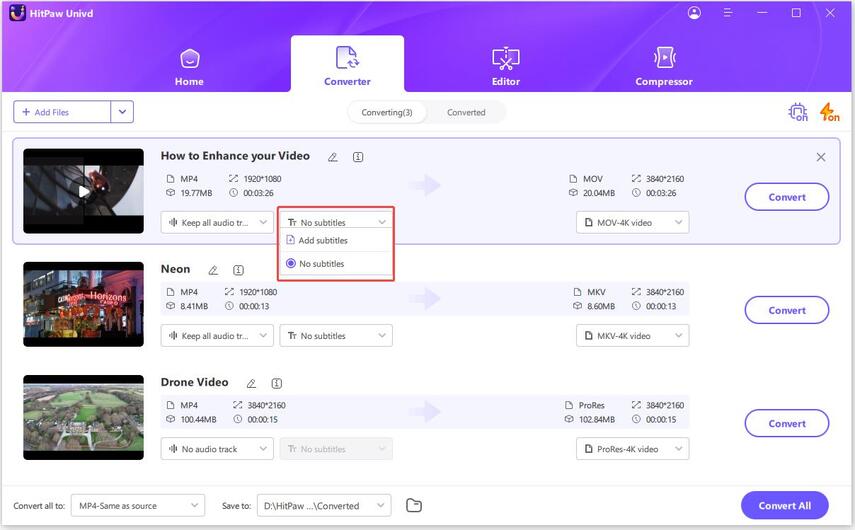
Upon importing a video into HitPaw Univd, review the subtitles status. If the default option is "No subtitles," it may indicate embedded hardware or closed subtitles. These types are permanently affixed to the original video frames and cannot be altered by users.
Step 4: Choose Output Format
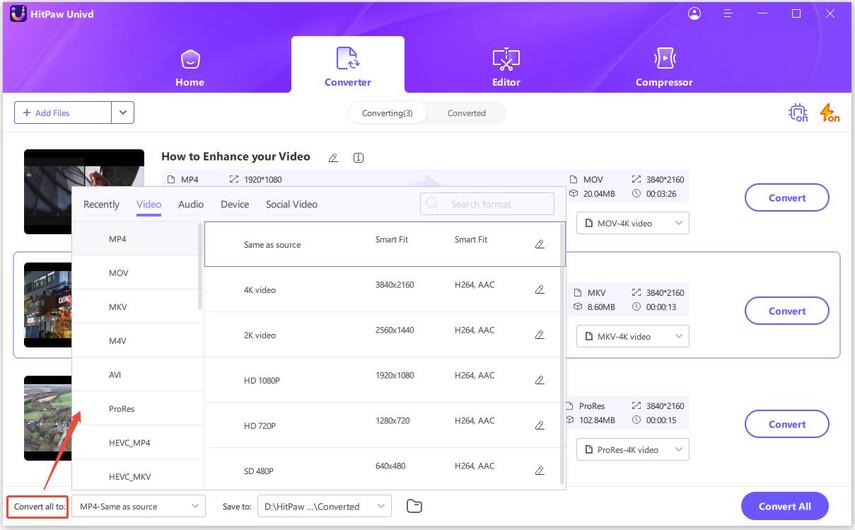
For each file, select an output format by clicking the inverted triangle icon in the lower right corner. Alternatively, choose a unified output format for all files by clicking "Convert all to" in the lower left corner.
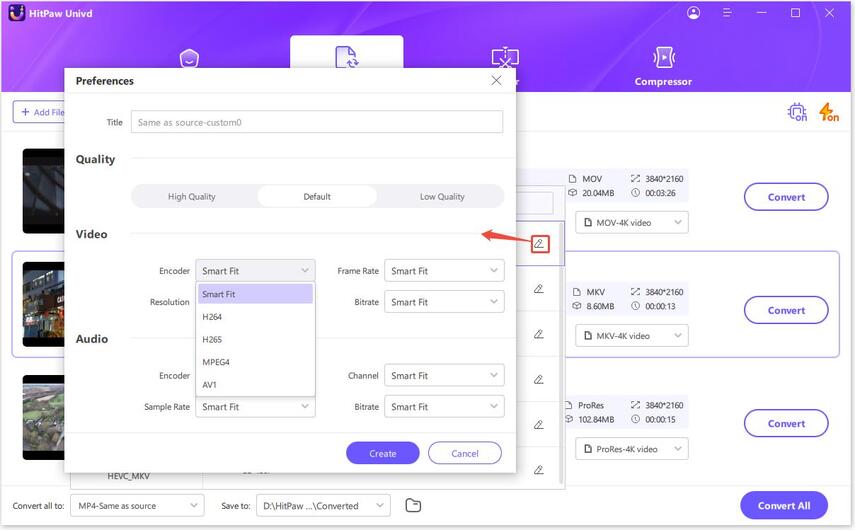
Customize output format parameters by clicking the edit icon, accessing the format preferences window, and adjusting quality, video, and audio codec settings.
Step 5: Convert Your Video
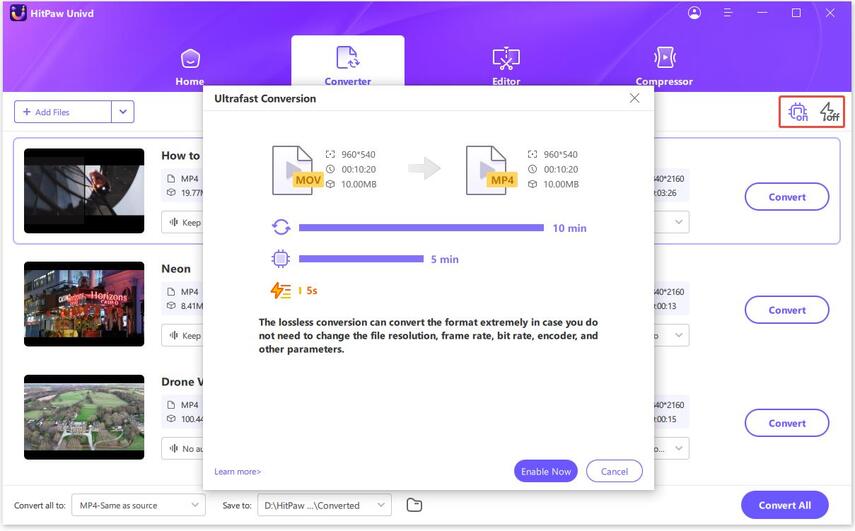
Navigate to the Hardware Acceleration Detection and Lossless Conversion tab at the top-right corner.
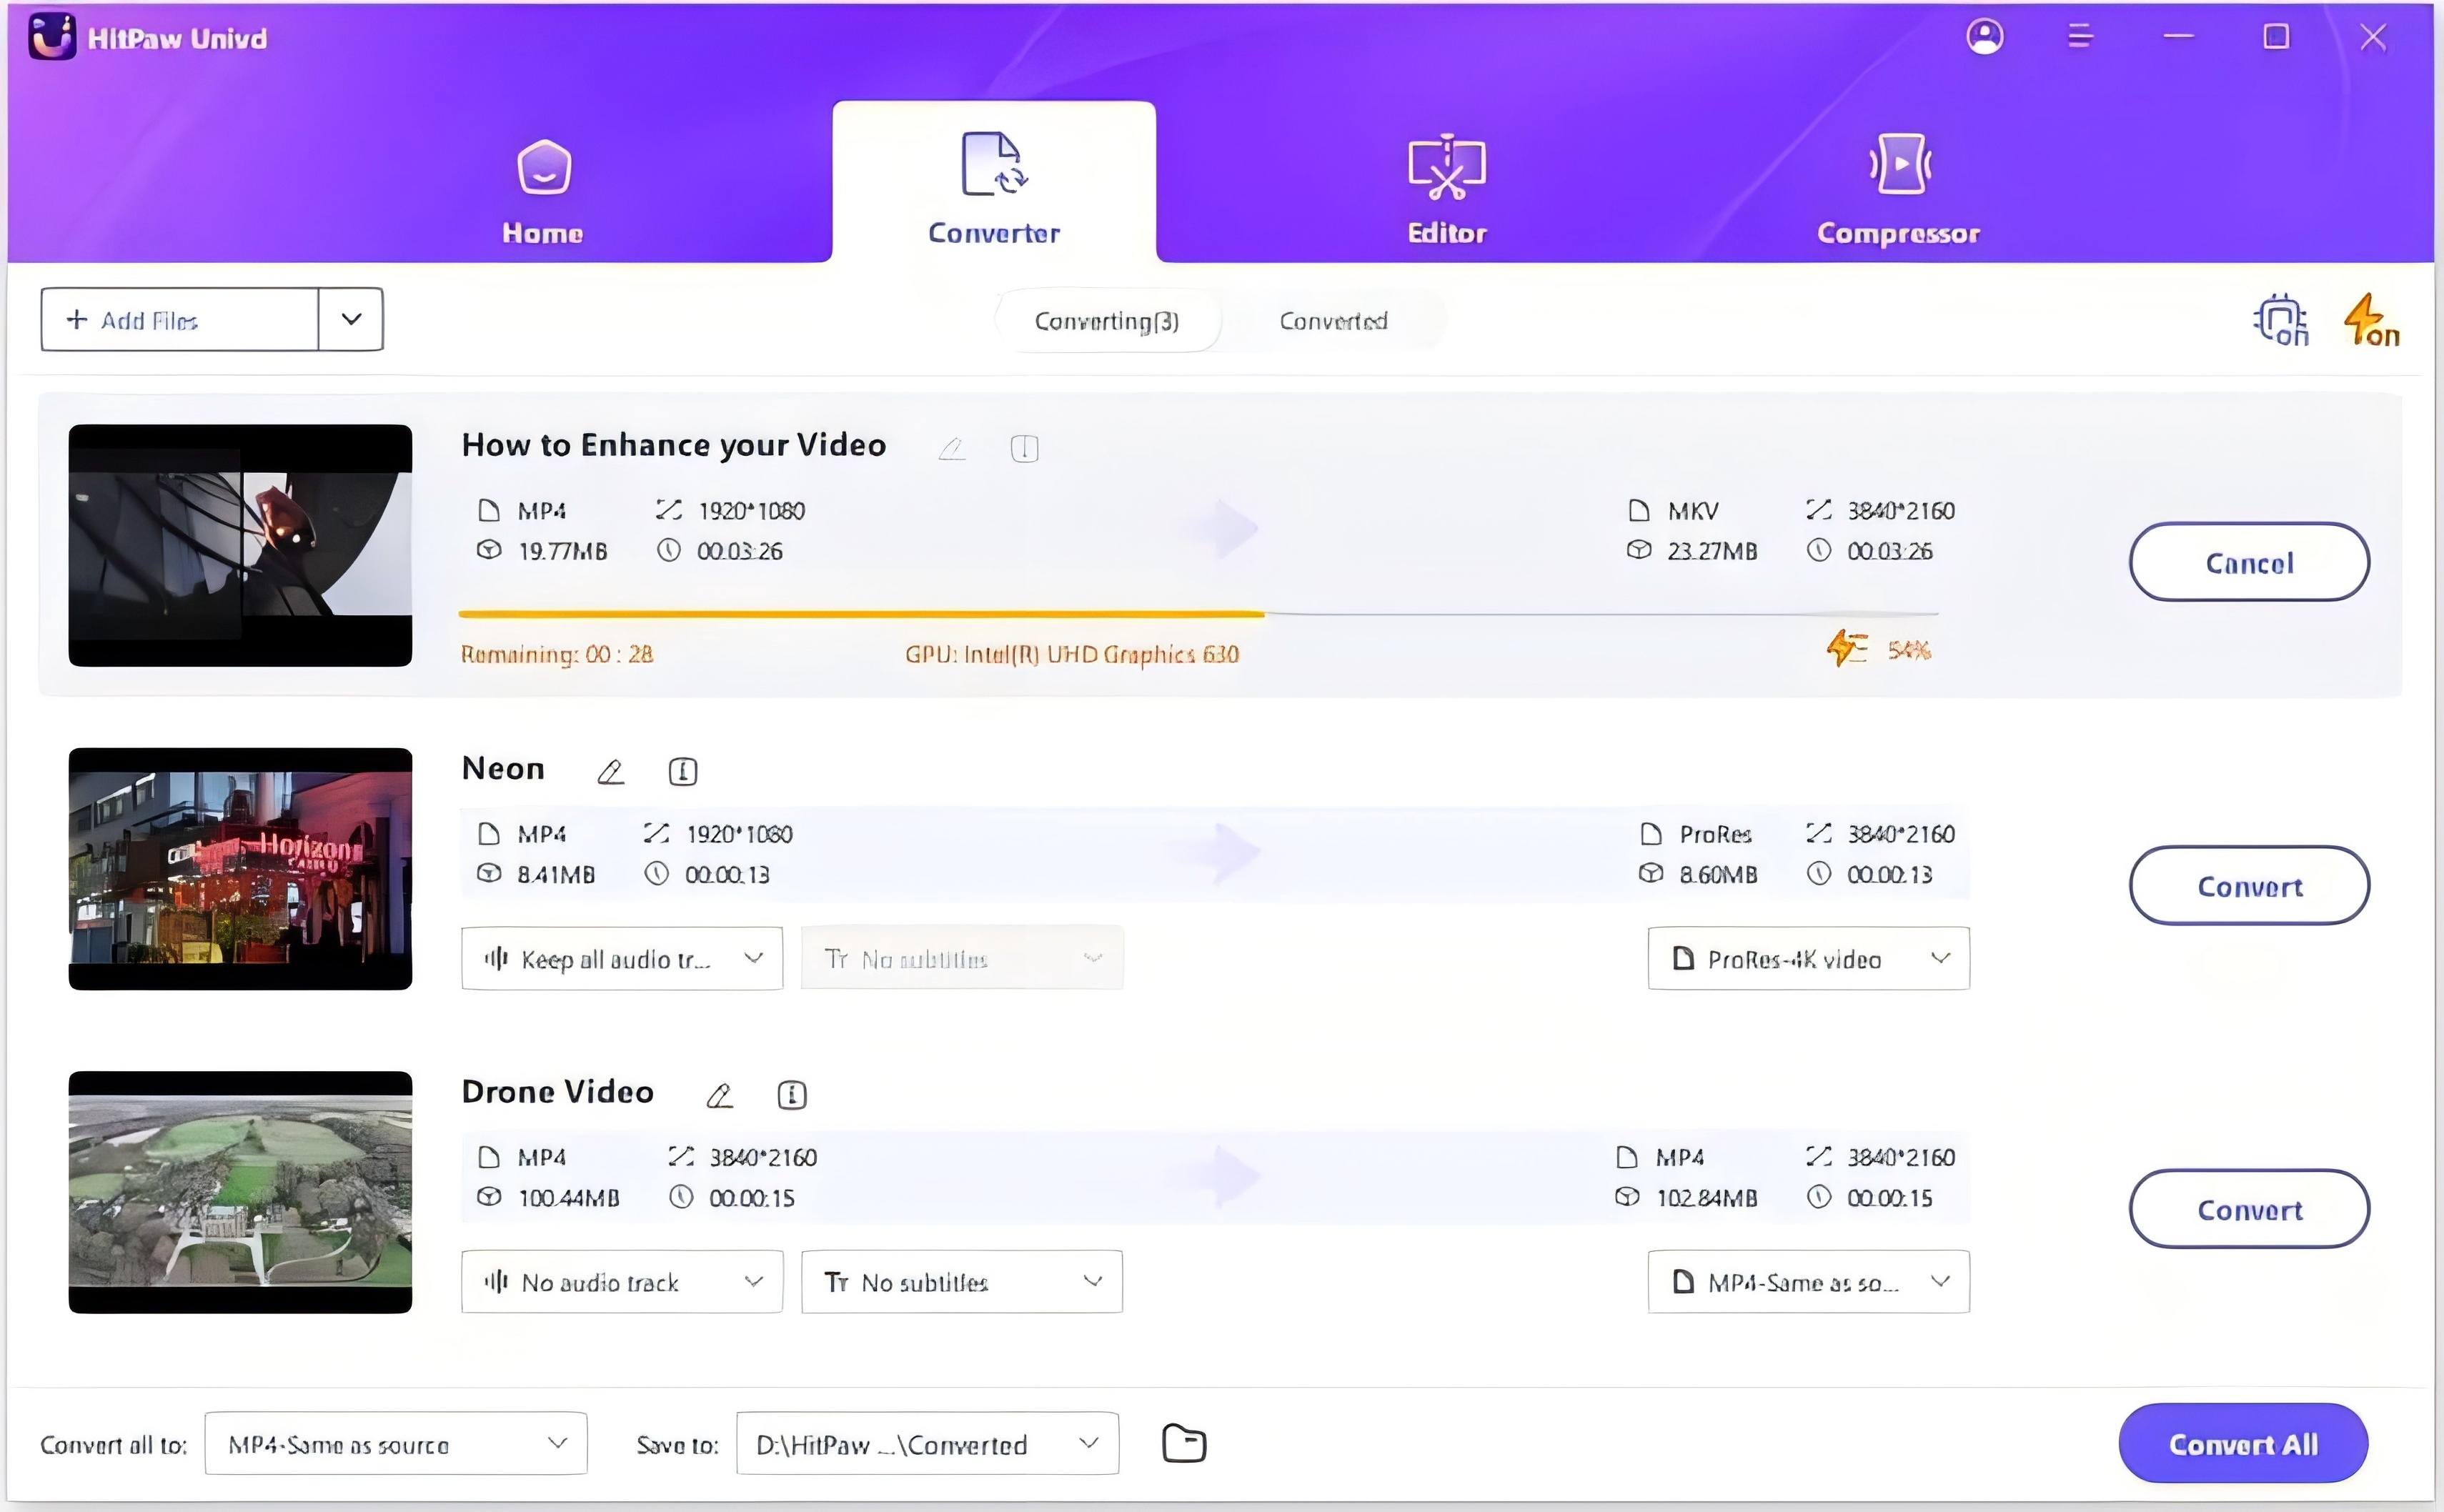
Select a target folder within the interface and initiate conversion by clicking "Convert" (or "Convert All" for multiple files). The video will be converted to the chosen format.
Step 6: Access Converted Files
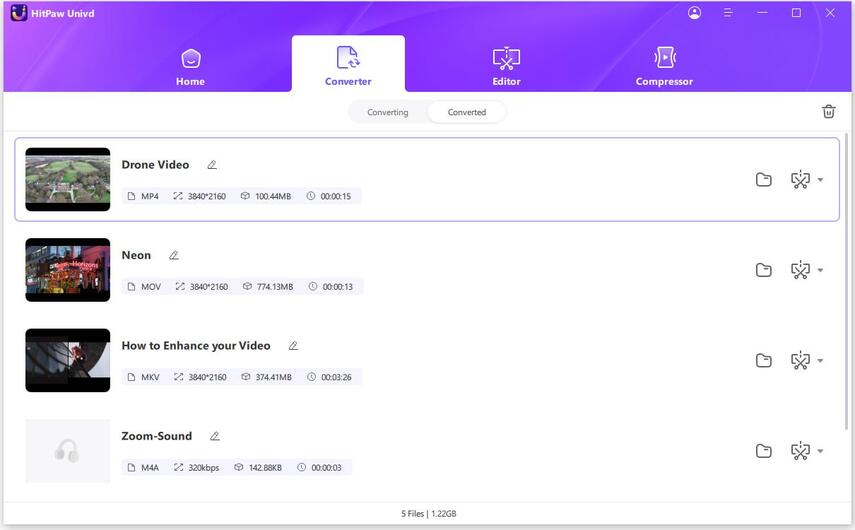
Once conversion is complete, head to the "Converted" tab at the top to view the converted files. Click "Open Folder" to access the finished files directly, or click "Add" to include them for further editing if necessary.
[Bonus] The Best Alternatives to QuickTime
While QuickTime is a good media player and converter for Apple users, it is not the best option for everyone.
VLC Media Player
This is one of the most popular and versatile media players that can play almost any file format, including DVD, CD, and streaming protocols. It is free, open source, and cross-platform. It also has many advanced features such as video conversion, recording, editing, and streaming. You can download VLC Media Player.

Steps to use
To use VLC Media Player, follow these steps:
Step 1: Launch the program and click on the Media menu, then select Open File, Open Disc, Open Network Stream, or Open Capture Device, depending on the source of your media.
Step 2: Browse and select the file, disc, URL, or device that you want to play, and click on the Play button.
Step 3: Use the controls at the bottom of the player to pause, resume, stop, adjust volume, switch to full screen mode, and access other options.
Step 4: To access the advanced features, click on the Tools menu, then select Effects and Filters, Media Information, Codec Information, Preferences, or Customize Interface, depending on what you want to do.
PotPlayer
This is another powerful media player that supports a wide range of video and audio formats, as well as 3D and VR content. It has internal codecs, so you don’t need to install any additional ones. It also has various customization options, such as skins, filters, and effects. You can download PotPlayer.

Steps to use
To use PotPlayer, follow these steps:
Step 1: Launch the program and click on the File menu, then select Open File, Open Folder, Open URL, or Open Device, depending on the source of your media.
Step 2: Browse and select the file, folder, URL, or device that you want to play, and click on the OK button.
Step 3: Use the controls at the bottom of the player to pause, resume, stop, adjust volume, switch to full screen mode, and access other options.
Step 4: To access the advanced features, right-click on the player, then select Video, Audio, Subtitle, Playback, Control Panel, or Preferences, depending on what you want to do.
Aiseesoft Blu-ray Player
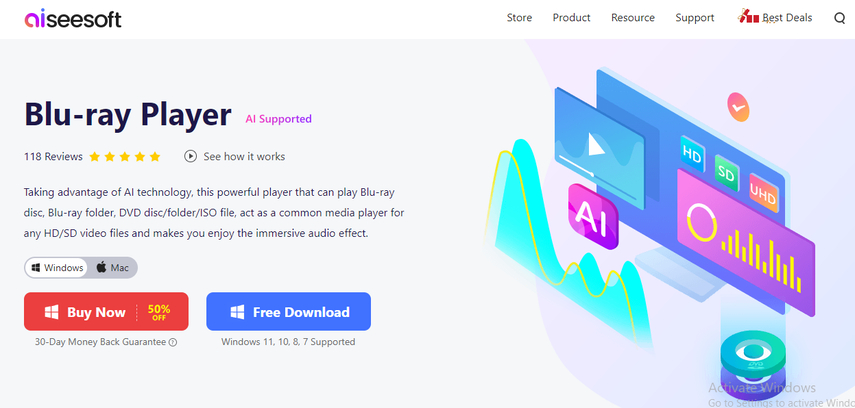
This is a professional media player that can play Blu-ray discs, folders, and ISO files, as well as other common video and audio formats. It can provide high-quality playback with lossless sound and smooth video. It also has a user-friendly interface and easy-to-use controls. You can download Aiseesoft Blu-ray Player.
Steps to use
To use Aiseesoft Blu-ray Player, follow these steps:
Step 1: Launch the program and click on the Open Disc, Open Folder, or Open File button, depending on the source of your media.
Step 2: Browse and select the disc, folder, or file that you want to play, and click on the Open button.
Step 3: Use the controls at the bottom of the player to pause, resume, stop, adjust volume, switch to full screen mode, and access other options.
Step 4: To access the advanced features, click on the Tools menu, then select Preferences, Snapshot, or Check for Update, depending on what you want to do.
SMPlayer
This is a lightweight and simple media player that can play most video and audio formats, as well as YouTube videos. It has a built-in codec finder, so you don’t need to install any extra ones. It also has some useful features, such as subtitles, playlists, and screenshots. You can download SMPlayer.

Steps to use
To use SMPlayer, follow these steps:
Step 1: Launch the program and click on the File menu, then select Open, Open URL, Open DVD, or Open Blu-ray, depending on the source of your media.
Step 2: Browse and select the file, URL, DVD, or Blu-ray that you want to play, and click on the OK button.
Step 3: Use the controls at the bottom of the player to pause, resume, stop, adjust volume, switch to full screen mode, and access other options.
Step 4: To access the advanced features, click on the Options menu, then select Filters, Preferences, Playlist, YouTube Browser, or Find Subtitles, depending on what you want to do.
RealPlayer
This is a classic media player that can play, download, and organize your media files. It can also stream videos to your TV, share them with your friends, and back them up to the cloud. It supports various formats, such as MP4, FLV, WMV, and MP3. You can download RealPlayer.
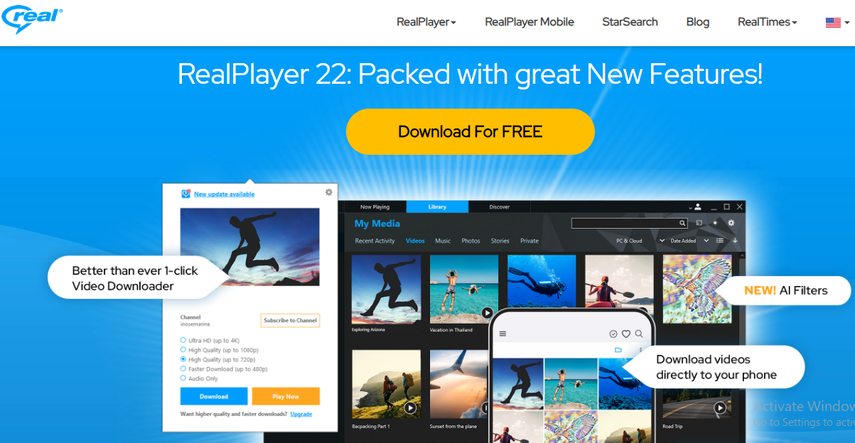
Steps to use
To use RealPlayer, follow these steps:
Step 1: Launch the program and click on the Library, Web Videos, or Burn tabs, depending on what you want to do.
Step 2: To play media files from your library, select the file and click on the Play button.
Step 3: To play web videos, click on the Web Videos tab and browse or search for the video that you want to play, then click on the Play button. You can also download the video by clicking on the Download This Video button that appears above the video.
Step 4: To burn media files to a disc, click on the Burn tab and drag and drop the files that you want to burn, then click on the Burn Your CD/DVD button.
Conclusion
Converting MP4 to QuickTime is a common and useful task for many video users, especially Apple users. However, it is not always easy and smooth to do it with QuickTime. That is why you need a reliable and efficient tool like HitPaw Univd, to help you convert MP4 to QuickTime in a few clicks. Moreover, if you want to enjoy more features and functions than QuickTime, you should try HitPaw Toolkit, the best alternative to QuickTime that can play and convert any video format, as well as edit, crop, rotate, add subtitles, and more. Download HitPaw Univd and HitPaw Toolkit today and experience the difference


 HitPaw Watermark Remover
  HitPaw Photo Object Remover
 HitPaw VikPea (Video Enhancer)


Share this article:
Select the product rating:
Daniel Walker
Editor-in-Chief
My passion lies in bridging the gap between cutting-edge technology and everyday creativity. With years of hands-on experience, I create content that not only informs but inspires our audience to embrace digital tools confidently.
View all ArticlesLeave a Comment
Create your review for HitPaw articles