The Ultimate Guide of MOV to GIF in Photoshop
Converting GIF to MOV in Photoshop can enhance your multimedia projects by providing a higher quality and more versatile video format. This guide will walk you through the process with detailed steps and useful tips, ensuring a smooth and efficient conversion. Whether you're a beginner or an experienced user, you'll find everything you need to successfully convert MOV to GIF in Photoshop.
Part 1. Understanding the Basics of Converting GIF to MOV in Photoshop
Converting GIF to MOV in Photoshop involves a series of steps that transform a looping, animated GIF into a high-quality MOV video file. Here's an overview of the process:
1. Importing the GIF: Open Photoshop and import your GIF file by selecting "File" > "Import" > "Video Frames to Layers." This will break down the GIF into individual frames and layers within Photoshop.
2. Editing the Frames: Once the GIF is imported, you can edit individual frames as needed. This can include adjustments to color, adding text, or applying filters to enhance the visual quality of each frame.
3. Timeline Setup: Open the Timeline panel by going to "Window" > "Timeline." Ensure that your frames are correctly sequenced and that the animation plays smoothly by using the playback controls in the Timeline panel.
4. Exporting as Video: To convert your edited GIF to MOV, go to "File" > "Export" > "Render Video." In the Render Video dialog box, choose the settings that best fit your needs, such as the destination, file name, and format. Select QuickTime as the format to export the file as an MOV.
5. Final Adjustments: Before finalizing the export, review your video settings, such as resolution and frame rate, to ensure they meet your requirements. Once everything is set, click "Render" to start the conversion process.
By following these steps, you can effectively convert a GIF to an MOV file in Photoshop, leveraging the program's powerful editing tools to create a high-quality video output.
Part 2. Converting MOV to GIF in Photoshop
Importance of Being Able to Convert MOV to GIF in Photoshop
Converting MOV to GIF in Photoshop is valuable for several reasons:
- Ease of Sharing: GIFs are more accessible for sharing on social media, websites, and messaging platforms due to their smaller size compared to video files.
- Looping Animations: GIFs automatically loop, making them ideal for creating eye-catching, repeatable animations.
- Wide Compatibility: Almost all modern web browsers and devices support GIF playback without the need for additional software or plugins.
Step-by-Step Guide on How to Convert MOV to GIF Using Photoshop
1. Open the MOV File:
- Launch Photoshop and go to "File" > "Import" > "Video Frames to Layers."
- Select your MOV file. A dialog box will appear asking you to specify the range to import. Choose "From Beginning to End" for the entire video or set a custom range if needed.
2. Edit the Frames:
- Once imported, your MOV file will be broken down into frames and displayed as layers.
- Use the Layers panel to make any necessary edits to individual frames, such as cropping, adding text, or applying filters.
3. Set Up the Timeline:
- Open the Timeline panel by selecting "Window" > "Timeline."
- Make sure your frames are arranged correctly and adjust the timing for each frame if necessary. You can do this by clicking the drop-down menu under each frame and setting the delay.
4. Optimize the Animation:
- To ensure your GIF has a manageable file size, reduce the image dimensions and frame rate if needed. Go to "Image" > "Image Size" to adjust dimensions and use the Timeline panel to reduce frame rate.
5. Export as GIF:
- Once satisfied with your animation, go to "File" > "Export" > "Save for Web (Legacy)."
- In the Save for Web dialog box, select GIF as the format. Adjust the settings like color reduction, dither, and lossy to balance quality and file size.
- Ensure the "Looping Options" is set to "Forever" if you want the GIF to loop continuously.
6. Save the GIF:
- Click "Save" and choose the destination for your GIF file. Name your file and click "Save" again to complete the conversion.
By following these steps, you can convert an MOV file to a GIF in Photoshop, creating animations that are perfect for web use, social media, and more.
Part 3. FAQs of MOV to GIF in Photoshop
Q1. Can I convert MOV to GIF using Photoshop?
A1. Yes, you can convert MOV to GIF using Photoshop. Import the video by going to File > Import > Video Frames to Layers, and then follow the steps to create a frame animation in the Timeline panel. Finally, export it as a GIF via File > Export > Save for Web (Legacy) (Adobe Help Center).
Q2. Why is my GIF not animating in Photoshop?
A2. If your GIF is not animating, ensure that you have created frame animations properly in the Timeline panel. Make sure the animation is set to loop by selecting the “Forever” option in the Timeline panel settings (8Designers).
Q3. What is the best format for exporting animations in Photoshop?
A3. For web use, exporting animations as GIFs is ideal due to their compatibility and small file size. In Photoshop, use the “Save for Web (Legacy)” option and select the GIF format to ensure optimal quality and file size (Adobe Help Center).
Part 4. Pro-tips: How to Convert Videos to GIF
HitPaw Univd (HitPaw Video Converter) is a versatile tool for converting videos to GIFs. It supports a wide range of video formats and provides an intuitive interface for easy conversion. With HitPaw, you can customize the GIF by selecting specific segments, adjusting resolution, and setting frame rates. This powerful converter ensures high-quality output and offers additional features like video editing, making it a go-to solution for all your multimedia needs.
Features
- Supports a wide range of video formats, ensuring compatibility with most video files
- Intuitive interface for easy and user-friendly conversion
- Customizable GIF creation with options to select specific segments, adjust resolution, and set frame rates
- High-quality output to maintain the integrity of your videos
- Additional features including video editing tools for enhanced customization
Steps
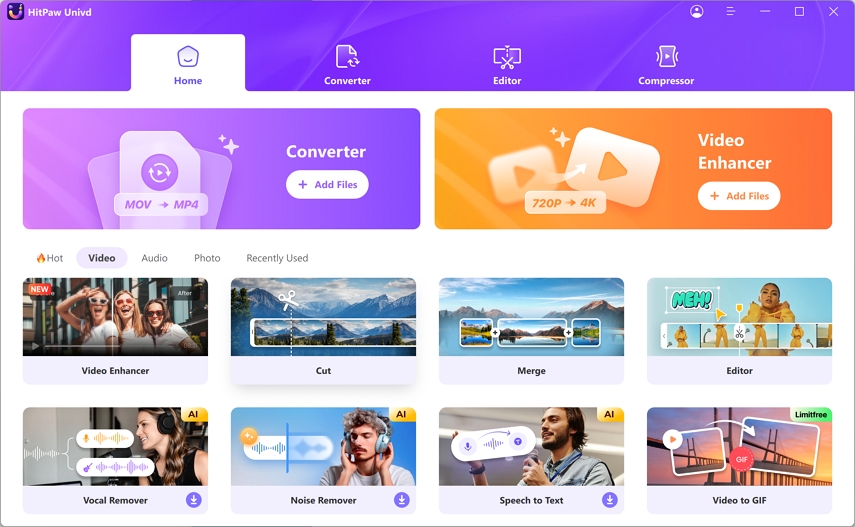
Step 1: Launch HitPaw Univd and Switch to Toolbox
After installing HitPaw Univd, open it and switch to the Toolbox tab. Select the Video to GIF feature.
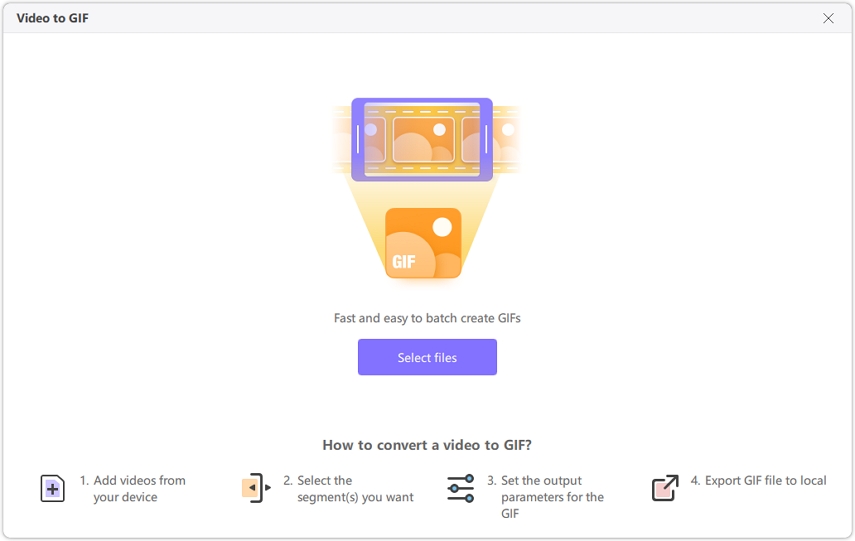
Step 2: Add a Video
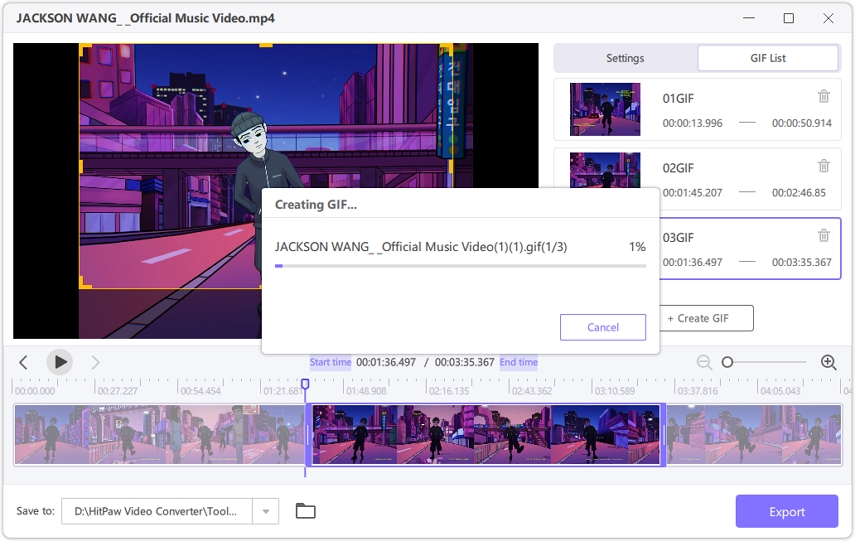
Import your desired video into the program. The video will appear in the timeline, where you can preview it by clicking the play button.
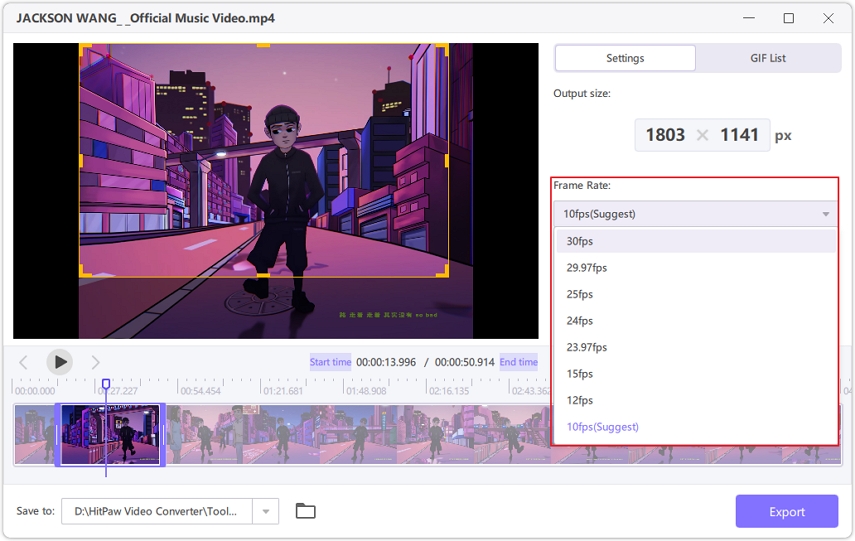
Step 3: Set GIF Output Parameters
In the Settings tab, configure the output resolution, frame rate, and size. Adjust the aspect ratio by dragging the matrix diagram in the preview window. Set the frame rate (default is 10fps) and size from the drop-down menus.
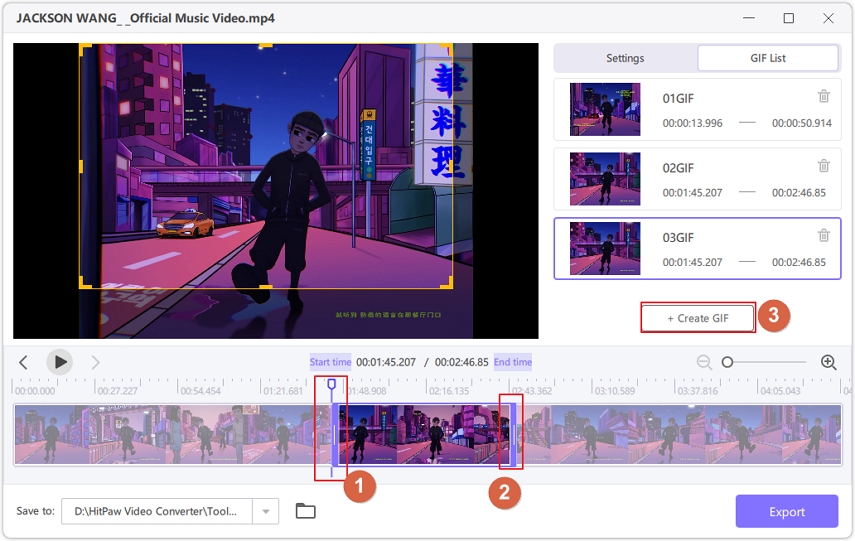
Step 4: Create GIF from Video
Adjust the start and end times of the GIF by dragging the timeline bars. Preview the segment, then click Create GIF to generate the GIF file. For multiple GIFs, select new segments and repeat the process.
Step 5: Export GIFs
Click the Export button in the lower right corner to save your created GIFs.
Watch the following video to learn more details:
Bottom line
Converting GIF to MOV in Photoshop enhances the quality and versatility of your animations, making them suitable for various professional uses. By following the detailed steps in this guide, you can efficiently achieve this conversion. For a simpler, more versatile tool, consider using HitPaw Univd. It offers an easy-to-use interface and robust features for converting various formats, ensuring high-quality results with minimal effort. Try HitPaw Univd for all your multimedia needs.


 HitPaw FotorPea
 HitPaw VoicePea
  HitPaw VikPea (Video Enhancer)

Share this article:
Select the product rating:
Daniel Walker
Editor-in-Chief
My passion lies in bridging the gap between cutting-edge technology and everyday creativity. With years of hands-on experience, I create content that not only informs but inspires our audience to embrace digital tools confidently.
View all ArticlesLeave a Comment
Create your review for HitPaw articles