[Solved!] How to Change Frame Rate in Premiere Pro
Are you looking to know how to change frame rate in Premiere project but unsure how to do it? Whether you're aiming for a cinematic look, need to match footage with different frame rates, or simply want to ensure smooth playback, adjusting the frame rate in Premiere Pro is a crucial skill for any video editor.
In this guide, we'll walk you through the steps to change the frame rate of your video clips and sequences, ensuring your projects look exactly as you envision. Let's dive in and explore how to change frame rate in Premiere pro.
Part 1. How to Change Frame Rate in Premiere Pro
1. How to change 60fps to 24fps in Premiere?
Changing the frame rate of a video clip from 60fps to 24fps in Adobe Premiere Pro involves a few steps to ensure smooth playback and maintain the quality of your footage.
How to change the frame rate in Premiere pro
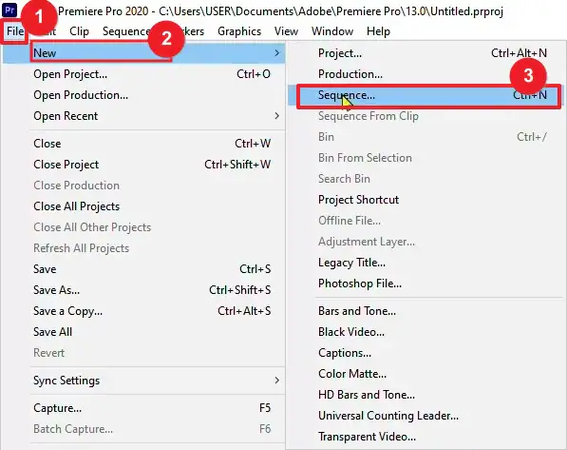
Step 1: Launch a new project in Adobe Premiere Pro. Navigate to "New" > "File" > "Sequence." To access the new sequence window, navigate to "AVCHD" > "1080p" > "AVCHD 1080p60." To start the new sequence, click "OK".
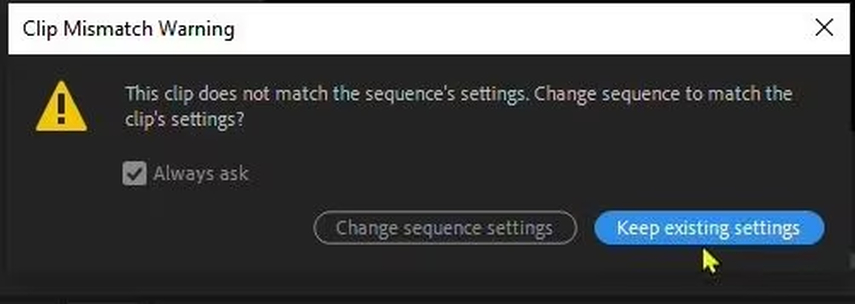
Step 2: Import your 60fps video into Adobe Premiere Pro and drag it into the timeline. When prompted, choose "Keep existing settings" to keep the sequence settings.
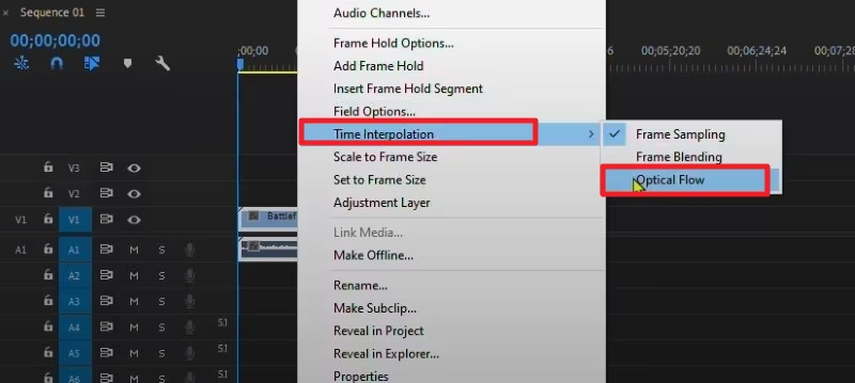
Step 3: In the timeline, right-click the video clip. Choose "Time Interpolation" > "Optical Flow." To begin rendering, use the "Enter" key. Await the completion of the processing. Please be patient as this may require some time.
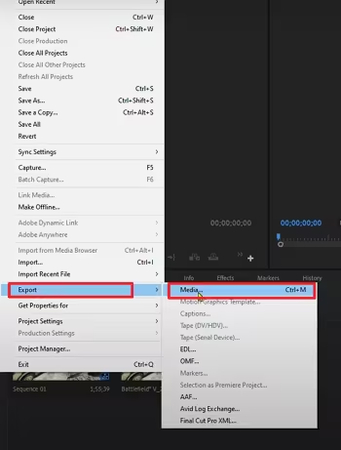
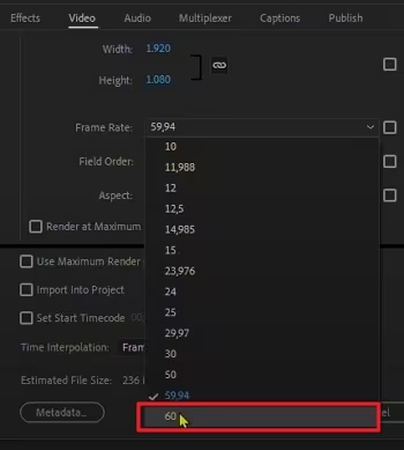
Step 4: Once the processing is complete, go to "File" > "Export" > "Media." In the export settings window, select a preset. Scroll down to the "Effects" section. Check the frame rate to ensure it is set to 60fps. If yes, change it to 24fps.
Step 5: After verifying the frame rate, click "Export." Wait for the export process to complete. Your video is now saved with the adjusted frame rate.
2. How do I change the frame scale in Premiere Pro?
You may easily alter the frame size of your video with Premiere Pro. Most importantly, changing the frame size of your video won't result in any resolution quality loss. Here are the easy procedures to adjust Premiere Pro's Frame Size.
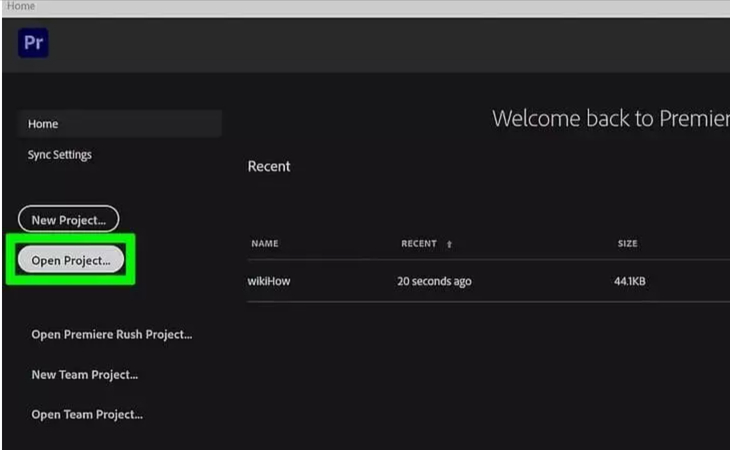
Step 1: Installing Adobe Premiere Pro on your device is a prerequisite for beginning the editing process. You must rapidly launch the application later. At this point, all you have to do is locate the video file whose frame size you want to modify. Launch the newly created project and attach a file from your PC. Double-clicking on your video will open your project file during this phase.
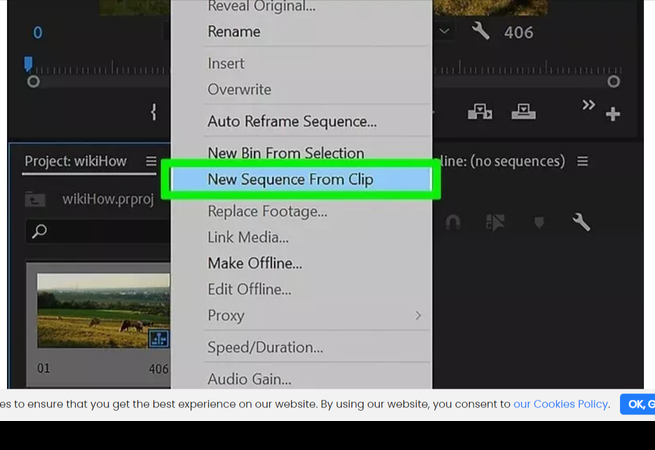
Step 2: You must right-click on your video after choosing your project and pick New Sequence from your clip.
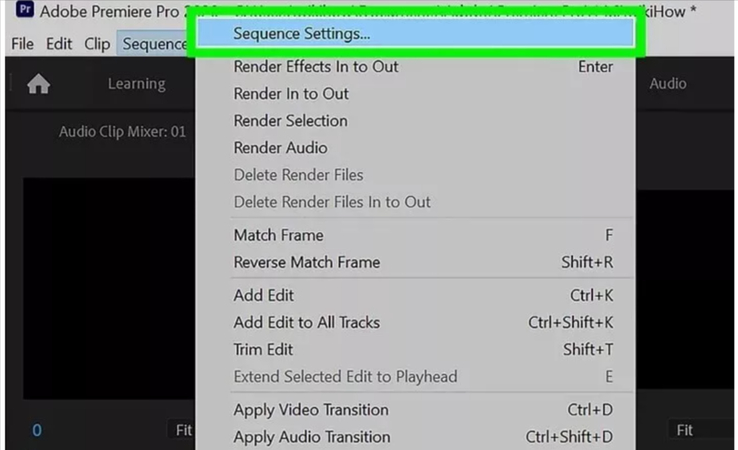
Step 3: You will need to perform a few steps before you can right-click the sequence option and select Sequence setting. The video clip's sequence setting will be displayed during this process.
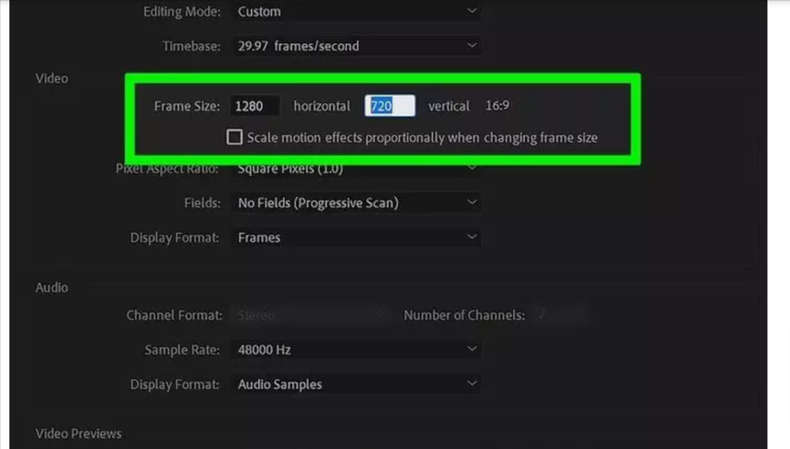
Step 4: You can adjust the Frame size by navigating around the window's upper side. It would be beneficial if you kept in mind that the aspect ratio depends on the frame size you have chosen. You must input your vertical value in the second box after providing the horizontal value first. To see if it works, you must first reproduce the sequence if you are unable to discover the option to change the resolution.
To accomplish this, right-click the sequence, then choose Duplicate by pressing the Cancel button. Next, you have to click on the sequence that you copied and choose Sequence Settings. This procedure will guarantee that the sequence can now be edited. Frame sizes such as 1920 x 1080, 1080 x 1080, and 1080 x 1920 are available for selection.
Part 2. The Best Premiere Pro Alternative to Change Frame Rate of Any Video
Need to adjust your video’s frame rate but don’t want to deal with Premiere Pro’s complexity? HitPaw Univd is the perfect alternative! Whether you're looking to achieve smoother motion, fix frame rate mismatches, or optimize your videos for different platforms, this powerful tool makes frame rate conversion simple, fast, and high-quality.
Features
- Converts frame rate in videos to 24fps, 30fps, 60fps, and more to match any project.
- Batch changes video frame rate, resolution, bit rate, and encoder.
- Supports over 1000 formats including MP4, MOV,AVI, TS, MP3, etc.
- Provides diversity editing features: cut, trim, crop, adjust speed, add filters, add watermarks, etc.
- AI features to enhance your video experience.
- Works on both Windows and Mac systems.
How to Change Frame Rate in Video Using HitPaw Univd
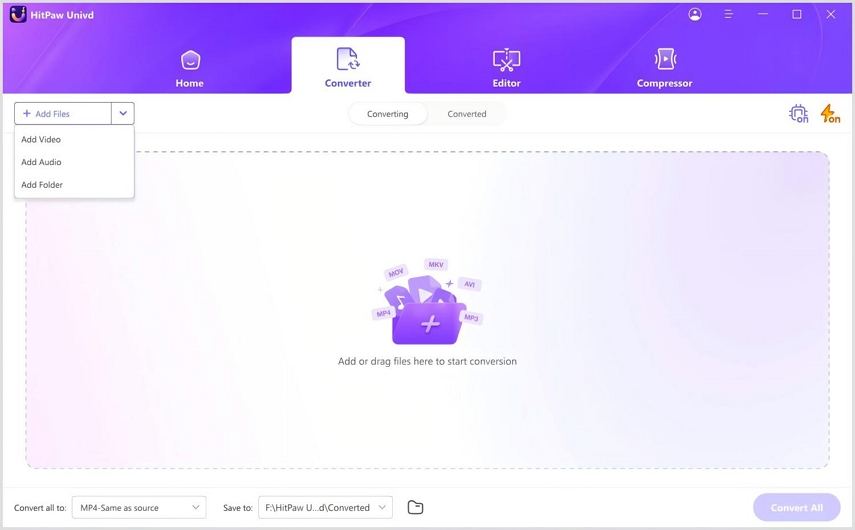
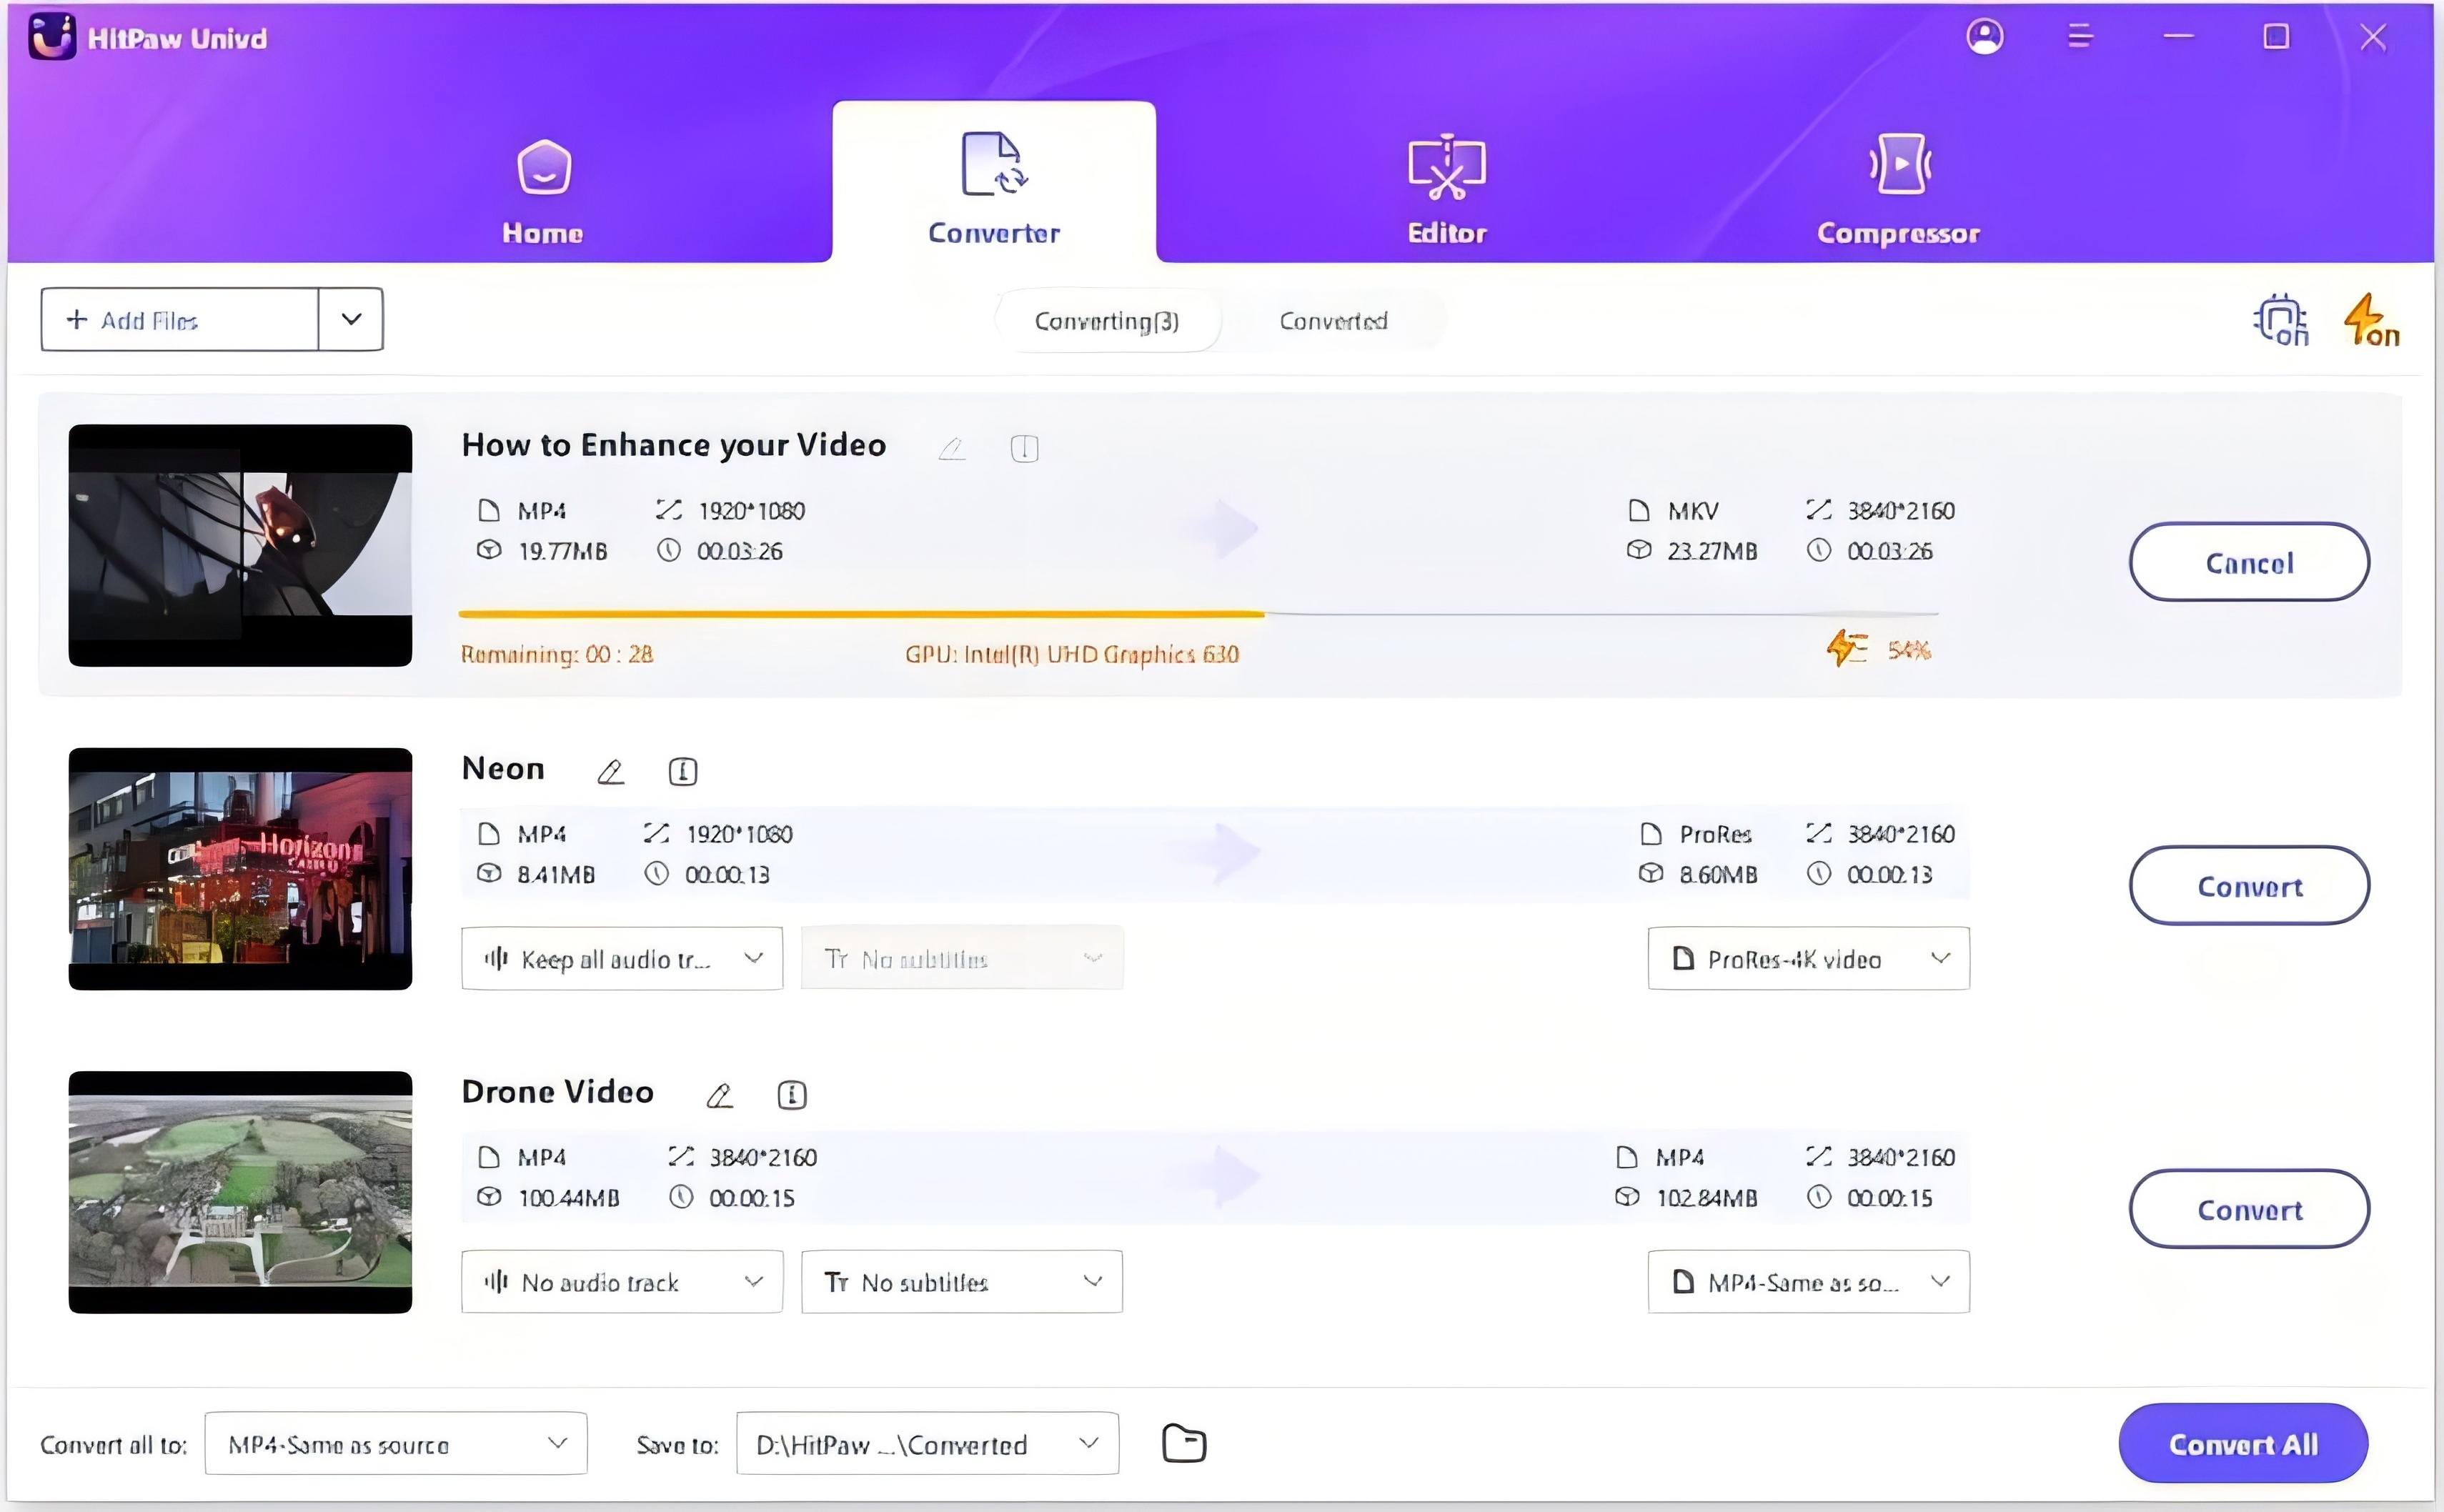
Step 1: Download the HitPaw Univd from the official website and follow the installation instructions. Once installed, open the program and go go the Converter tab. Click Add Video to import the video you want to change the frame rate.
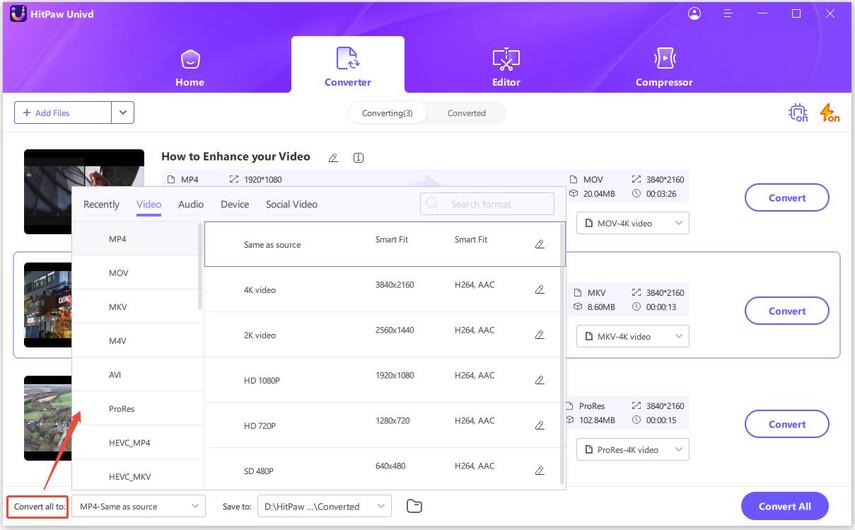
Step 2: Click the "Convert all to" option to expand the output format list. Please select the output format that you want to convert, for example, MP4.
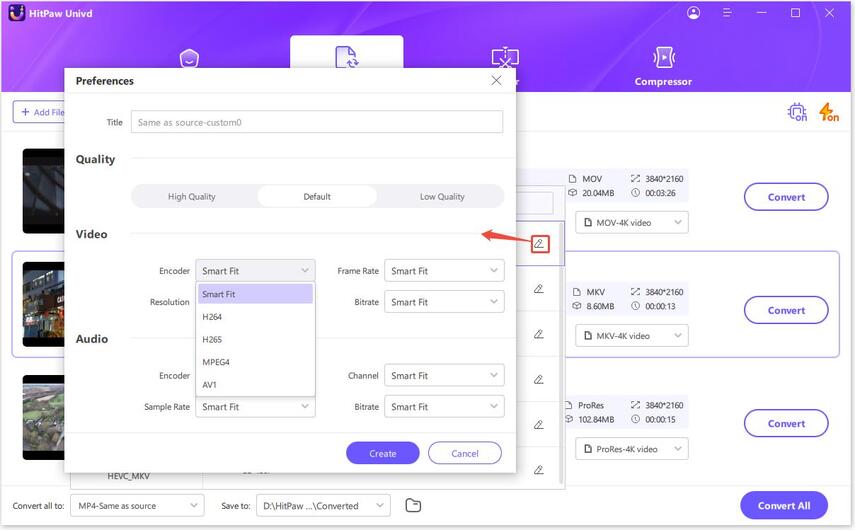
Now, click the edit icon in the select formta, you'll be able to adjust the frame rate, resolution, encoder, and bit rate.
Step 3: Save your changes and back to the main interface. Click the Convert All button to start converting videos with new frame rate.
Wrap-up
In summary, learning how to change frame rate in Premiere pro is a crucial aspect of video editing that can enhance the visual storytelling of your projects. While Adobe Premiere Pro offers robust capabilities for speed adjustments, it can be complex and challenging for beginners. HitPaw Univd presents itself as a seamless alternative, providing a user-friendly interface and powerful features without the complexity.
HitPaw Univd stands out with its intuitive frame rate change, a wide range of speed options, real-time preview, and high-quality output. It supports a variety of video formats and allows batch processing, making it an efficient choice for both novice and experienced editors.


 HitPaw Edimakor
 HitPaw Watermark Remover
  HitPaw VikPea (Video Enhancer)

Share this article:
Select the product rating:
Daniel Walker
Editor-in-Chief
My passion lies in bridging the gap between cutting-edge technology and everyday creativity. With years of hands-on experience, I create content that not only informs but inspires our audience to embrace digital tools confidently.
View all ArticlesLeave a Comment
Create your review for HitPaw articles