[Solved!] How to Export Premiere Pro for Instagram
Crafting videos for Instagram involves more than creativity; it requires precise technical steps to ensure your content stands out. Whether you're sharing a captivating story, an engaging reel, or a striking post, exporting your videos from Premiere Pro with the right settings is crucial.
In this guide, we'll walk you through the detailed process to export Premiere pro to instagram, ensuring your content looks flawless and meets the platform's requirements. Follow along to master the export settings and make your Instagram videos shine to export Premiere pro for instagram.
Part 1. Instructions for Uploading Videos to Instagram
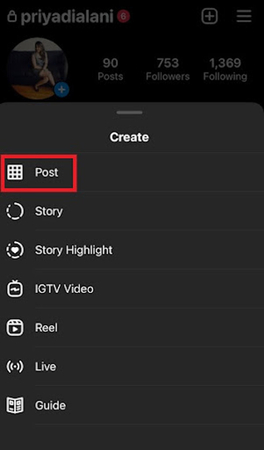
Uploading videos to Instagram is a straightforward process. First, open the Instagram app on your mobile device and log in if you haven't already. Tap the plus icon (+) in the center of the bottom navigation bar to start a new post. This will open your gallery, where you can select the video you want to upload. Once you've chosen your video, trim it to the desired length (up to 60 seconds) using the provided sliders.
Next, you can apply filters, trim further if needed, or select a cover frame, then tap "Next." Add a caption, tag people, include a location, or share the video to other social media platforms. Finally, tap "Share" to post your video to your profile and your followers' feeds. For Instagram Stories, swipe right from your home feed or tap the camera icon in the top-left corner, then select or record a video to share immediately with your followers.
Part 2. The Best Way to Export Premiere Pro for Instagram
Whether you're working on a major film production, a commercial advertisement, or a simple social media post, Premiere Pro provides the tools you need to produce high-quality content.
These videos can be used for a variety of purposes, including commercial purposes to boost brand visibility, public broadcasting to reach wide audiences, or shared on social media platforms for promotions, raising awareness on important issues, or even just for fun and personal expression. The versatility of Adobe Premiere Pro makes it an essential tool for both professional editors and hobbyists alike, enabling them to opt for Premiere export for Instagram. Follow these steps to set up the best export settings for Premiere pro export for instagram:
Step 1: Open Adobe Premiere Pro (using CC 2019 for this example), go to File > New > Project, and set your project settings. Then, go to File > New > Sequence. In the New Sequence box, select the Sequence Presets tab. Expand Digital SLR > 1080p on the left pane and choose your preferred framerate (e.g., DSLR 1080p30).
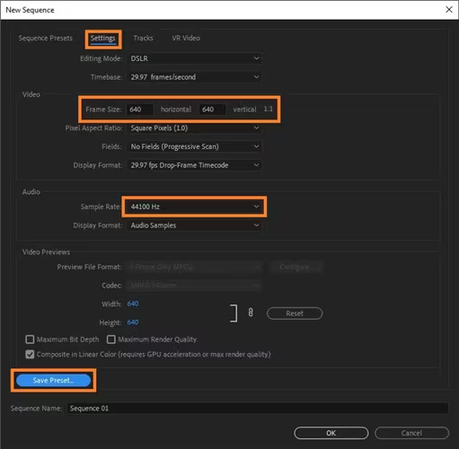
Go to the Settings tab and set the Frame Size values under the Video section to 640 for both horizontal and vertical. Choose 44100 Hz from the Sample Rate drop-down list in the Audio section. Click Save Preset, give it a name and description, and click OK. Ensure your new preset (e.g., Instagram) is selected, and click OK to reach the main window. Note: Saving the sequence preset is optional. It's useful if you plan to post videos on Instagram regularly and want to avoid reconfiguring settings each time.
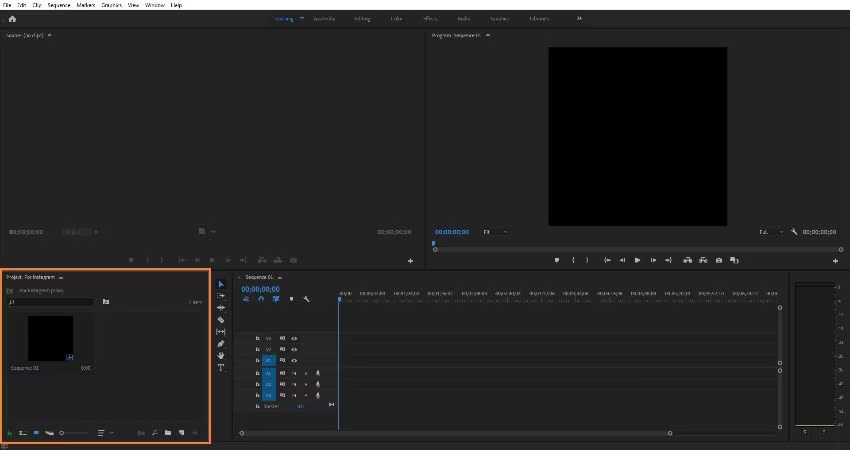
Step 2: Double-click inside the Project window at the bottom left to import your clip. Drag the clip to the Timeline on the right. If a Clip Mismatch Warning appears, click Keep existing settings.
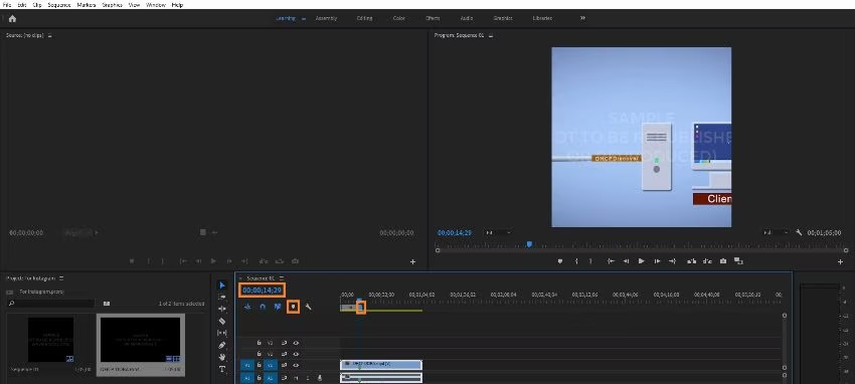
Step 3: Click the Time at the top-left corner of the Timeline pane. Type 14:29 (since Instagram accepts videos up to 15 seconds long) and press Enter. Click the Add Marker icon below the Time. Drag the work area handle from the right towards the left, letting it snap to the marker. Adjust the clip handles to match the marker, trimming the footage to 14:29 seconds.
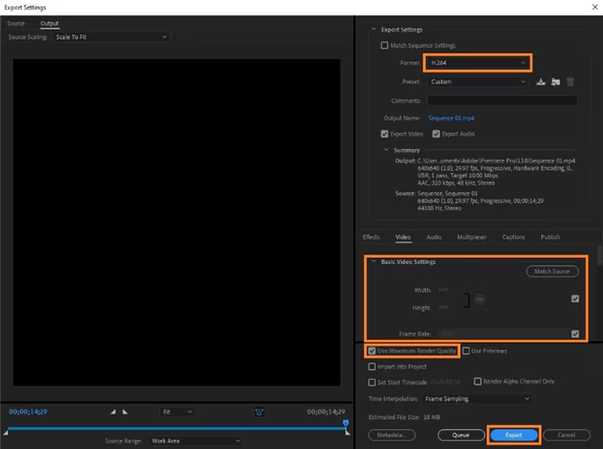
Step 4: Go to File > Export > Media. In the Export Settings box, select the desired format from the Format drop-down list. Ensure both Width and Height under the Basic Video Settings on the Video tab are set to 640. Check the Use Maximum Render Quality box. Click Export.
Part 3. The Best Tool to Convert Videos Format with HitPaw Univd (HitPaw Video Converter)
After setting up the best export settings for Instagram in Adobe Premiere Pro, you might need to convert the video format to ensure compatibility across different devices and platforms. This is where HitPaw Univd comes in as an invaluable tool. Known for its user-friendly interface and powerful features, HitPaw Univd makes video format conversion a breeze, whether you are preparing content for social media, mobile devices, or other purposes.
HitPaw Univd stands out due to its versatility and efficiency. It supports a wide range of video formats, including MP4, AVI, MOV, and more, ensuring that your videos can be played on any device.
Features
- Supports various video formats like MP4, AVI, MOV, and MKV, ensuring compatibility across devices.
- Fast conversion speeds allow for quick processing of multiple videos.
- Maintain the original quality of your videos during conversion.
- Convert multiple videos simultaneously to save time.
- Intuitive design makes it easy for all skill levels to use.
- Includes tools for trimming, cropping, and adding subtitles before conversion.
- Allows adjustment of resolution, bitrate, and frame rate to meet specific needs.
- View your video before converting to ensure the desired adjustments.
- Handles high-definition and 4K videos, maintaining quality.
Steps to Convert Videos Format with HitPaw Univd
Step 1: Open the HitPaw Univd on your computer. To add videos, click the "Add Files" button or simply drag and drop your video files into the main interface. This will import the videos you want to convert.

Step 2: Once your videos are loaded, locate the format icon next to each video thumbnail. Click on this icon to open a new window to choose your desired output format.
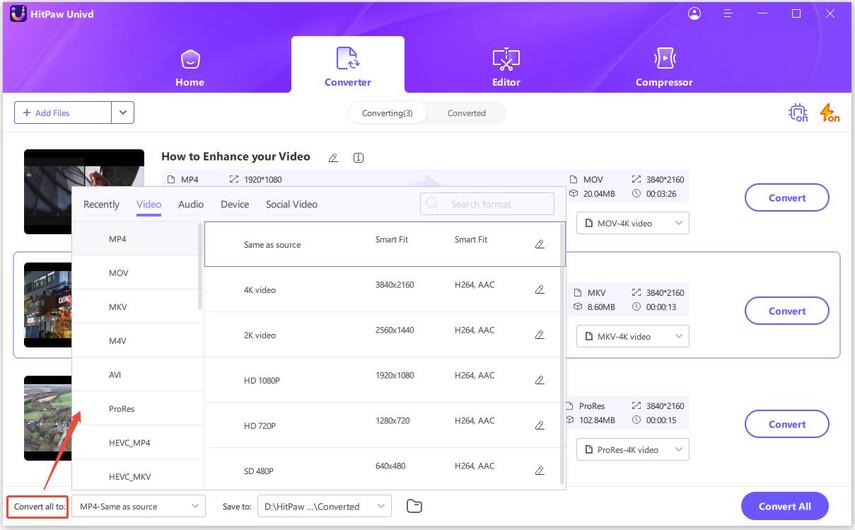
Step 3: If you wish to customize the output settings, click the "Settings" icon. You can adjust parameters such as resolution, bitrate, and frame rate here. This step is optional but useful if you need specific settings for your converted videos.
Step 4: After selecting your output format and customizing settings (if needed), click the "Convert" button. HitPaw Univd will begin the conversion process.
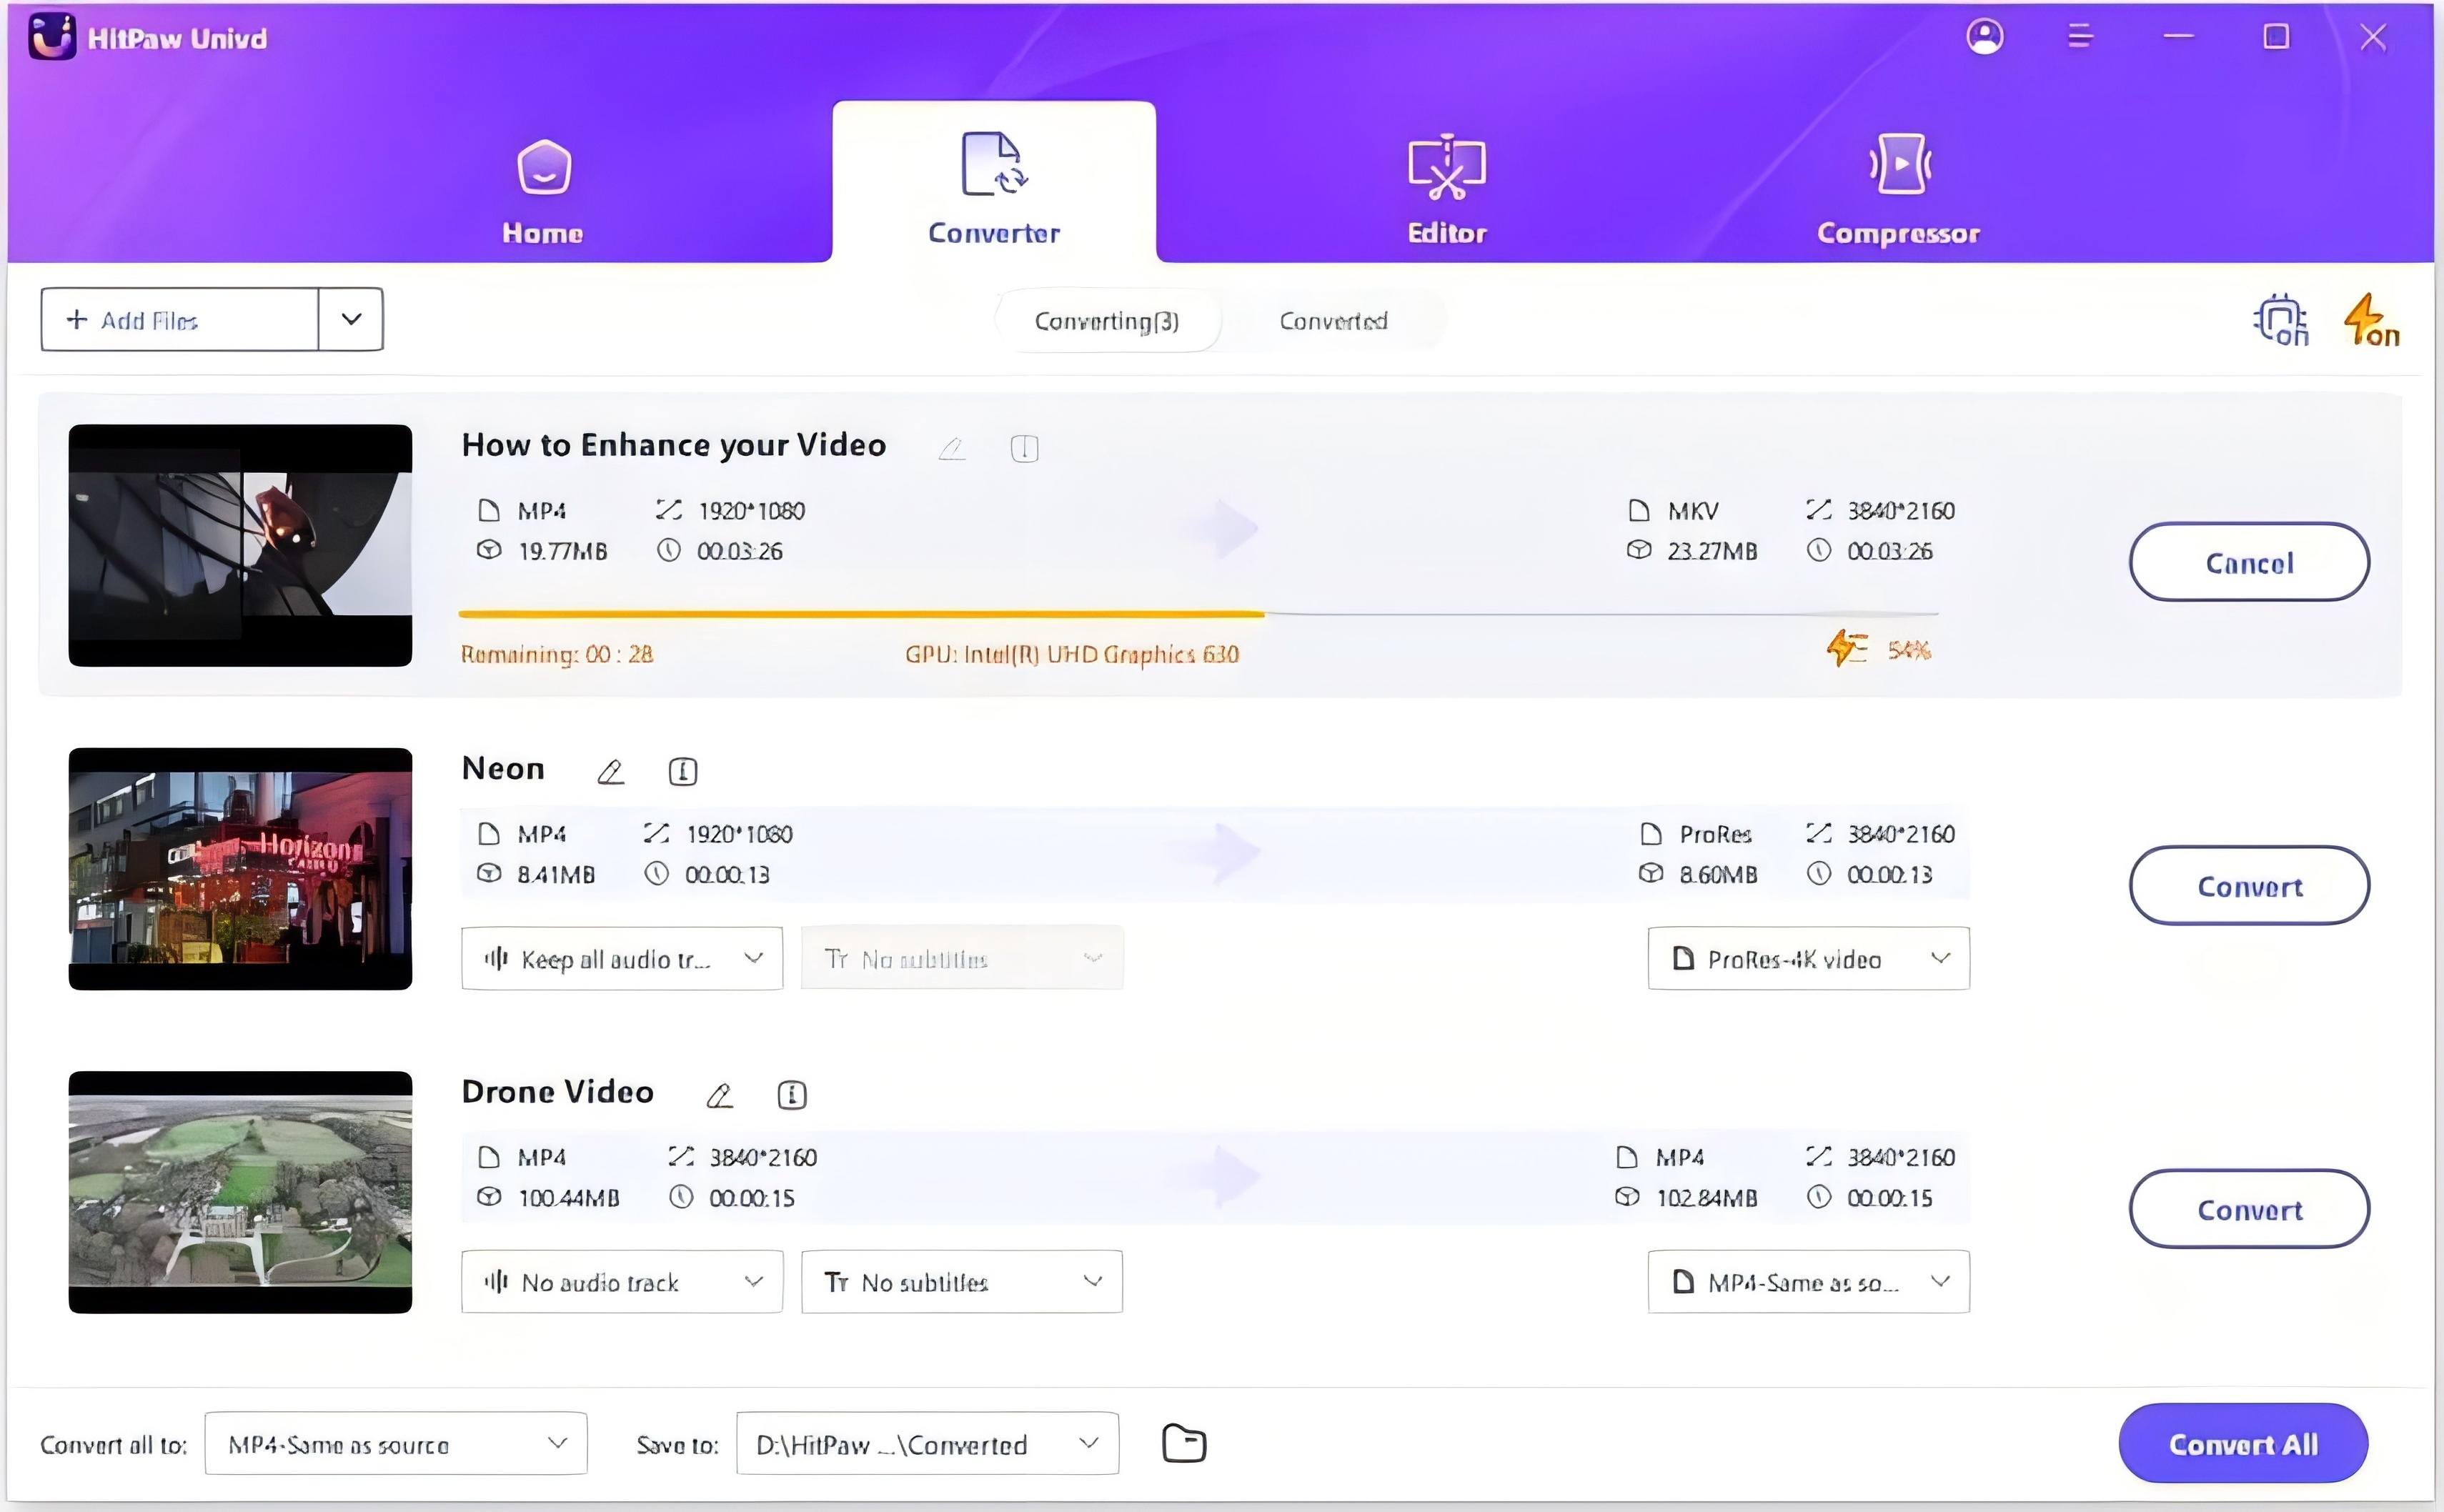
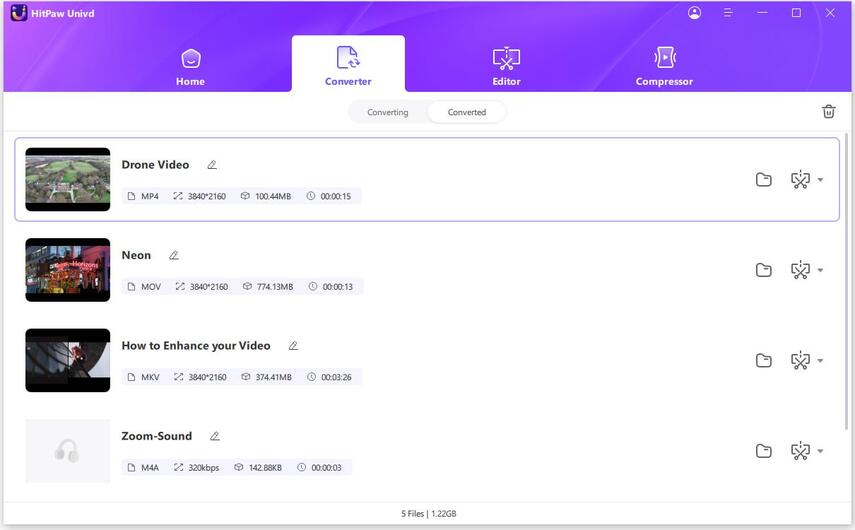
Step 5: Your converted videos can be found in the output folder after the conversion is finished. HitPaw Univd makes it easy to access and use your videos immediately after conversion.
Final Words
In this guide, we explored how to set up the best export settings to export Premiere pro for instagram, ensuring your videos are optimized for the platform. We then transitioned to discussing the importance of converting video formats to ensure compatibility across various devices and platforms. For this purpose, we highlighted the HitPaw Univd as an exceptional tool.
HitPaw Univd offers a user-friendly interface, supports a wide range of video formats, and provides fast conversion speeds without compromising quality. It also includes convenient editing features, making it an all-in-one solution for video conversion needs.


 HitPaw Edimakor
 HitPaw Watermark Remover
  HitPaw VikPea (Video Enhancer)


Share this article:
Select the product rating:
Daniel Walker
Editor-in-Chief
My passion lies in bridging the gap between cutting-edge technology and everyday creativity. With years of hands-on experience, I create content that not only informs but inspires our audience to embrace digital tools confidently.
View all ArticlesLeave a Comment
Create your review for HitPaw articles