PNG vs SVG: A Comprehensive Comparison for Web and Print
If you are looking to achieve optimal quality and performance in both web and print design, choosing the right image format is essential. It is because the right image format can make or break your visual content. If we talk about the most popular format, the two that stand out are SVG (scalable vector graphics) and PNG (portable network graphics).
These two are commonly used in designing websites, creating logos, or preparing print material, but they often confuse designers and developers. In this guide, we will dive deep into a detailed comparison of SVG vs PNG, exploring their strengths and best use cases for web and print applications.
Part 1: PNG vs. SVG: What's the Difference?
1. What is SVG, and what is PNG?
SVG (Scalable Vector Graphics)

SVG is a vector-based format that uses mathematical equations to define shapes, lines, and text. Unlike raster formats, SVG files are resolution-independent and keep sharpness regardless of size. Thus, it is perfect for logos, icons, and illustrations. Furthermore, you can easily edit XML-based files of SVG through text editors and manipulate them using CSS or JavaScript.
PNG (Portable Network Graphics)
PNG, on the other hand, is a raster format that stores images as pixels. It offers lossless compression; thus, images won't lose quality but will reduce in size. PNGs are excellent for complex images, such as photographs or detailed graphics, and they support transparency, which is useful for web design elements like overlays.
However, PNG files can become large, especially for high-resolution images, which may impact web performance if you do not optimize them.
2. Key Differences Between SVG and PNG
File Format and Size
SVG files are typically smaller. It is because these files consist of XML code that stores information in mathematical coordinates rather than pixel information, and this text-based approach often results in a smaller file size for simple graphics. This means you can scale them effortlessly without increasing file size.
PNGs, on the other hand, can become quite large, especially when used for detailed or high-resolution images. This is because, in PNG, each pixel's data is stored individually.
Image Quality
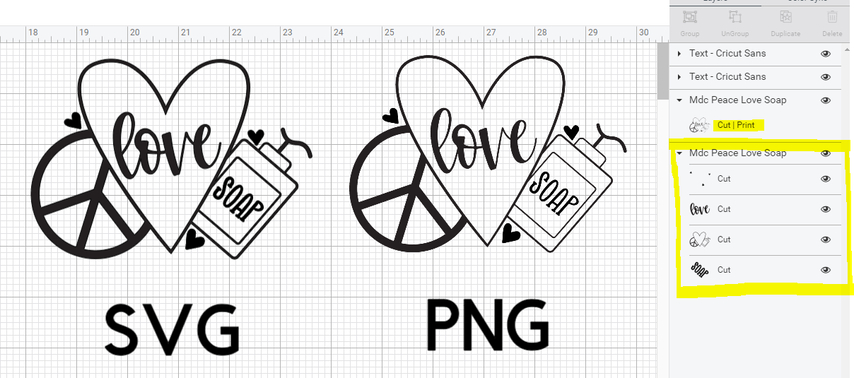
As SVGs are scaled mechanically, they maintain crystal-clear quality at any size. This means whether you zoom in or resize it, it will remain crisp or clear. You could display an SVG logo on a billboard or a business card with equal sharpness.
PNGs, meanwhile, have fixed dimensions. This means if you try to enlarge it, it will result in pixelation or blurriness, which can affect the visual appeal of detailed graphics or photographs.
Browser Support
Modern web browsers handle both formats beautifully. Nevertheless, SVGs offer more flexibility for styling through CSS and JavaScript. You can change colours, animate elements, and modify shapes dynamically-something impossible with PNGs.
Animation
Another notable difference is the animation support. Using CSS or JavaScript, you can animate an SVG file smoothly and even scale the animation without additional plugins. On the other hand, PNGs do not natively support animation. For animated raster images, formats like GIF or APNG are required, which have their own limitations and file size concerns.
Part 2: How to Choose SVG vs. PNG for Web Use
Advantages of SVG for Web Applications
SVG offers several benefits for web use, especially for vector-based graphics like icons, logos, and illustrations. Because SVGs do not depend on resolutions, they look sharp on all devices, from mobile phones to large desktop screens. Moreover, SVGs integrate seamlessly with modern web development practices. They're perfect for responsive design and can be styled directly through your website's CSS.
Benefits of PNG for Web Graphics
While SVGs are quite good at dealing with simple graphics, PNGs are much better when it comes to handling complex images and clear photos. It handles photographs, gradients, and textures excellently while preserving the depth of colours and fine details. Another big plus for PNG is transparency, which allows you to create images with transparent backgrounds that you can overlay seamlessly on most elements on a web page.
Part 3: When to Use SVG vs. PNG for Printing
Why SVG is Preferred for Print Design
Generally, designers prefer SVG for print design because of its scalability. Whether it's a business card or a large billboard, SVG files maintain their quality, ensuring crisp, clean lines and shapes.
This is particularly important for logos and vector illustrations, which need to look sharp at any size. Additionally, SVG files are free to edit, and therefore the designer can easily change the colours or shapes without losing quality.
When to Use PNG for Print Projects
While SVG is excellent for scalable graphics, PNG is more suitable for images with very fine details, such as photographs or artwork containing fine details. As PNG files retain their quality and colour accuracy, you can use them for print materials that require high-resolution images.
Besides this, as PNG supports transparency, you can use it to create a layered design. However, always make sure that the PNG files are saved at the correct resolution (usually 300 DPI) for print to avoid any loss of quality.

Part 4: Bonus Tips: Creating Transparent PNGs with HitPaw FotorPea
Modern design often requires images with a transparent background. Particularly if you are designing a logo, editing product images, or crafting a social media graphic, you may be required to remove the background to give your projects a sleek, professional touch. This is where AI editing tools like HitPaw FotorPea come in.
In the world of AI photo editing, HitPaw FotorPea emerges as a powerful solution that makes removing background a surprisingly simple process. Powered by advanced AI algorithms, this tool excels in AI photo enhancement and automatic background changing that too while preserving image quality.
Some of the key features of HitPaw FotorPea include:
Wondering how to remove the background using HitPaw FotorPea?
Step 1: Download and Install Hitpaw FororPea
Visit the official website of HitPaw FotorPea and download it. Then install the software following the on-screen instructions.
Step 2: Launch the Software
Launch Hitpaw and from the main screen menu click on “BG Remover”.

Step 3: Upload the Photo
Now click on “Start Remove” and Select the photo from your computer. Then click on “Import” to upload it.
Step 4: Let the AI do its work
The Powerful AI will take few seconds to upload the photo. Just wait for few seconds and let the photo upload.
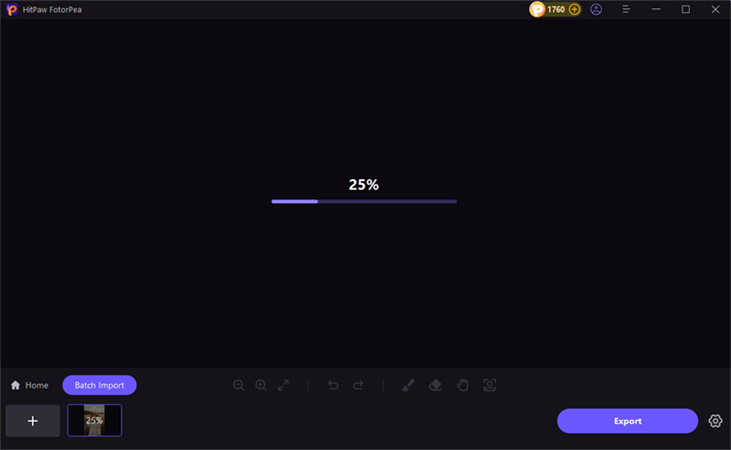
After few seconds AI will upload the photo and automatically remove the background, giving you the transparent photo.
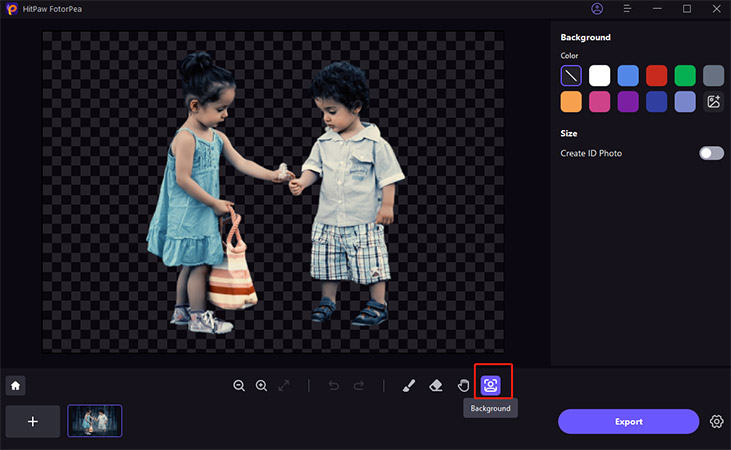
Step 5: Export the Image or Change the Background
Now click on the image icon located on the right to upload the new background. But If you want the image as it is, simply click on “Export” and download it.
The Ultimate Guide of HitPaw FotorPea
Conclusion
Both SVG and PNG are popular image formats, and deciding between SVG vs PNG depends on your specific needs. SVG is perfect for scalable graphics, interactive elements, and responsive web designs, while PNG excels in detailed visuals and transparent overlays.
However, if you have an image or graphic and you want to remove its background, give HitPaw FotorPea a try. This amazing tool will remove the background in a few steps, further enhancing your workflow and making it easier to create high-quality images.


 HitPaw Univd (Video Converter)
 HitPaw VoicePea
  HitPaw VikPea (Video Enhancer)


Share this article:
Select the product rating:
Daniel Walker
Editor-in-Chief
My passion lies in bridging the gap between cutting-edge technology and everyday creativity. With years of hands-on experience, I create content that not only informs but inspires our audience to embrace digital tools confidently.
View all ArticlesLeave a Comment
Create your review for HitPaw articles