How to Color Grade Rec 709?
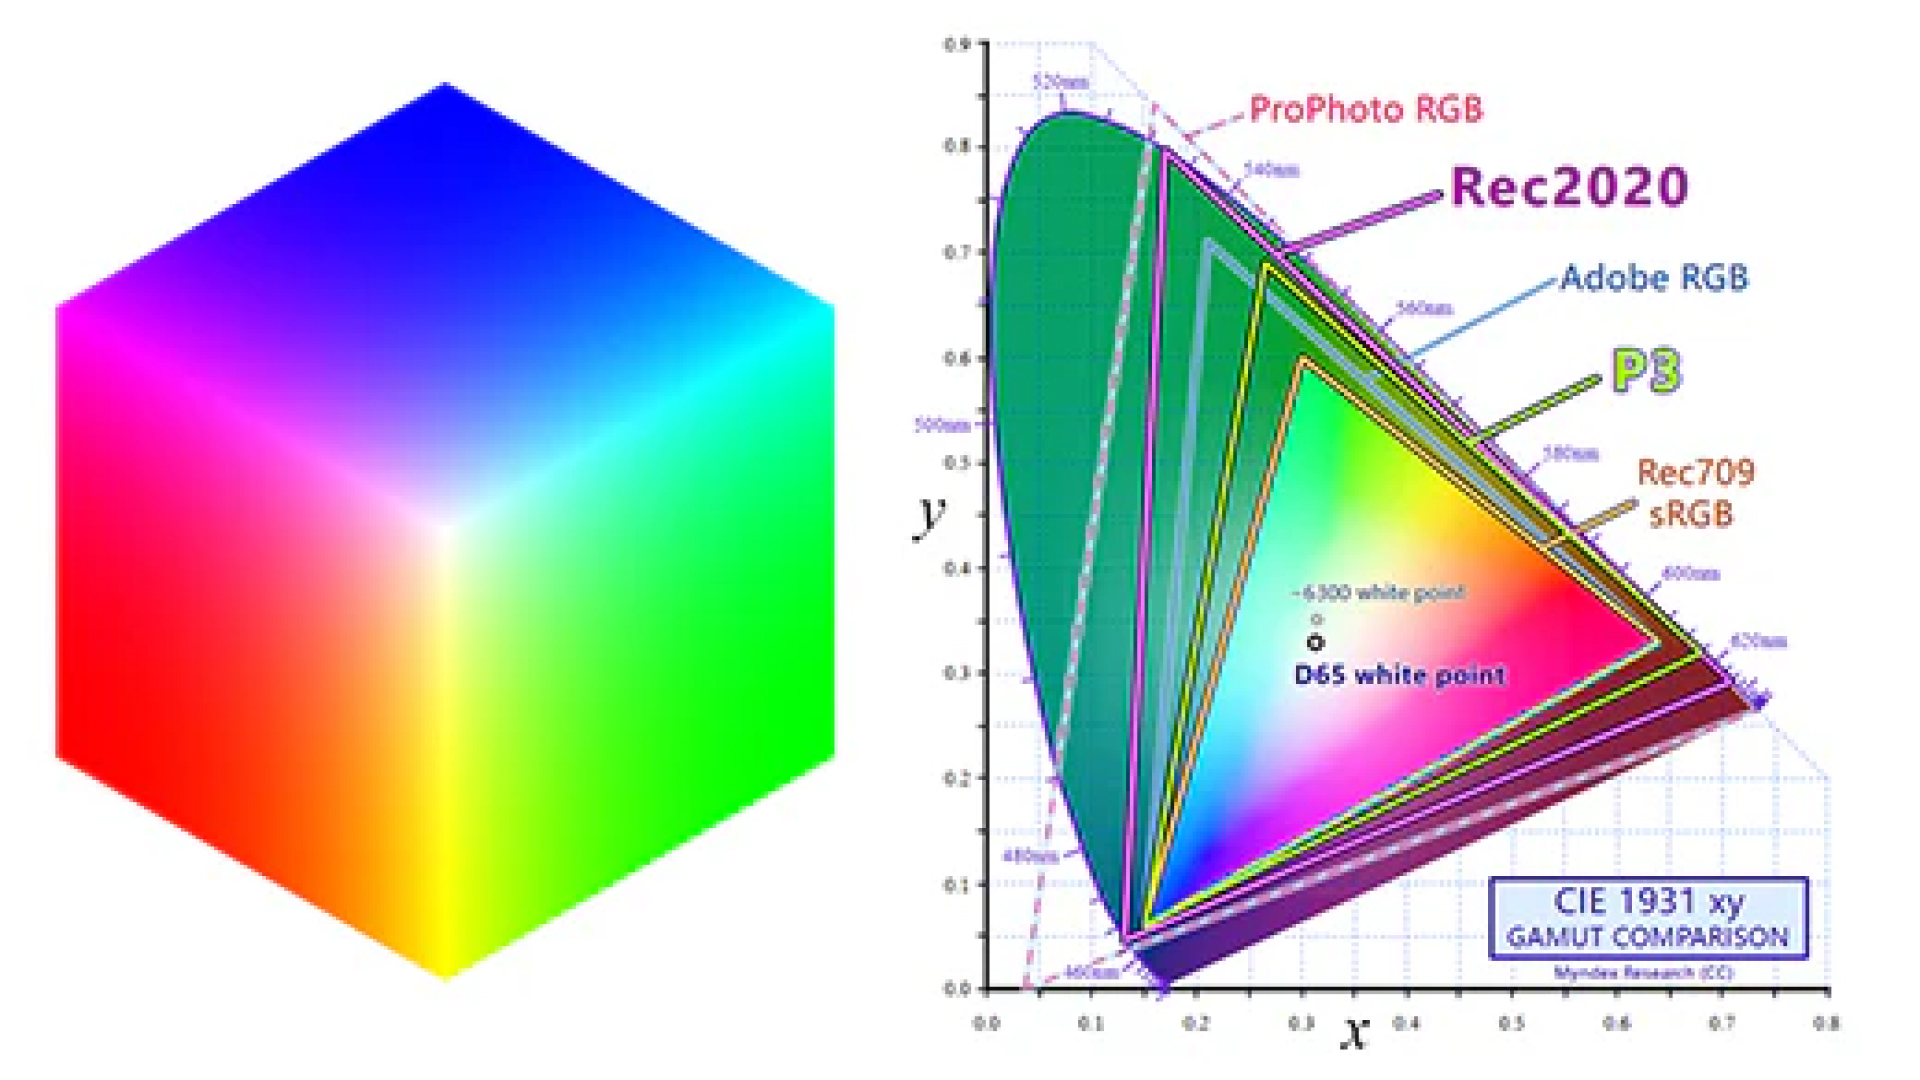
If you want to create visually attractive and polished footage, color grading in Rec. 709 color space is an essential skill. For the majority of HD videos, Rec. 709 is the standard color space which guarantees consistent colors on all platforms. However, it can be difficult to master this technique.
The basics of color grading in Rec. 709 are covered in our detailed guide. You will know how to improve color consistency, polish your footage and enhance your videos with easy-to-follow instructions and helpful advice.
Part 1. Why Rec 709 Color Space Is Essential for Video Editing?
Rec. 709 is an important video editing standard that guarantees your images appear polished and uniform across all platforms. This is why it's essential:
Color Consistency
Rec. 709 is a universal color standard that guarantees your videos will seem the same on a variety of screens including TVs and projectors. This constancy preserves your creative vision and builds audience trust.
Broad Compatibility
Rec. 709 guarantees compatibility with the majority of cameras, editing programs, and playback devices. It removes uncertainty to facilitate smooth collaboration and content sharing.
Optimized Dynamic Range
Rec. 709 provides a dynamic range designed for screens by balancing highlights, shadows, and mid tones. It offers a regulated, natural image that is perfect for storytelling.
Part 2. Top 3 Tools to Color Grade with Rec 709 Color Space
Color grading is an art that can decide the look of your video. Rec. 709 color space is the industry standard for broadcast and online video to ensure consistency and compatibility across devices. If you want to get professional-level outcomes, you have to choose the correct tool. Here are three popular video editing tools that excel at rec. 709 color grading. Here we will discuss each tool with their usage.
1. DaVinci Resolve
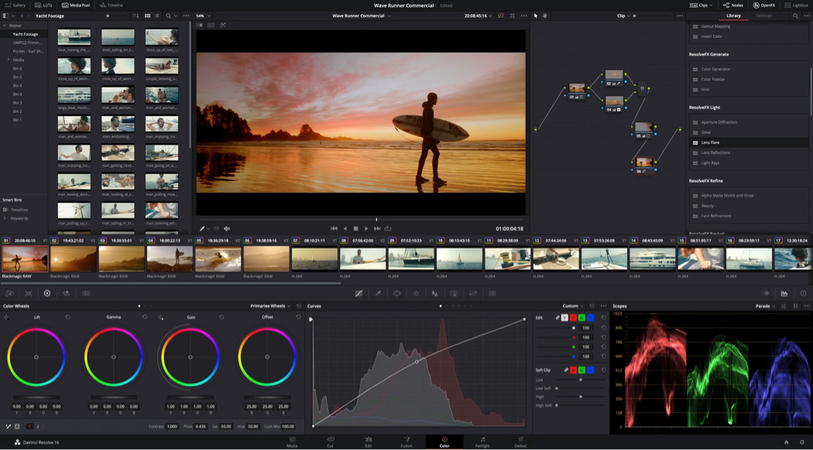
DaVinci Resolve is professional-grade color correcting tool. Its node-based approach allows you complete control over your workflow for precise adjustments. Whether you're working on a Hollywood blockbuster or a small project, Resolve delivers high-quality results.
Its seamless integration of editing and grading makes it ideal for individuals who require a single platform for every stage of editing. The free version has powerful features which make it professional tools available to anyone.
Here is how to color grade in Rec. 709 with DaVinci Resolve:
- Import your footage and start a new project and select Rec. 709 as the project color space.
- Use the Color Page to change the exposure, contrast, and white balance of nodes.
- Use LUTs or manual changes to fine-tune and export the project with preserving the Rec. 709 parameters.
2. Adobe Premiere Pro
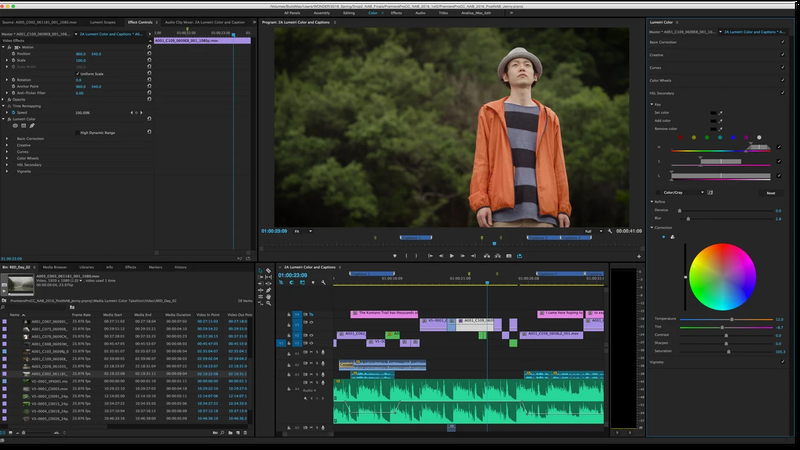
Adobe Premiere Pro is a flexible platform that blends powerful features with user-friendliness. Professionals and beginners alike love it because of its Lumetri Color panel, which is made for easy Rec. 709 grading.
Complex workflows are made simpler by the program's seamless transitions between Photoshop, After Effects and Premiere due to its interaction with the Adobe ecosystem. For those who are seeking a single editing and grading solution, Premiere is perfect.
Here are the Steps for Color Grading in Rec. 709 with Premiere Pro:
- Import your media and generate a sequence using Rec. 709 settings.
- Open the Lumetri Color panel from the Color workspace.
- Basic Correction can be used to adjust exposure, contrast, and white balance.
- Color wheels and curves are useful creative tools for refining your style.
- Export using Rec. 709 settings for broadcast-ready results.
3. Final Cut Pro
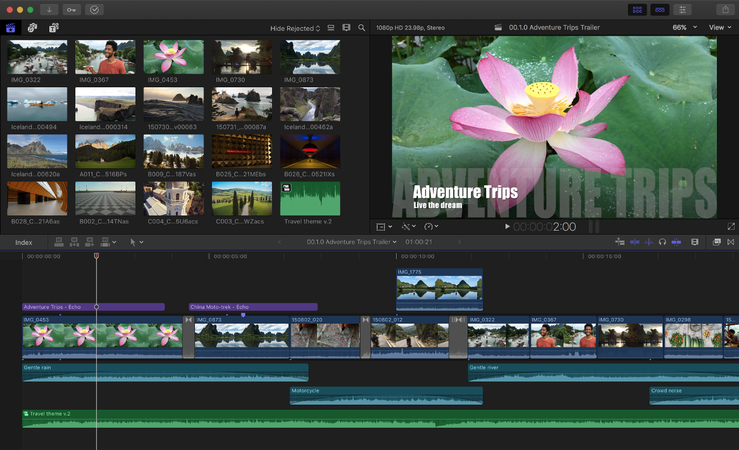
Final Cut Pro is Apple's professional video editing program,which is renowned for its speed and simplicity. Its color grading tools are powerful but simple, whichmake it excellent for editors who seek efficiency without sacrificing quality.
Final Cut Pro is optimized for macOS to provide smooth performance and precise control. It's an excellent alternative for editors working in Apple's ecosystem which offer quick outputs and simple project administration.
Here is How to Use Final Cut Pro to Color Grade in Rec. 709:
- Import your video into the timeline and turn on the Color Inspector. Verify that Rec. 709 is selected as the project's color space.
- Modify the main parameters, such as color balance, saturation, and exposure.
- To improve the grading, use custom LUTs or color wheels.
- Export in Rec. 709 to ensure consistent playback across devices.
Part 3. Pro-Tips. Best HDR Video Enhancer Free Try
Sometimes even after color grading, you get the images that don't meet the required quality. This is where powerful video enhancers come to highlight details, adjust dynamic ranges and polish your footage for HDR monitors.
HitPaw VikPea (formerly HitPaw Video Enhancer) is an excellent alternative for improving video quality as it is a simple yet powerful tool that ensures your videos look great on all screens.HitPaw VikPea provides everything you need, whether you want to maximize dynamic range, smooth transitions, or upscale resolution.
Features of HitPaw VikPea
- Automatically enhances resolution and sharpness to produce crisper, clearer images.
- Adjusts hues and saturation to provide rich and authentic color reproduction.
- Removes undesirable grain and pixelation, particularly in low-light or difficult footage.
- Improves brightness and contrast, showing fine details in shadows and highlights.
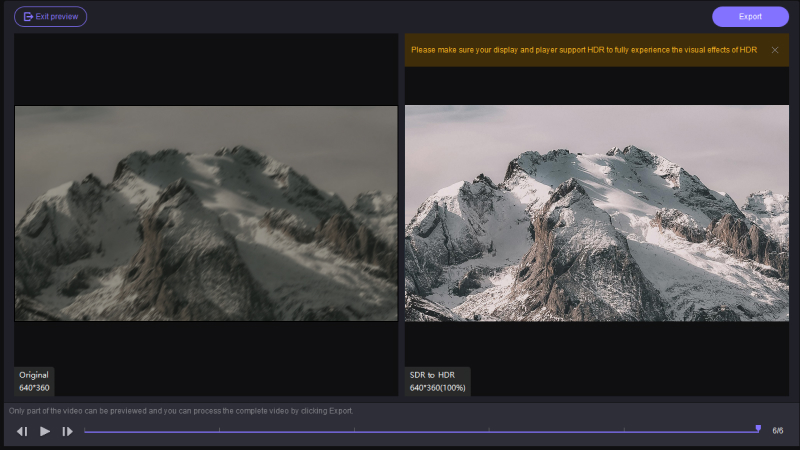
- Upgrades SDR videos to HDR-like quality, resulting in a professional and polished image.
Steps to Enhance Video
1. Download and Install
Visit the HitPaw's official website and download the software on your computer.
2. Choose SDR to HDR Model
Select the video that you want to improve and click on Upload. Depending on your requirements, you can choose between AI Upscaling and HDR Enhancement.
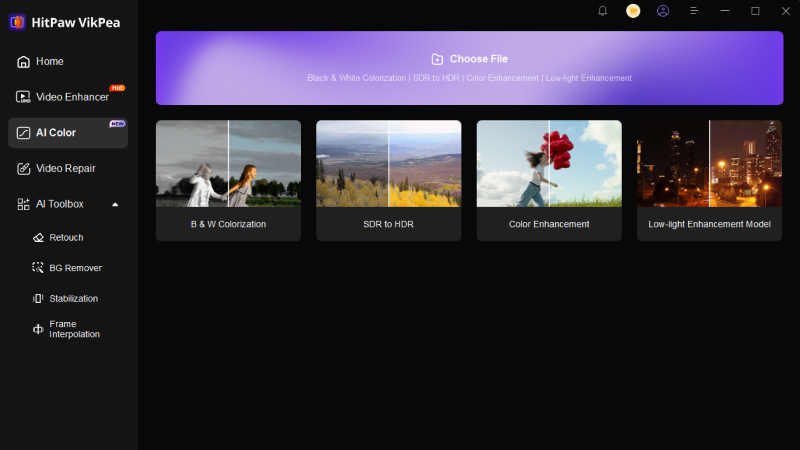
3. Preview and Export
Once you are satisfied, save the enhanced video in the format of your choice in desired location.
Learn More about HitPaw VikPea
Conclusion
To sum up, creating videos of professional quality with vibrant colors and accurate details requires a thorough understanding of Rec. 709 color grading. Although editing software helps in this process, improving video quality even more is important. With AI-powered tools for HDR effects, sharpness, and resolution, HitPaw VikPea provides a smooth approach to improve your projects. Give it a try now for amazing results.


 HitPaw Univd (Video Converter)
 HitPaw VoicePea
  HitPaw FotorPea

Share this article:
Select the product rating:
Daniel Walker
Editor-in-Chief
My passion lies in bridging the gap between cutting-edge technology and everyday creativity. With years of hands-on experience, I create content that not only informs but inspires our audience to embrace digital tools confidently.
View all ArticlesLeave a Comment
Create your review for HitPaw articles