3 Ways to Convert SDR to HDR
Has anyone tried converting SDR(8 bit) to HDR? Is there a method that can simulate HDR from SDR? At least increase darkness and brightness? Standard Dynamic Range (SDR) content to High Dynamic Range (HDR) can make a massive difference to your viewing experience. In addition to such things as improvements in brightness and color accuracy, it also enhances details missed in shadows and highlights. In this article you will learn about some of the most effective ways to undergo this transformation conveniently. This article will tell about visual the different between SDR & HDR, recommend best 4 tools to convert SDR to HDR.
Part 1. What Is SDR and What Is HDR?
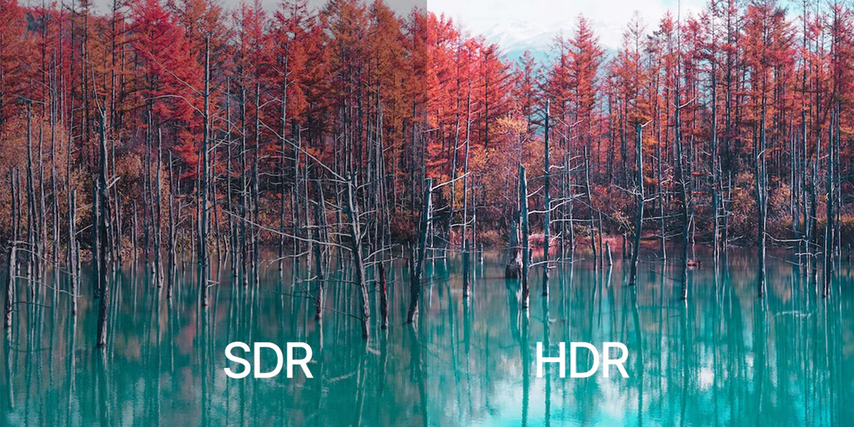
In order to understand the conversion from SDR to HDR, we have to define both terms. There are two different ways to display images: Standard Dynamic Range (SDR) and High Dynamic Range (HDR), and they both do things differently.
Standard Dynamic Range (SDR)
The traditional format for video and images is SDR and was used prior to the emergence of HDR technology. It usually has a narrow (usually between 0 to 100 nits) brightness range and a narrower color gamut.
Usage of SDR
- Limited Brightness Range: Extreme contrasts cannot be displayed on SDR displays, and hence, you get a dull image.
- Narrow Color Gamut: However, there is a limit in SDR, and it's less detail in bright and dark areas, because we only get a smaller range of colors.
- Widespread Compatibility: Almost every display and device gives support to SDR which makes it general use.
High Dynamic Range (HDR)
While HDR is more lifelike, of course, it offers a significantly more comprehensive range of brightness and color. It adds more detail in the brightest and darkest parts of the image.
Key Features of HDR
- Enhanced Brightness Range: The brightness can go up to 1000 nits and ultimately up to brightness levels that are HDR capable and reveal stunning highlights.
- Wider Color Gamut: That lets you see richer and variered visuals with HDR.
- Improved Detail: It's a way of enhancing details in many more shadows and highlights, giving you an immersive experience.
Part 2. What Is The Difference Of SDR and HDR?
Standard Dynamic Range (SDR) vs. High Dynamic Range (HDR) is an extreme difference in viewing experience. Understanding the differences between each technology helps you determine which characteristics best enhance or limit how images are presented, helping you to consume content in an optimal way.
1. Brightness
Where SDR caps out at around 100 nits, there is a more minor impact and a flatter image results. On the other hand, HDR can achieve brightness 1000 nits and above, giving much more dynamic lighting and, indeed, theistic highlights. The gorgeous expanded brightness range enables HDR images to pop and show light and shadow more accurately than ever before.
2. Color Depth
SDR represents most systems with an 8-bit color depth, so there are 256 shades per color channel. It can also limit the richness and subtlety of the colors. However, HDR supports 10-bit or higher color depth, giving us over a billion shades per channel. This means smoother gradients and a more vibrant color palette all leading to a richer experience visually.
3. Contrast
SDR has a limited contrast ratio meaning that in bright areas and dark areas, detail can be lost. HDR brings dramatic contrast: darker blacks and brighter whites. HDR content can expose finer information in shadows and highlights so that at the same time, it is more immersive.
4. Content Source
For many years now, SDR content has been widely available. However, HDR content is growing quickly with modern films, games, and streaming services. Content Access to HDR offers quite a bit in terms of viewing.
5. Viewing Environment
For environments with ambient light, SDR is more forgiving and, hence, a good choice. While HDR is great in darker settings, its dynamic range is best appreciated.
6. Compatibility
All of the displays support SDR (almost), but HDR needs hardware support. Some viewers may be limited in accessibility because not all devices are HDR-compatible. This knowledge allows selecting the best content and settings to ensure a good viewing experience.
Part 3. Best SDR to HDR Video Enhancer Free Try
Converting SDR to HDR enhances visual experience by expanding brightness range, enriching colors, and deepening contrast for more lifelike images. HDR preserves details in both shadows and highlights, reducing color loss and improving quality in films, gaming, and photography.
This transformation is easily achievable with tools like HitPaw VikPea (formerly HitPaw Video Enhancer), which leverages AI to upscale resolution to 4K or 8K while enhancing brightness and color depth. Its intuitive interface makes SDR-to-HDR conversion effortless, even for beginners.
Why Choose HitPaw VikPea
- It uses advanced algorithms for the automatic correction of your videos.
- It's simple and easy for beginners to understand.
- It allows for simultaneous video enhancement.
- You have real time changes before you finalize.
- Provides stunning HDR results without compromising on quality in the shortest time.
Steps to Enhance Video
Step 1.Go to its official website, download and install HitPaw VikPea.
Step 2.After installing the software, you can import files directly or drop videos using HitPaw VikPea's over thirty input formats support, which includes MP4, AVI, MOV, MKV and M4V.

Step 3.This video quality enhancer has General Denoise, Animation, Face, Colorize, Color Enhancement, Frame Interpolation, and Stabilize AI models.
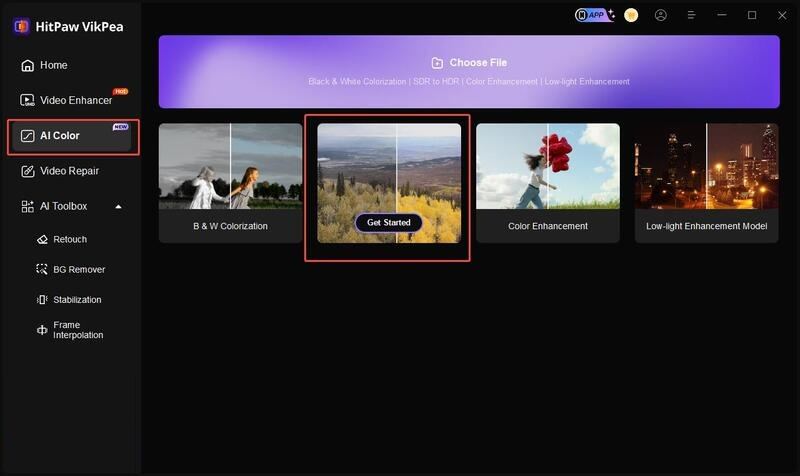
Step 4.Using HitPaw VikPea's SDR to HDR function, the effects of enhancing game videos are as follows. If you are happy with the video, click export to save it after uploading and previewing.

NOTE: For exporting the improved video, you'll need the premium version.
Learn More about HitPaw VikPea
Part 4. Convert SDR to HDR with Popular 3 Tools
Converting SDR to HDR can significantly improve your video projects, and there are many powerful tools to do the work for you. Here are three popular options that professionals frequently use:
1. Adobe Premiere Pro
Adobe Premiere Pro is a powerful video editing software and sdr to hdr converter that features great HDR conversion features. With the Lumetri Color panel, users can change brightness, contrast, and color settings to convert SDR footage into HDR. With support for many different HDR formats, it gives you exact control over the final output.
2. DaVinci Resolve
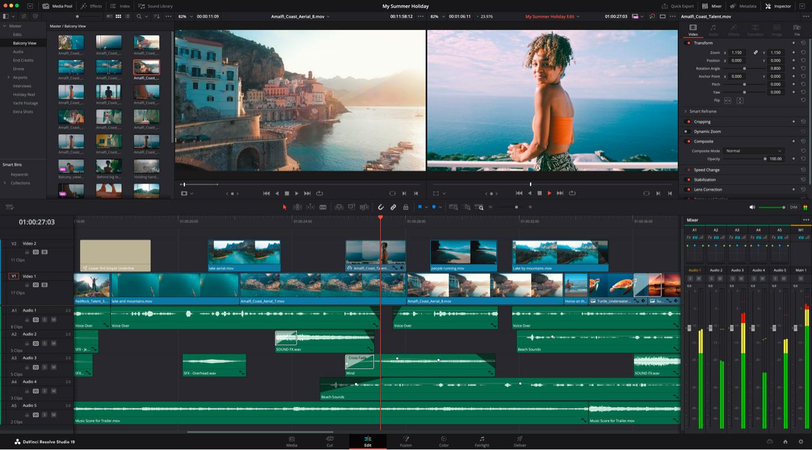
If you're looking to convert sdr to hdr, DaVinci Resolve is known for its killer color grading features. It has pervasive tools for color depth and brightness manipulation so that you can do stuff like boost highlights, shadows, and whatnot. Its HDR grading panel provides a simplified workflow, so conversion is easy and efficient.
3. Final Cut Pro
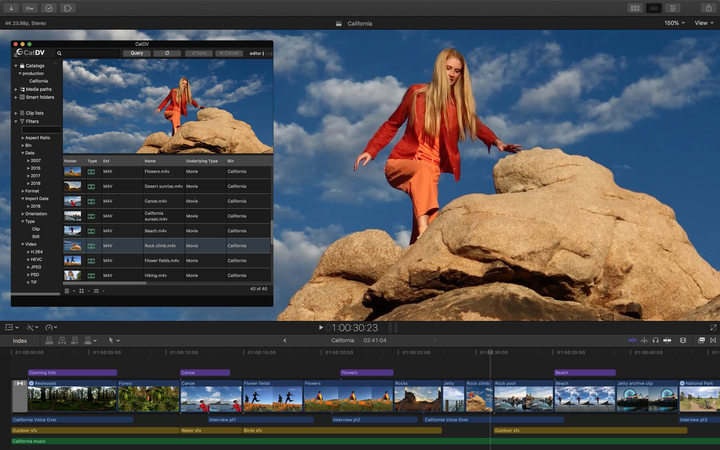
Supporting HDR in Apple's professional video editing software, Final Cut Pro, is the last point. The color grading tools of its color grading tools makes it easy for users to convert SDR footage using their options to adjust nice and saturation. Thanks to its intuitive interface, the software is easy to edit and adapt quickly and provides high-quality HDR outputs.
Conclusion
You can convert sdr to hdr and get a much better video and viewing experience. HitPaw VikPea boasts a user-friendly design and powerful AI with many tools available. It's an excellent choice, whether you're a beginner or a pro, to transform your videos into stunning HDR.


 HitPaw Univd (Video Converter)
 HitPaw VoicePea
  HitPaw FotorPea


Share this article:
Select the product rating:
Daniel Walker
Editor-in-Chief
My passion lies in bridging the gap between cutting-edge technology and everyday creativity. With years of hands-on experience, I create content that not only informs but inspires our audience to embrace digital tools confidently.
View all ArticlesLeave a Comment
Create your review for HitPaw articles