How to Convert HLG to Rec 709 Davinci Resolve 19?
If you are working with HDR video in HLG and need to convert it to the normal Rec. 709 color space in DaVinci Resolve 19, you have come to the correct place! Though this may sound complicated, it is actually quite simple if done correctly.
Whether you are an experienced video editor or just getting started, this article will explain each process in simple language.at the end, your HLG footage will appear perfect in Rec.709. Ready to start? Let's get started.
Part 1. Why We Need to Convert HLG to Rec 709?
If you have edited videos in HLG, but they do not look good on some screens or platforms, you are not alone. HLG is best for HDR content, but sometimes it's not the right fit for every situation. That's where converting to Rec. 709 comes in. Here i will discuss why converting from RAW to Rec 709 is essential:
1. Broadcast Compatibility
Not all broadcasters and streaming platforms support HLG. Rec. 709 is the gold standard for HD content delivery, so your video will meet industry requirements and look great on all channels.
2. Standardized Color Space
Rec. 709 provides a color profile that is consistent, so your footage will look the same everywhere. This removes guesswork and maintains color accuracy in your projects.
3. Display Device Support
Most user's devices such as TVs, monitors and smartphones are optimized for Rec. 709. Converting your footage ensures it displays correctly to avoid washed-out colors or excessive brightness on non-HDR screens.
Part 2. Steps: How to Convert HLG to Rec 709 Davinci Resolve 19
Converting HLG footage to Rec. 709 in DaVinci Resolve 19 maintains compatibility with standard screens and increases color fidelity throughout your project. This is easily accomplished using DaVinci Resolve's advanced color management features. Here's how to accomplish it, with images to help you.
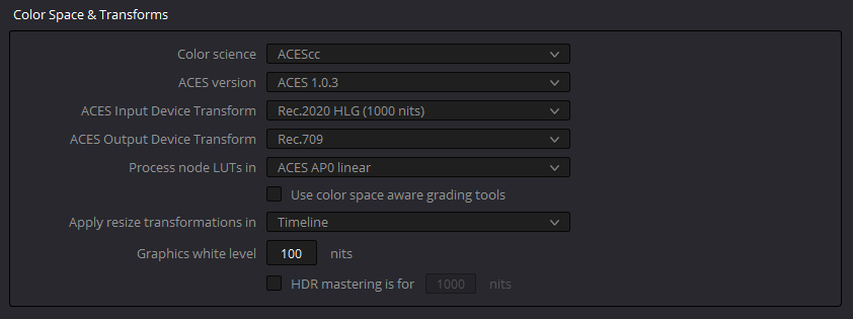
Step 1: Configure project settings
- Open your project in DaVinci Resolve and select File > Project Settings (gear icon in bottom right corner).
- In the Color Management tab, select DaVinci YRGB Color Managed as the Color Science.
- Set the input color space to Rec. 2020 HLG, the format of your footage.
- To specify the intended output color space, select Timeline Color Space as Rec. 709.
- Save your changes by clicking the Save button at the bottom right corner.
Step 2: Import and add clips
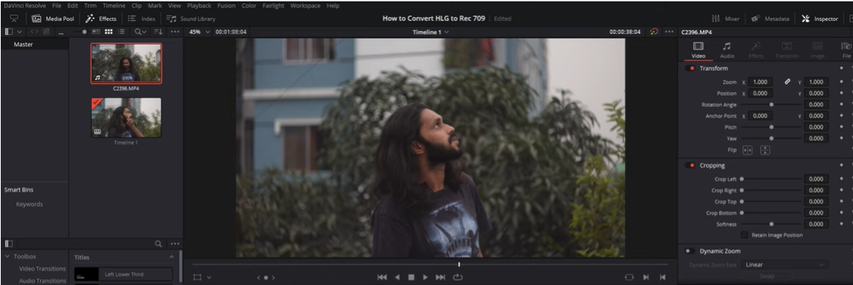
- Add your HLG film to the Media Pool by dragging and dropping. Resolve will automatically apply the input color space settings, converting your HLG film to Rec. 709 during playback and editing.
Step 3: Use the Color Space Transform Node
For more accurate control:
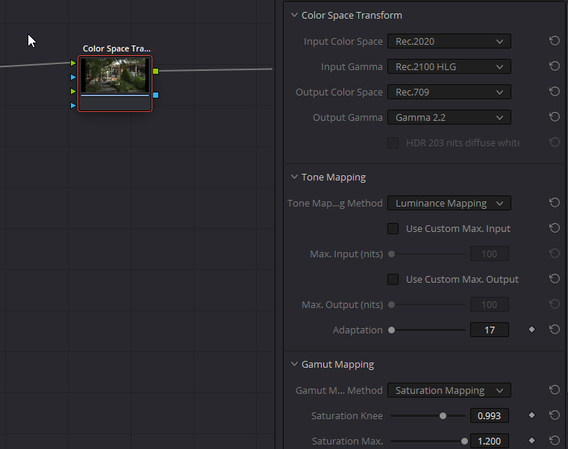
- Go to the Color Tab and choose a node from the node editor.
- Add the Color Space Transform effect (located in the Effects Library).
- Set the Input Color Space to Rec. 2020 and Gamma to Rec. 2100 HLG.
- Set the Output Color Space to Rec. 709 and the Gamma to 2.4.
Step 4: Final Color Grading Adjustments
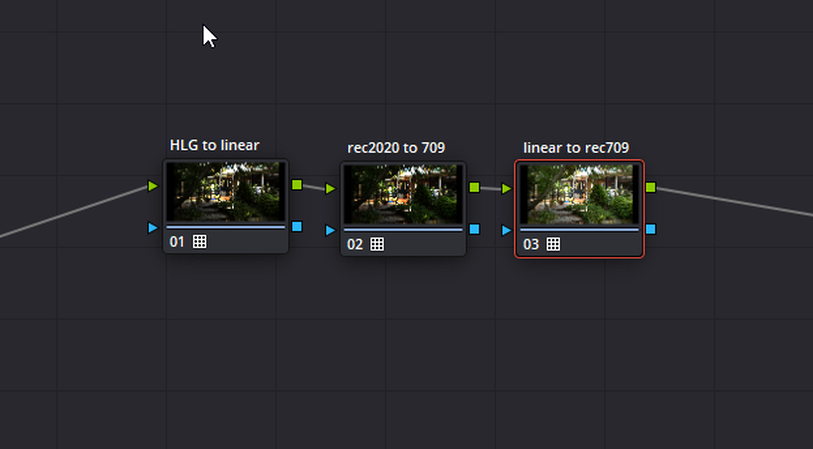
- Fine-tune the appearance of your footage by adjusting the highlights, shadows, and saturation.
- Use the Color Wheels or Curves to adjust the brightness and contrast for SDR output.
Step 5: Export settings
- Go to the Deliver tab.
- Under Advanced Settings, make sure the Color Space Tag and Gamma Tag are both set to Rec. 709.
- Render your footage in your desired format (e.g., MP4, MOV).
Part 3. Pro-Tips. Best HDR Video Enhancer Free Try
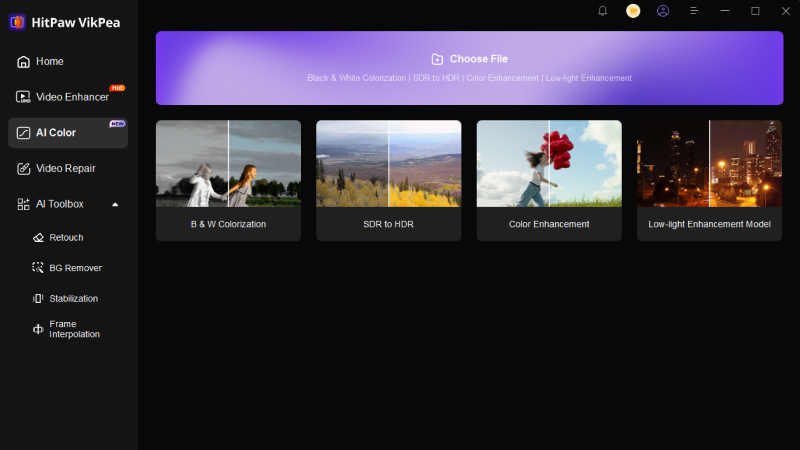
After successfully converting your HLG film to Rec. 709, improving the video quality can make a significant difference. The right tool can make it easier to improve color vibrancy, sharpen details, and modify lighting. This is when HitPaw VikPea (formerly HitPaw Video Enhancer), a professional video editing program, comes in. HitPaw VikPea is an all-in-one video enhancer that can easily improve video quality.
Features of HitPaw VikPea
- Automatically enhances resolution and sharpness to provide crisper images.
- Changes hues and saturation to provide clearer, more natural colors.
- Eliminates undesirable grain or pixelation, particularly in low-light scenarios.
- Balances brightness and contrast to bring forth detail in both shadows and highlights.
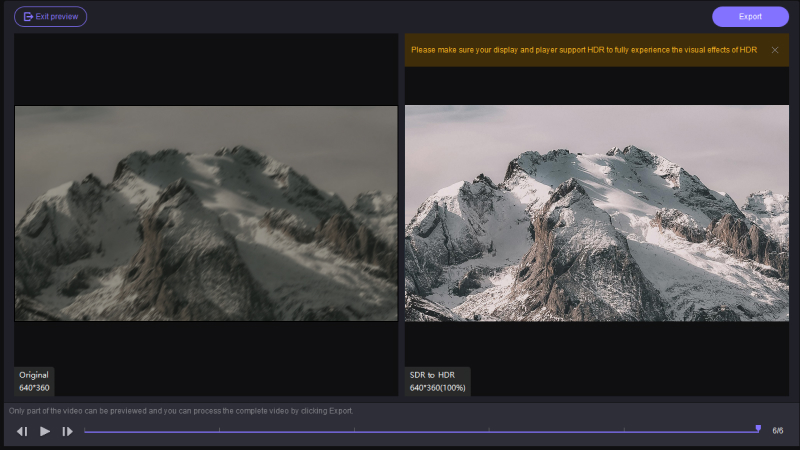
- Transforms SDR videos into HDR-like quality for a professional-grade appearance.
Steps to Enhance Video
1.To start, visit the official download website for HitPaw VikPea and start downloading it.
2.Select the video that you want to improve and click on Upload.

3.Depending on your requirements, you can choose between AI Upscaling and HDR Enhancement.Use the built-in preview function to compare the original and improved versions. Once you are satisfied, save the enhanced video in the format of your choice.

Learn More about HitPaw VikPea
Part 4. FAQs of Converting from Raw to Rec 709
Q1.What is the difference between raw and Rec 709?
A1.RAW footage is unedited and contains all sensor data, allowing for maximum flexibility in post-production. Rec. 709 is a standardized color space for HD video that includes predetermined brightness and color profiles to ensure display compatibility.
Q2.Which tool support converting from raw to rec 709?
A2.Tools such as DaVinci Resolve, Adobe Premiere Pro, and Final Cut Pro include built-in RAW to Rec. 709 conversion options via LUTs, color management settings or Color Space Transform effects.
Conclusion
DaVinci Resolve converts HLG to Rec. 709, ensuring compatibility with standard monitors. This guide explained through setting up color management, using Color Space Transform nodes, and exporting properly. For better results, use HitPaw VikPea, a powerful video enhancer that includes AI upscaling, color enhancement, and HDR effects. It's a simple tool for enhancing the appearance of your footage. Test it for free HitPaw Video Enhancer.


 HitPaw Univd (Video Converter)
 HitPaw VoicePea
  HitPaw FotorPea

Share this article:
Select the product rating:
Daniel Walker
Editor-in-Chief
My passion lies in bridging the gap between cutting-edge technology and everyday creativity. With years of hands-on experience, I create content that not only informs but inspires our audience to embrace digital tools confidently.
View all ArticlesLeave a Comment
Create your review for HitPaw articles