Catalog
If you want to enhance an unclear video, HitPaw VikPea is one of the best choices. All you need to do is just a few clicks. Now, check the detailed steps below. Enhancing a single video is a little different from batch enhancing videos. Let's take a look at how to upscale a video first.
1: Enhance Video
Step 1: Download and Install
Go to the official web page of HitPaw VikPea or click on the download button below to download the genuine package of HitPaw VikPea.
Step 2: Upload the Original Video
After installing the software, now you need to import the video you want to AI upscale to the software. You can click the Choose File or just drag & drop the original video to it.
By the way, HitPaw VikPea supports 30+ input formats including most commly used ones like MP4, AVI, MOV, MKV, M4V etc.

Step 3: Select An AI Model
There are multiple AI models for you in this video quality enhancer, i.e. General Denoise Model, Animation Model, Face Model, Colorize Model, Color Enhancement Model, Frame Interpolation Model, and Stabilize Model.
- General Denoise Model:
General Denoise Model effectively analyzes noise patterns and artifacts, restoring visual integrity to content that may have been compromised by environmental factors or compression techniques. It is perfect for enhancing those videos of real scene, such as landscape, building, animals and flowers, etc. - Face Model:
Face Model can greatly make your portrait video clear. There are 3 modes to choose from: Sharpen, Soften, and Fast. Each one offers different rendering effects and requires different processing times. - Video Quality Repair Model:
Video Quality Repair Model can greatly enhances visual clarity by restoring vintage footage, reducing noise, and improving overall quality, ensuring a more enjoyable viewing experience for audiences. . - Animation Model:
Choose Animation Model to deal with old or blurry animation videos. - Detail Recovery Model:
Detail Recovery Model is perfect for enhancing details of videos. By utilizing advanced algorithms, it intelligently analyzes each frame, restoring clarity and sharpness to elements that may have been lost due to compression or other quality issues. - Colorize Model:
Perfect for colorizing black and white(or grayscale) videos. - Color Enhancement Model:
The Color Enhancement Model can enhance the faded color and make the video looks better. - Frame Interpolation Model:
The model will intelligently convert low frame rate video to that of high frame rate, making motion smoother and details clearer in videos. - Stabilize Model:
This model can automatically detect and correct shaking in video, providing more stable and clear video output. - Low-light Enhancement Model:
If you have shot a video in an extremely dark environment, try this model to see clearly what happened in the darkness.
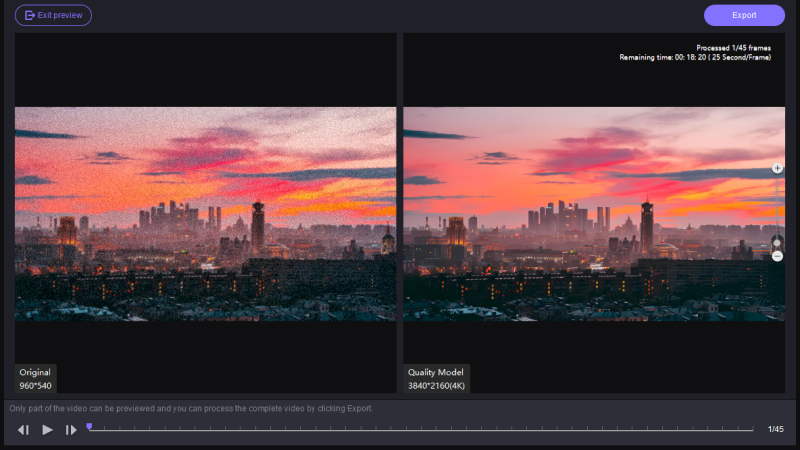
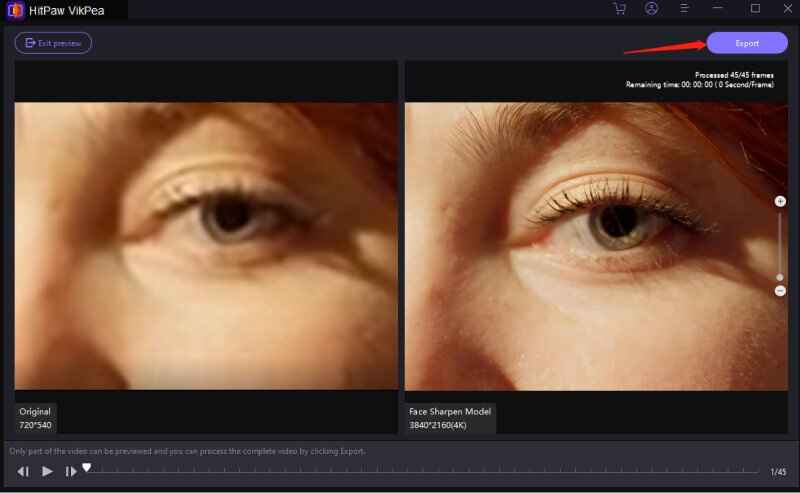
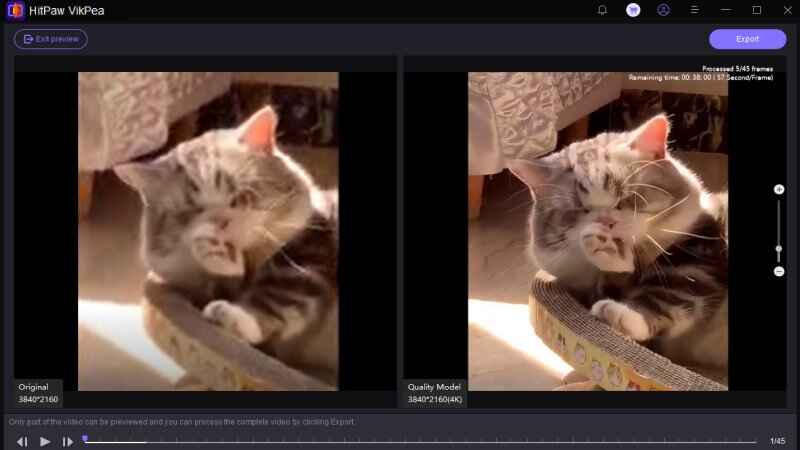
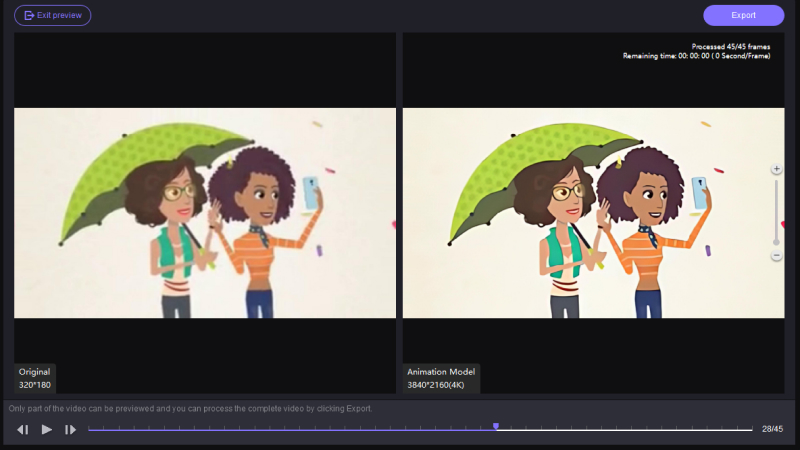

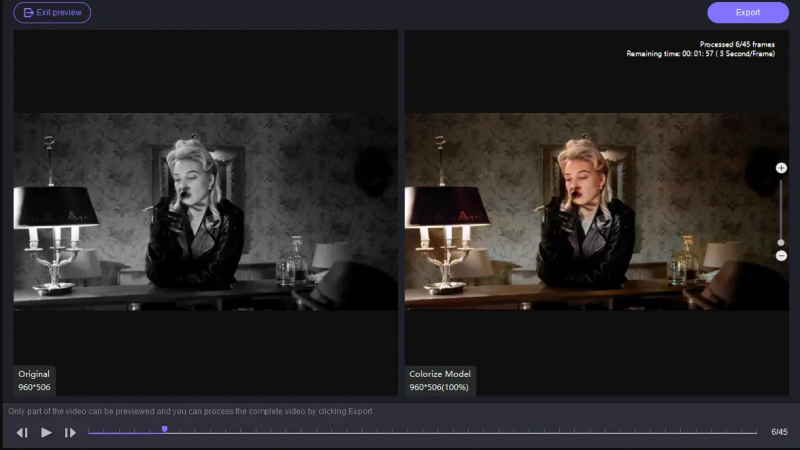
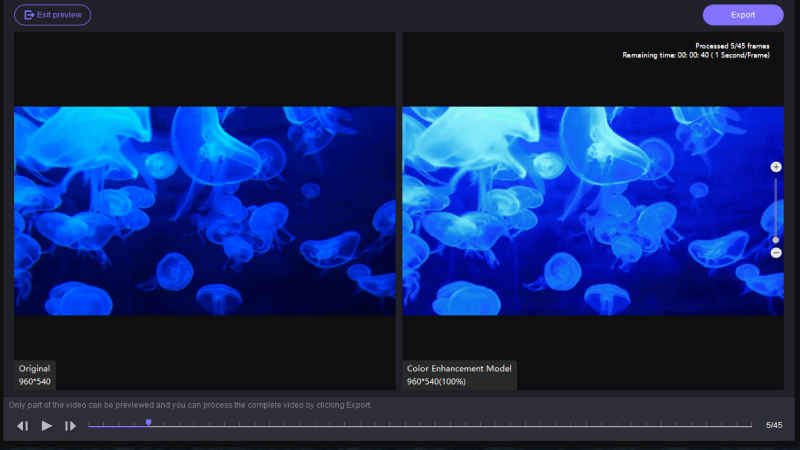
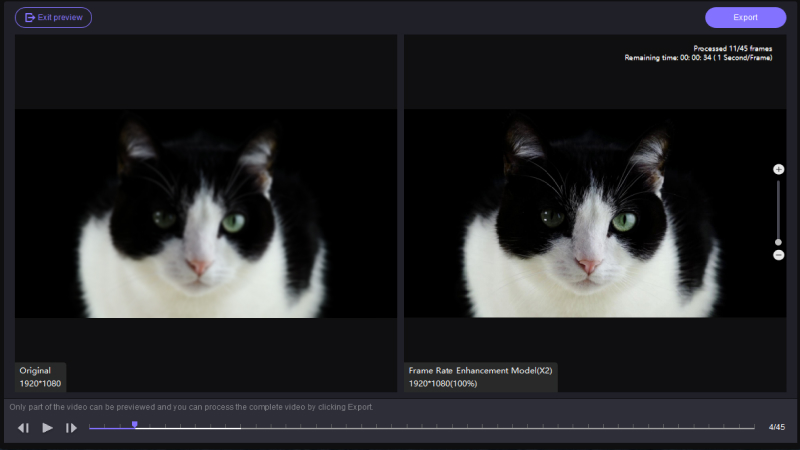
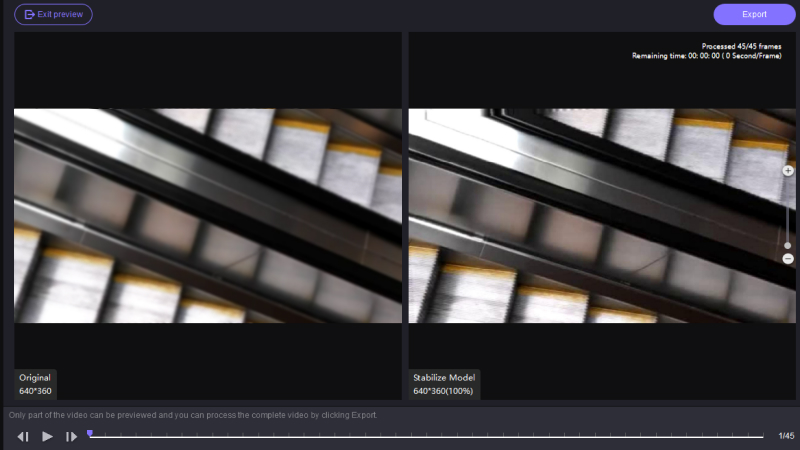
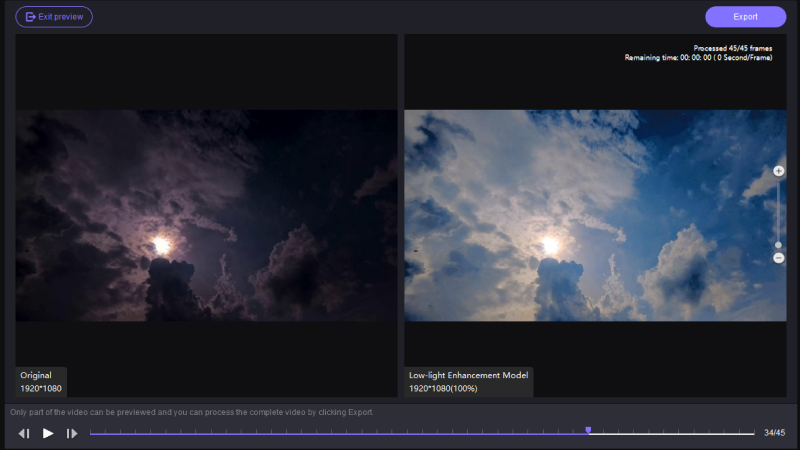
- General Denoise Model:
-
If you need to batch enhance videos, you can also use the Import button in the upper left corner to apply the same model to all of your videos.
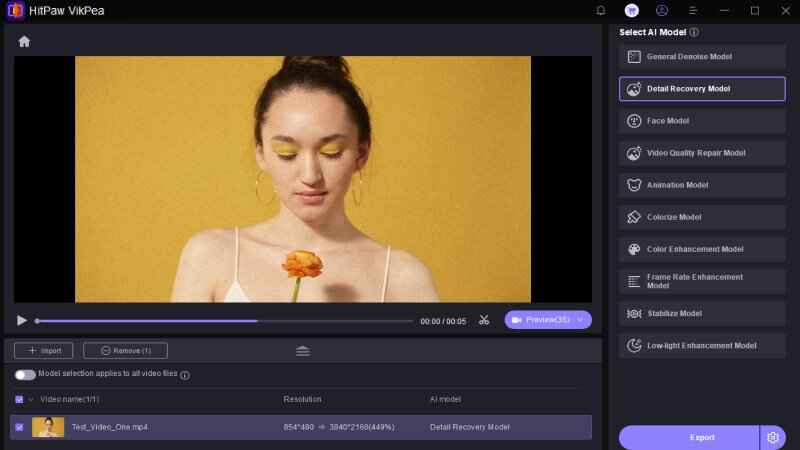
-
Step 4: Preview the Effect & Export
Once uploaded the video, click the Preview button to process the video. You may need to wait for a few seconds for this. Then, click Export button to save the enhanced video once you are satisfied with it.

Note: If you are using the free version, you cannot export the enhanced video. Please tick the Buy Now button to purchase a full version so that you can save and share the video processed with HitPaw VikPea.
2: Remove Background from Video
-
Step 1: Download and Install
Click on the Download button below to have HitPaw VikPea on your computer.
-
Step 2: Locate the AI Background Removal Module
Find the AI Background Removal module on the main interface. You can directly drag or drop your video files to get started. Or you can click the Import Video File button to put in your videos.
-
Step 3: Choose the Background Fill Mode
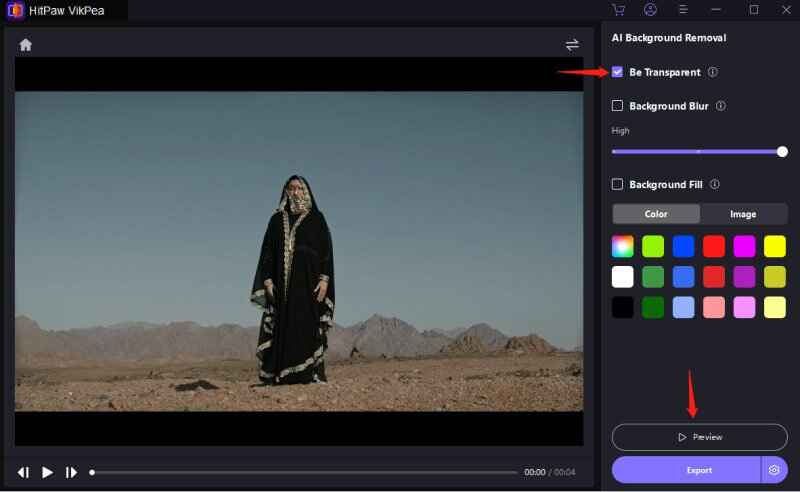
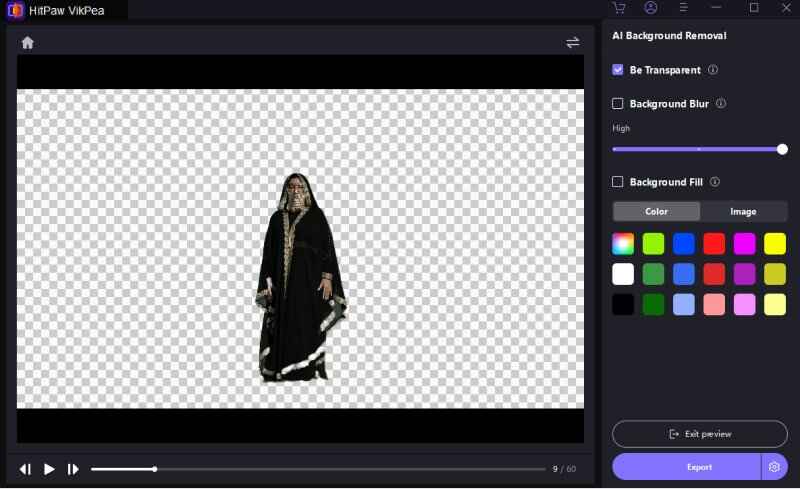
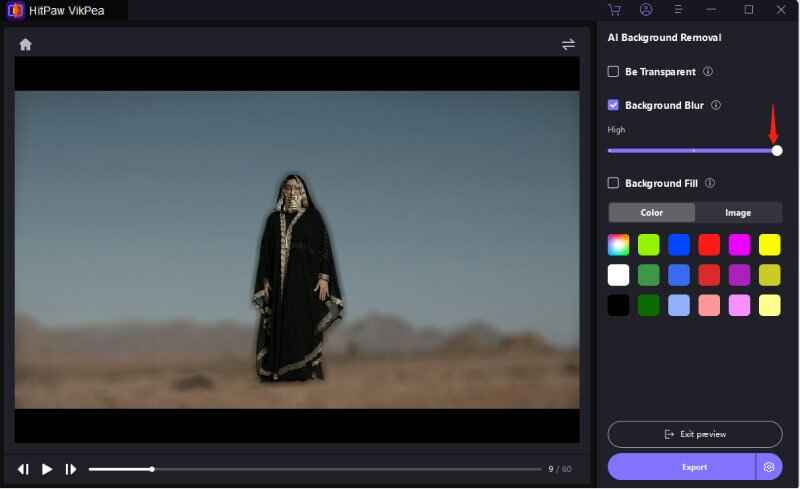
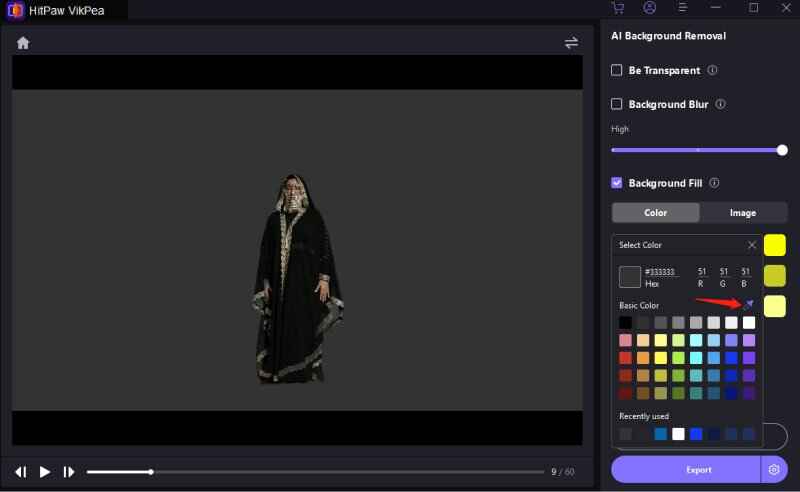
There are 3 ways to remove the original background from video: Be Transparent, Background Blur, and Background Fill.
- Be Transparent:
Click the button Be Transparent and push Preview to check out the outcome of this mode. Be Transparent will automatically recognize the figure and fulfill your video background with mosaic. - Background Blur:
Click the button Background Blur and push Preview to check out the outcome of this mode. Background Blur will also automatically recognize the figure and blur your video background. You can choose the degree of blurriness by dragging the circle point under this mode. - Background Fill:
Click the button Background Fill and push Preview to check out the outcome of this mode. Begin with choosing the color from the interface list, Background Fill will also automatically recognize the figure and colorize your video background. You can also pick any color you want on your device's screen by tapping the color picker icon.
- Be Transparent:
3: Repair Videos
Step 1: Download and Install
Click on the Download button below to have HitPaw VikPea on your computer.
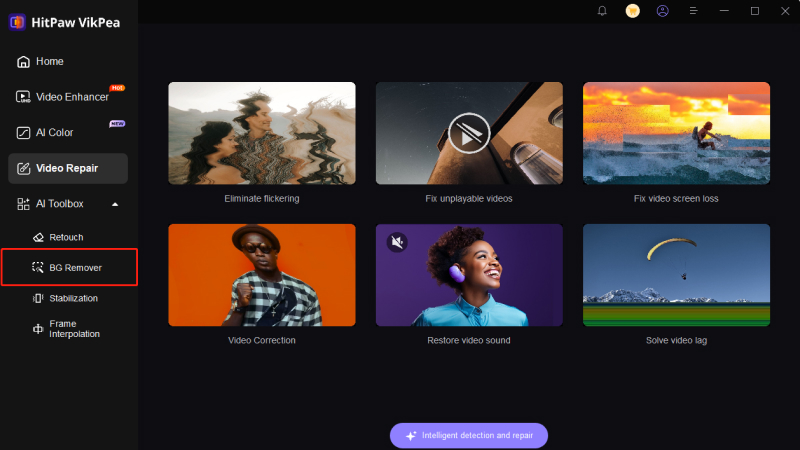
Step 2: Locate the Video Repair Module
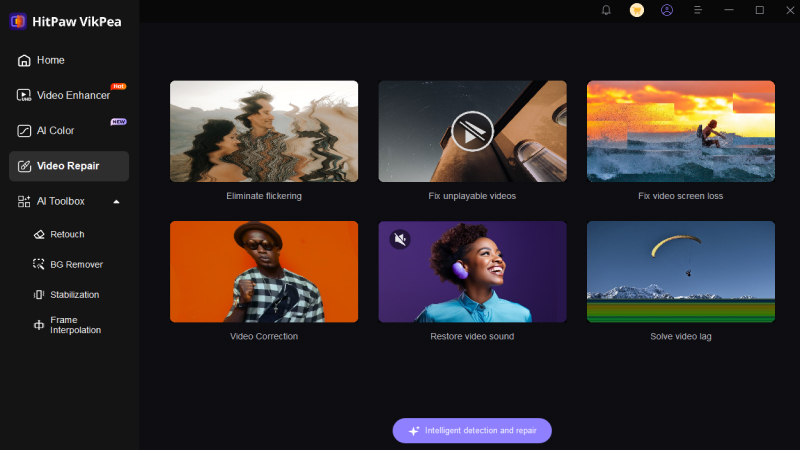
Find the Video Repair module on the main interface. Here you will see a bunch of corrupted video scenarios, such as fix video sound, fix video screen loss, video correction, etc. Find the one that suits you most for repairing, or simply click the "Intelligent detection and repair" button at the bottom.
Step 3: Import Damaged Video File for Repairing:
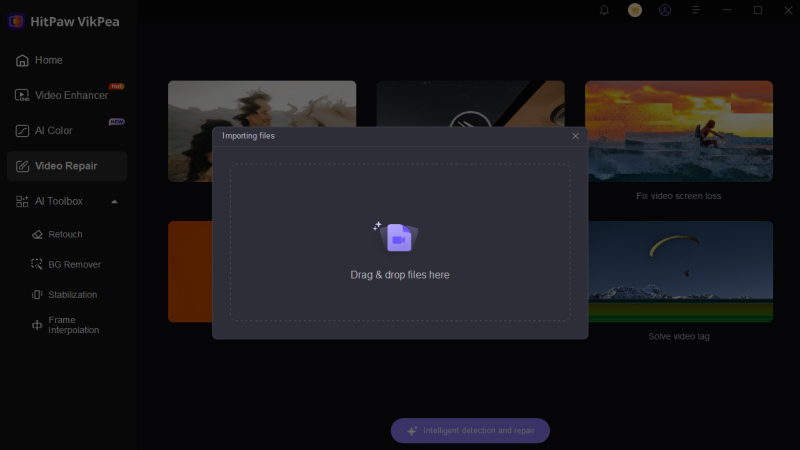
Click to browse folders, or drag & drop video file(s) to the frame to repair corrupted videos. The Video Repair function also supports batch processing.
Step 4: Click Start Repair
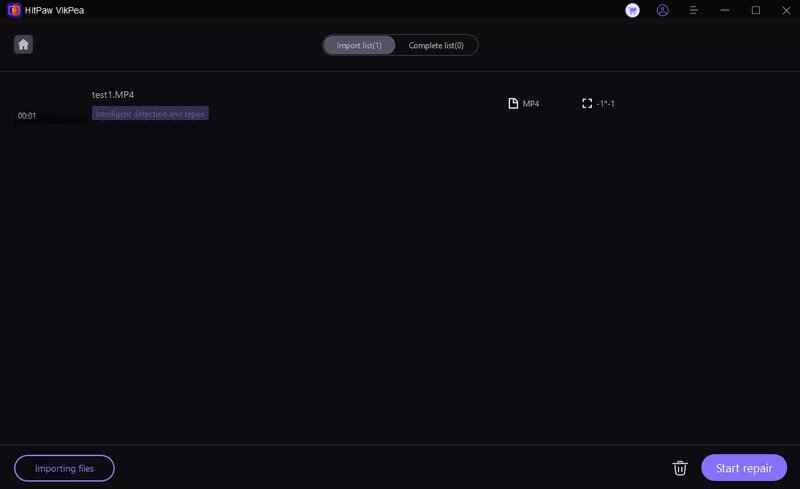
After selecting all the videos you want to repair, click the "Start Repair" button at the down-right corner.
Step 5: Repair Completed
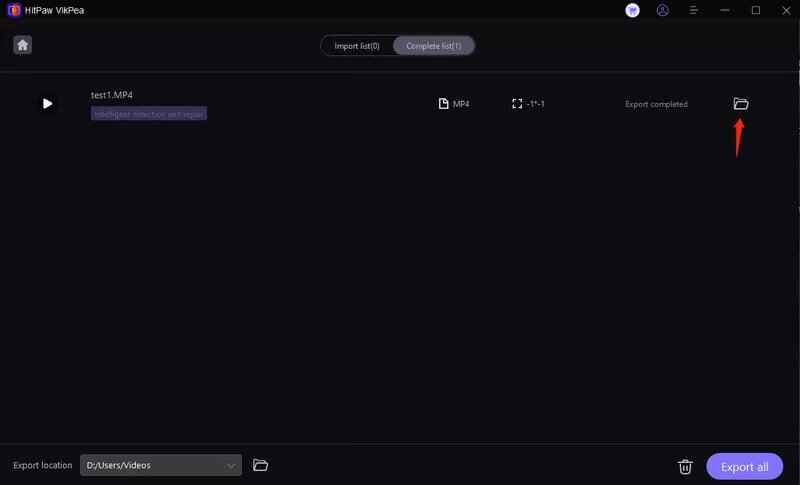
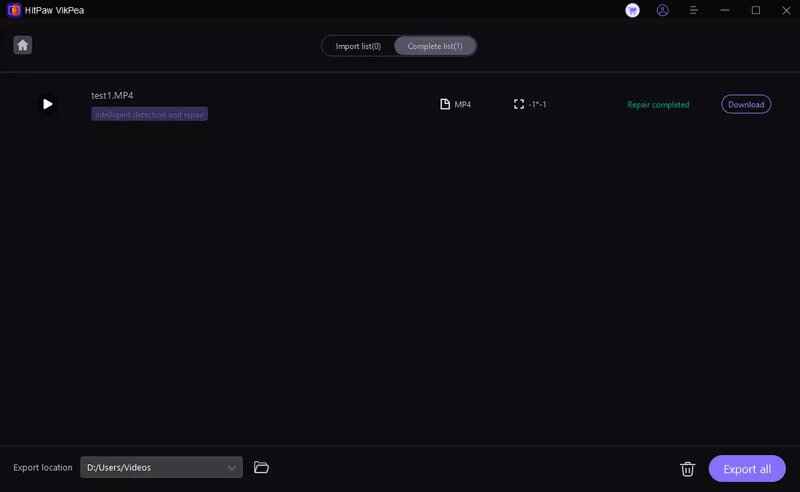
After the video files being successfully repaired, find them in the Complete list showing "Repair completed". Then click the "Download" button in the right or the "Export All" button at the down-right corner.
Step 6: Check the Processed Video
Click the "File" icon, and check the final video files in your desired saving path.
