Catalog
If you are wondering for how to make a standard ID photo for passport or visa, you may find it difficult to make the right size and background color. But with HitPaw FotorPea, you can make it in very simple steps.
Follow the 5 easy steps below and begin to make a standard ID photo.
Step 1: Import Photo
Head to ID Photo tab and click on Create to upload the portrait that you want to make it as an ID photo. Or you can simply drag the photo into the edit box.

Step 2: Adjust the Selection by Tools
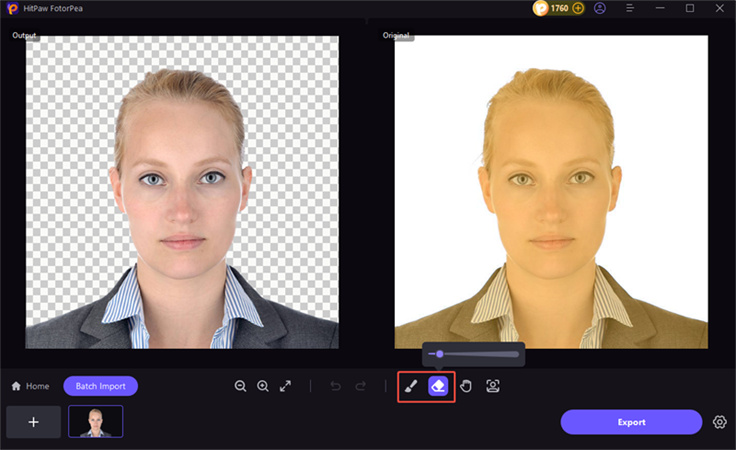
Then AI will automatically remove its background. If you want to refine some deails, find the Brush or Erase Selection tool in the bottom of the program.

Step 3: Enable the Size and Select the Country
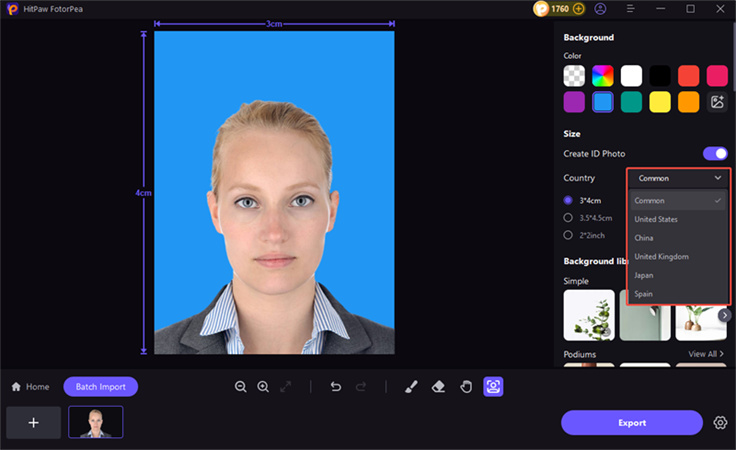
After the background selection, you could head to the size chosen. Enable the Size button and selection the country you are. Here list some common size sample for different countries, including the United states, the Uninted Kindom, Japan and Spain.

Step 4: Preview and Export the Photo
After choosing the background color and size frame, you could scale up or down the original photo by the frame to make it fit. If the effect is satified, click "Export" and save the final photo(s) to your computer.


