How to Create a Tattoo Design: Essential Steps for Crafting Your Unique Ink
Tattoos have long been a powerful form of personal expression, symbolizing identity, beliefs, and experiences. Whether you're looking to commemorate something meaningful or simply add an artistic design to your body, creating a custom tattoo allows you to showcase your individuality.
This article provides a detailed guide on how to design a tattoo, from initial concept to final creation. We'll walk you through the essential steps, tips, and techniques to help you craft a tattoo that is both meaningful and visually striking. Let's dive into how to create a tattoo design!
Part 1. How to Choose a Tattoo Design
Choosing the perfect tattoo design is an exciting and personal journey. Here are key tips to guide you through the process:
1. Personal Meaning and Symbolism
A tattoo is often more than just a decorative piece of art; it's a reflection of who you are, your beliefs, and your life experiences. When learning how to choose a tattoo design, consider selecting something that holds personal significance or conveys a message important to you. This could be a representation of your family, values, spirituality, or key moments in your life.
Examples of personal tattoos:
- Memorial tattoos: A design that honors a loved one, such as a name, date, or symbol that reminds you of them.

- Cultural symbols: Designs that reflect your heritage or spiritual beliefs, such as a Celtic knot or a religious icon.
2. Placement and Size Considerations
The location of your tattoo on your body plays a significant role in its overall appearance and impact. When deciding on placement and size, keep in mind the following:
- Visibility: Do you want your tattoo to be easily visible or more discreet? Areas like the forearm or wrist are visible, while the back, thigh, or ribs allow for more privacy.
- Pain Tolerance: Different body parts have varying levels of sensitivity. For example, areas with more flesh (like the upper arm or thigh) tend to hurt less, while bony areas (like the ribs or spine) can be more painful.
- Size: Consider how large or small the tattoo should be. A small, simple design might be best suited for areas like the ankle or behind the ear, while larger, more intricate designs look better on areas with more space, such as the back, chest, or full arm (sleeve tattoos).
Placement Examples:
- Small tattoos: Ideal for the wrist, ankle, or behind the ear.

- Large tattoos: Full arm sleeves, thigh pieces, back, or chest designs.

Tips
Always consider how the tattoo will flow with the natural lines and shape of your body. For example, a tattoo on the shoulder should complement the shoulder's curve.
3. Researching Styles and Trends in Tattoo Art
Tattoos come in a wide variety of styles, and it's important to choose one that suits your personality and aesthetic preferences. Here are some popular styles you might want to research:
- Traditional/Old School: Known for bold black outlines and primary colors, this style often features iconic imagery like roses, skulls, and anchors.
- Realism: Focuses on lifelike, detailed depictions of subjects, like portraits or animals.
- Watercolor: Uses flowing, vibrant colors that resemble a watercolor painting.
- Geometric: Incorporates shapes and lines to create minimalist and abstract designs.
- Neo-Traditional: A modern take on traditional tattoos, using more color gradients and softer details.
When learning how to pick a tattoo design, it's important to look at various styles and find one that matches your aesthetic. This process can help you decide on your design and give you a better idea of what you want before meeting with an artist.
Part 2. How to Draw a Tattoo Design
1. Digital vs. Traditional Drawing Methods
When learning how to design a custom tattoo, you will need to choose between digital and traditional drawing methods. Each approach has its own set of benefits, and knowing which one works best for your style and workflow is essential.
- Digital Drawing:
- Flexibility: Digital designs allow for easy editing. You can quickly adjust shapes, colors, and sizes, which is perfect for refining a design.
- Precision: Digital tools provide high precision for detailed linework, which is ideal for complex tattoos.
- Learning Curve: Mastering digital tools requires some practice, and there's a slight learning curve when it comes to software and hardware.
- Less Hands-On: Some artists find that digital drawing lacks the organic feel of traditional techniques.
- Traditional Drawing:
- Tactile Experience: Many artists enjoy the direct, hands-on experience of drawing on paper, which can lead to more intuitive, flowing designs.
- Authenticity: Traditional tattoo designs often have a raw, personal quality that some clients appreciate.
- Limited Edits: Once a traditional design is done, making changes is difficult. This can be frustrating if you want to refine or tweak the design.
- Time-Consuming: Drawing by hand can take longer, especially if you need to make multiple versions of a design.
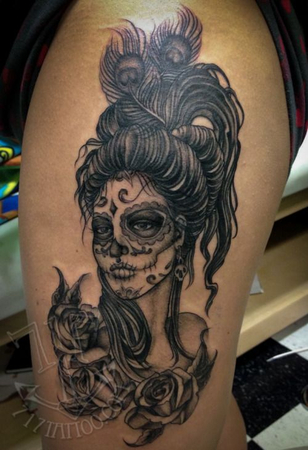
Digital tattoo design is done using drawing software (like Adobe Photoshop, Procreate, or Illustrator) on devices like a tablet or computer. A drawing tablet (e.g., Wacom, iPad with Apple Pencil) is used to sketch and finalize the design.
Advantages:
Disadvantages:
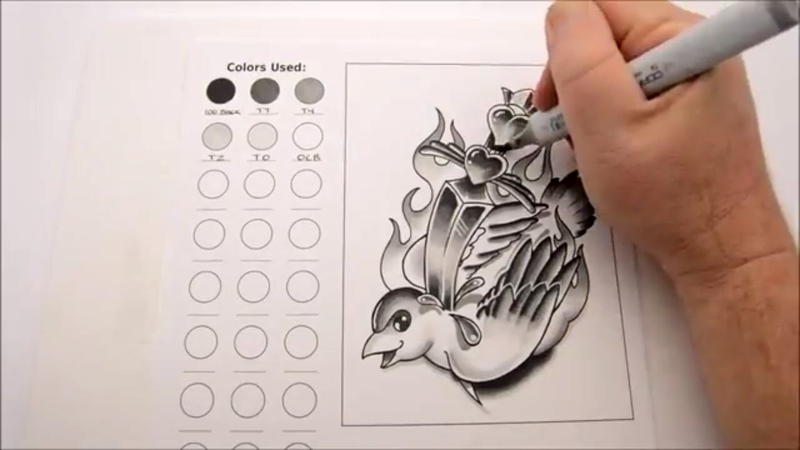
Traditional tattoo design involves using physical materials like pencils, pens, markers, and paper to sketch out the design by hand. This is the classic approach that has been used for centuries.
Advantages:
Disadvantages:
2. Tips for Creating Clean and Professional-Looking Designs
When learning how to design a good tattoo, clean lines, clarity, and precision are essential. Whether you're working digitally or traditionally, here are some tips to ensure your design looks professional:
A. Focus on Line Quality:
- Consistency: Make sure your lines are smooth and even. Inconsistent lines can make a tattoo design look sloppy.
- Vary Line Weight: Using thicker lines for the outer edges and thinner lines for details can add depth and dimension.
B. Shading and Contrast:
- Effective Contrast: A well-designed tattoo should have strong contrast, particularly between light and dark areas.
- Soft Shading: When you add shading, keep it smooth. Use gradients or stippling techniques to avoid harsh transitions.
C. Simplify Your Design:
- Minimalism: Complex designs can be harder to read and may not age well on skin. When learning how to design a unique tattoo,focus on simple, bold shapes that are timeless and impactful.
- Balance: Ensure the elements of your design are well-balanced. Avoid overcrowding your design with too many intricate details.
D. Test the Design on a Body Template:
- Once you've sketched out your design, whether digitally or traditionally, test it by placing it on a body template. This helps you visualize how to draw out a tattoo designthat will fit the body's natural flow and shape.
Part 3. How to Design a Custom Tattoo
Designing a custom tattoo is a deeply creative process that involves brainstorming ideas, sketching initial concepts, and sometimes incorporating modern tools like AI art generators. Below is a breakdown of these essential steps for creating a unique, meaningful tattoo.
1. Brainstorming Ideas and Themes
The first step in designing a custom tattoo is brainstorming ideas. This process involves thinking about the personal significance of the tattoo and the kind of imagery that will best represent the wearer's story, beliefs, or style.
- Personal Meaning: Think about what the tattoo will represent. It could be a symbol of personal strength, a tribute to a loved one, or an expression of an interest or passion .
- Themes: Explore different themes like nature), mythology, geometric designs, or abstract art. You can also draw inspiration from different cultures, art styles , or tattoo history.
Example: If the tattoo is meant to represent strength and perseverance, you could look into themes like mountains, trees, or animals known for their resilience (e.g., lions or elephants).
2. Sketching Initial Concepts
Once you have a clear idea of your theme, the next step is sketching initial concepts. This is where you begin to visualize how the tattoo will look. Don't worry about perfection at this stage-focus on getting the ideas down.
- Start with Rough Shapes: Begin with simple shapes and outlines that represent the overall structure of your design.
- Refine the Details: Gradually add more details to the sketch, paying attention to the lines, shading, and overall composition.
- Placement Consideration: Think about the area of the body where the tattoo will go.
Example: For a wolf tattoo, start by sketching the basic outline of the animal's head, then add in details like fur texture, eyes, and shading to give it depth.
3. Utilizing AI Tattoo Generator - HitPaw FotorPea
One way to enhance the tattoo design process is by using an AI tattoo generator like HitPaw FotorPea. AI generators can help refine your ideas and inspire new design possibilities. Here's how to use HitPaw FotorPea to generate AI tattoos.
Features and Benefits of HitPaw FotorPea
HitPaw FotorPea - All-in-one Photo Editing Tool for Win & Mac
Secure Verified. 212,820 people have downloaded it.
- AI-Powered: HitPaw FotorPea uses artificial intelligence to generate high-quality tattoo designs based on your input.
- Customizable Options: You can enter specific keywords or upload an image to guide the AI in creating a tattoo design that matches your vision.
- Multiple Styles: The tool allows you to generate tattoos in various styles, helping you find a design that fits your personal aesthetic.
- Easy to Use: The interface is user-friendly and intuitive, making it accessible even for beginners.
Secure Verified. 212,820 people have downloaded it.
Steps to generate AI tattoos with art generator
Here is how to make a tattoo design:
Step 1: Choose AI Generator
First, click the Download button to start using the HitPaw FotorPea AI Art Generator.

Step 2: Enter Prompt
Provide a prompt or description of the tattoo design you want to create. You can use the default prompt or click "Replace prompt" to modify it.

Step 3: Generate AI Tattoo Designs
Once you've entered your prompt and selected your preferred image size, resolution, and art style, click the Generate button. HitPaw FotorPea offers a variety of art styles, from realistic to surrealistic, allowing you to explore different looks for your tattoo.

Step 4: Preview and Download AI-Generated Tattoo Art
After the AI processes your request, it will generate two similar tattoo designs for you to choose from. The generation time depends on image size and server speed. Click on an image to preview it in more detail.
Finally, click the Download icon on the AI-generated tatto that you want to download it to computer.
Here's a video guide for you to follow to create AI tattoo:
Part 4. FAQs about How to Design a Good Tattoo
Q1. How do I choose the right tattoo design for me?
A1. Consider personal meaning, style preferences, and placement to ensure the design fits your personality and body.
Q2. How do I make sure my tattoo design looks good over time?
A2. Focus on bold lines, simplicity, and proper placement to ensure longevity and clarity.
Conclusion
In conclusion, designing a good tattoo involves brainstorming meaningful themes, sketching initial concepts, and utilizing modern tools like HitPaw FotorPea for AI-generated designs.
Whether you're looking for inspiration or a custom piece, AI tools can enhance creativity and streamline the design process. Embrace these innovative resources to bring your unique tattoo vision to life and ensure a design that's personal, professional, and timeless.




 HitPaw Univd (Video Converter)
 HitPaw VoicePea
  HitPaw VikPea (Video Enhancer)


Share this article:
Select the product rating:
Daniel Walker
Editor-in-Chief
This post was written by Editor Daniel Walker whose passion lies in bridging the gap between cutting-edge technology and everyday creativity. The content he created inspires the audience to embrace digital tools confidently.
View all ArticlesLeave a Comment
Create your review for HitPaw articles