How to Burn FLAC to Audio CD on Different Devices
Do you have a collection of high-quality FLAC music files that you'd love to be able to play in your car or on your home stereo? Burning FLAC files into audio CDs can allow you to listen to your digital music collection anywhere a regular CD player is available. However, not all CD-burning software and devices make burning FLAC files straightforward. On this guide, you will find some of the best FLAC CD burner download free options that you can consider. Take a look at the different methods and pick the right one for you.
Part 1. How to Burn FLAC Files to Audio CD on Mac
1. Burn FLAC to CD Free with Mac Built-in Feature
Burning FLAC audio files to CD on Mac allows you to enjoy your high-quality digital music collection in any standard CD player. The process involves transferring FLAC files into an organized folder, inserting a blank disc, selecting the folder to burn, and adjusting settings to determine CD quality and burning speed. Follow these simple steps to burn great-sounding audio CDs from FLACs on your Mac.
Step 1: Create a Folder
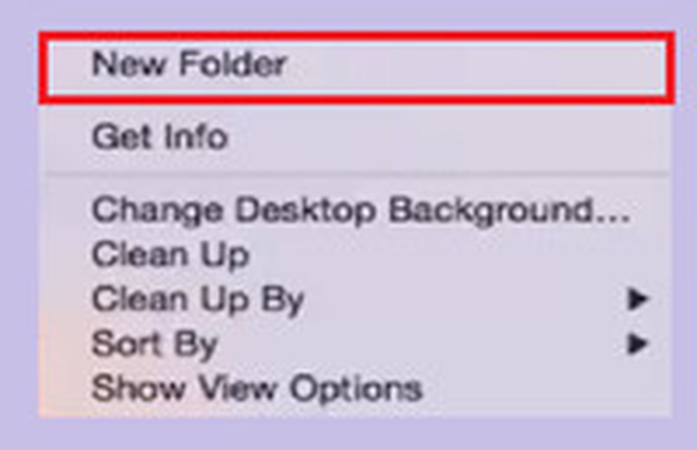
First, create a new folder on your Mac's desktop to organize your FLAC files. Right click on an empty space on the desktop, select "New Folder" and give it an appropriate name like "My Music FLACs". This folder will hold files for burning.
Step 2: Insert a Blank CD
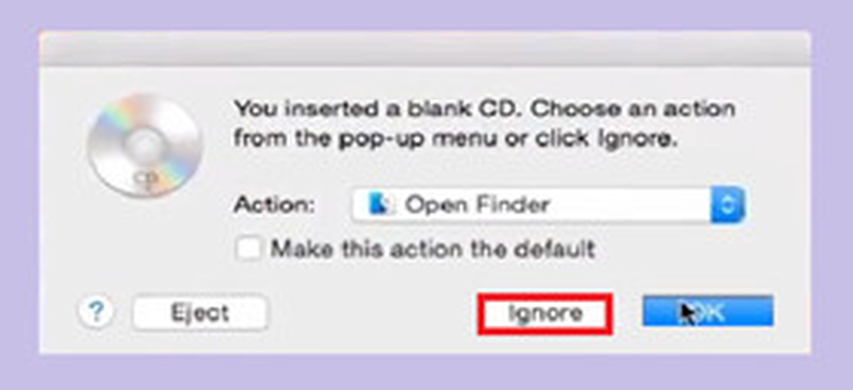
Insert a blank CD-R into your Mac's CD/DVD desktop drive. A prompt will appear asking if you want to use the disc. Click "Ignore" to bypass any formatting options for now.
Step 3: Select Folder to Burn
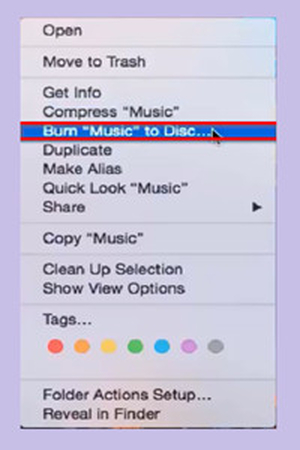
Right-click on the FLAC folder you created and choose "Burn [Folder Name] to Disc”. This starts the CD burning process.
Step 4: Burn FLAC CD on Mac
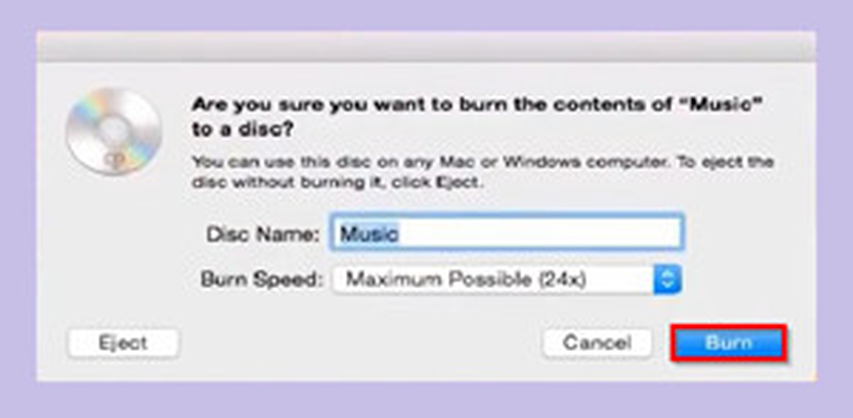
In the burn options window, name your disc, adjust the burning speed if desired, then click "Burn" to transfer files onto the CD. Your FLAC audio CD will now be ready to play!
Pros
- A simple method to use
- Free of charge
- Decent burning speed
Cons
- Doesn't offer metadata editing
- Can't create disc images
2. Burn Audio CD from FLAC with iTunes
iTunes is the default media player and library manager that comes bundled with every Mac computer. While it may not be as full featured as dedicated CD burning software, iTunes provides a free and convenient way to burn audio CDs from FLAC files for Mac users.
Steps to Burn FLAC Files to Audio CDs with iTunes:
Step 1: Add FLAC files to iTunes library
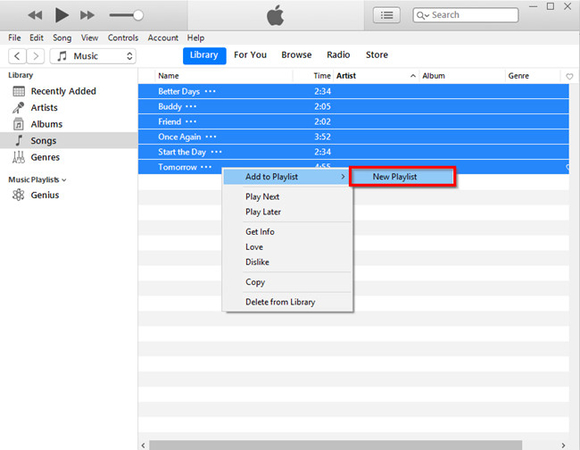
First, open iTunes and drag your FLAC files into the iTunes library. This imports the FLAC files, so they are ready to burn to CD.
Step 2: Insert a blank CD
Insert a blank CD-R into your Mac's CD/DVD drive. Make sure the CD is completely blank - iTunes will prompt you if you need to erase or format the CD first.
Step 3: Create a new playlist
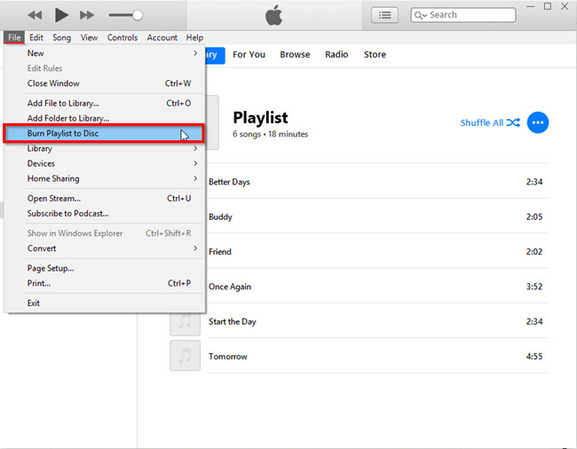
Create a new playlist on iTunes, name it something like "My FLAC CD", and add the FLAC tracks you want to burn from your library into the playlist by dragging them over. Arrange your tracks in the right order.
Step 4: Burn FLAC Playlist to Audio CD
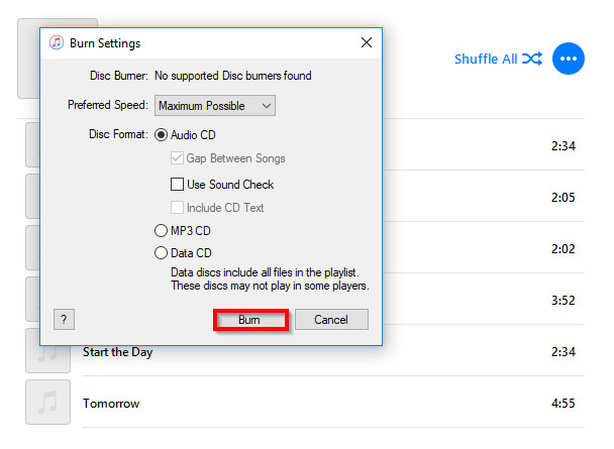
With your playlist selected, click File > Burn Playlist to Disc to burn the tracks onto the blank CD as an audio CD. Adjust the settings if needed before clicking Burn.
Pros
- Free and simple to use
- Works nicely for casual audio CD burning
Cons
- Limited control over burning settings
- Not suitable for advanced CD burning features
Part 2. How to Burn FLAC to CD on Windows
1. Burn FLAC to CD with Windows Media Player
As the default media app in Windows, Windows Media Player provides a built-in way to burn audio CDs if you don't have dedicated CD burning software. This works great for common formats like MP3. For FLAC files, an extra step is required given Media Player lacks native FLAC support. But by first converting FLACs into lossless WMA files, users can still use Windows Media Player to successfully burn high-quality audio CDs from FLAC music files.
Steps to Burn FLAC Files with Windows Media Player:
Step 1: Convert FLAC files into WMA
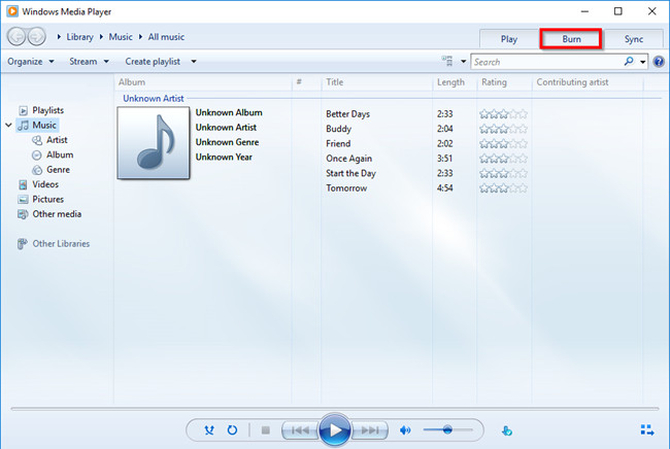
In Windows Media Player, click "File > Open Folder" and select your folder of FLAC files. Click "Convert" to open the Convert Files window. Set format to "Windows Media Audio Lossless" and start conversion.
Step 2: Add WMA files to burn playlist
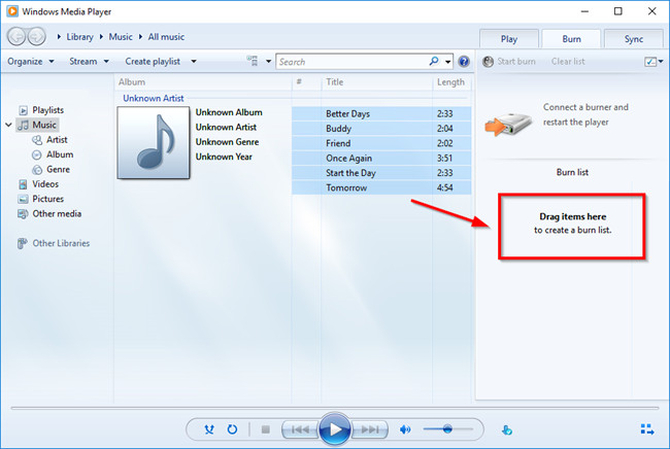
In Windows Media Player library, drag converted WMA files into the "Burn" sidebar. Rearrange tracks here for your CD playlist order.
Step 3: Insert disc and burn
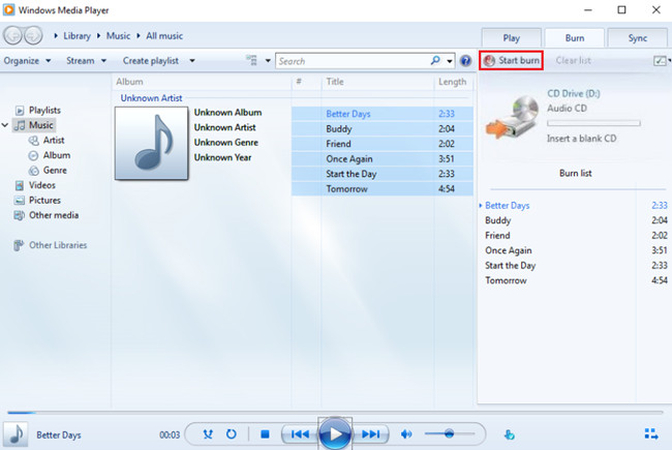
With your burn playlist ready, insert a blank CD-R into your PC's disc drive. In Windows Media Player, click "Start Burn" then adjust settings as needed before burning to disc. Burn FLAC to CD Windows Media Player is quite simple.
Pros
- Simple interface for basic CD burning
- Handles lossless formats like WMA
Cons
- Initial FLAC to WMA conversion required
- Lacks some advanced burning options
2. Burn FLAC to Audio CD using Power ISO
PowerISO is a popular disc image utility for Windows that provides advanced CD/DVD burning capabilities. While free tools like Windows Media Player can handle basic FLAC-to-CD jobs, PowerISO gives users more control over the burning process with customizable settings, error checking, and handy extras like the ability to save disc images.
Steps to Burn FLAC Files with PowerISO:
Step 1: Create new audio CD project
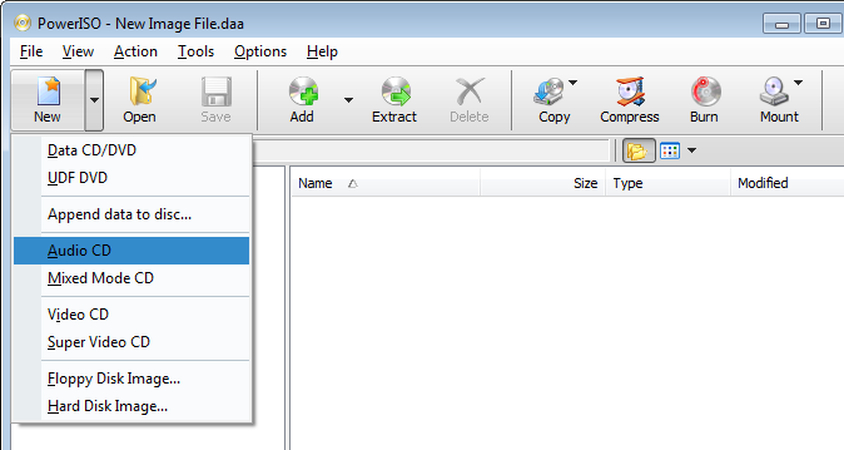
Open PowerISO. Go to "File > New > Audio CD" to start a new empty project for your FLAC audio disc. This is where you'll add files.
Step 2: Add FLAC files
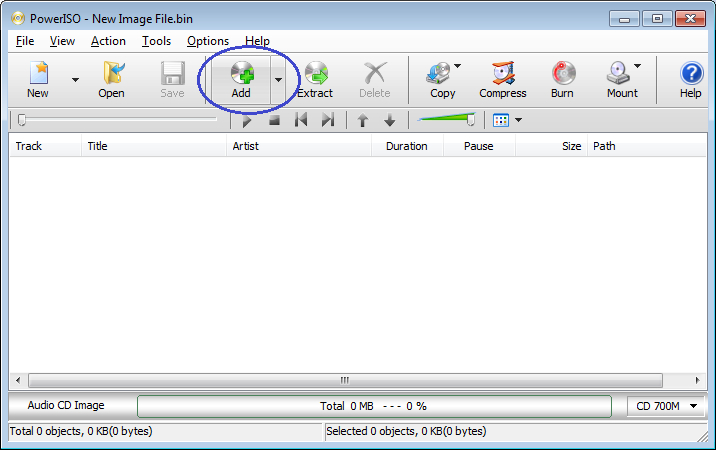
Click the toolbar "Add" button, select your FLAC files in the file browser, and add them to the PowerISO music disc project. Repeat to add multiple tracks.
Step 3: Insert Disc And Burn Audio to CD
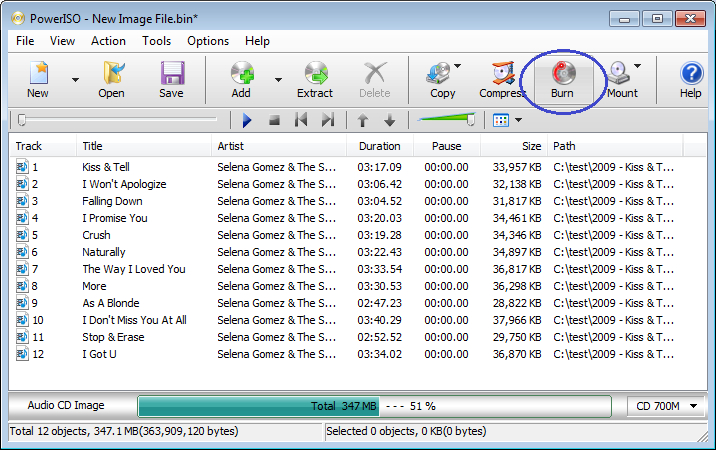
With FLAC files added and arranged, insert a blank CD-R or CD-RW into your disc drive. In PowerISO, adjust settings if desired, then click the “Burn” button to transfer audio files onto the disc. Burning FLAC files to audio CD is pretty straightforward with this method.
Pros
- Advanced burning options
- Can save disc images
- Handy audio conversion tools
Cons
- Steeper learning curve
- Must purchase after 30-day trial
3. Burn FLAC to CD with AnyBurn
AnyBurn is a free and lightweight CD/DVD burning tool for Windows that provides a streamlined workflow for routine tasks like audio disc burning. While lacking some advanced features found in premium software, AnyBurn's simple interface and basic FLAC support offers an easy way for casual users to transfer tracks from their FLAC music libraries onto standard audio CDs playable in car and home stereos.
Steps to Burn FLAC with AnyBurn:
Step 1:Go to anyburn.com and download and install AnyBurn. Open the program and click "Burn Audio CD from mp3/flac/ape".

Step 2:In the AnyBurn "Burn Audio CD" window, click "Add" to select FLAC tracks from your library to add to the disc burn playlist. Arrange tracks as needed.

Step 3:With your playlist ready, insert a blank disc and click "Burn Now" to start transferring tracks to the CD according to your set burn speed and settings. If you wonder how to burn 24 bit FLAC to CD, this is a good option to try.

Pros
- Easy to use interface
- Lightweight software
- Supports key audio formats
Cons
- Lacks advanced functionality
- Windows only
- Basic burning options
Bonus: How to Convert FLAC File to Any Audio Format Losslessly
HitPaw Univd (HitPaw Video Converter) is an all-in-one audio conversion software that makes it easy to convert between audio formats, download streaming music, edit metadata, and more. While its name refers to video conversion, HitPaw Univd includes professional-grade audio encoding and decoding tools optimized to retain 100% of the source audio quality during file conversion, regardless of format. Ideal for converting between lossless formats like FLAC and lossy ones like MP3 or AAC, HitPaw Univd ensures compatibility across different devices without compromising sound quality.
HitPaw Univd - All-in-one Video Solutions for Win & Mac
Secure Verified. 254,145 people have downloaded it.
- HitPaw specialized encoders perfectly convert between all key audio formats, including FLAC, MP3, AAC, WAV, M4A and more, with zero quality loss in the process.
- Convert entire music libraries 5-10x faster than real-time thanks to full GPU acceleration and advanced parallel processing algorithms.
- Fine-tune audio encoding parameters like bitrates, sample rates, channel layouts, metadata and more with total control over output quality.
- Rip and download tracks, albums or playlists from top streaming platforms, then easily convert them to any format you need.
- Modify audio files' ID3 tags and metadata fields, embed album art, customize file info, and manage large libraries.
- HitPaw Univd uses an intuitive drag-and-drop workflow to make audio conversion and editing simple for novices and audio professionals alike.
Secure Verified. 254,145 people have downloaded it.
How to Convert Lossless FLAC to Any Audio Format
Step 1: Import FLAC Files in HitPaw
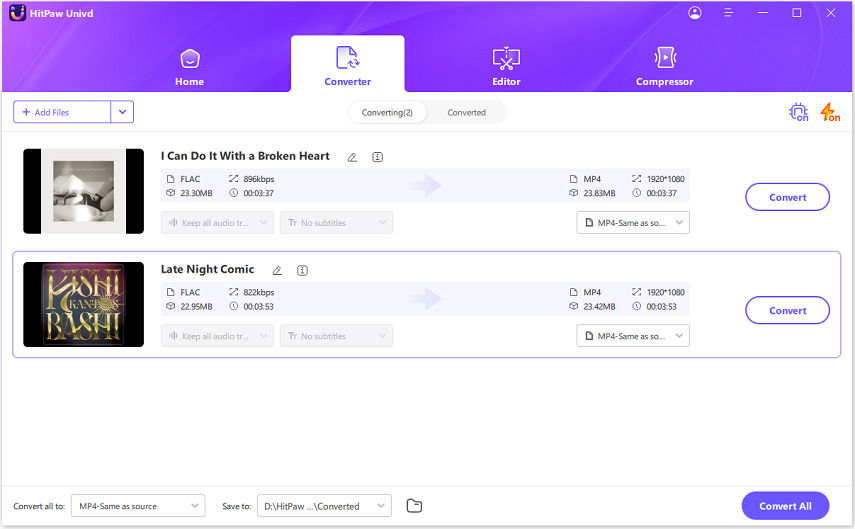
Launch HitPaw Univd and click the "Add Audio" button in the top left corner to import your source FLAC files. You can also directly drag and drop FLAC files onto the main interface conversion board. This loads your original lossless tracks ready for format conversion.
Step 2: Select Output Audio Format
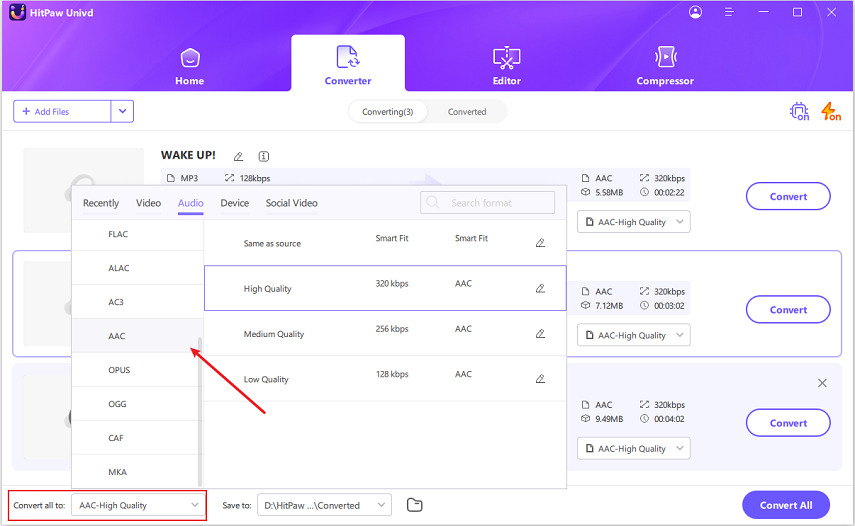
With your FLAC files imported, click the downward arrow output button on each track to open format options. Choose your desired output format like MP3, AAC, WAV etc. You can batch set all files to one format via the "Convert All To" menu. Enable editing to customize quality parameters if needed.
Step 3: Convert FLAC Files Losslessly
Double check your output configuration meets quality needs. Then click the "Convert" button to start encoding FLACs to your chosen format. Advanced parallel processing ensures lightning fast, high quality, lossless audio conversion leveraging GPU power.

Step 4: Export Converted FLAC Audio Files
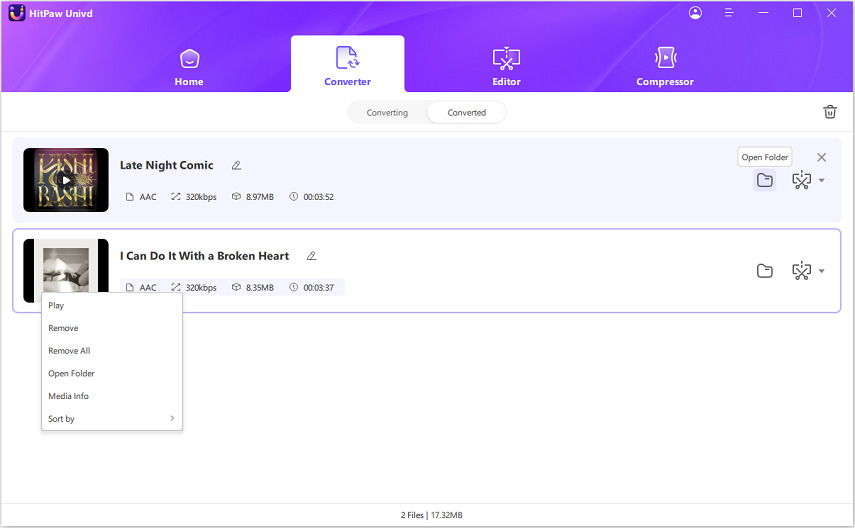
Once complete, converted files are available in the "Converted" tab of HitPaw Univd. Click open folder to access the lossless audio now in your chosen standard format, ready for enjoying across different devices. You can also further edit files if needed.
FAQs about Burning FLAC to CD
Q1. Can Windows Media Player burn FLAC to CD?
A1. No, Windows Media Player cannot directly burn FLAC files to CD since it does not natively support the FLAC format. You would first need to convert FLACs to a compatible lossless format like WMA before burning to CD with Windows Media Player.
Q2. How big is a FLAC file per CD?
A2. A standard CD can hold around 700-800 MB of data. Uncompressed audio CD tracks would be around 10 MB per minute. FLAC compresses this data with no quality loss while achieving around 50% file size savings. So around 5 MB per minute of CD-quality FLAC audio is common.
Q3. Does FLAC sound as good as CD?
A3. Yes, FLAC preserves 100% of the sound quality you would get listening to the audio CD. When properly decoded, a FLAC file will be sonically identical compared to the CD version. This makes it ideal for ripping and archiving CDs digitally. This is something to keep in mind when you burn audio CD from FLAC.
Q4. How do I burn a 24 bit FLAC to a CD?
A4. You will need to down sample 24 bit FLACs to 16 bits before burning if you want CD compatibility. This entails Decode the FLAC to WAV, down sample with an audio program like Audacity, then burn the 16 bit WAV using CD burning software.
Conclusion
Burning FLAC files to audio CD can ensure you always have physical backups of your high resolution music collection. As we've covered, you have various options from freeware like Windows Media Player to advanced tools like HitPaw Univd. While technical challenges can arise working with larger FLAC files, the right software makes it possible to easily save FLACs onto CDs playable anywhere while retaining pristine lossless audio quality. Use it as your default option when you burn FLAC files to CD.




 HitPaw VoicePea
  HitPaw VikPea (Video Enhancer)
 HitPaw FotorPea

Share this article:
Select the product rating:
Daniel Walker
Editor-in-Chief
My passion lies in bridging the gap between cutting-edge technology and everyday creativity. With years of hands-on experience, I create content that not only informs but inspires our audience to embrace digital tools confidently.
View all ArticlesLeave a Comment
Create your review for HitPaw articles