Detailed Guide To Optimize Pictures for Web [Tips & Tricks]
In this digital world, speed is everything, so it is essential to make your website load quickly. If it takes longer, viewers are likely to leave before seeing what you offer. One of the common factors that slow down a website is your uploaded image, which may have a large file size. That is why image optimization is a significant element in speeding up the website loading time.
However, optimizing images is not just about making them visually appealing; it's about enhancing user experience and SEO. Therefore, knowing how to optimize pictures for the web is a crucial element. To assist you, this article will provide a detailed guide on the best tool for image optimization and how it resizes high-resolution images of the website.
Part 1. A Quick Overview of Image Formats: Choosing the Right One
Before you know about image optimization in detail, knowing the image formats and their use case is vital. To optimize images for the web, the given table provides a detail on which type of format is suitable for website performance:
| Features | JPEG | AVIF | PNG | WebP | GIF |
|---|---|---|---|---|---|
| Compression Type | Lossy | Both lossy and lossless | Lossless | Both lossy and lossless | Lossy (limited color depth, 256 colors) |
| Animation Support | No | Yes | No | Yes | Yes |
| File Size | Moderate to large (depends on compression) | Minimal (better compression than JPEG/PNG) | Larger (due to lossless compression) | Smaller than JPEG and PNG (better compression) | Larger (due to limited color palette) |
| Image Quality | Good (lossy, some quality loss) | Excellent (higher quality than JPEG and WEBP) | Excellent (lossless, no quality loss) | High quality (better than JPEG at smaller sizes) | Low quality (limited to 256 colors, pixelated) |
| Browser Support | Universal (all modern browsers) | Supported in Chrome, Firefox, and Opera (limited support) | Supported in all modern browsers | Supported in most modern browsers (Chrome, Firefox, Edge, Opera) | Supported in all modern browsers (with some limitations for animations) |
| SEO Impact | Moderate (slightly slower page load times) | High (smaller file sizes = faster page load times) | High (lossless but large files, slow download times) | High (fast loading with small file sizes) | Low (large file sizes, lower quality impact UX) |
| Best Use Cases | Photographs, images with gradients | High-quality photos, next-gen web usage | Logos, icons, images with transparency | Web images, photos, icons, transparent images, animation | Simple animations, logos, icons, small images |
Part 2. Best Practices For Optimizing Image Size and Scaling for the Web
As mentioned, optimizing image size and scaling is essential for SEO image optimization that improves site performance and user experience. Thus, use the listed techniques that ensure fast speed without losing image quality:
1. Match Image Size to Display Dimensions: First, resize the images that will be displayed on your website to match the exact dimensions. This avoids loading unnecessarily larger files, which improves the page loading time.
2. Make Wise Image Format Choice: Once the image is resized, select the correct file format, depending on your image type. From the image formats, PNG is best for image transparency, JPEG is for photos, and WebP has a small file size for high-quality compression.
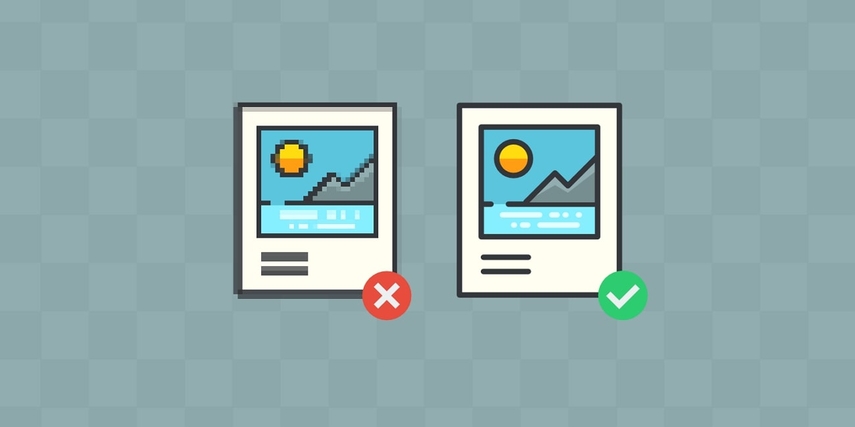
3. Compress Images Without Losing Quality: While picking the desired format, use ideal tools for image compression to minimize file size while losing image quality. The image in small size loads faster and helps to optimize site performance.
4. Avoid Overloading Pages with Many Images: Avoid using unnecessary images on the page while optimizing the image. This can increase page load time and negatively affect website performance.
5. Use Responsive Image: Last but not least, use the “srcset” attribute in your HTML to deliver various images according to the screen resolution.
Part 3. Tips & Tricks You Should Know to Optimize Images For SEO
Now that you know how to resize and scale images for the web, learning about expert tips for SEO image optimization can improve a site's visibility. For your understanding, we have mentioned a few of them in this section:
1. Incorporate Descriptive File Names: You can name your images with relevant keywords to help search engines understand their content. Also, use hyphens between words in file names instead of underscore, enhancing readability.
2. Improve Image Alt Text: Write clear and keyword-rich alt text to describe the image content. It helps search engines understand index images while making the content accessible for impaired users.
3. Compress and Resize Images: Reduce image file size without losing quality to improve page loading speed. Ensure that pictures are correctly resized according to the website display size.

4. Leverage Image Sitemaps: Use image sitemaps as they help search engines understand index images more efficiently. These sitemaps make it easier for search engines to explore and adequately rank the image and enhance visibility in search results.
Part 4. 5 Common Mistakes To Avoid For Image Optimization
For image optimization, a few mistakes can negatively impact your site's performance. Thus, below are some common errors you need to avoid in order to improve your website's efficiency:
1. Large File Sizes: To minimize file size, compress the images without sacrificing quality, which will cut the page loading time.
2. Missing Alt Text: You are advised to add clear and descriptive alt text under each image while including relevant keywords for SEO.
3. Ignoring Image Sitemaps: Use image sitemaps to enable search engines to find and index your images more efficiently.

4. Not Resizing Images: Before uploading, you should always resize the images to fit the display size and prevent unnecessarily large files, which leads to search delays.
5. Enable Lazy Loading: Users should utilize lazy loading to delay image loading until they are showing in the viewport.
Part 5. Over Compressed Images? Retrieve Their Quality in an Instant!
While resizing the images for Web image compression, they become blurred if over-compressed, which leads to poor image quality. To prevent these, the right solution is the HitPaw FotorPea, which retains clarity and minimizes extreme compression. It allows users to make their pictures less blurry, remove the noise of images, and upscale images with 9 different AI models.
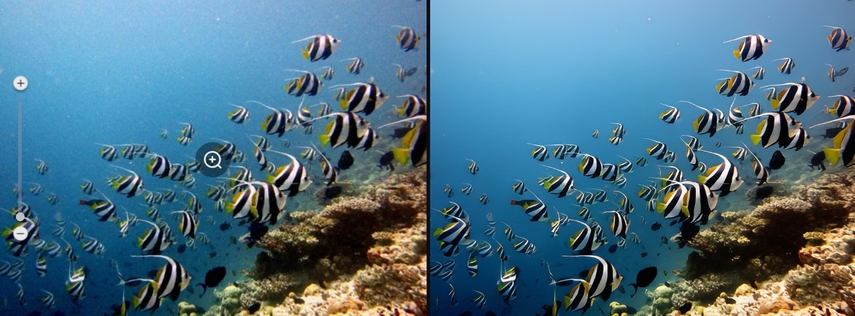
Furthermore, with the AI face enhancer model, users can remove blemishes, tinny spots, and wrinkles to make flawless images. Its denoise model with powerful AI noise reduction technology removes noise from high-ISO and low-lighting and also de-pixelate images. HitPaw FotorPea AI helps to restore old photos and colorize the black and white photos in a few clicks.
Key Features
1. Compatibility: This fast AI image enhancer is available on both Mac and Windows.
2. Batch Processing: It allows users to enlarge and upscale multiple images at one time with high resolution.
3. Preview Mode: Users can preview the final enhanced image with its review feature to ensure a difference.
Comprehensive Guide on How to Enhance Image Quality
Now that you have learned about the best tool to compress images without losing quality let's see how it works:
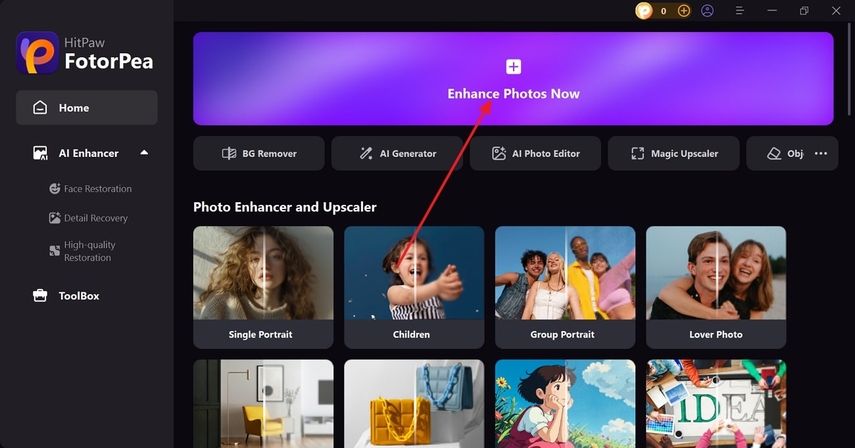
Step 1. Open HitPaw FotorPea and Access the Image Enhancer
First, install HitPaw FotorPea, access the main interface, and hit the “Enhance Photos Now” button.
Step 2. Import the Image and Choose the Compression Artifact Model
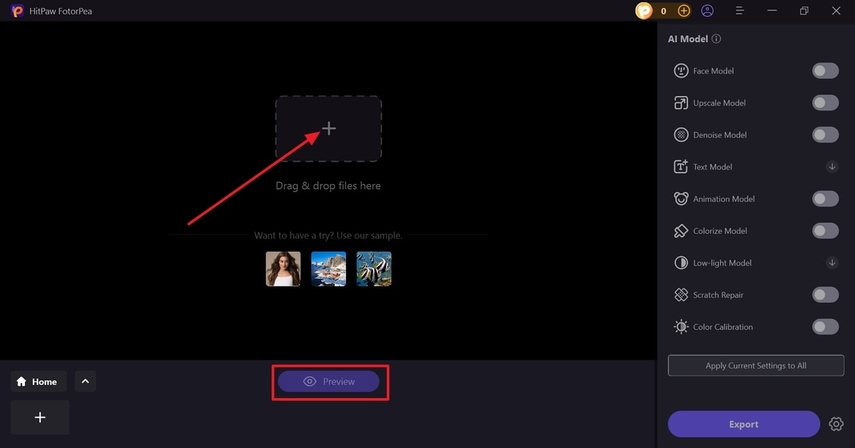
Next, press the “+” button to drag and drop the targeted image from the device. On the right panel, from the “AI Mode” section, toggle the “Compression Artifact” model. Then, hit the “Preview” button to compare the before and after results from the main screen.
Step 3. Preview and Import the Result
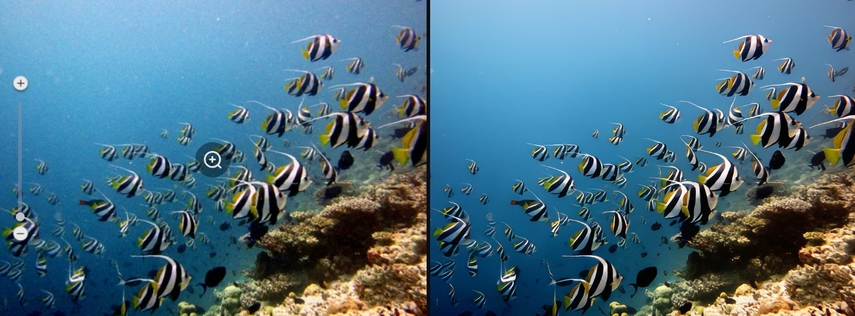
If you are satisfied with the enhanced image, press the “Export” button to download your image.
Conclusion
To conclude, optimizing images with lossless quality is an effective to improve the website speed. The technique listed above for optimizing image size or scaling enhances the overall user experience and SEO performance. This article provides you with the best free online image compressors for the web that help you resize images in a perfect file format. To increase page loading speed, use HitPaw FotorPea and enhance compressed images in a few clicks.


 HitPaw Edimakor
 HitPaw VikPea (Video Enhancer)
 HitPaw Univd (Video Converter)

Share this article:
Select the product rating:
Daniel Walker
Editor-in-Chief
My passion lies in bridging the gap between cutting-edge technology and everyday creativity. With years of hands-on experience, I create content that not only informs but inspires our audience to embrace digital tools confidently.
View all ArticlesLeave a Comment
Create your review for HitPaw articles