Turning a Low-Quality Photo to High Quality – Your Go-To Guide
Image quality matters the most, whether you’re sharing moments on social media or displaying a business presentation. Many reasons, like compression and poor camera sensor, can turn photos into low-quality, leading to loss of details. That's why people prefer converting their low-quality photos to high-quality for both personal and professional use.
To address this, there are many effective solutions available to improve image quality with just a few clicks. Considering the user demand, the following article is a complete guide packed with the best-enhancing tools. The guide will also introduce you to an innovative platform that rescues your precious memories with a tutorial.
Part 1. Clarifying Dynamics of Image Quality & Resolution
A high-quality image is defined by many aspects, including resolution, sharpness, clarity, and noise levels. Here, resolution refers to the number of pixels in an image, which is typically measured in pixels per inch or DPI for printing. Higher resolution means more pixels that result in greater detail and a sharper image. Moreover, clarity is the overall visibility of the fine details and the absence of distortion.
Besides this, high-quality images should have minimal noise, strong definition, and consistent detail across the entire frame. At the same time, file formats have a massive impact on quality. For instance, JPEG sacrifices details, while PNG preserves them with lossless compression. Before knowing how to enhance low-quality photos, read the reasons below to understand why images lose quality:
1. Pixilation: This typically occurs when you’re trying to enlarge a low-resolution image while making it look stretched or resized beyond its original limit.
2. Blurriness: It happens when the details of an image are not sharp or well-defined due to poor focus or a low-resolution camera sensor.
Part 2. [Quick Review] 5 Best AI Tools to Enhance Low-Resolution Images
For learning how to enhance a poor-quality image for printing, adhere to the list of best tools mentioned in this section to make a foremost choice:
1. Remini
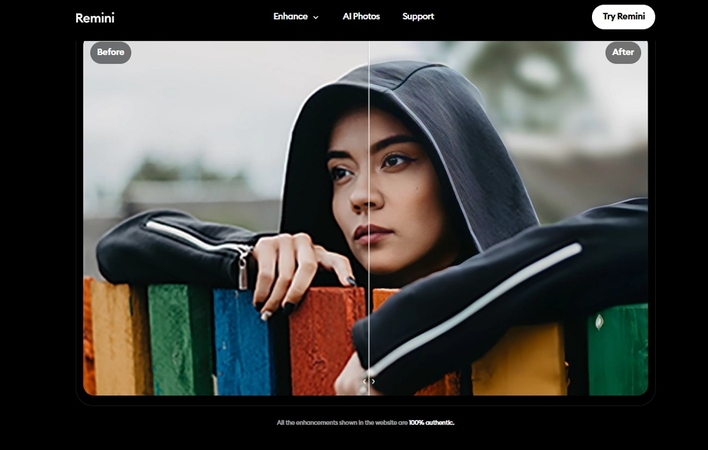
An image-quality improvement tool that is specifically designed to transform your grainy or pixelated pictures into improved versions is Remini. It increases the size of your low-quality images by up to 2x while enhancing their quality,
Key Features
1. Using its photo enhancement feature, one can restore the quality and detail of their old photos.
2. The sharpener tool allows users to remove blurriness and transform images into HD shots.
3. This tool’s sharpening capabilities can also help banish motion blur and return photos to ultra-clear perfection.
Pros
- Its AI technology recognizes and perfects uneven skin textures for a flawless look.
- The platform automatically adjusts the lighting and colors to bring out facial features.
Cons
- Remini can only upscale images by up to 2x, which might not be convenient for professionals.
- The free version of this platform comes with restrictions and displays advertisements between the edits.
2. VanceAI
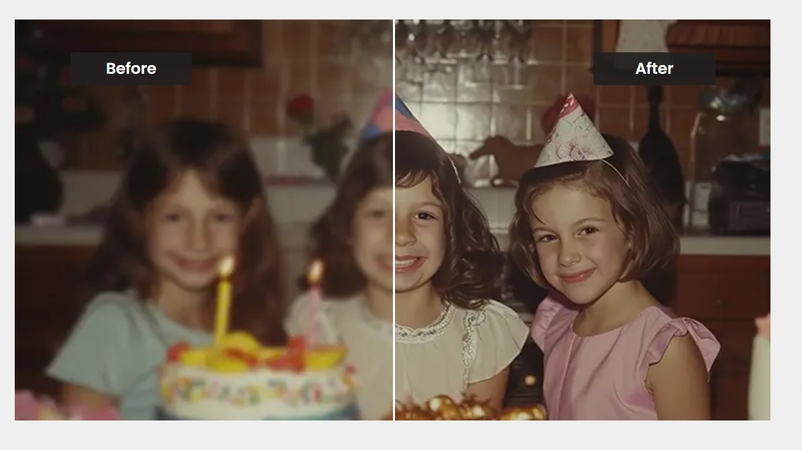
It’s another AI image enhancement platform that automatically increases the resolution by enhancing the overall colors. In addition, it makes photos HD or 4K from 480p or smaller resolution with the best possible details.
Key Features
1. This platform’s sharpener tool works well for improving motion blur or out-of-focus images.
2. Using AI models, you can fix your lens blur images by simply dropping them to the tool.
3. While upscaling, users are allowed to lift their images up to 8x online or a massive 40x.
Pros
- You can sharpen or enhance multiple images at a time to achieve spotless results.
- The processed images on this tool will be deleted in 24 hours for user privacy concerns.
Cons
- There is no free trial or version for beginners to try its enhancement capabilities.
- The pricing plan with the credit system is a bit confusing for the new editors.
3. Pixelcut
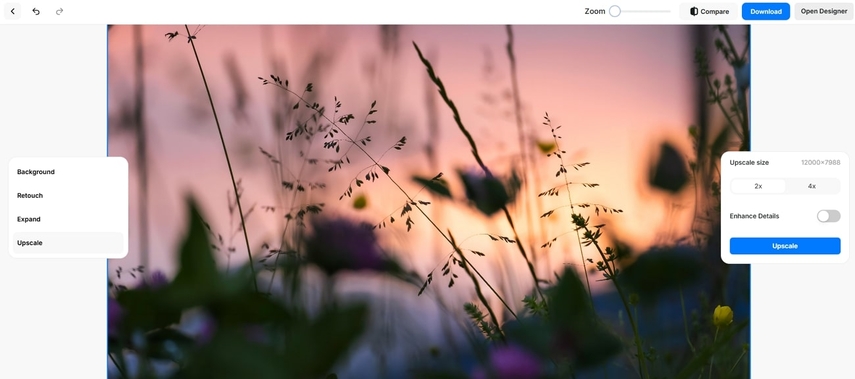
To increase photo quality online, Pixelcut facilitates users in increasing quality up to 4K with AI assistance. You can import your images in various image formats, select your preferred quality, and download high-resolution pictures.
Key Features
1. Its unblur tool provides focus and sharp shots by removing the blurriness from images.
2. The platform is capable of restoring lost details of old pictures using AI assistance.
3. After enhancing, you can adjust the size of your images to any dimension within seconds.
Pros
- It assists users in saving their time and enhancing multiple images at once.
- With this platform, editors can download their images in their desired dimensions.
Cons
- Users cannot upscale their images up to 4K in its free version.
- The batch processing capability is only facilitated in the pro plan.
4. Picsart
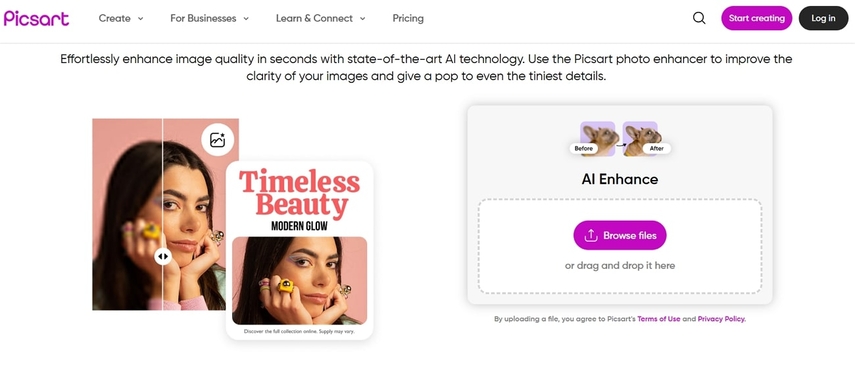
This online image quality enhancer provides users with a click-solution for enhancing picture details. It facilitates individuals with momentary resolution increase of up to 2x to get crystal image quality. At the same time, you can get rid of blurriness and keep precious moments in high resolution.
Key Features
1. Before downloading, it allows users to preview their before and after enhanced versions.
2. While preserving the original quality, its sharpened image tool instantly makes photos clear.
3. The platform restores an old photo by fixing details or adding depth automatically.
Pros
- You can upscale image resolution by simply dropping the image to the tool.
- Its cleanup pictures tool benefits one to remove any unwanted distractions quickly.
Cons
- The platform does not facilitate users with an enhancement facility in the free trial.
- Despite its high price, you can only enhance or edit up to 50 images at once.
5. HitPaw FotorPea
For enhanced pixelated images, HitPaw FotorPea is a versatile solution that allows enhancing quality up to 8K in a click. Its enhancement capability sharpens edges, improves color accuracy, and restores lost details with minimal user input. In addition, the compressed image enhancement model specifically targets the quality loss caused by image compression. This model works by determining the compressed image data and retrieving color accuracy.

Consequently, it reduces artifacts and pixelation that often result from saving images in low-quality formats. The platform supports users with 9 best AI models to deliver fast and impressive results. After applying models, it allows one to preview before and after results to see what change the tool has made. Upon exporting, you can choose the location to save your enhanced image on the device.
Key Features1. Face Model: The face model assists users in retouching every detail on their face.
2. Colorize Model: You can use a colorized model to add vibrant colors to your black-and-white images.
3. Low Light Model: It provides a low-light model to lift underexposed or saturation-lacking effects.
Pros
- The scratch repair model is ideal for improving old photos with scratches.
- Its Color Calibration feature helps in brightening photos taken in low light.
Cons
- There are a lot of AI models for image enhancements and editing, which sometimes confuses users.
Part 3. How to Convert Low-Quality Photos to High-Quality Easily?
Walk through the tutorial to learn how to fix blurry and pixelated photos easily using HitPaw FotorPea:
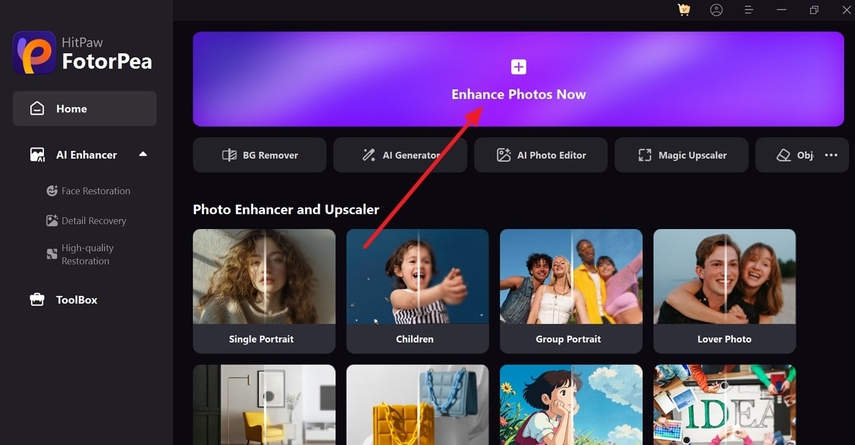
Step 1. Commence the Tool and Access Enhance Photos Now
Launch HitPaw FotorPea on your device and press the “Enhance Photos Now” button from the main interface.
Step 2. Import Your Image and Toggle the Model
After accessing, add your low-quality image by pressing the “+” button. Later, toggle the “Compressed Image Enhancement” model from the left panel and press the “Preview” button for analysis.
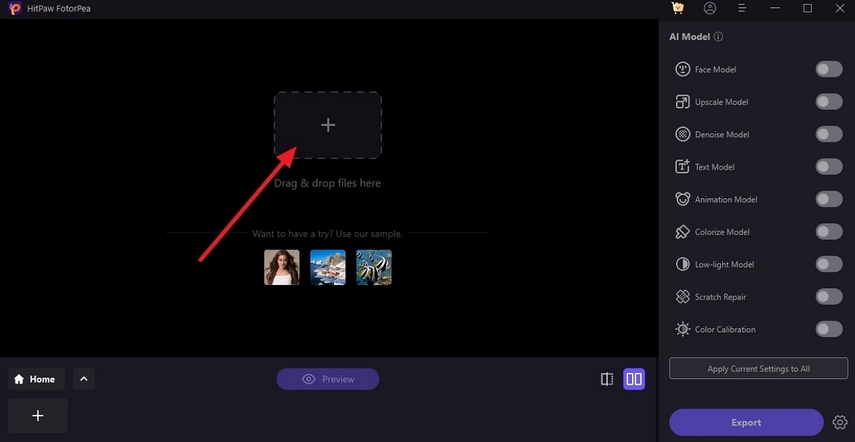
Step 3. Export the Enhanced Image to the Device
Navigate to the “Export” button at the bottom right corner to save your image by specifying the location.

Part 4. Make Low-Resolution Images Look Sharper and Clearer [Generic Steps]
Improving sharpness and clarity is another important point to consider when converting low-quality photos to high-quality, and here’s how you can do it:
1. Modifying Brightness and Contrast: By increasing brightness, you can reveal hidden details in dark areas, whereas adjusting contrasts enhances lightning.
2. Importance of Resizing: Ensure that the aspect ratio is always maintained when resizing to upscale the images while preserving details intelligently.
3. Vector Tracking for Graphic Enhancement: While converting low-resolution logos or graphics to a vector format, ensure that it remains sharp and clear at any size.
4. Eliminate Noise and Artifacts: Use a noise reduction tool to remove unwanted grainy textures and eliminate unwanted color specks for a cleaner look.
Conclusion
To wrap up, learning how to convert a low-quality photo to high-quality online is a practical step for achieving a professional look. With numerous tools discussed, enhancing social media content or preparing images for printing is much easier. However, for a more comprehensive solution, HitPaw FotorPea should be used, which provides a compressed image enhancement model for instantly improving compressed photos.


 HitPaw Edimakor
 HitPaw VikPea (Video Enhancer)
 HitPaw Univd (Video Converter)
Share this article:
Select the product rating:
Daniel Walker
Editor-in-Chief
My passion lies in bridging the gap between cutting-edge technology and everyday creativity. With years of hands-on experience, I create content that not only informs but inspires our audience to embrace digital tools confidently.
View all ArticlesLeave a Comment
Create your review for HitPaw articles