How to Upload High-Quality Photos on X/Twitter Without Compression
Sharing your pictures on X (formerly Twitter) should be simple, but there is one frustration, which is compression. You upload crisp and high quality visuals only to find out it looks blurry and washed out. Twitter’s automatic compression can ruin the details, which makes your images appear far from what you intended.
However, there is a way to outsmart the compression caused by this app’s algorithm. By using the right image formats, resolution, and upload settings, you can ensure your photos retain their original clarity. Hence, in this guide, you’ll get to learn how to upload high quality photos on Twitter without losing details so posts always look polished and professional.
Part 1. Understanding Twitter’s Image Compression
As mentioned above, X, like every other social media platform, uses different compression algorithms to reduce the size of pictures and videos. It has a few specific limitations for uploaded content, so when you are uploading a high-quality photo or video, its algorithms reduce resolution, reencode, and compress it. When there is a large-sized image, it gets downsized to minimum resolution, and file formats like JPEG or MP4 are preferred to save space.
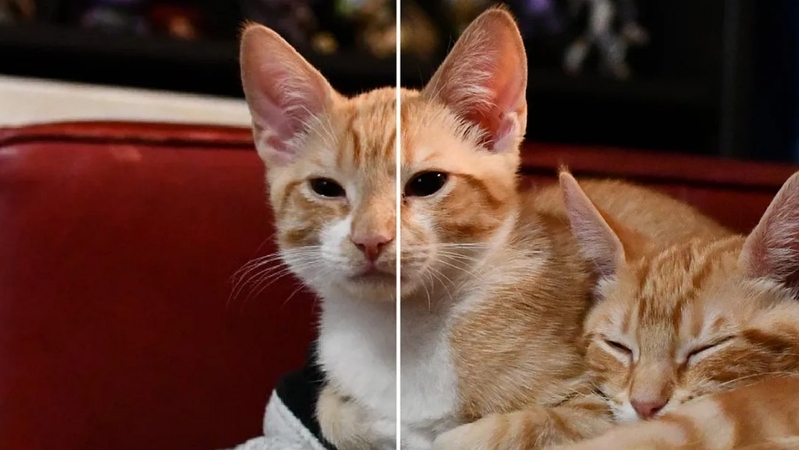
Usually, around 85% of EXIF data is deleted for privacy and security purposes. These specifications optimize content across different devices for a consistent experience while minimizing bandwidth usage as well. One of the main reasons for these Twitter photo compression settings is to maintain efficiency and performance, even for users with slower internet connections.
Part 2. Best Image Specifications for X/Twitter
Learning a few requirements for uploading can help you get the best Twitter image resolution and format for high-quality uploads. Following are a few optimization techniques that can help minimize reduction:
Recommended Photo Resolutions & Formats
When uploading a high-resolution image on X, make sure that it sit right on all following criteria’s for satisfactory results.
1. Timeline images: minimum 1600x900 or larger for better quality.
2. Profile pictures: 400×400.
3. Header images: 1500×500.
4. Best file formats: PNG, JPEG (if it is a high quality image).
Maximum File Size Limits
When you have met all the specifications that were recommended, it is always better to ensure the file size is suitable to upload as well.
1. Standard Image Uploads: Up to 5 MB per image case of mobile phones, on the other hand, up to 15 MB per image.
2. Profile Picture: 2 MB minimum.
3. Header Image: 5 MB Maximum.
Part 3. Tips & Tricks to Avoid X/Twitter’s Image Compression
If you want to learn how to upload HD photos on Twitter without compression, here are a few tips and tricks for you:
1. Twitter’s Maximum Resolution: Twitter compresses oversized images, which results in loss of quality. Thus, it is highly recommended that you should not exceed Twitter's maximum resolution.
2. Resize Images: Manually resize images to Twitter’s recommended sizes before uploading.
3. Use PNG Format: Although JPEG format is also supported by X, it is better to use PNG format to reduce compression loss.
4. Avoid Heavy Filters: If you over-process your pictures by applying heavy filters, X compresses it more, so using natural edits is more practical.
Part 4. Enhance Photo Quality Before Uploading on X/Twitter
To help you upload high-quality photos on Twitter, it is essential that you enhance photos before you post them. For your better understanding, we have listed the top 4 platforms below that can help you attain sharp and clear pictures:
1. HitPaw FotorPea
Uploading high-quality photos on Twitter can sometimes prove to be a difficult task, even after you have taken all the precautions from your end. If you are looking for an ultimate solution to avoid this kind of disappointment, try the best photo enhancer tool, HitPaw FotorPea. It is an advanced AI technology software that can transform your defective images with multiple AI Models.
Moreover, if you have a lot on your plate and very little time, it can enhance a whole batch of your images side by side with only a few clicks. As compressions can cause a lot of blurry patches and pixilation artifacts, HitPaw FotorPea’s AI models can help you sharpen those areas. It also offers a preview feature that lets you see the before and after results.
Key Features
1. Upscale Model: Enhancing the quality and resolution of your images to a maximum has become the easiest job with Upscale Model.
2. Export Format: You can choose a desired format for your photograph from its settings before exporting it.
3. Auto Select Models: This intelligent feature automatically selects a suitable model by detecting the details of your image.
A Guideline To Improve Image Quality Using HitPaw FotorPea
After learning about the amazing features that it uses to enhance images, follow the given steps to work with it:
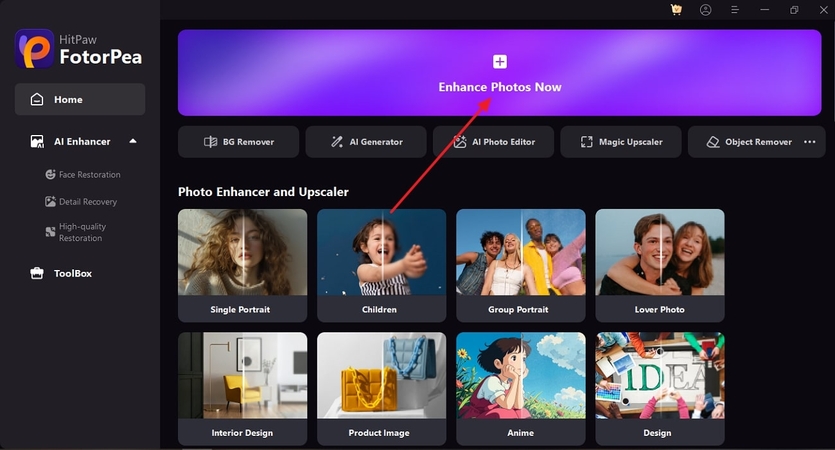
Step 1. Install FotorPea and Initiate EnhancementYou can launch the tool after downloading it and click the "Enhance Photos Now" button on the top.
Step 2. Import The Desired Photo and Choose the AI Model
Press the “+” icon above “Drag and Drop Files Here” to import your image. From the section of “AI Models” on the right side, toggle the “Compression Artifact” model and other options to adjust your image. After that, hit the “Preview” button to let the tool enhance the image for you.
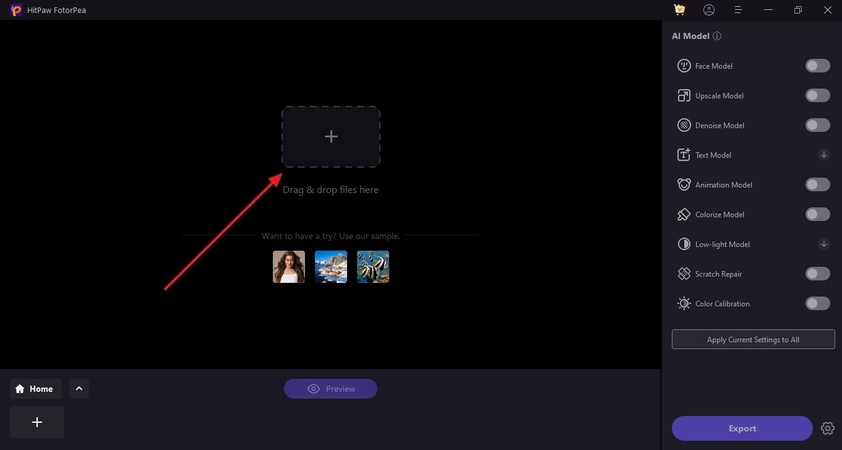
Step 3. Download Your Transformed High-Resolution Picture
When the after results are satisfying for you, you can simply click the “Export” present at the bottom-right corner of the screen.
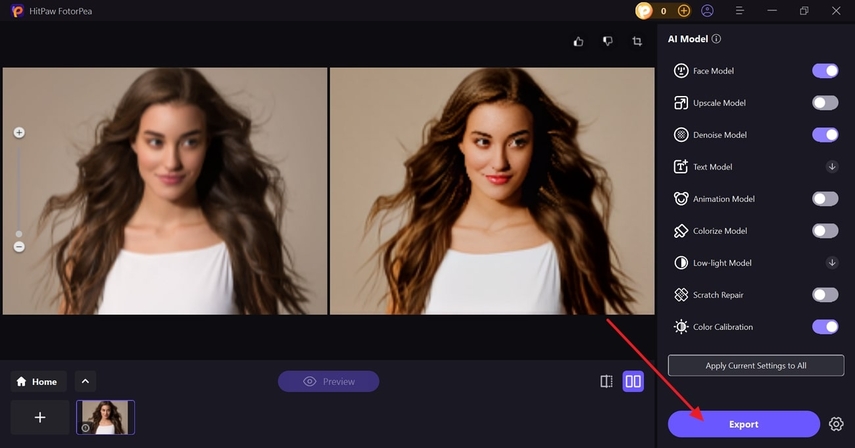
2. Topaz Photo AI
If you want to get high-quality images, this editor uses AI-powered technology and provides tools like Clarity, Sharpen, etc. You can adjust the lighting and balance the color of photos to make them look vibrant and appealing. To help you achieve the best results, we have provided a simple stepwise guide below:
Step 1. Open the tool and click the “Browse Images” button to import your target picture from your device.

Step 2. Go to the “Add Enhancement” button, and a pop-up menu will appear. There, choose the target “Denoise” and “Sharpen” tool to get high-quality images and press “Export Image” to download.
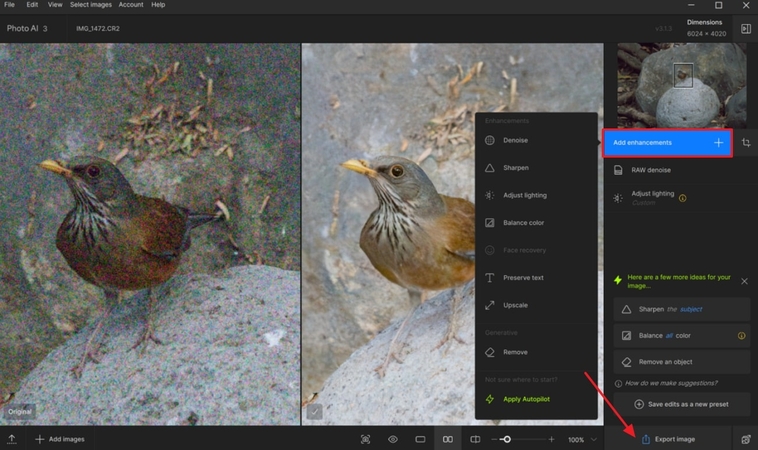
Key Features
1. The Recover Face tool lets you sharpen the facial features in the images.
2. To get a clean and polished look, use its Remove Object Feature, which detects unwanted things and extracts them.
3. If your images contain captions, use its Preserve Text tool, which is specifically made to sharpen text.
3. Fotor
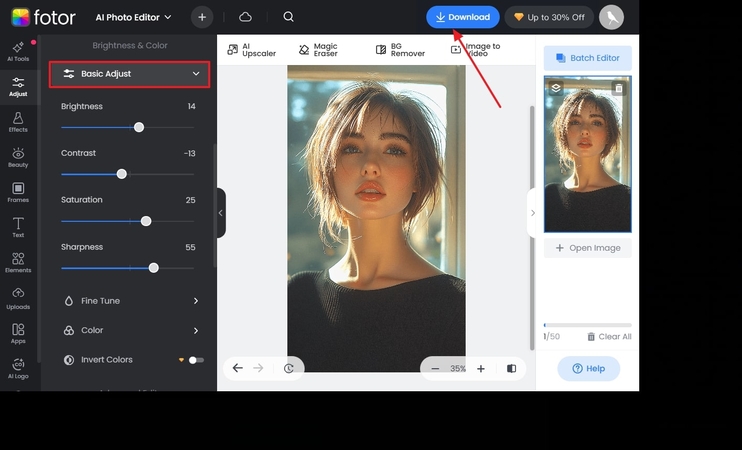
To increase Twitter photo upload quality, you can use Fotor, an advanced tool that allows you to make basic adjustments to your pictures, such as contrast. By using the fine-tune feature, you can change the exposure and shadows to give your images a defined and polished look.
Step 1. Open the tool and click the “Open Image” button from the main screen to upload the photo.
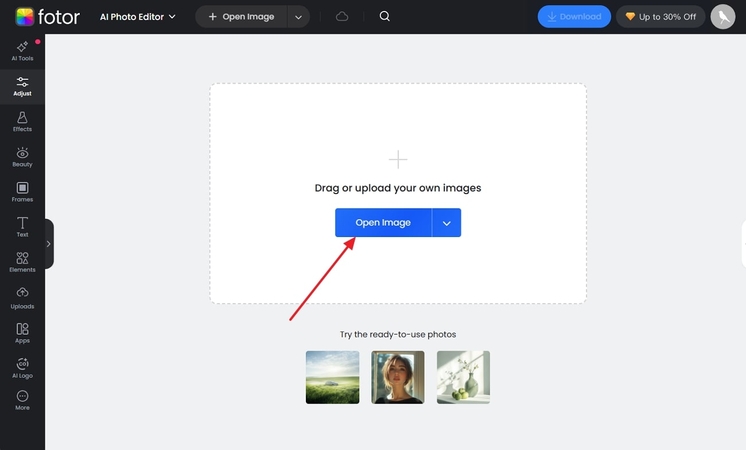
Step 2. From the “Basic Adjust” section, modify the contrast, brightness, and sharpness from its toolbar and then press the “Download” button.
Key Features
1. The Denoise tool lets you remove the Luminance and Color noise from the images.
2. Crop images in different shapes, such as hearts and circles, to make them look appealing.
3. Cut the background of the images using the BG Remover tool, which gives them a clean look.
4. Canva
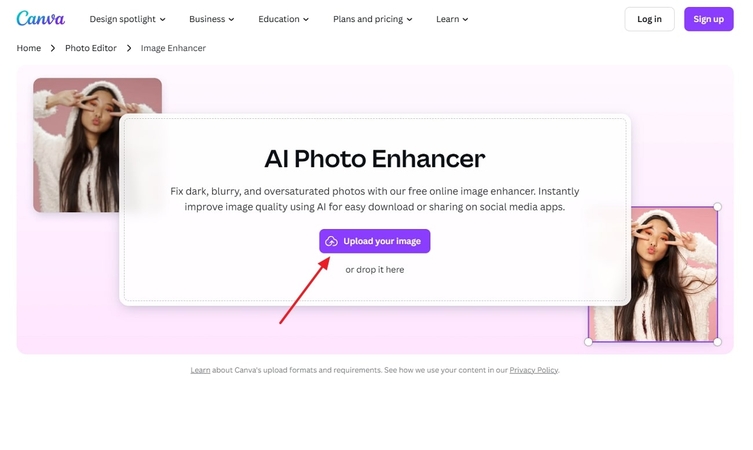
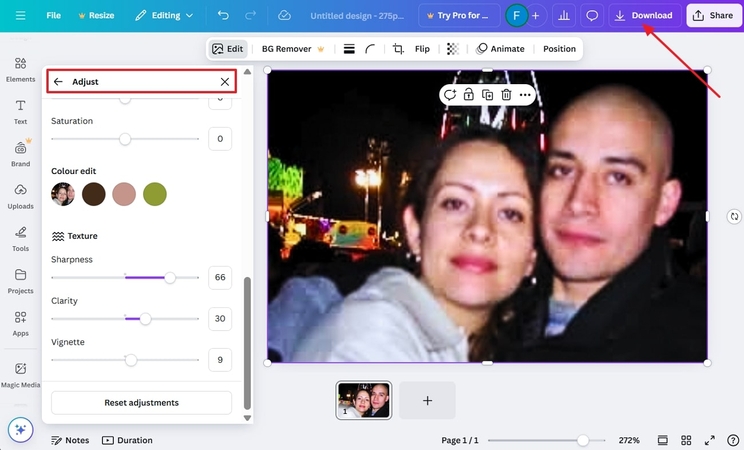
With this editor, you can modify pictures by changing their contrast, clarity, and sharpness. Unlike other tools that enhance the whole image, Canva allows you to highlight specific parts with the help of the brush tool, letting you adjust only the blurry part of your photos.
Step 1. Search the Canva’s AI Enhancer tool and press the “Upload Your Photos Now” button from the main interface to import the picture.
Step 2. From the next screen, change the saturation, sharpness, and clarity of the image under its “Adjustment” section and hit the “Download” button to save it.
Key Features
1. The auto-adjust button lets you instantly enhance your images with just one click.
2. To add vibrance and saturation to your compressed pictures, you can use its Color tool.
3. A wide range of filters, such as Fresco and Belvedere, allows you to give unique looks to your photos.
Conclusion
Only the right approach to avoid excessive compression can help you maintain image quality on X. By following the specifications and tips given in this article, you can ensure your photos stay crisp and clear. If that doesn't help you, tools like HitPaw FotorPea will help upscale and sharpen images with ease. So, download HitPaw FotorPea now and upload high-quality photos on Twitter.


 HitPaw Edimakor
 HitPaw VikPea (Video Enhancer)
 HitPaw Univd (Video Converter)
Share this article:
Select the product rating:
Daniel Walker
Editor-in-Chief
My passion lies in bridging the gap between cutting-edge technology and everyday creativity. With years of hands-on experience, I create content that not only informs but inspires our audience to embrace digital tools confidently.
View all ArticlesLeave a Comment
Create your review for HitPaw articles