How to Post an Audio File on Facebook
Sharing audio files on Facebook isn't as straightforward as uploading a video or an image. Since Facebook doesn't support direct audio file uploads, users need alternative methods to share their favorite songs, podcasts, or voice recordings.
In this guide, we'll walk you through different ways to upload audio to Facebook, including using third-party platforms, converting audio into video, and leveraging Facebook's built-in tools.
Method 1. Convert Audio to Video and Share It to Facebook
While Facebook doesn't support direct audio uploads, you can easily post audio on Facebook by converting your voice recordings into video format. This way, you can add a background image or simple animation, making your post visually engaging. Below are some methods to turn your audio into video.
HitPaw Univd is a great tool to convert audio to video quickly and easily. It supports batch conversion, meaning you can convert multiple audio files at once. This feature is perfect if you have several recordings you wish to share on Facebook.
HitPaw Univd - All-in-one Video Solutions for Win & Mac
Secure Verified. 254,145 people have downloaded it.
- Supports 1000 formats video and audio formats conversion.
- Converts audio to video or video to audio easily.
- Batch conversion for multiple audio files.
- Customizable file metadata including cover image, title, artist, etc.
- More features: video editor, image converter, video compressor, AI tools, etc.
Secure Verified. 254,145 people have downloaded it.
Step-by-Step Guide to Convert Audio to Video
If you want to share your audio recordings on Facebook, the first step is to convert them into a video format. Here's a simple tutorial to help you get started:
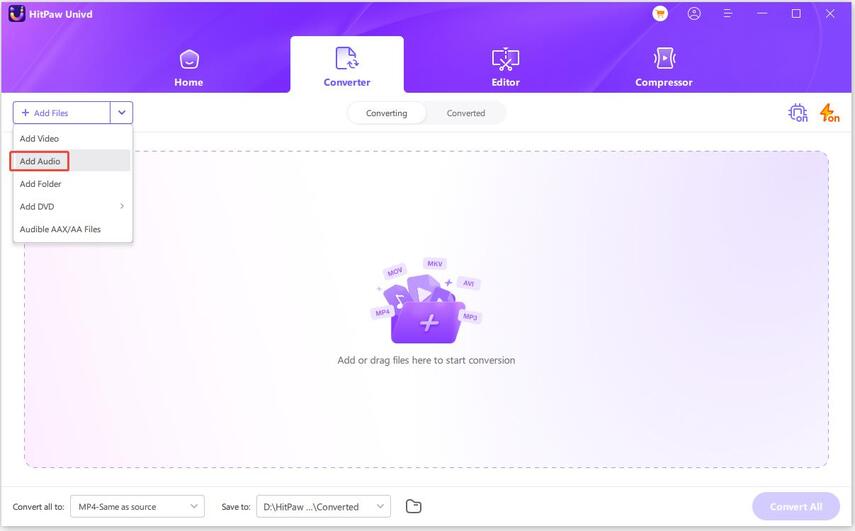
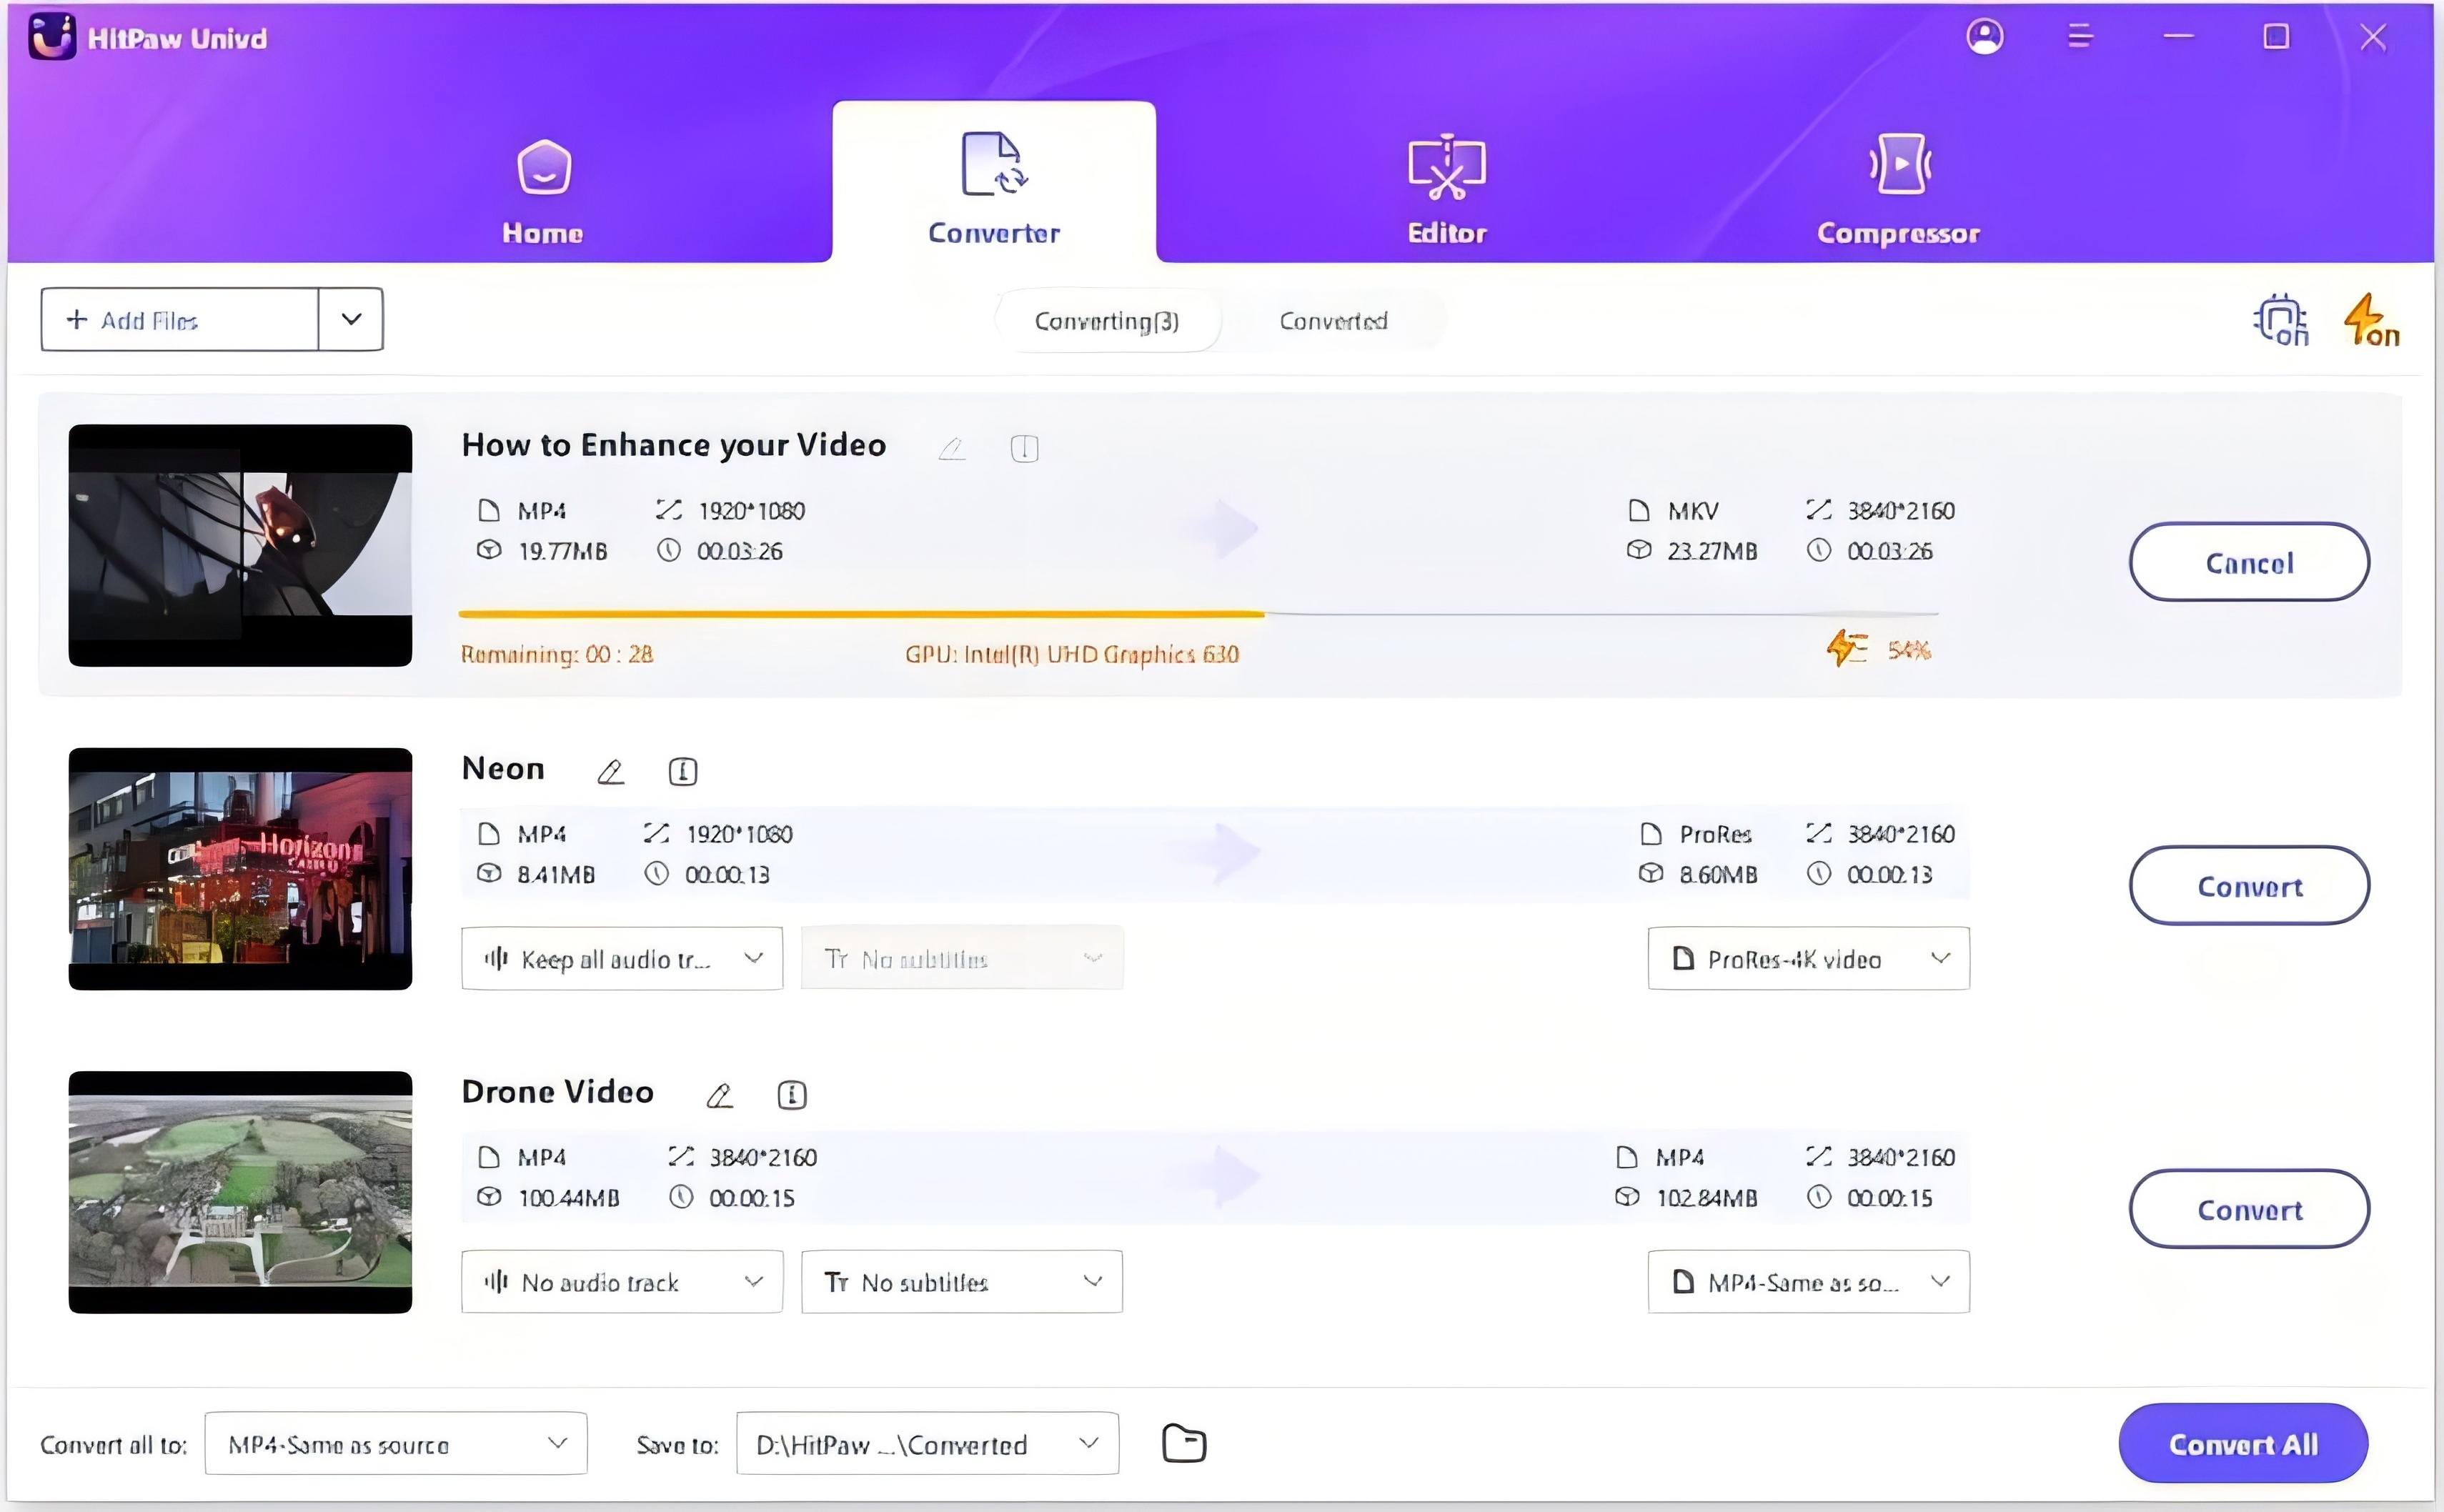
Step 1:Open the software and click on "Add Audio" in the upper left corner of the main interface. Alternatively, you can drag and drop your audio file directly onto the conversion board.

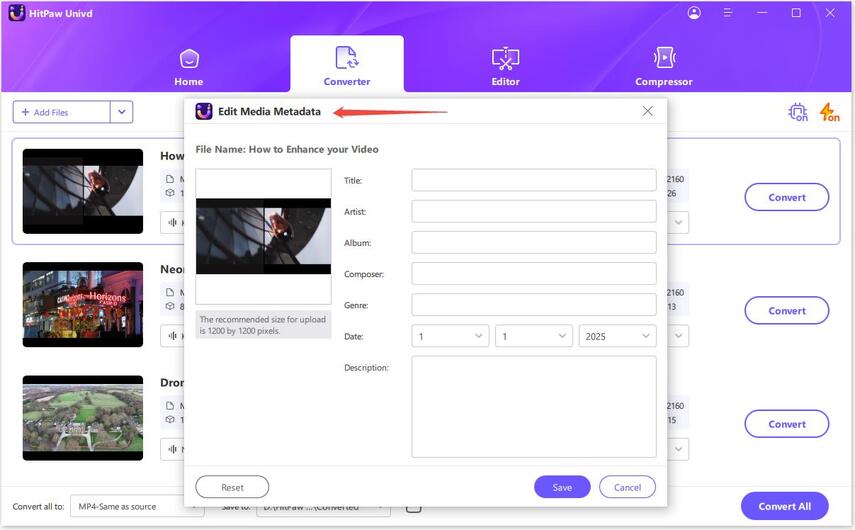
Step 2:After the audio files are imported, you can click the Edit icon in the file to enter the metadata editor panel. Here you can add file info.

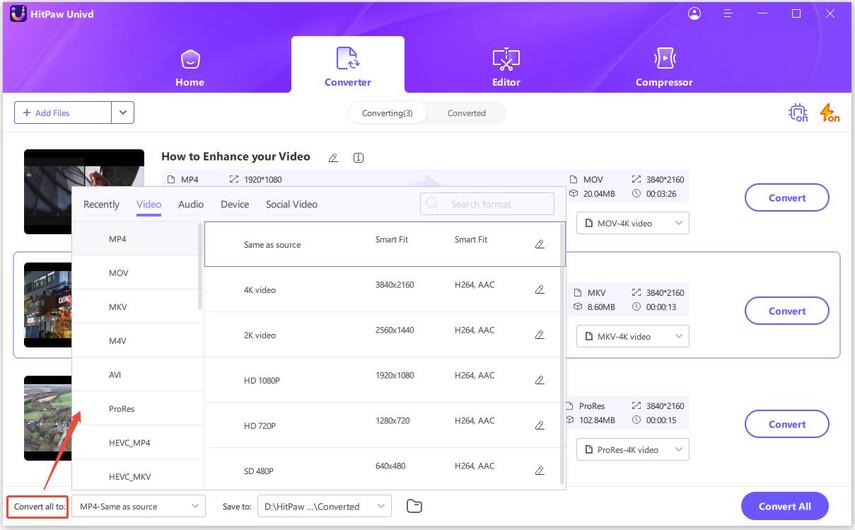
Step 3:To choose an output format, click the inverted triangle on the lower right side of each file. If you're converting multiple files, click "Convert all to" in the lower left corner to set a unified output format. Switch to the "Video" tab in the output format list and select an audio format such as MP4.

Step 4:Once you're satisfied with your selections, click "Convert" or "Convert All" to start the process. The software will convert your audio files with lossless quality, ensuring no drop in sound clarity.

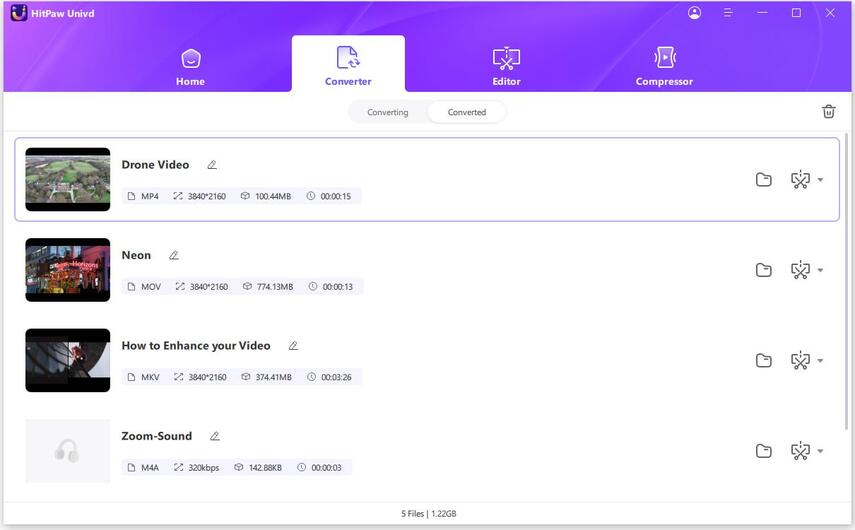
Step 5:After the conversion is complete, head to the "Converted" tab at the top of the interface. Here, you'll find your converted files. Upload them to Facebook now.

Method 2. Upload Voice Recording to Facebook Using File Sharing Services
Another way to share your audio on Facebook is by using a file-sharing service that generates a shareable link, such as Google Drive, Dropbox, or SoundCloud. Although this method doesn't include visuals like a video, it is a fast and free way to share your audio.
By uploading your audio file (e.g., .mp3, .wav, .m4a) to a cloud storage service, you can easily generate a link and share it on Facebook. Here's a step-by-step guide for sharing voice recordings via Google Drive:
Step 1:First, open Google Drive on your device.
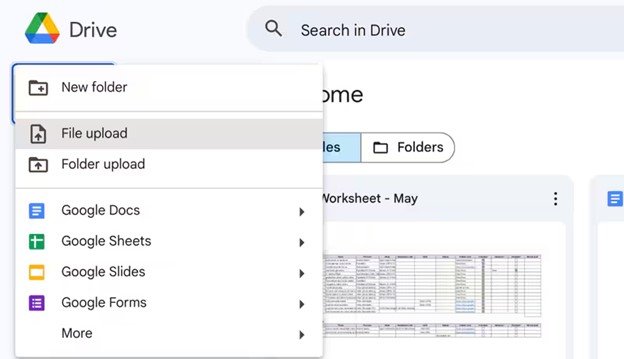
Step 2:Click on New and select File Upload. Find and choose the audio file you wish to upload.

Step 3:Once the upload is complete, double-click on the uploaded file to open it.
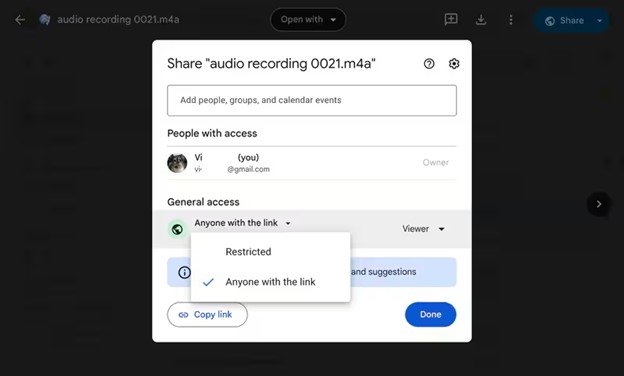
Step 4:In the top-right corner, click on Share, then change the General Access from "Restricted" to "Anyone with the link." Afterwards, click Copy Link to copy the shareable link.

Step 5:Now, go to Facebook and create a new post. Paste the link you copied and share your audio with your audience.
This method is simple and allows for quick sharing of audio content on Facebook without needing to convert it into a video.
Can I Download Voice Recordings from Facebook Messenger?
When it comes to Facebook Messenger, you might want to download a voice message that someone sent you. While Messenger does not provide a direct "download" option, it's still possible to save the audio. This can be useful if you want to keep a recording for future reference or save important information shared through voice messages.
However, the process of downloading is not as straightforward as simply clicking a download button. If you've received an important voice message and want to save it, here's how you can do it.
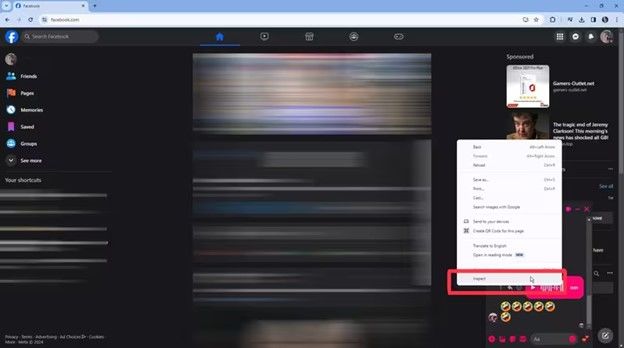
Step 1:Go to Facebook Messenger and find the voice recording.
Step 2:Right-click the voice message and select "Inspect."

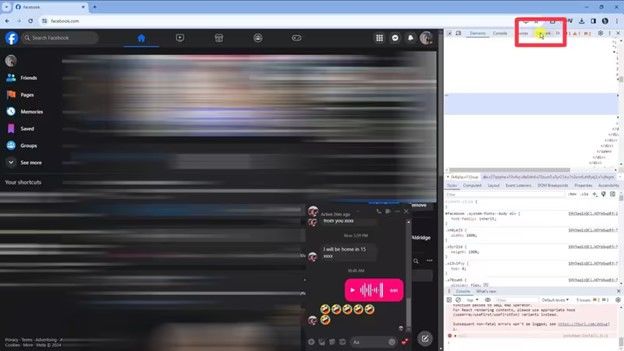
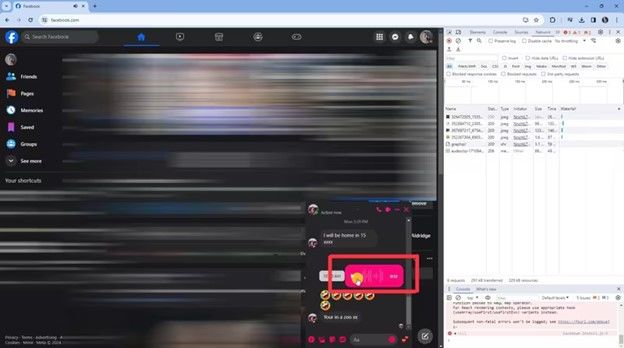
Step 3:In the Developer Tools window, click the "Network" tab and play the audio.

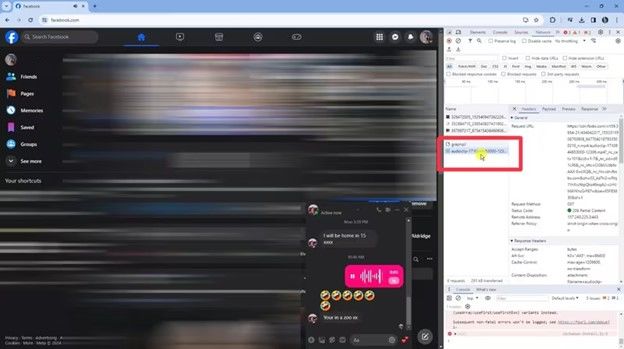
Step 4:In Facebook Messenger, click on the audio message. A new entry with a ".mp4" or ".ogg" file extension will show up in the Network tab.

Step 5:To download the audio, double-click on the new entry, and the file will be saved to your computer.

Conclusion
Sharing voice recordings on Facebook doesn't have to be complicated. Whether you convert your audio into a video or use file-sharing services, there's a method that works for everyone. Now that you know how to post an audio clip on Facebook, you can start sharing your recordings with ease. These tips are perfect for content creators, podcasters, or anyone who wants to share their voice with the world. So, go ahead and post your voice recordings on Facebook today!



 HitPaw VoicePea
  HitPaw VikPea (Video Enhancer)
 HitPaw FotorPea


Share this article:
Select the product rating:
Daniel Walker
Editor-in-Chief
My passion lies in bridging the gap between cutting-edge technology and everyday creativity. With years of hands-on experience, I create content that not only informs but inspires our audience to embrace digital tools confidently.
View all ArticlesLeave a Comment
Create your review for HitPaw articles