
Set Up the Perfect Photography Room: Top Tips and Ideas
A photography room is considered essential for a photographer if they need to capture high-quality visuals. For this, you need to have a separate space which will help you boost your workflow. If you know how to set up and design a photography area, it will ensure the right light and background to make shots smooth and appealing.
In this guide, we’ll uncover essential details regarding the photography room design and how to structure and set it up. From choosing the right place and creating an organized layout to setting up different photography styles, you’ll get to know everything in detail.

Part 1. Understanding the Photography Room
When starting your photography business, learning “What is a photography room?” is necessary before finding expert ways on how to set up a professional photography room at home. Basically, a photo studio is a place where photographers capture images. This dedicated room helps them control lighting, background, and other factors that can affect the picture. Unlike other places, this particular room reduces unwanted distractions, shadows, and reflections.
Mainly lighting plays a significant role in this setup, and for that, many photographers use soft box lights, LED panels, or ring lights. This equipment aids them in achieving perfect brightness and shadow control. Besides light, reflectors and diffusers are also used that help in softening or redirecting the light. Acoustic treatment, such as foam panels, reduces echo if you're also recording videos, enhancing the quality and creativity of work.
Part 2. Designing and Organizing Your Photography Room
Designing and organizing a photography studio setup is not easy, and it seems that it requires careful planning and attention to various details. However, some people don't have time for in-depth research, and for them, the below details can offer great assistance:
1. Pick the Ideal Layout for Photography Room: Start by picking the right room and plan your space to ensure easy movement during the photoshoot. While doing so, it is better if you keep enough space for your camera, lights, and backdrop setup to capture shots seamlessly.
2. Set Up Lights Properly: As a photographer, having good quality light is the key to a perfect shot. Use a mix of natural and artificial lights, such as softboxes or LED panels, to avoid shadows.
3. Choose the Right Backdrops for Photo Shoot: Since the backdrop sets the tone of your images, it is advised to use solid colors, printed backgrounds, and texture walls.
4. Organize Equipment and Accessories Ideally: No one loves to find tools while shooting and to save yourself from this situation, it's better to store cameras, lenses, tripods, and props in an organized manner.
5. Soundproof and Minimize Distractions From the Room: Now that you have arranged everything, add foam panels or curtains to avoid noises, whether you are recording videos or sharing the place.
Part 3. Setting Up a Photography Room for Various Photography Styles
Though you have an idea of how to set up a photo studio, these requirements might vary according to the photography style. While learning DIY photography room ideas, make sure you organize your place as per the mentioned setups:
1. Setup For Portrait Photography: If you are capturing headshots, opt for soft lighting like soft boxes or ring lights. Consider using a reflector and neutral or textured backdrops to create flattering shadows and balance light on the model’s face.
2. Product Photography Ideal Setup: For this type of setup, a lightbox or diffused lighting setup is the foremost option to get illumination with manila shadow. You can use a clean white or black background to highlight the product details and texture.
3. Setup Style For Fashion Photography: When it comes to capturing fashion shots, having enough room space is a must. Not just that, ensure you have various light sources such as ring light, key, fill, and rim that are adjustable.
4.Food Items Photography Setup: It is best if you use natural lights with reflectors or soft LED lights for food shots. Since the photoshoot is easy yet intricate details of food items are required, you can achieve this by using a simple background and arranging props ideally.
5.Setup For Creative or Cinematic Photography: This type of setup requires additional equipment like a fog machine, colored LED lights, and projects to get artistic effects. While using them, users can also experiment with various backgrounds and angles to achieve a dramatic shot.
Part 4. Enhancing Your Captured Shots in a Photography Room
After arranging photography room equipment, suppose you have captured images and they came out blurry and distorted. In such a situation, you can use an ideal tool, HitPaw FotorPea to upscale their quality up to 4K or 8K. This solution features an AI Photo Enhancer that comes with 9 AI models to offer you crisp and clear images without affecting their originality.
Using its upscale model, you can remove the blur effect and apply denoise models within the pictures. The best thing is that this tool features batch processing, allowing you to import images in bulk for enhancement. While saving you the manual hassle, preview the upscaled images to determine the changes. If the image has text, its Text Model can boost the appeal of blurry and unclear writing.
Key Features
1. Extensive Compatibility: Featuring a simple interface, users can access this tool on Windows 11/10/8/7 64-bit and on MacBook to enhance images.
2. Restore Old Images: Besides upscaling, this tool also allows you to restore old images without losing any details.
3. Restore Face Details: With the Face Model, you can remove wrinkles and blemishes from the face to get focused and enhanced images.
A Comprehensive Guide On How To Restore Captured Shots With HitPaw FotorPea
If poor photography room lighting setup or any other factors have made your image blurry, here is how you can upscale it with HitPaw FotorPea:


Step 1. Install HitPaw FotorPea and Choose Image Enhancer
To begin with, access the tool on your device, and from the main interface, hit the “Enhance Photos Now” button.
Step 2. Add the Image from File Explorer
After that, import the picture on the tool by pressing the “+” icon or simply drag and drop it from File Explorer.
Step 3. Toggle the Model and Choose Preview Option
Once the image is uploaded, toggle the “Upscale Model” and another one from the list. After doing that, click the “Preview” button to commence the image enhancement process.
Step 4. Preview the Image and Save Results
See the before and after of the picture, and if you are satisfied with the results, tap the “Export” button and fetch the image to the device.
Part 5. Budget-Friendly Tips for Creating a Photography Room
When beginners set up their photography rooms and explore how to choose the right backdrop for a photography studio, this is where they rethink their decisions. To save your budget, we have mentioned some cost-effective tips to organize a photo studio.
1. Consider DIY Backdrops: If you are tight on budget, you can use bedsheets, curtains, or painted walls as backdrops instead of seeking expensive ones. Make sure sheets are clean, and it is advised to utilize white ones to get clear and vibrant shots.
2. Choose Second-Hand Equipment: Use second-hand and used cameras, lightning gears, and tripods to save money while still getting quality images. This will save you a lot of money that you can invest to build a small-scale setup.
3. Utilize Natural Light: Before the photoshoot, choose a place near windows to take leverage of natural lighting rather than buying artificial ones. Other than that, you can start with outdoor shoots to make the most of free light.
4. Organize with Affordable Storage: Instead of purchasing large and durable storage boxes, shelves and plastic bins can be a cost-effective option. At first, you don’t have a lot of equipment, so simple storage solutions will work just fine.
5. Start Small and Upgrade Later: Don’t buy all gear at once and purchase the basic tools that can be used for the time being. Later, when you earn revenue through your photos, you can easily invest in the latest equipment.
Conclusion
Summing up, setting up a photography room is the dream of many amateur photographers. However, they don’t know how to organize and set it up, which is why this guide has offered them comprehensive assistance. While having photography equipment, we recommend using HitPaw FotorPea to upscale the quality of your blurry images in real-time.

 HitPaw Edimakor
 HitPaw VikPea (Video Enhancer)
 HitPaw Univd (Video Converter)
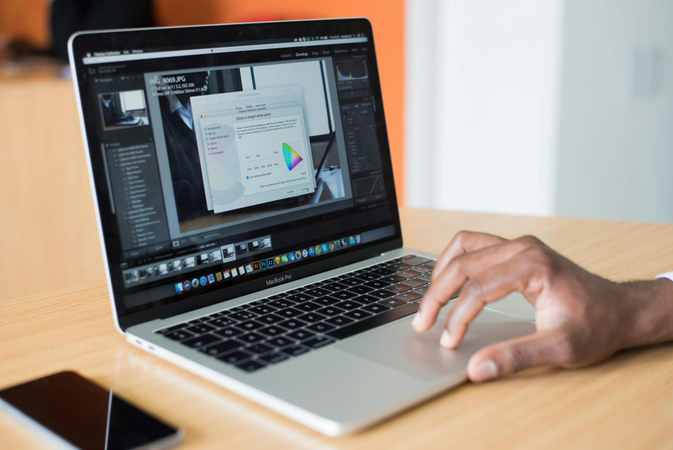


Share this article:
Select the product rating:
Daniel Walker
Editor-in-Chief
My passion lies in bridging the gap between cutting-edge technology and everyday creativity. With years of hands-on experience, I create content that not only informs but inspires our audience to embrace digital tools confidently.
View all ArticlesLeave a Comment
Create your review for HitPaw articles