DIY Digital Photo Frame: How to Build Your Own Custom Digital Frame for Photos
A DIY digital photo frame stands out as a creative project that lets you showcase your cherished memories in a personalized yet advanced way. Unlike traditional photo frames, a digital version adds exciting features like slideshows, remote photo updates, and even video displays. This feature allows you to enjoy a variety of memories without having to swap out physical prints in a traditional photo frame.
To aid your creativity, this article serves as a comprehensive guide to build your own digital photo frame. We'll walk you through the essential materials, tools, and software required to make your vision a reality.
Part 1. Why Choose a DIY Digital Photo Frame?
Starting our discussion, the following reasons will explain why you need to choose a photo frame that operates digitally:
1. Cost-Effective Customization: Building your digital frame can be more budget-friendly than purchasing a costly one. Additionally, it allows you to customize features and designs to fit your unique needs.
2. Learning Opportunity: A DIY digital photo frame project offers a chance to explore your skills in technology. It is an educational experience to bring your ideas to life while learning something new.
3. Personalized Features: You can integrate a voice command or motion sensors to your digital frames. Adapting this level of personalization ensures your frame fits perfectly into your lifestyle.
4. Sustainable and Upgradeable: By repurposing old tablets or other devices, you reduce waste. Additionally, you can easily upgrade your frame over time to keep it updated.
Part 2. Materials and Tools Needed for a DIY Digital Photo Frame
After exploring the advantages of choosing a digital frame kit, let’s learn the process of building one with the following essentials:
1. Display Screen
A small LCD or an old tablet can be used as a display screen for the frame. You need to ensure that you choose a screen that has high resolution for a better experience. Moreover, tablets that have Wi-Fi can be an ideal choice to get a remote update on your photo collection.

2. Frame Materials
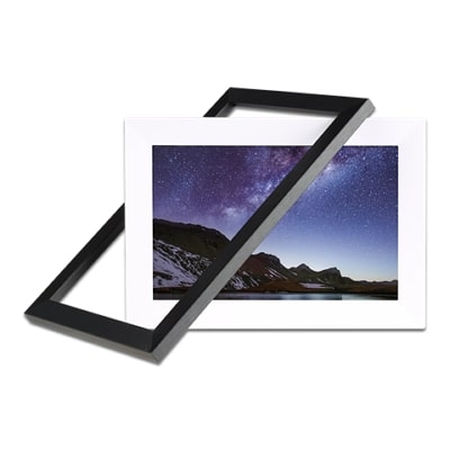
Users who want to create digital frames should choose materials like wood or plastic based on the surrounding environment. You must ensure the materials are lightweight but strong enough to protect the display. They can also add custom elements to the DIY digital photo frame to further match their aesthetics.
3. Raspberry Pi or Similar Device
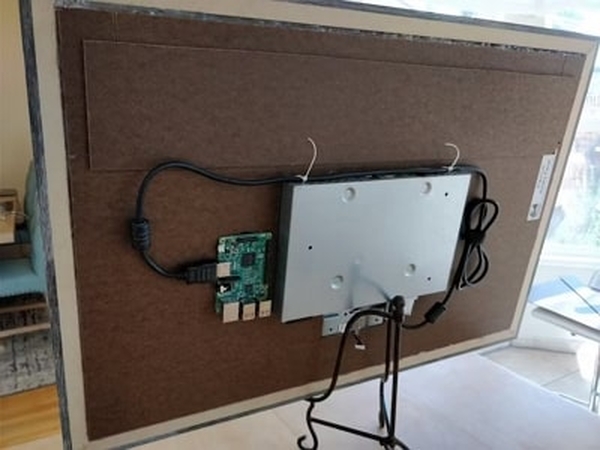
A Raspberry Pi is a compact computer perfect for powering your DIY digital photo frame. It can run slideshow software and connect to the internet for advanced features. The ones new to Raspberry Pi can go for the beginner kit that includes helpful accessories and pre-installed software. You can also go for Orange Pi 5 for faster speed and more features.
4. Power Supply
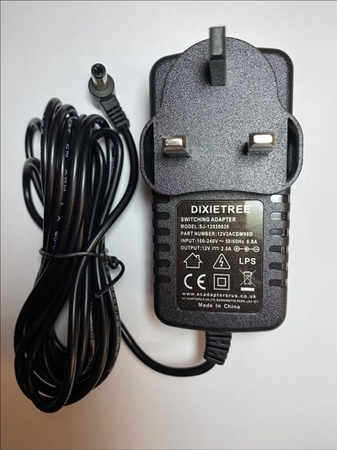
A stable power source is essential to keep your digital photo frame running. While a standard power adapter is sufficient, power banks add portability for frames displayed in various locations. Furthermore, you must ensure that the power supply and the device are compatible with each other. One of the DIY digital picture frame materials you can consider is cable management solutions to keep the design neat and clutter-free.
5. Software and Apps
The software controls the slideshow functionality of your digital photo frame. Many apps support features like scheduling, transitions, and remote updates to add convenience. Choose software that matches your technical expertise to avoid unnecessary complexity.
6. Miscellaneous
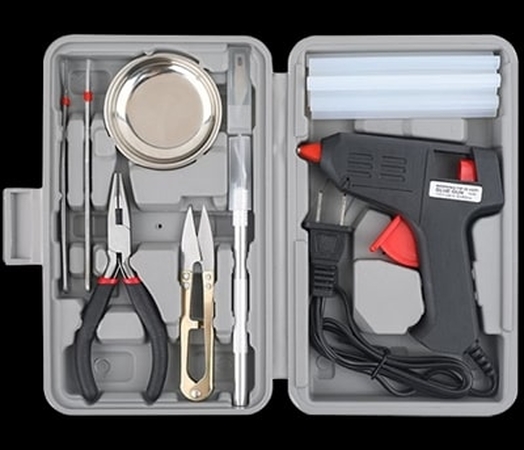
Basic and affordable DIY digital photo frame materials like a screwdriver and adhesives are necessary for assembly. Use Velcro or brackets to secure components inside the frame without permanent fixes. A ruler or tape measure helps ensure precise alignment for a professional finish.
Part 3. Guide to Building Your Own DIY Digital Photo Frame
After choosing the materials, let’s look into the steps you need to take. Following the given steps, you will be able to learn how to build your own DIY digital photo frame from scratch.
1. Pick Your Display Screen: Start by going through the options for a display screen and prepare it for use as your screen. You need to ensure that it is compatible with the software that you’re planning to use.
2. Build a Frame: Next, you need to build a frame out of your preferred material based on the size of the screen. You need to ensure that the frame has a back panel for the display and Raspberry Pi device to be installed.
3. Connect the Device: Moving on, you need to connect the Raspberry Pi or alternative device you picked to the screen. Then, install the necessary software for the photo slide show.
4. Customize the Slideshow: As you assemble the base of the digital frame kit, you must create a slideshow of the pictures you want to play on the screen. You can customize it based on your preferences for the transitions, time interval between each photo, and much more.
5. Add Slideshow to the Software: Insert the custom photo slideshow you have just created into the software. This will allow you to play the presentation on the screen.
Part 4. Creative Ideas for Your DIY Digital Photo Frame
Apart from creating the smart multimedia frame for the slideshow pictures, you can then customize it to suit your needs. Here are some creative ideas to inspire you and make your project even more unique:
1. Family Slideshow: Turn your frame into a dynamic gallery of cherished family moments. You can update it remotely with new photos as they’re taken to keep the display fresh and heartwarming.
2. Themed Frames: The slideshows you designed can focus on specific themes, such as vacations or birthdays. This adds a personal and meaningful touch to your digital display for a perfect run down memory lane.
3. Multi-Purpose Frames: Beyond the images, you can use the frame to showcase motivational quotes or nature videos. You can also display art or designs to turn your frames into a versatile decorative piece.
4. Special Events: Bring your DIY digital photo frame to life at weddings, birthdays, or graduation parties by showcasing live images and videos. This creates an interactive and memorable experience for your guests.
Part 5. How to Enhance Images You Want to Use in Your DIY Digital Photo Frame
Enhancing your images is important to ensure they look stunning on your DIY digital photo frame. With HitPaw FotorPea, you can improve the overall images in a single click with the help of various AI models. FotorPea helps you create visually striking images that will shine on your digital display with its Magic Upscaler tool.
Moreover, if you are using old images, you can use the Scratch Repair model to fix up old scratched-up pictures for the digital display. You can also utilize its Colorize Model to add more shades and colors to your black-and-white photographs. Once you understand the DIY digital photo frame project, let us look into the steps below to figure out how to enhance the pictures through HitPaw FotorPea:
Step 1. Install HitPaw FotorPea and Add Images to Enhance Them
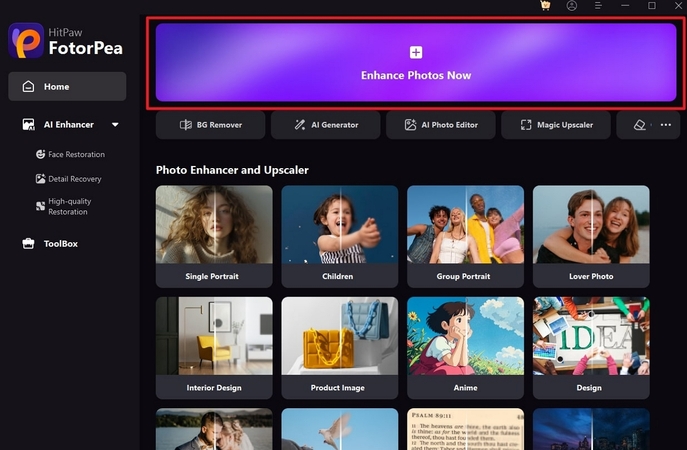
Upon installing the software, click on the “Enhance Photos Now” button on the main interface. Moving forward, import your images you want to display on the frame.
Step 2. Apply AI Model to the Image
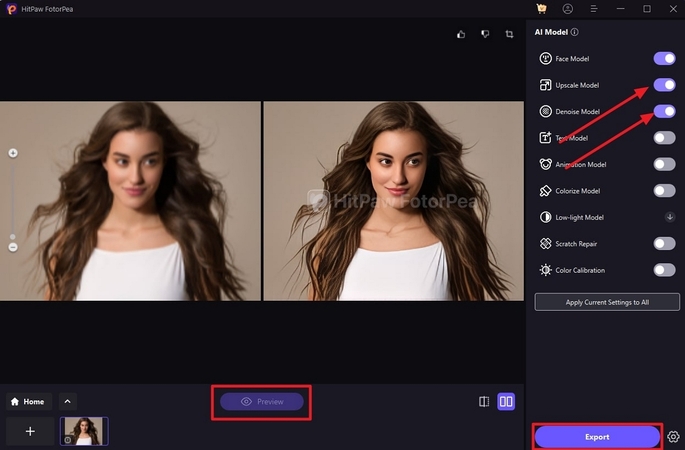
Once your images are on the interface, turn on the toggle button for “Face Model.” Then adjust its extended properties to get further enhancement of pictures.

Step 3. Apply Different AI Models to Preview and Export Results
Next, you can continue applying different AI enhancement models to the picture and preview the results. Once FotorPea is done applying the required enhancement, hit the "Export" button to save the results to your desktop.
Conclusion
In conclusion, creating a DIY digital photo frame allows you to showcase your memories in a unique way. You can craft a personalized display that fits your style by carefully selecting materials, tools, and software. Most importantly, we recommend you enhance your images with editing tools like HitPaw FotorPea to make them shine in a digital frame.


 HitPaw Edimakor
 HitPaw VikPea (Video Enhancer)
 HitPaw Univd (Video Converter)


Share this article:
Select the product rating:
Daniel Walker
Editor-in-Chief
My passion lies in bridging the gap between cutting-edge technology and everyday creativity. With years of hands-on experience, I create content that not only informs but inspires our audience to embrace digital tools confidently.
View all ArticlesLeave a Comment
Create your review for HitPaw articles