Master Video Editing with iMovie: Easy Steps for Beginners
Todays for any content creator, marketer, or anyone who would like to narrate a story through pictures is video editing. Video editing software iMovie for windows is standout, since one of the best features available-it's easy to use and just great for those new to movie-making and also perfect for enthusiasts. It runs from simple cuts such as trimming and adding transitions to more complex ones like color correction and audio tweaks. The rest of this article will guide you how to use iMovie to edit videos, explaining its functions, and giving you a better alternative.
Part 1: Introduction to iMovie
iMovie is specifically video editing developed by Apple for Mac, iOS and windows. With different effects and easy addition of video content, it's excellent for beginners, making their experience with video-making with editing techniques an absolute delight. Be it about creating family memories or a highly professional-grade presentation, iMovie is quite versatile to let ease be in edit.

Part 2: Basic Video Editing Techniques in iMovie
Learn how to use iMovie to edit videos by trimming clips, using transitions, title insertion, audio level adjustments, all of which may be done quite easily to have polished and engaging videos. Discover how do you edit videos on iMovie:
Trimming and Cutting Clips
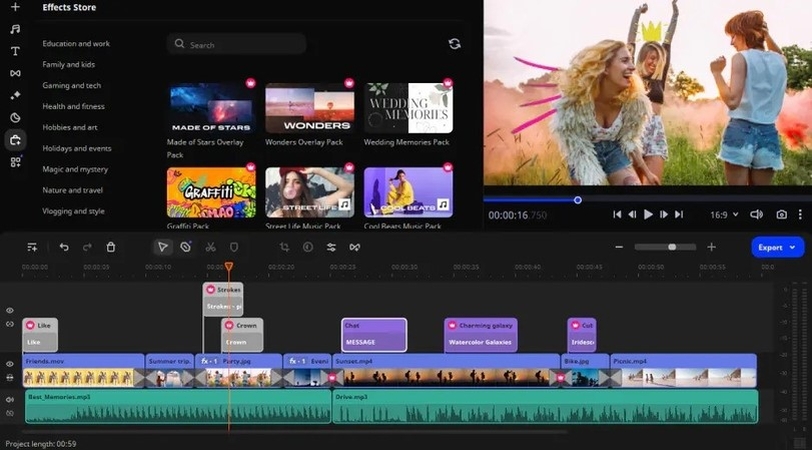
Trimming and cutting is one of the most basic editing techniques if you want to solve that how to edit vertical video in iMovie. It involves refining your video content by omitting the pieces that do not add any relevance. Start by opening iMovie, importing your video, and drag it into your timeline. Select the clip you want to edit, trim the ends by dragging the edges, or split the clip at any point using the playhead.
Adding transitions and effects
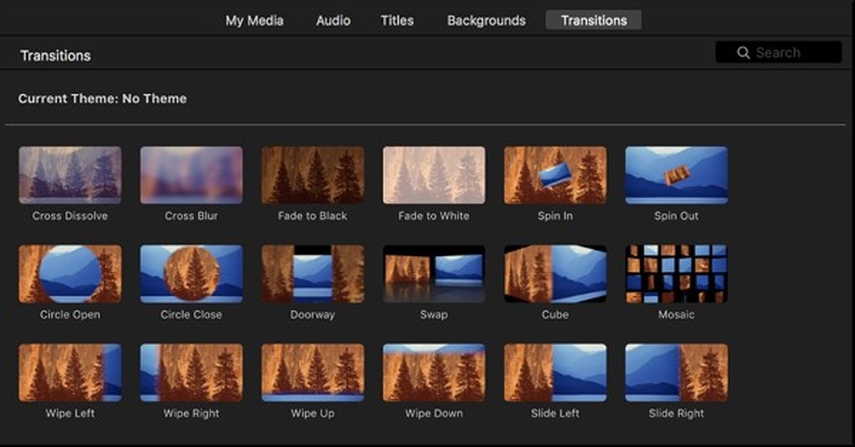
Transitions and effects make run-of-the-mill videos eye-catchingly visual creations. Use iMovie's Transition Library to add a transition of your choice between clips by dragging and adjusting its length to blend it perfectly. Add video effects to your chosen clip in the Video Effects menu by clicking your favorite effect, which will appear to modify its intensity for an effective effect, perfecting your mood, thereby perfecting your professional appearance.
Inserting titles and text
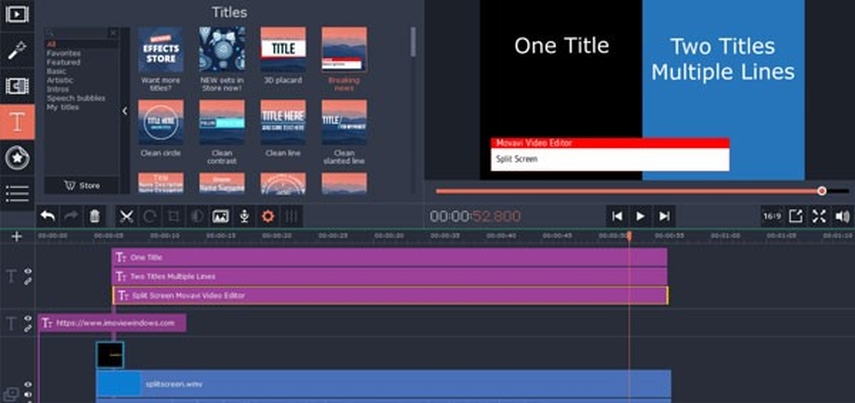
Titles and text bring clearness and a professional touch to your videos. In iMovie, open the Titles tab and drag your favorite title style into your timeline. Adjust the text, font, color, and size in the preview window to fit the theme of your video. Titles at the right spots guide your audience and make your project more professional.
Adjusting audio levels
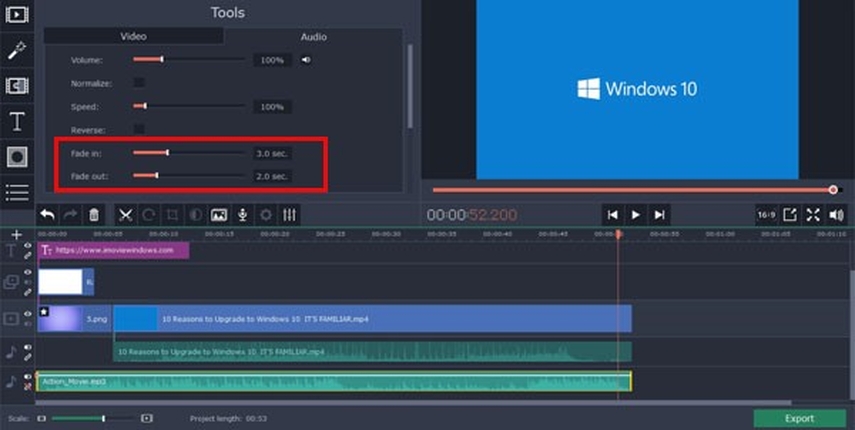
Balancing audio will automatically make the video professional and entertaining. To make the volume of an audio in iMovie, one will make selection and then drag the volume line to where they want the volume to be. Audio effects enhance the clarity of the sound. Well-balanced audio gives solid support to your visual and makes your presentation enjoyable for the audience to view.
Part 3: Advanced Editing Features in iMovie
Explore advanced features to answer for how to use iMovie to edit videos. Syncing background music, picture-in-picture, and color correction to take your videos to a whole new level. If you have a question that how do i edit videos on iMovie in premium quality than explore these feature.
Adding and syncing background music
Background music adds to the mood and emotional tone of your video. To do this, import a music file into your project. Drag the file to the timeline, below your video clips. Trim the audio to fit your video. To perfectly sync, use the Waveform Display feature to align the beats with your visuals.
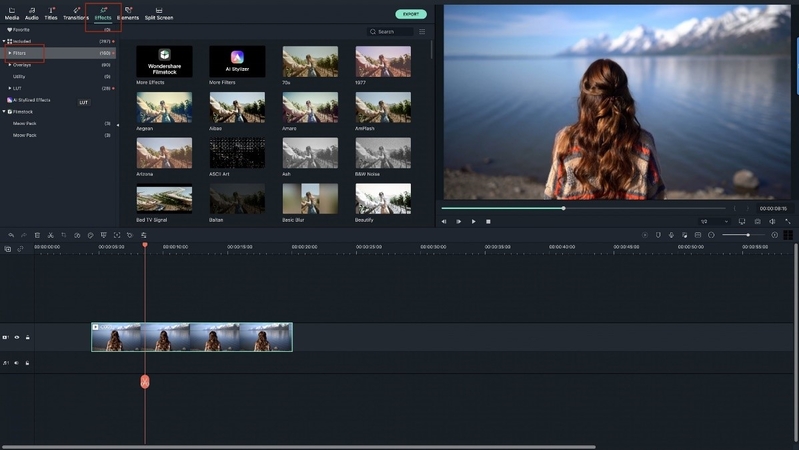
Using picture-in-picture effect
The Picture-in-Picture (PiP) effect is great for tutorials or commentary where one video can play inside another. Drag the secondary video clip above the main video on the timeline. Select this overlay clip and choose Picture-in-Picture from the overlay settings. Resize and reposition the inset clip for a polished and professional look.
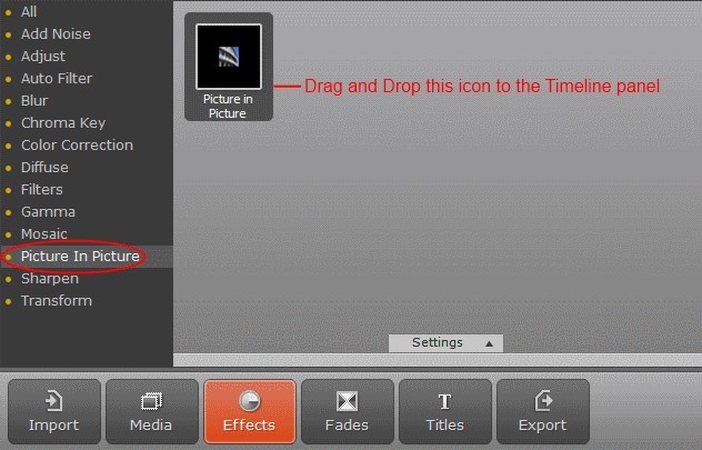
Color correction and enhancement
Color correction is the key to make the videos pretty striking. Identify the clip for improvement and unlock the Color Correction tool. Finally, use adjustment on the slider of brightness, contrast, saturation, and even temperature to finish off the output. If wanting a quick outcome, then making use of auto-enhance.

Best Alternative: Convert Videos with HitPaw Univd
Meet HitPaw Univd (HitPaw Video Converter) your one-stop solution for smooth and hassle-free video creation as comapare to iMovie. Whether you're a beginner or an expert, HitPaw stands out with its robust features, user-friendly interface, and high-quality output. While tools like iMovie have their strengths, they often fall short in compatibility and advanced capabilities. This is where HitPaw Video Editor Univd excels, offering unmatched functionality and creative freedom.
Key Features of HitPaw Univd:
- Support for Multiple Formats: Easily convert videos to and from over 1,000 formats, ensuring seamless compatibility with various devices and platforms.
- 4K and HDR Editing: Craft stunning visuals with professional-grade 4K and HDR support, making your videos truly shine.
- Batch Processing: Save valuable time by editing and converting multiple files simultaneously without compromising on quality.
- Advanced Editing Tools: Trim, crop, merge, and add effects with precision and ease, giving you creative control over your content.
- Ultra-Fast Conversion: Enjoy lightning-fast conversions that maintain exceptional quality for your videos.
- Intuitive Interface: With a straightforward and user-friendly design, HitPaw Video Editor simplifies editing for both newbies and pros alike.
How to use HitPaw Univd functions?
Step 1: Cutting VideosIn the Edit section, select the Cut feature and add your video.

Drag the playhead to the desired point and click the scissor icon to split the video. Repeat to create more clips. To merge the clips, check the “Merge into one file” option and click Confirm to export.
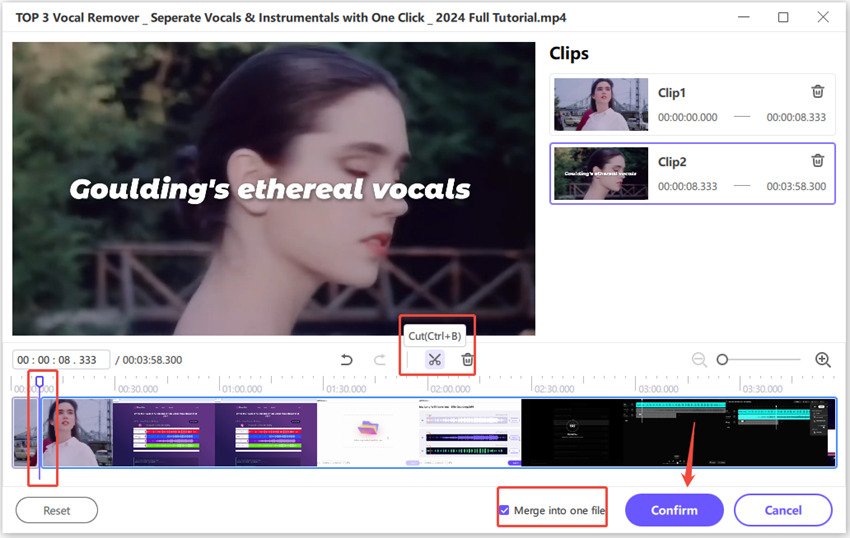
Preview your cut video, select an output format, and export as a single file or all files.

Step 2: Merging Videos
In the Edit section, add videos to merge, select an output format, and check the “Merge into one file” option. Click Export All to combine the videos into one.

Step 3: Cropping and Rotating Videos
In the Crop & Rotate section, rotate videos clockwise, counterclockwise, or upside down. To crop, drag the edges of the frame or select a preset ratio. After previewing, export the cropped video in your chosen format. For batch cropping, ensure all videos share the same resolution.
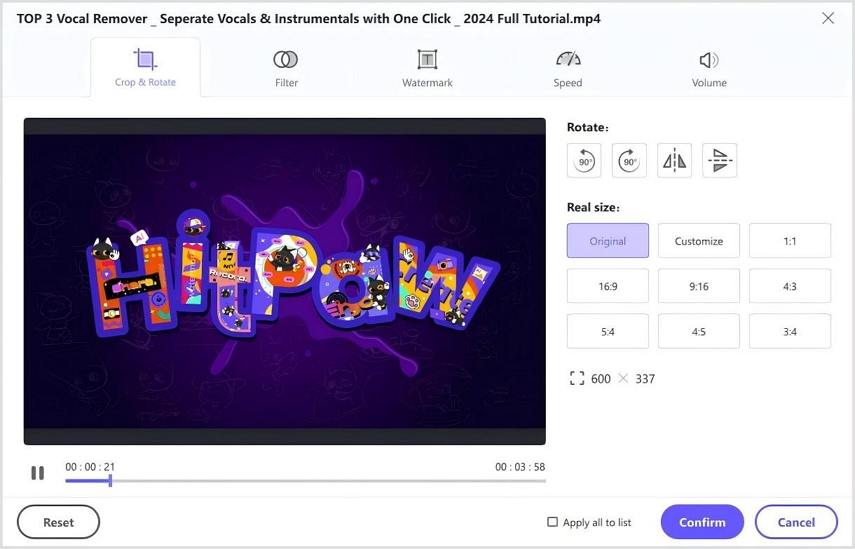
Step 4: Adding Filters
Apply preset filters like black and white, scenery, or landscape with a single click. Fine-tune brightness, contrast, saturation, and more. Use the “Apply all to list” option to apply settings across all imported videos.

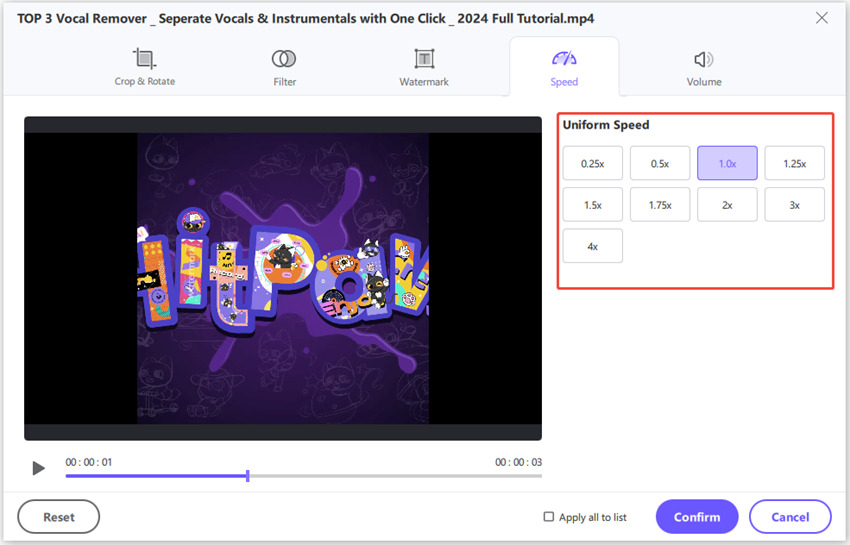
Step 5: Adjusting Video Speed
Easily change video speed from 0.25x to 4x in the speed settings. Preview the effect in real time and use “Apply all to list” to adjust all imported files simultaneously.
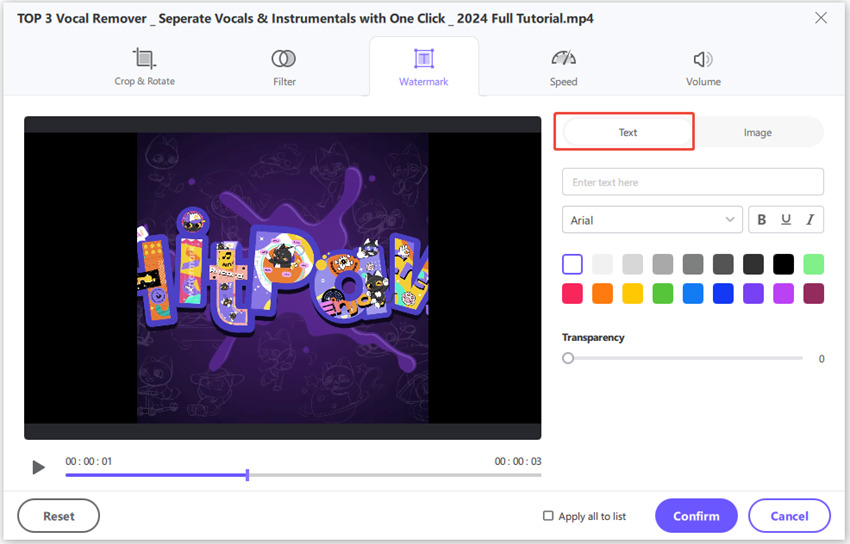
Step 6: Adding Watermarks
Add text or image watermarks to videos. Adjust text fonts, colors, sizes, and transparency, or drag them to the desired position. For image watermarks, upload and position them as needed. Ensure videos have the same resolution for consistent watermark application.
Step 7: Stabilizing Videos (Windows Only)
Stabilize shaky footage from devices like GoPro, drones, or smartphones. In the Edit tab, select Video Stabilization, import your video, and let the program automatically analyze and stabilize the footage at a 50% ratio.

FAQs About Using iMovie
Q1. Does iMovie support 4K video editing?
A1. Yes, you can even edit 4K videos with iMovie. Import, edit, and export the result of 4K-resolution videos to provide professional-quality results.
Q2. How do I add effects in iMovie?
A2.
Adding effect in the iMovie
Conclusion
This guide is all about your question on how to use iMovie to edit videos. iMovie video editing software for windows is actually a powerful and user-friendly video editor that works out great for both amateur folks and professionals. But HitPaw Univd gives you all the premium features, supports numerous formats, and can work on file processing in bulk with the least amount of effort. Whether you’re a hobbyist or a professional, these tools will elevate your video editing skills and bring your creative visions to life.


 HitPaw VikPea (Video Enhancer)
 HitPaw VoicePea
  HitPaw Univd (Video Converter)
Share this article:
Select the product rating:
Daniel Walker
Editor-in-Chief
My passion lies in bridging the gap between cutting-edge technology and everyday creativity. With years of hands-on experience, I create content that not only informs but inspires our audience to embrace digital tools confidently.
View all ArticlesLeave a Comment
Create your review for HitPaw articles