(Full Guide) How to Change a Logo Color with 3 Ways Fastly
Ever wondered how to effortlessly transform the vibe of your brand without breaking the bank or diving into complex design software? The answer lies in mastering the art of "change logo color." Many businesses face the challenge of revamping their logo hues without the luxury of Photoshop prowess or hefty budgets for professional designers.
In 2024, we bring you three straightforward methods to recolor your logo, no expert skills required. Say goodbye to design dilemmas as we walk you through the steps of changing the colour of a logo, unlocking a world where logo updates are as easy as 1-2-3!
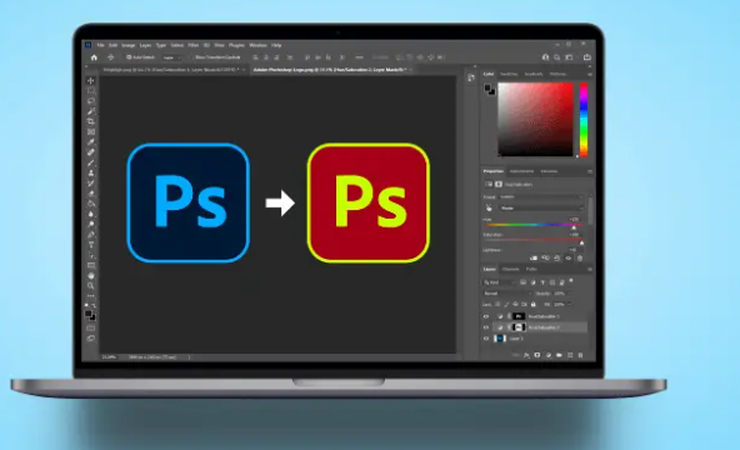
Method 1: Change the Color of a Logo with Photoshop
Adobe Photoshop is a powerful graphic design platform widely used for image manipulation and editing. In this tutorial, we'll explore a step-by-step process to change the colour of a logo using Photoshop, ensuring a seamless transition to a new colour scheme.
Step 1 – Open the Logo:

Begin by opening the logo in Photoshop. Convert the logo from an SVG to an editable PNG file by selecting File > Export > Export As, choosing PNG as the format.
Step 2 – Delete the Background:

To change the entire colour of the logo, remove the background using the Magic Eraser tool. Adjust the tool's Tolerance value, tick Anti-Alias, and untick Contagious. Click on the logo's background to erase it, leaving the logo on a transparent background.
Step 3 – Create a Color Overlay:
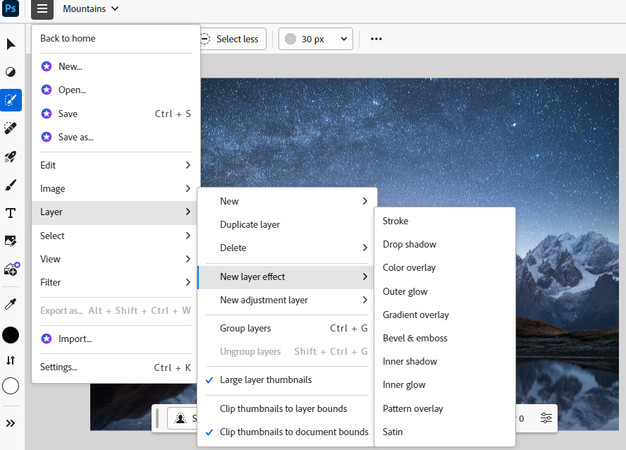
Apply a Color Overlay using Layer Styles to change the logo's colour without affecting the background. Head to Layer > Layer Style > Color Overlay or double-click the Layer thumbnail in the Layers Panel. Choose the desired color for the overlay, ensuring it covers the original logo completely.
Step 4 – Save the Logo:
Save the edited logo as both a PSD editable and an SVG uneditable file for future use. For PSD, select File > Save As and choose Photoshop as the format. For SVG, choose File > Export > Export As and select SVG as the format.
By following these steps, you can successfully change the colour of a logo using Photoshop, offering flexibility and control over the visual identity of your brand or design.
Pros:
- Seamless colour change without affecting the background.
- Preserves the original logo as a separate layer.
- Allows for easy experimentation with different color overlays.
Cons:
- Limited to changing the entire logo to one colour.
- May not be suitable for highly intricate logos.
- Requires basic knowledge of Photoshop tools and functions.
Method 2: Change the Colour of a Logo with Illustrator
Adobe Illustrator provides a powerful platform for graphic design, allowing users to manipulate and enhance images with precision. If you want to change a logo's colour, Illustrator offers a straightforward method that ensures accuracy and quality.
Steps:
1. Open the logo in Illustrator.
2. Select the image and activate the “Image Trace” option in the top menu.
3. Click on “Image Trace” and opt for “High Fidelity Photo” from the presets.
4. After tracing, expand the image using the “Expand” button in the control panel.
5. Ungroup any objects if necessary.
6. Now, you can select individual parts of the image and change their colours using the “Fill” colour in the swatches panel or the colour picker.
Pros:
- Illustrator allows users to change the colour of each component with high precision.
- The "High Fidelity Photo" preset ensures that the recolored logo retains a professional and polished appearance.
Cons:
- It might be challenging for beginners, requiring time to master its features.
- Adobe Illustrator is a paid software, which could be a drawback for those seeking free alternatives.
By following these steps, users can effortlessly recolor logos in Illustrator, creating visually appealing and customized designs.
Method 3: Change the Color of a Logo with Canva
Canva, a user-friendly graphic design platform, offers a straightforward method to change the color of a logo effortlessly. Follow these detailed steps to recolor your logo using Canva:
1. Click on the Logo:
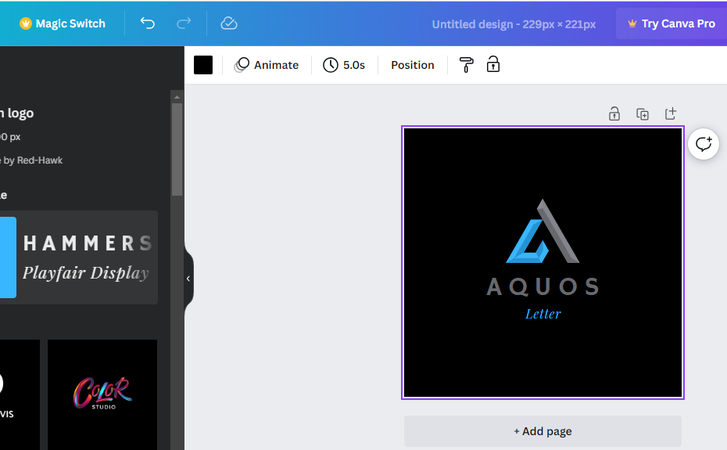
If your logo is editable, click on it, and a left panel will appear. From there, you can easily change the colour of the logo.
2. Change Text Color:
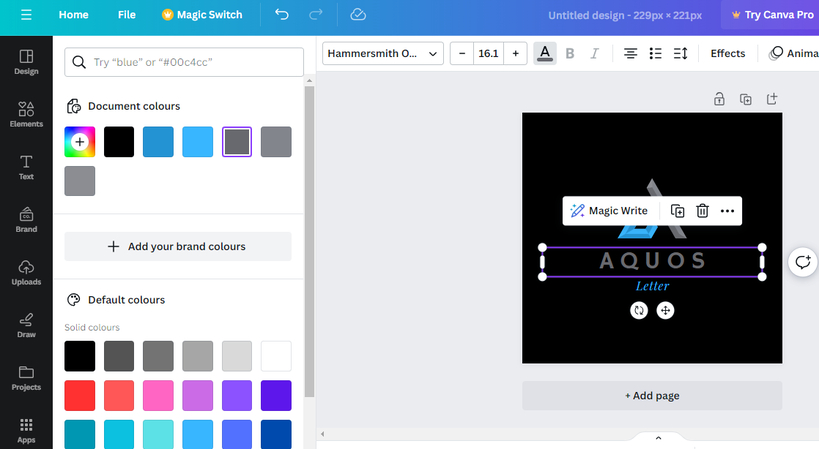
Modify the text colour within the logo by selecting the text element. Adjust the colour to match other elements in your design.
3. Edit Image:
Suppose your element isn't editable through the top panel; choose 'Edit Image' from the top bar. Adjust the settings provided in the left side panel to recolor the logo.
4. Apply Monotone or Duotone Effects:
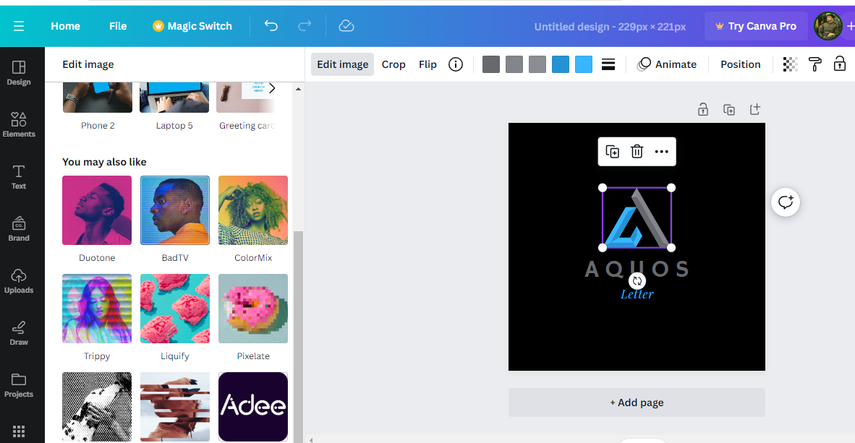
Opt for a monotone or duotone effect by navigating to 'Edit Image.' This allows you to change the entire logo to white or any monotone colour.
5. Adjust Duotone Settings:
Select a duotone effect and access settings. Modify both colour palettes to your desired colour, effectively changing the logo's colour scheme.
6. Download Logo with Transparent Background:
When satisfied with the changes, download your logo in PNG format to retain a transparent background.
Pros:
- Intuitive platform for beginners.
- Diverse color customisation options.
- Offers duotone effects for unique designs.
- Transparent background download feature for versatile use.
Cons:
- Limited advanced editing capabilities.
- Some features may require a Canva Pro subscription.
- Precision in color matching might be challenging for intricate designs.
With Canva, transforming the colour of your logo becomes a seamless and visually appealing process.
Extra Tip: Recolor Logo Background with HitPaw FotorPea
As you've explored three methods to tweak logo colours, here's an additional tip: With HitPaw, you can now effortlessly switch up your logo background colour. Embrace the versatility of HitPaw FotorPea, and watch your logo transform into a vibrant and eye-catching masterpiece. Take advantage of this innovative solution and transform your logo in no time.
Key Features of HitPaw FotorPea:
- Auto Enhancement: Automatically enhances image quality for a polished look.
- AI Upscaler: Enlarge images without loss of quality, ensuring clarity and detail.
- Batch Processing: Streamline your workflow by editing multiple photos simultaneously.
- Image Restoration: Effectively edit old photos to remove blurriness and recover image details.
Detailed Steps to Change Logo Background Color:
1. Import your logo into HitPaw FotorPea using the "Remove BG" option or drag the photo into the edit box.

2. Await automatic recognition as the tool identifies and removes the background.
3. Adjust reserved areas with the Brush tool to refine the portion you wish to keep.

4. Fine-tune erased areas using the Erase tool to remove unwanted elements.

5. Choose a new background color to replace the removed one.

6. Export the final image by clicking "Export" after viewing it in the Output section.
Revitalize your logo and elevate your visual content with HitPaw FotorPea's intuitive tools and advanced capabilities.
This is the ultimate guide of HitPaw FotorPea
Final Thoughts
Mastering the art of logo customisation is now within reach with the three straightforward methods detailed above. Whether you're looking to change the colour of a logo, recolour a logo, or alter the entire palette, these steps empower you.
For an extra layer of finesse, consider exploring HitPaw FotorPea—a cutting-edge tool for seamlessly transforming its background hues. Upgrade your visual identity and make a lasting impression with these easy-to-follow steps.


 HitPaw Univd (Video Converter)
  HitPaw VikPea (Video Enhancer)


Share this article:
Select the product rating:
Daniel Walker
Editor-in-Chief
My passion lies in bridging the gap between cutting-edge technology and everyday creativity. With years of hands-on experience, I create content that not only informs but inspires our audience to embrace digital tools confidently.
View all ArticlesLeave a Comment
Create your review for HitPaw articles