How to Convert M4A to WAV with Audacity
Are you facing compatibility issues with your audio files? Maybe you need to convert your M4A files to WAV format to ensure smooth playback across different platforms. Thankfully, with the help of Audacity, a free and popular audio editing software, you can easily accomplish this task. Here, we'll walk you through the steps of Audacity M4A to WAV converter, along with alternative methods and tools for seamless audio conversion.
Part 1. Understanding M4A vs. WAV
Before getting into the conversion process, it's essential to understand the difference between M4A and WAV formats. M4A is the preferred audio format for Apple devices, known for its efficient compression and high-quality sound. On the other hand, WAV is a standard audio format that offers uncompressed, lossless audio quality. While M4A files are more compact, WAV files ensure better compatibility across various media players and devices.
Part 2. M4A to WAV using Audacity: A Step-by-Step Guide
Audacity, acclaimed for its multifaceted functionalities in audio editing, recording, and conversion, serves as a dependable tool for transforming M4A files into the more universally compatible WAV format. In this comprehensive guide, we'll unravel the intricacies of the conversion process, offering a detailed walkthrough to ensure seamless results.
Step 1. Install Audacity to Your System
- Download the latest version of Audacity and install it to your computer.
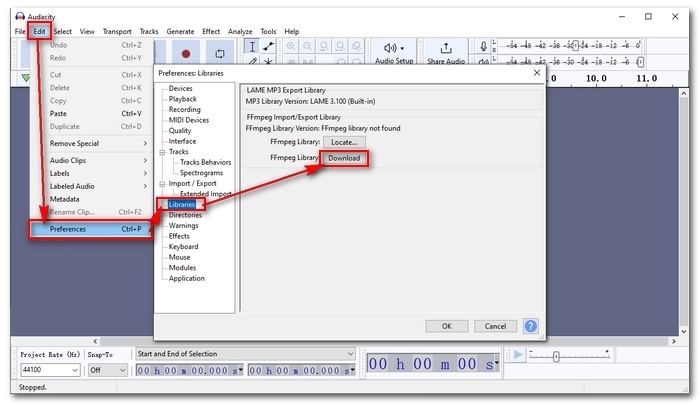
- Launch Audacity and navigate to Edit > Preferences. Then, find the Libraries section.
If FFmpeg is not installed, you'll encounter a message saying "FFmpeg library not found." Simply click on Download to proceed with the installation.

A webpage from AudacityTeam containing details about the FFmpeg library will appear. Click on the highlighted "Installing FFmpeg" link.

- Follow the instructions provided on the page to download the FFmpeg installer.
- Once the .exe file is downloaded, click on it and follow the prompts to complete the installation process.
Now, Audacity will automatically detect the FFmpeg library, allowing you to proceed with the next steps to convert M4A to WAV within Audacity.
Step 2. Convert M4A to WAV in Audacity
- Launch Audacity and navigate to File > Open to import your M4A audio file. Feel free to make any desired edits to the audio.
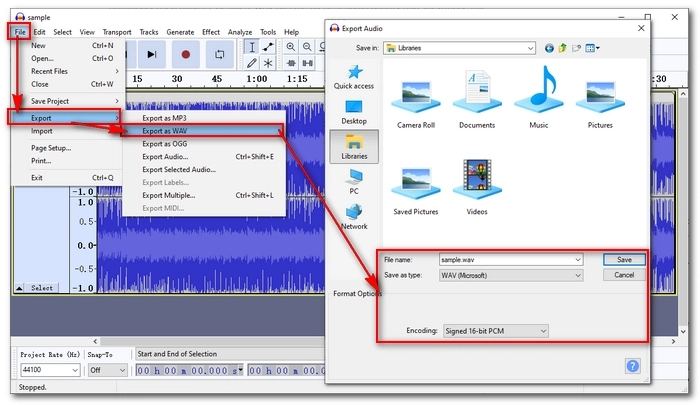
- After making your edits, go to File > Export > Export as WAV.
Rename the file as desired and select the output format type. You also have the option to adjust the encoding settings if needed. Finally, click Save to export the M4A file to WAV format.
Part 3: Batch Convert M4A to WAV with an Audacity Alternative
While Audacity is a reliable option for audio conversion, you may prefer a more streamlined approach. HitPaw Univd (HitPaw Video Converter) offers a user-friendly interface and robust features for converting M4A to WAV and vice versa.
Benefits of Using HitPaw Univd
HitPaw Univd offers several advantages for audio conversion, including:
- Intuitive interface: The user-friendly interface makes it easy for beginners to navigate and use the software effectively.
- 120X conversion speed: HitPaw Univd ensures swift conversion of audio files without compromising quality.
- Batch conversion: You can convert multiple M4A files to WAV simultaneously, saving time and effort.
- Customizable settings: The software allows you to adjust audio parameters such as bitrate, sample rate, and channel for optimal results.
- Wide compatibility: HitPaw Univd supports various audio formats, ensuring compatibility with different devices and media players.
How to Convert M4A to WAV using HitPaw Univd
In this guide, we'll walk you through the simple steps to convert M4A to WAV.
Step 1: Import Audio File
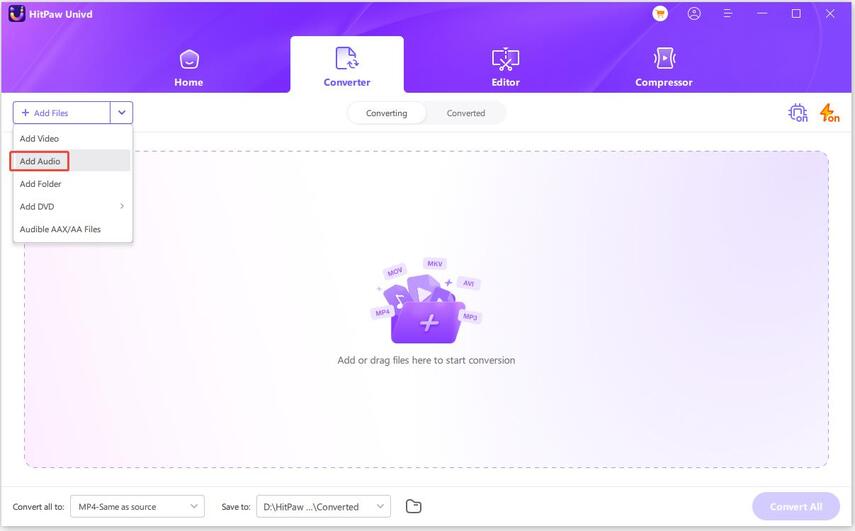
Open HitPaw Univd after installing it to your computer. In the Convert tab, click Add Audio or simply drag and drop your M4A files to the program.

Step 2: Select the Audio Format
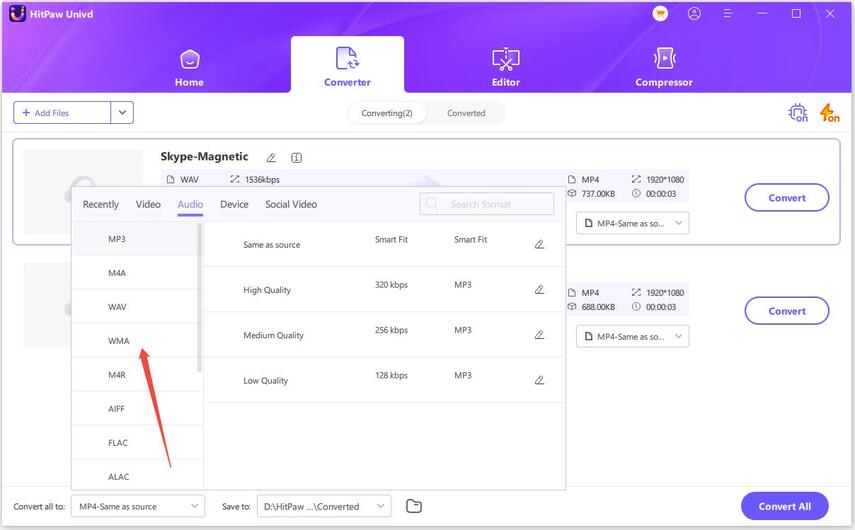
After importing your audio files, it's time to choose the desired output format. Click the inverted triangle on the lower right side of each file to select WAV format.

Step 3: Converting M4A to WAV
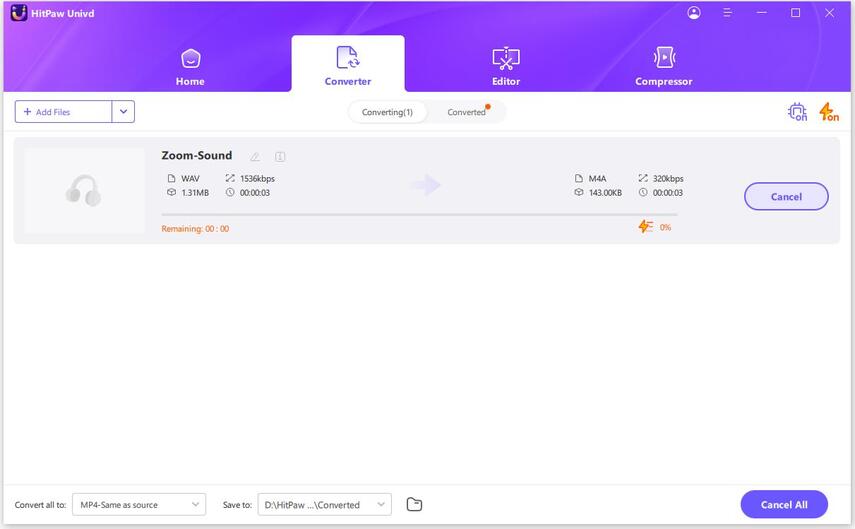
Once you've made your selections, click "Convert" or "Convert All" (for multiple files) to initiate the conversion process. HitPaw Univd ensures lossless quality during the conversion.

Step 4: Access to the Converted Files
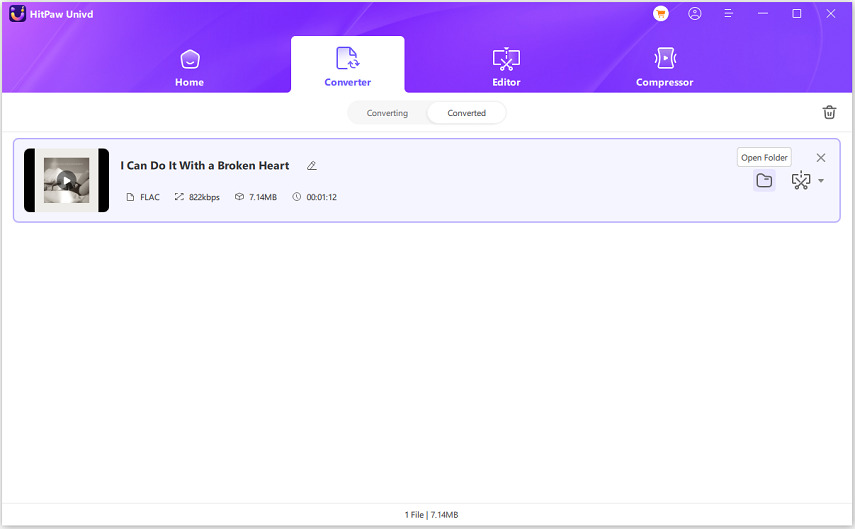
After the conversion is complete, head to the "Converted" tab at the top to view the processed files. Click "Open Folder" to access the converted files directly or choose "Add to edit list" for further audio editing if needed.

Conclusion
Converting M4A to WAV using Audacity is a straightforward process that can be accomplished in just a few simple steps. However, if you're looking for a more efficient and feature-rich solution, HitPaw Univd emerges as a top contender. With its intuitive interface, fast conversion speed, and customizable settings, HitPaw Univd offers a seamless M4A to WAV conversion experience for users of all levels.





 HitPaw Edimakor
 HitPaw Watermark Remover
  HitPaw VikPea (Video Enhancer)


Share this article:
Select the product rating:
Daniel Walker
Editor-in-Chief
My passion lies in bridging the gap between cutting-edge technology and everyday creativity. With years of hands-on experience, I create content that not only informs but inspires our audience to embrace digital tools confidently.
View all ArticlesLeave a Comment
Create your review for HitPaw articles