How to Handle Unsupported Compression Type in Premiere Pro
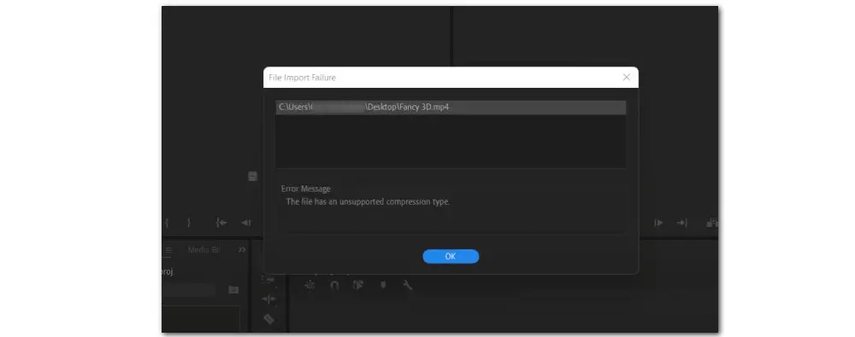
Ever tried to import a video into Premiere Pro, only to be met with the dreaded unsupported compression type premiere pro error message? It can be frustrating when your editing software throws a wrench in your plans. But fear not, video warriors!
This message simply means Premiere Pro can't understand the way your video file is compressed. The good news is that there are several solutions you can try to conquer this error and get your footage into your project. By the end of this journey, you'll be equipped to handle unsupported compression types with confidence and keep your editing workflow flowing smoothly.
Part 1. 3 Ways to Fix Unsupported Compression Type Premiere Pro
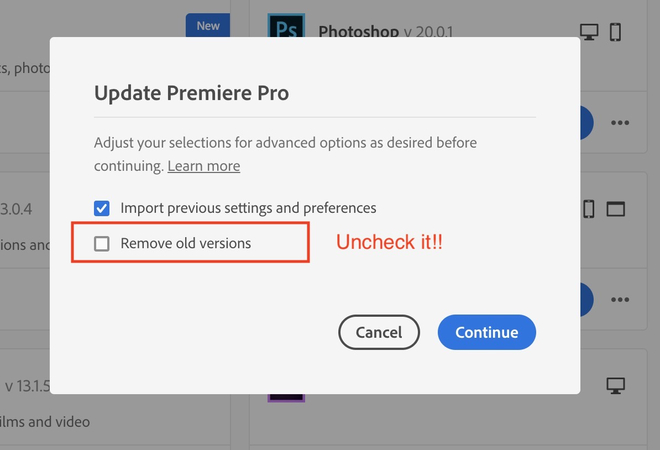
Method 1. Update Premiere Pro
In the trial version of Premiere Pro, users may face difficulties and face the issues like premiere pro unsupported compression type importing AVCHD and MP4 files due to missing .dll (dynamic link library) files that are necessary for proper file handling. These .dll files are typically located in the directory C:\Users\Public\Public Documents\AdobeInstalledCodecs. Without these essential components, the software may be unable to recognize and process these file formats effectively.
Upgrading to the paid version of Adobe Premiere Pro not only provides access to these missing .dll files but also unlocks a host of additional features and functionalities. These features may include advanced editing tools, enhanced performance, access to Adobe's cloud services for collaboration and file storage, technical support, and regular updates with new features and improvements.
By transitioning to the paid version, users can ensure a smoother and more seamless editing experience, with the ability to work with a broader range of file formats and take advantage of the full capabilities of Premiere Pro.
Method 2. Clear Media Cache Files and Database
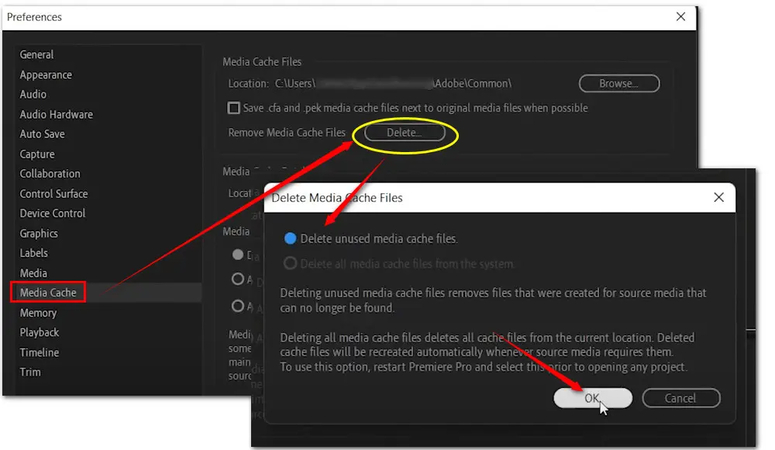
A corrupt media cache is the root of many different kinds of application issues like adobe premiere pro file has unsupported compression type. To test if it makes a difference, try clearing it.
Step 1: Launch Premiere Pro, select Edit, then Preferences, and finally Media Cache.
Step 2: Select the Delete option under Media Cache to empty your media cache. The premiere should now operate without a hitch after restarting. Alternatively, you may just tell Premiere to create a new media cache and rename the old one.
Method 3. Modify the Extension of the File
To troubleshoot the adobe premiere pro the file has an unsupported compression type, consider relocating the problematic file to a different folder as a viable solution. Begin by navigating to the directory where the file is currently stored, whether it's on your computer's local storage or an external drive. Once you've located the file, select it and proceed to move it to a new destination folder. This new location should offer ample accessibility and storage space.
After completing the file transfer, return to Adobe Premiere Pro and attempt to import the file once more. By selecting the file from its new folder location, you can circumvent the compression type issue and potentially resolve any associated import difficulties. This straightforward approach of relocating the file provides a practical workaround for addressing the problem and facilitates smoother editing processes within Adobe Premiere Pro.
Part 2. The Best Alternative of Compressing Videos and Images | HitPaw Univd (HitPaw Video Converter)
HitPaw Univd stands out as the premier alternative for compressing videos and images, boasting a user-friendly interface that simplifies the compression process. This versatile tool supports batch compression, enabling users to process multiple files simultaneously with ease.
Features
- Compress multiple videos simultaneously with batch processing for efficient workflow.
- Ideal alternative to Premiere Pro, offering tailored compression settings with Small, Medium, and Normal presets for precise control.
- Customize compression options to suit diverse preferences and requirements.
- Enjoy compatibility with various formats such as MP4, MKV, MTS, TS, MPEG, and more.
- Access a versatile suite of tools, including video conversion, downloading, editing, GIF creation, image editing, and music conversion for Spotify and iTunes.
- Seamlessly compress both videos and images within a single platform, enhancing workflow efficiency.
Here's the detailed guide to compress images and videos via HitPaw Univd.
Compressing videos
Step 1: Install HitPaw Univd on your computer for free. Next, choose the Video/Image Compressor option from the Toolbox section.
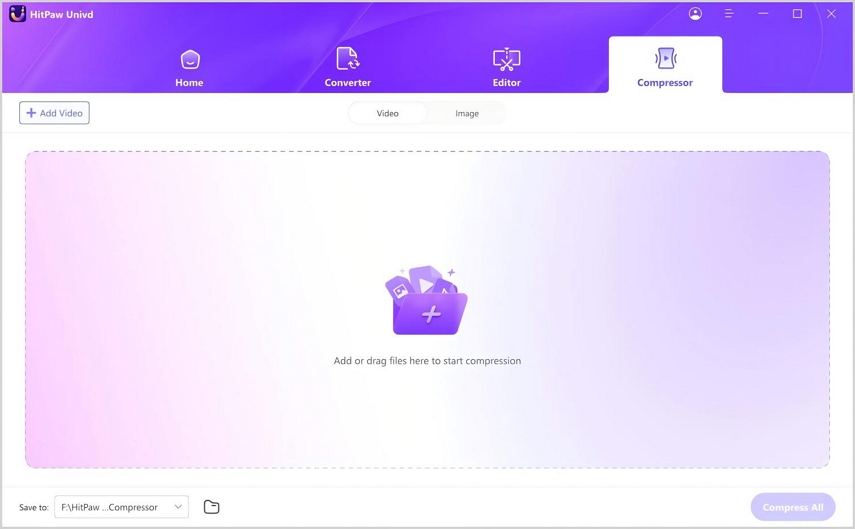
Step 2: Open the app and add your videos to it. For instance, load the MP4 files into the program to generate them.
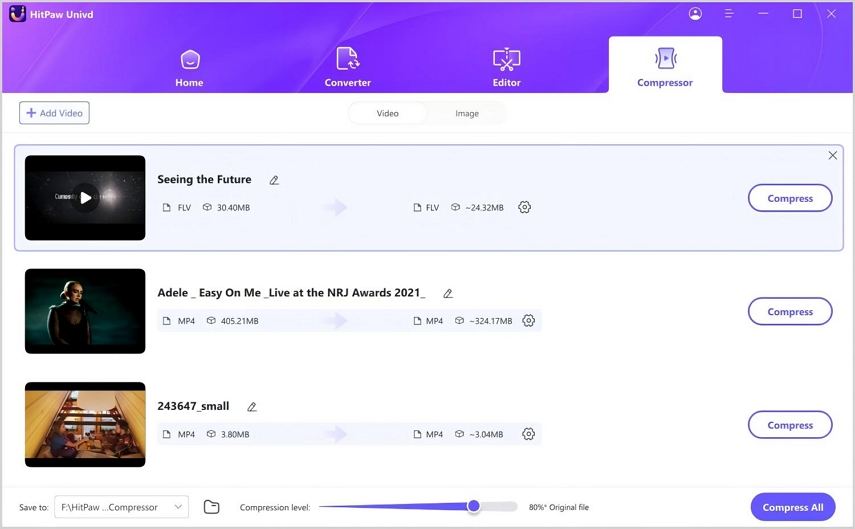
Step 3: To verify the compression settings, click the gear icon. You select the suitable level of compression and video quality. Choose a compression level from the list of options if you're compressing numerous videos at the same ratio.

Step 4: After adjusting the settings as needed, click "Compress" or "Compress All" to begin the compression process. Remain composed and let HitPaw Univd shrink video files without sacrificing quality.
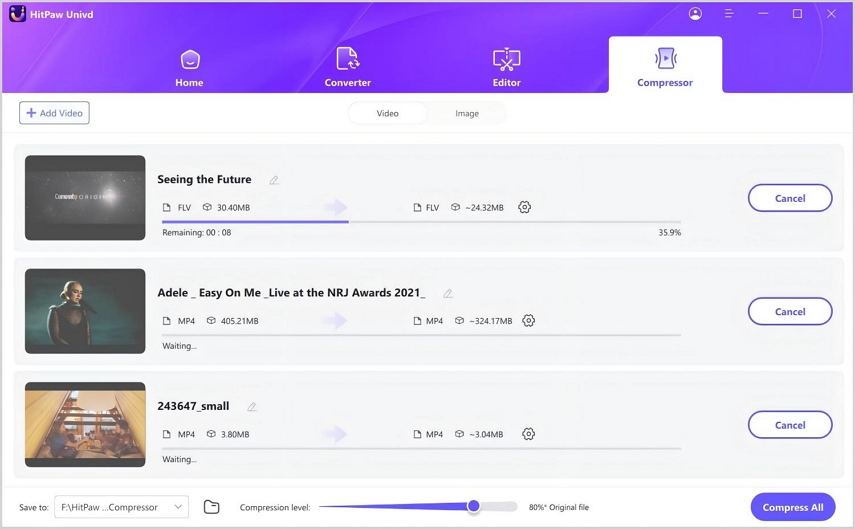
Compressing Images
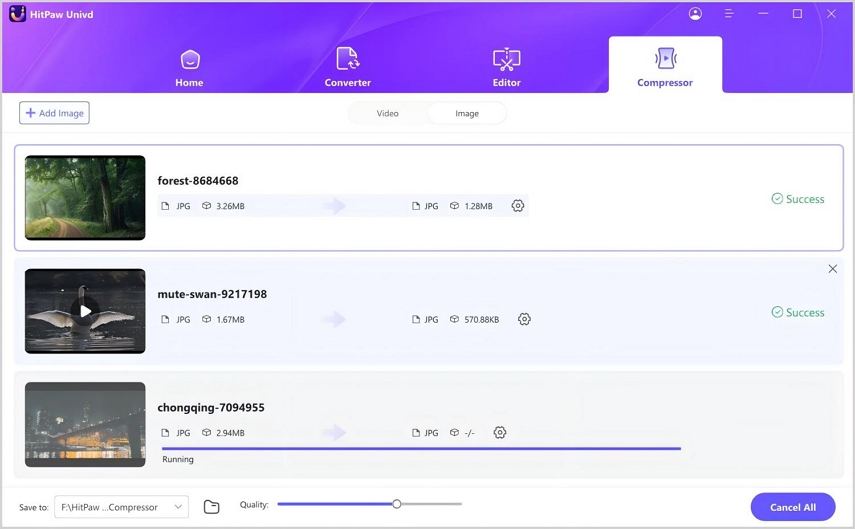
Step 1: To add a picture or image to the application, select "Add Image" from the Image menu.
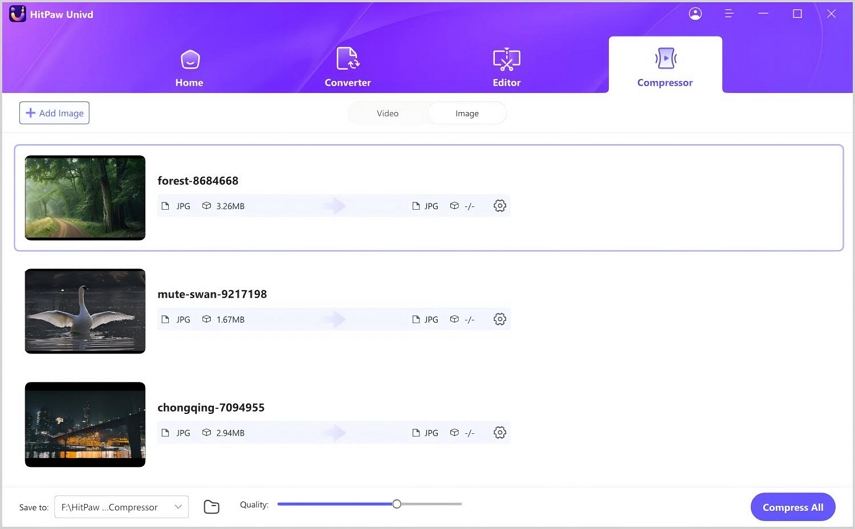
Step 2: Click the gear icon on a file to choose the appropriate compression level and quality. There are options for "Original," "JPG," "JPEG," and "WEBP" among the formats. Every image in the list will have the compression level applied if "Apply all to list" is selected. Click the Confirm button to preserve your configuration.
You can choose from the bottom left which level of compression to apply to each file in the list. We recommend using a medium compression level. The video size before and after compression is displayed in the file list.
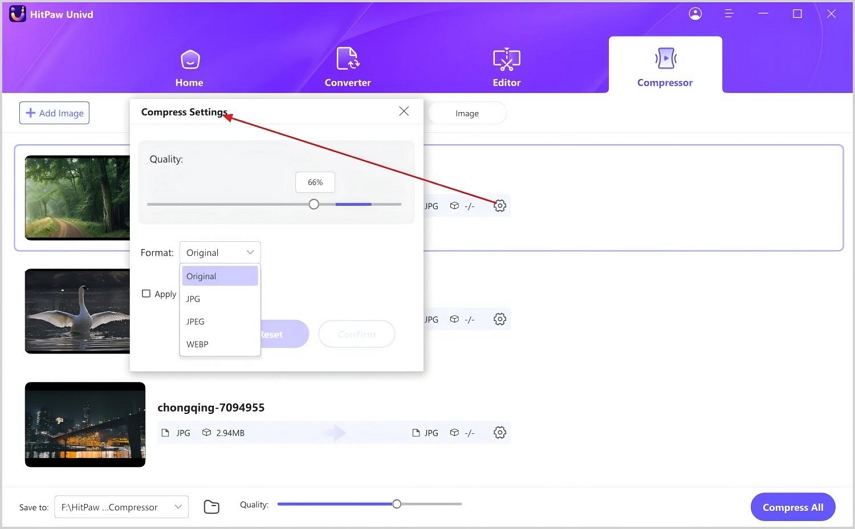
Step 3: Choose Compress All to start compressing every picture at once. After the compression procedure, the compressed video(s) can be seen in the output folder.
Final Words
We've presented an extensive guide detailing methods to resolve unsupported compression type premiere pro. However, for users seeking a more user-friendly and efficient solution, HitPaw Univd emerges as the optimal choice.
This robust tool not only offers superior compression capabilities for both images and videos while preserving their original quality but also supports batch processing, enabling users to streamline their workflow. Furthermore, its compatibility with a wide range of image and video formats ensures versatility and convenience for users with diverse media needs. With HitPaw Univd, compressing media files becomes a straightforward and effective task, empowering users to enhance their editing process with ease.


 HitPaw Watermark Remover
  HitPaw Photo Object Remover
 HitPaw VikPea (Video Enhancer)


Share this article:
Select the product rating:
Daniel Walker
Editor-in-Chief
My passion lies in bridging the gap between cutting-edge technology and everyday creativity. With years of hands-on experience, I create content that not only informs but inspires our audience to embrace digital tools confidently.
View all ArticlesLeave a Comment
Create your review for HitPaw articles