How to Compress Video in PowerPoint
Most of the time, we need to compress videos to save disk space or improve playback performance. Though there are unlimited platforms to rely on for compressing videos, PowerPoint is relatively reliable and beginner-friendly. Almost everyone has worked with this platform before, so why not use the same knowledge to compress videos now? But how can you do that?
If you are stuck on the same, we have covered it for you in this ultimate guide on how to compress video in PowerPoint. So, without any further ado, let's begin exploring!
Part 1: How to Compress Video Size in PowerPoint?
The video compression feature is accessible in PowerPoint Windows, not on PowerPoint Mac or the web version. So, if you are wondering how to compress videos in PowerPoint Mac, you can't do so.
However, video compression is quite like a hidden feature, as PowerPoint is almost always linked with nothing but presentations, either educational or business. However, let's get straight into how do you compress a video in PowerPoint.
Here is how to compress a video in PowerPoint new Version
Step 1:Launch Microsoft PowerPoint and open the presentation featuring the video to be compressed.
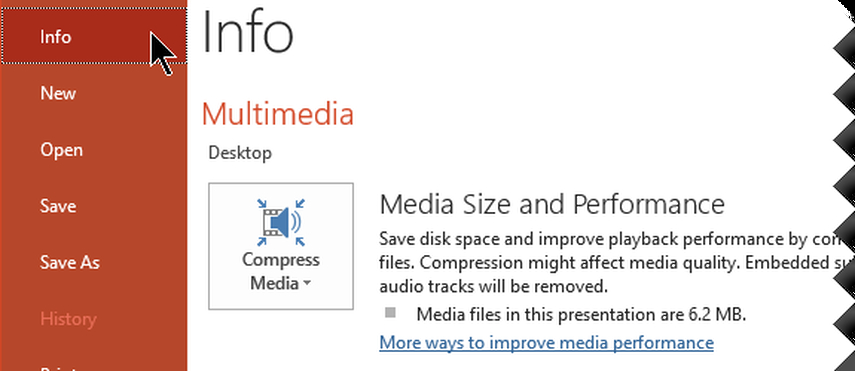
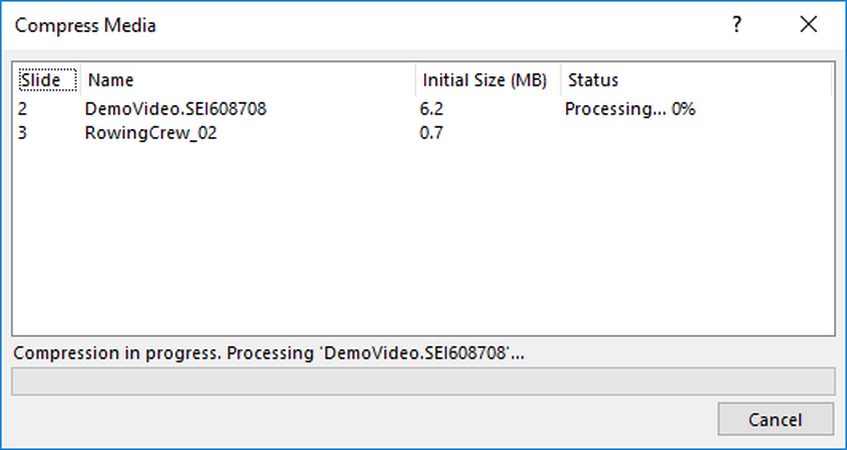
Step 2:Once the presentation is opened, navigate to the File tab, choose Info, and click on Compress Media in the Multimedia section.

Note: Keep in mind that this compression will remove all the embedded subtitles or alternate audio tracks during the process.
Step 3:Select from the multiple supported video quality options to determine the size of your compressed file. Options include:
Full HD (1080p): Choose this when you need to save disk space when maintaining overall video and audio quality.
HD (720p): Compress to the quality that will be sort of comparable to the quality of videos we stream over the internet.
Standard (480p): Go with this selection when you have limited space. For instance, when your goal is to upload your PowerPoint presentation as an attachment to the mail and send it.

Video Compression Guide for Office 2016
Here is how to compress video in PowerPoint Office 2016:
Step 1:Open PowerPoint and also the file that contains the video to be compressed.
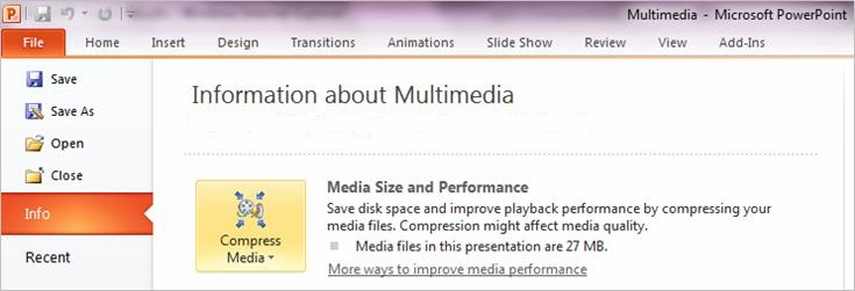
Step 2:Go to the File tab, select Info, and choose Compress Media from the Media Size and Performance.

Note: Alternate audio tracks and embedded subtitles will be lost in this compression, too.
Step 3:Adjust the video quality settings according to the extent of compression you desire. This can be anything between:
Presentation Quality: This option lets you save disk space when not compromising an inch on the quality of video and audio.
Internet Quality: By choosing this, you decide to compress to the quality that's comparable to the quality of videos we stream on the internet.
Low Quality: Choose this option when you need to switch to low quality to compress enough. This is mostly chosen in case you need to share your PowerPoint presentation via email.

Note: Note one thing: older video formats aren't properly compressed in Office on a Windows RT PC. However, a better approach would be to choose formats, like AAC (Advanced Audio Coding) and H.264, that are supported by PowerPoint 2013 RT.
Part 2: Alternative to Compress Videos in PowerPoint
PowerPoint affects video quality during compression, and as mentioned above, embedded subtitles and alternate audio tracks are also removed. Not only this but if you are wondering how to compress a video in PowerPoint on Mac, rest assured you won't be able to, as only PowerPoint Windows has this feature. So, if you want to ditch all these cons when compressing your video files, we recommend trying out a more comprehensive platform, i.e., HitPaw Univd (HitPaw Video Converter).
This amazing platform enables you to compress your videos without compromising on video quality. With it, you can also compress your video files on Mac, getting rid of PowerPoint limitations. The compression of video files is not the only feature of PowerPoint; it does have other features, including the ones mentioned below.
Main Features of HitPaw Univd
Here are some of the exclusive features you can access in HitPaw Univd:
- Enables downloading videos from renowned streaming platforms.
- Can burn videos to Blu-rays without impacting quality.
- Works as a 120X AI video converter for images, DVDs, music, and videos.
- Features built-in smart AI tools to enhance your productivity and creativity.
- Ideal music converter for TIDAL, Deezer, Spotify, Apple Music, etc.
How to Use HitPaw Univd?
By now, you have explored the basic overview of HitPaw Univd; let's now explore how to compress videos with it.
Step 1:Download and install the HitPaw Univd on your device. Once you are done with the installation, launch the platform.
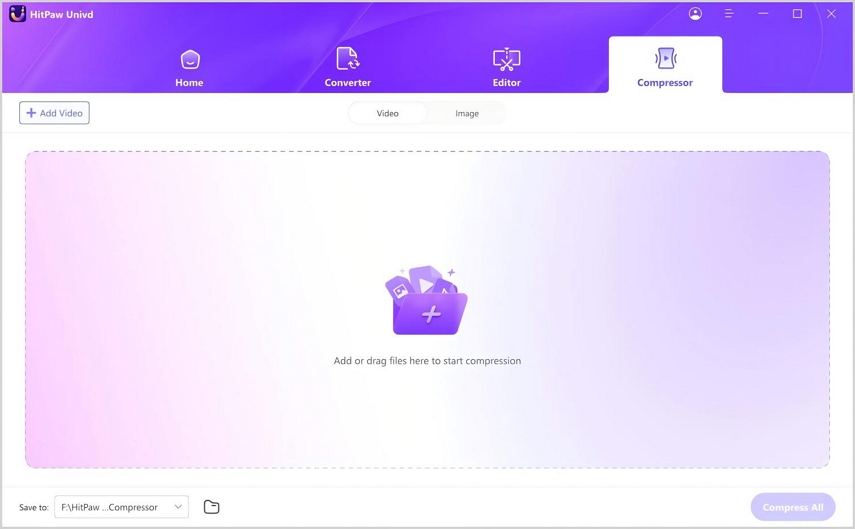
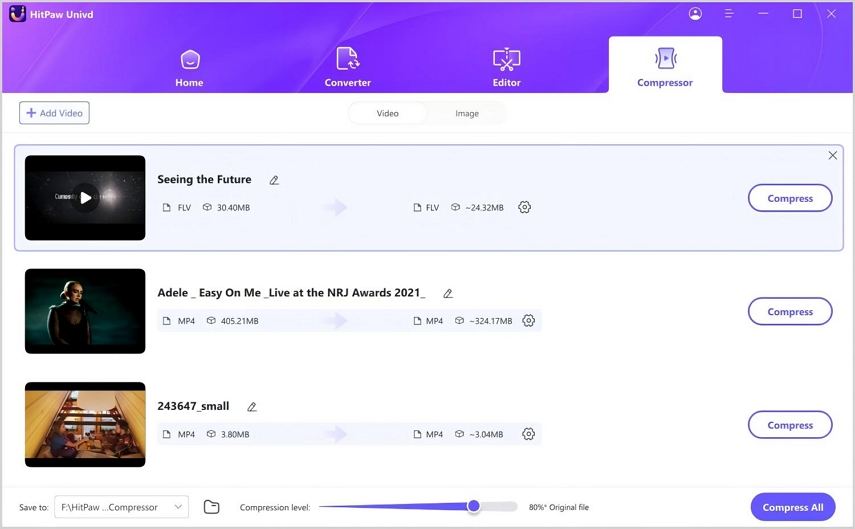
Step 2:Switch to the Toolbox tab and choose Video Compressor.

Step 3:Hit the Add Video option to add the video that you want to compress. You can also rename the uploaded video title by hitting the pen icon.

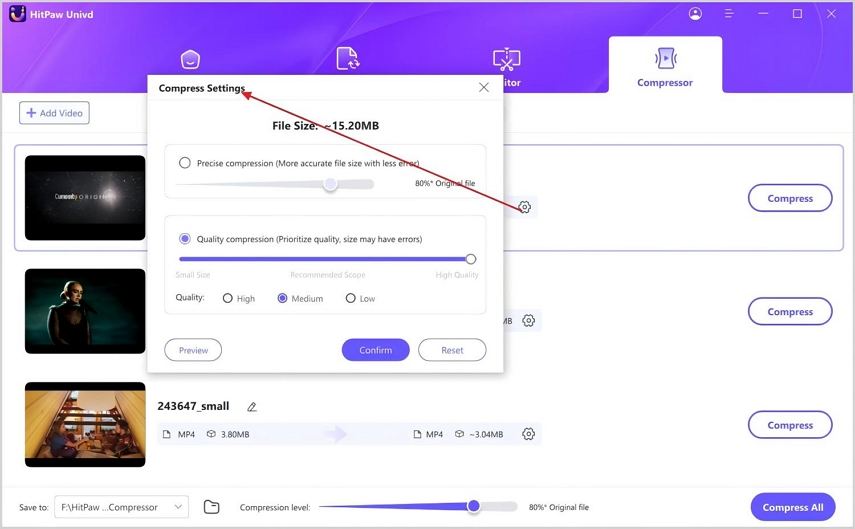
Step 4:Now click on the gear icon and select your desired compression level from the available options. You can also tweak the quality of compressed files to fit your needs. The format list provides you with Original and MP4 options.
If you are confused and unable to choose parameters, you can click the Preview button to view the compression effect with specific settings. Once you have chosen the right one, hit the Confirm button to save your settings.

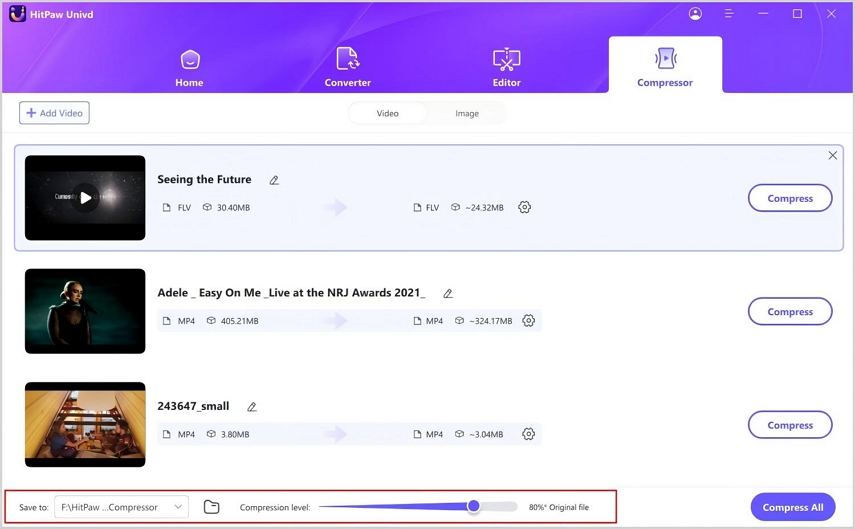
Step 5:When you select the compression level from the bottom left, the selection will apply to all files in the list. By default, the recommended compression level is set to medium. You can tweak it. Also, you may view the size of files before and after compression in the file list.

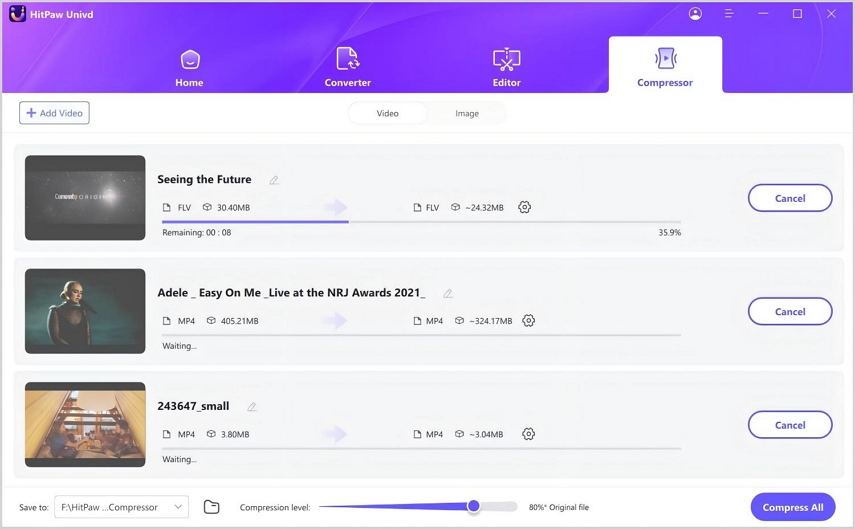
Step 6:Now, hit the Compress button to begin compressing your selected file, or simply select Compress All to batch compress all the uploaded files at once instead of wasting time doing each of them manually.

Once the compression is over, you can access your compressed files in the output folder.
Watch the following video to learn more details:
FAQs
Q1. Can I Compress Videos in PowerPoint?
A1. Yes, you can compress videos in PowerPoint. All you need to do is to open the presentation featuring a video that needs to be compressed. Go to the File tab > Info > Multimedia > Compress Media. Select your desired video quality option and begin compressing the video. However, if you are wondering how to compress video in PowerPoint Mac. you can't do it, as this feature is only accessible on Windows.
Q2. Can I Compress a PowerPoint File as a PDF?
A2. Yes, you can convert a PowerPoint file into a PDF with online editors like Adobe Acrobat. By converting to PDF files, you can easily share your videos - much more manageable than the heavily sized PowerPoint presentations.
Conclusion
PowerPoint is an exclusive platform for creating presentations, but it's not the only feature. You can also compress your videos with PowerPoint. However, it poses multiple cons, like loss of embedded subtitles and lack of this feature in Mac and online versions. But no worries when you have a top-tier alternative like HitPaw Univd. With it, you can seamlessly compress your video files on Windows and Mac without impacting the video's quality or removing any audio. So, be sure to check it out!





 HitPaw VikPea
 HitPaw Watermark Remover


Share this article:
Select the product rating:
Daniel Walker
Editor-in-Chief
My passion lies in bridging the gap between cutting-edge technology and everyday creativity. With years of hands-on experience, I create content that not only informs but inspires our audience to embrace digital tools confidently.
View all ArticlesLeave a Comment
Create your review for HitPaw articles