How to Compress a Video in PowerPoint in 2025
Integrating video content into PowerPoint presentations enriches communication by visually illustrating concepts and capturing the audience's attention effectively. Videos offer dynamic storytelling, enhancing engagement and comprehension. This blog post serves as a comprehensive resource on video compression within PowerPoint, addressing the vital need to optimize file sizes without sacrificing quality.
Part 1. How to Compress a Video to Low Quality in PowerPoint?
In today's digital age, multimedia content has become an integral part of presentations, with videos being a powerful tool for communication and engagement. However, large video files can significantly increase the size of PowerPoint presentations, leading to slower performance and potential compatibility issues. To address this challenge, PowerPoint offers a built-in feature to compress videos, reducing their size without compromising visual quality. In this comprehensive guide, we'll walk you through the process of compressing videos in PowerPoint, step by step.
Step 1: Open your PowerPoint presentation
Begin by opening the PowerPoint presentation containing the video you wish to compress. Please navigate to the slide that contains the video element, ensuring that it's selected and ready for compression.
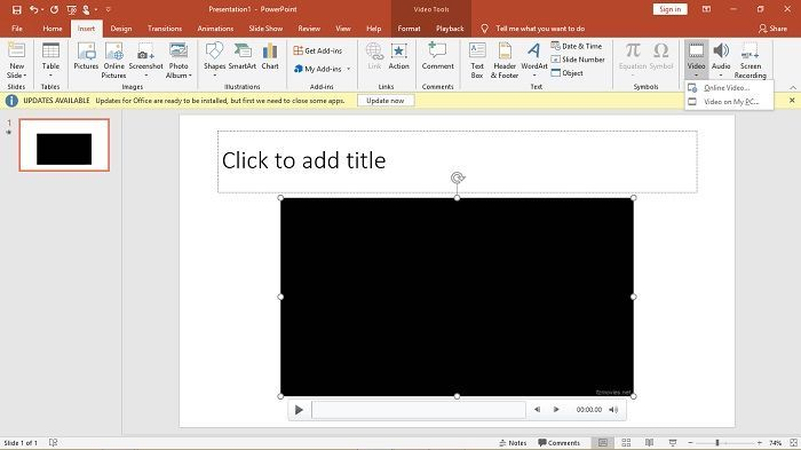
Step 2: Access the "File" menu
Click on the "File" tab located in the top-left corner of the PowerPoint window. This will open a dropdown menu with various options for managing your presentation.
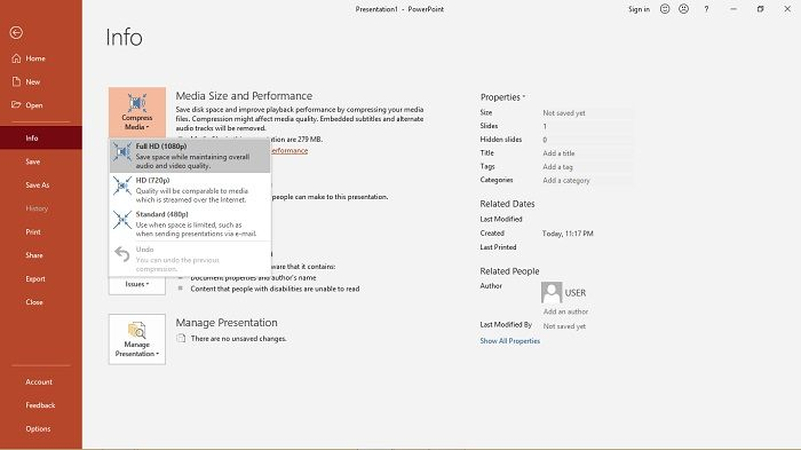
Step 3: Save the Media
The compression starts automatically, and you just need to save it by right-clicking on the video and 'Save Media as…'. Select the destination folder and rename your video.
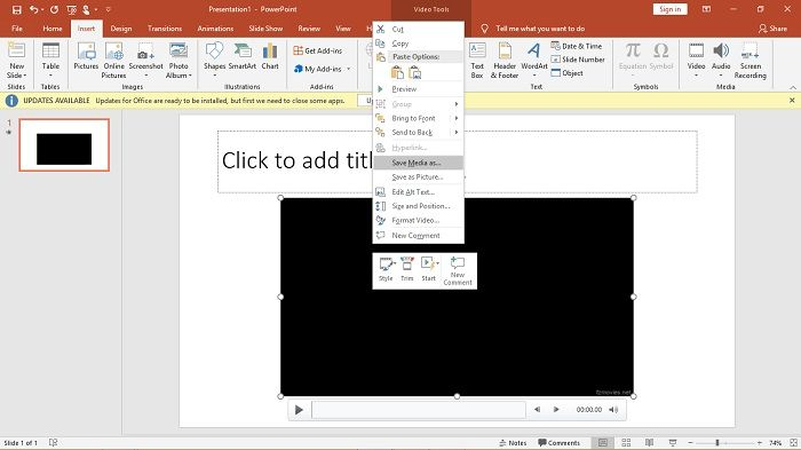
By following these simple steps, you can effectively compress videos within PowerPoint, reducing their size without sacrificing visual quality. Whether you're creating professional presentations or educational materials, mastering the art of video compression in PowerPoint will enhance your overall presentation experience and ensure smooth delivery every time.
Part 2. Bonus Tips on How to Compress Videos without Compromising Quality
In today's digital age, video content has become an integral part of presentations, whether for business, education, or entertainment purposes. However, incorporating videos into presentations often comes with the challenge of managing file sizes without sacrificing quality. Fortunately, HitPaw Univd (HitPaw Video Converter) emerges as a reliable solution, offering the ability to compress videos effectively while maintaining exceptional quality.
Main Features of HitPaw Univd
- High-Quality Compression: HitPaw Univd utilizes advanced algorithms to compress videos without compromising their quality. Whether you're dealing with high-definition footage or standard video files, HitPaw ensures that the integrity of your videos remains intact throughout the compression process.
- Wide Format Support: One of the standout features of HitPaw Univd is its extensive support for various video formats. Whether your source video is in MP4, AVI, MOV, or any other format, HitPaw can handle it with ease, ensuring compatibility and flexibility for users.
- Batch Processing: HitPaw Univd streamlines the compression process by offering batch processing capabilities. This feature allows users to compress multiple videos simultaneously, saving time and effort, especially when dealing with large collections of video files.
- Customizable Settings: HitPaw empowers users with customizable compression settings, allowing them to tailor the output according to their specific requirements. Whether you need to adjust the resolution, bitrate, or other parameters, HitPaw provides the flexibility to fine-tune the compression process to achieve optimal results.
- User-Friendly Interface: With its intuitive interface, HitPaw Univd makes video compression accessible to users of all levels of expertise. Whether you're a seasoned professional or a novice user, HitPaw's user-friendly design ensures a seamless and hassle-free experience.
How to Compress Video Using a HitPaw Univd?
1. Download and Install HitPaw Univd:Start by downloading and installing HitPaw Univd from the official website. Follow the on-screen instructions to complete the installation process.
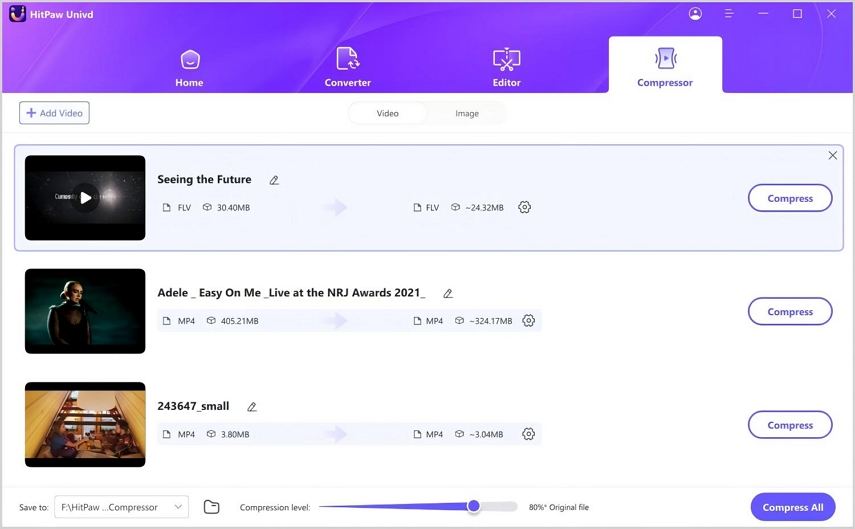
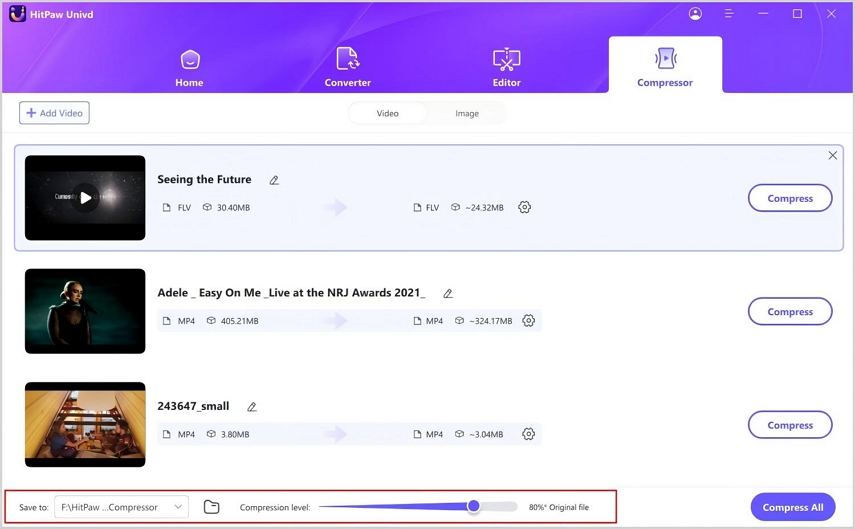
2. Add Video Files:Launch HitPaw Univd and click on the "Add Files" button to import the video files you wish to compress. Alternatively, you can drag and drop the files directly into the application window.

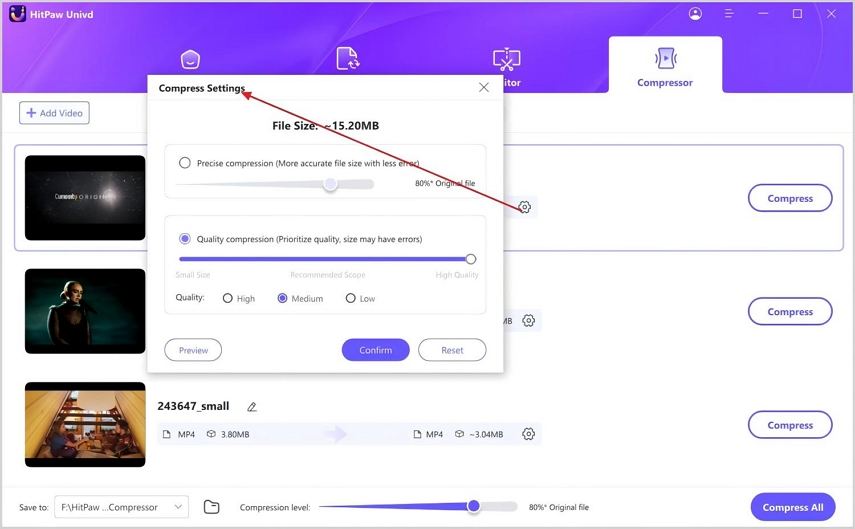
3. Select Compression Settings:Once your video files are loaded into HitPaw, you can customize the compression settings according to your preferences. Adjust parameters such as resolution, bitrate, and format to achieve the desired balance between file size and quality.

4. Preview:Before initiating the compression process, HitPaw Univd allows you to preview the compressed video to ensure that it meets your expectations. This preview feature enables you to make any necessary adjustments before finalizing the compression.

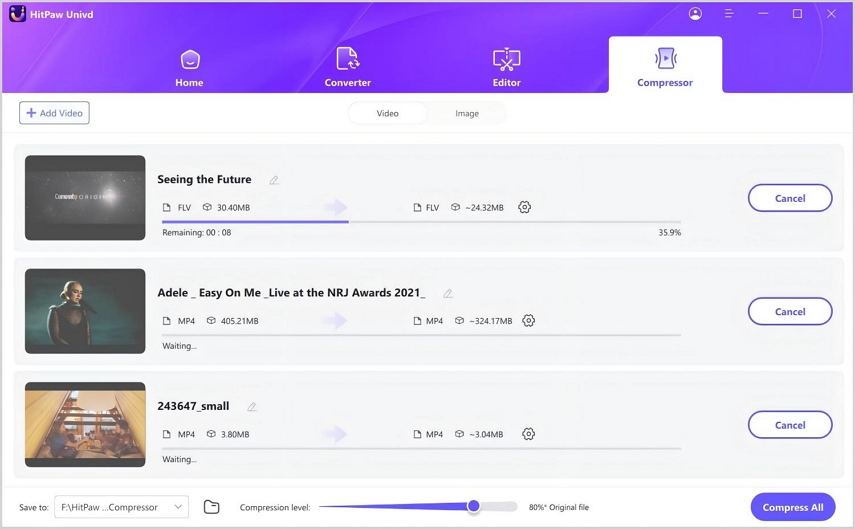
5. Initiate Compression:Once you're satisfied with the compression settings, click on the "Convert" button to initiate the compression process. HitPaw Univd will process the video files according to the specified parameters, delivering high-quality compressed output.

6. Save Compressed Videos:Upon completion of the compression process, HitPaw Univd provides options for saving the compressed videos to your desired location. You can choose to save the files locally or export them directly to external storage devices.
Watch the following video to learn more details:
By following these simple steps, you can leverage the power of HitPaw Univd to compress your videos effectively while preserving their quality. Whether you're preparing a presentation, sharing content online, or optimizing storage space, HitPaw empowers you to achieve exceptional results with ease.
Part 3. FAQs about PowerPoint Compressing Videos
Q1. How can I ensure the quality of compressed videos in PowerPoint?
A1. To ensure quality in PowerPoint, adjust compression settings cautiously, balancing file size and clarity.
Q2. What formats does HitPaw Univd support for compression?
A2. HitPaw Univd supports various formats like MP4, AVI, WMV, and more, ensuring versatility in compression.
Conclusion
In conclusion, mastering video compression in PowerPoint is essential for seamless presentations. While PowerPoint offers basic compression options, HitPaw Univd provides advanced features to maintain video quality. By following the steps outlined in this guide and utilizing HitPaw's intuitive interface, users can ensure their presentations are both visually appealing and smoothly executed.



 HitPaw VikPea
 HitPaw Watermark Remover


Share this article:
Select the product rating:
Daniel Walker
Editor-in-Chief
My passion lies in bridging the gap between cutting-edge technology and everyday creativity. With years of hands-on experience, I create content that not only informs but inspires our audience to embrace digital tools confidently.
View all ArticlesLeave a Comment
Create your review for HitPaw articles