The Ultimate Guide of AVCHD Premiere Pro [2025]
AVCHD is a file format that revolutionizes high-definition video recording and playback. However, to unlock the full potential of video editing with AVCHD, try Adobe Premiere Pro, the software chosen by professional editors. If you're importing AVCHD files in Premiere Pro, you'll find valuable tips to enhance your workflow and achieve exceptional results.
Perfect for beginners and professionals, this guide ensures you leverage the best AVCHD in Premiere Pro to elevate your video projects. You will also learn the best options for converting AVCHD to a Premiere Pro-friendly format.
Part 1. Understanding AVCHD and Premiere Pro
Advanced Video Codec High Definition or AVCHD is a file format for digital recording and playback of high-definition video. Developed jointly by Sony and Panasonic, it allows users to store large amounts of HD video on memory cards and disks efficiently, making it ideal for professional and amateur videographers.
Adobe Premiere Pro supports AVCHD files. This allows editors to import AVCHD files to Premiere Pro and edit them directly without conversion. This compatibility simplifies the workflow, reduces file handling, and preserves original video quality throughout editing.
Using AVCHD in Premiere Pro offers significant advantages for video editing. The format supports high-resolution content without consuming excessive storage, facilitating smoother editing of HD videos. Premiere Pro's robust editing tools enhance AVCHD's high-quality outputs, enabling professionals to produce visually stunning and dynamically rich projects.
Part 2. Importing AVCHD into Premiere Pro
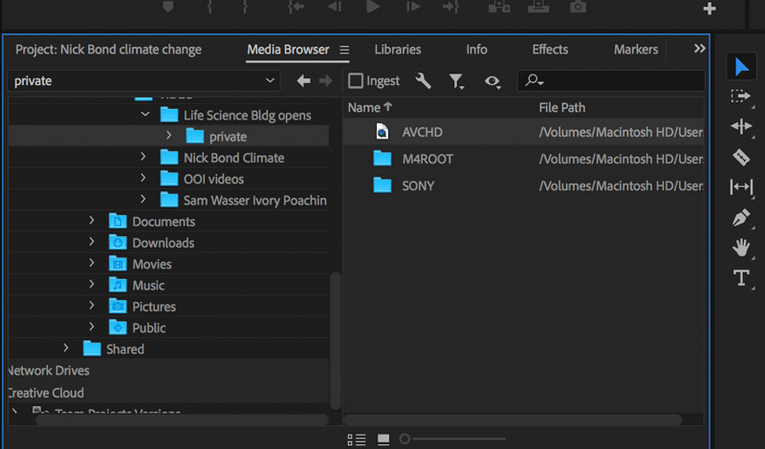
Now that you have understood the relationship between AVCHD and Premiere Pro let's explore the practical aspects of how to import AVCHD files to Premiere Pro.
- Open Adobe Premiere Pro.
- Navigate to the "File" menu, select "Import," then browse to the location of your AVCHD files.
- Select the files you need to edit and click "Import." The files will be added to your project for immediate editing.
In cases where direct import is not possible or if the high data rate of AVCHD files hinders system performance, converting the files into a more manageable format like ProRes or H.264 may be necessary. Use a reliable video converter to transform your AVCHD files into a format easier for Premiere Pro to handle. After conversion, follow the regular import process. This method reduces strain on your editing system, leading to a smoother editing process.
While importing AVCHD files can be flexible, it's not without its challenges. Recognizing potential issues ahead of time can prepare you for a smoother editing process.
Performance Issues: AVCHD files are high-definition and can be large, which may slow down editing on older or less powerful systems. Using proxies or lower-resolution versions for editing can mitigate this.
Software Compatibility: Ensure your version of Premiere Pro is up-to-date, as older versions may struggle with newer AVCHD formats.
Corrupted Files: Occasionally, files may not import correctly if corrupted. Before importing, it is essential to ensure your media is correctly formatted and error-free.
Part 3. Converting AVCHD to Premiere Pro-friendly formats
Converting AVCHD files can enhance performance or compatibility. Consider these three top options:
1. HitPaw Univd (HitPaw Video Converter)
One of the most effective methods to convert AVCHD to a Premiere Pro-friendly format on Windows and Mac is utilizing the HitPaw Univd. This robust and flexible converter can process any video format and resolution. It allows you to easily convert AVCHD to MP4, MOV, and other formats with just a few clicks, ensuring that the quality of your video remains intact.
Key Features of HitPaw Univd
- Feature a simple and user-friendly interface
- Support over 1000 video and audio formats
- Enhance conversion speed up to 30x faster through GPU acceleration
- Compatible with various devices & platforms, i.e., iPhone, iPad, Android, YouTube, Facebook, Instagram, etc.
- Allow editing of videos before conversion, including trimming, cropping, rotating, and adding watermarks
Steps to use HitPaw Univd
Step 1: Import AVCHD Video

Open HitPaw Univd. Import your files by clicking the "Add Video" button or dragging & dropping them into the interface.
Step 2: Change Meta Information
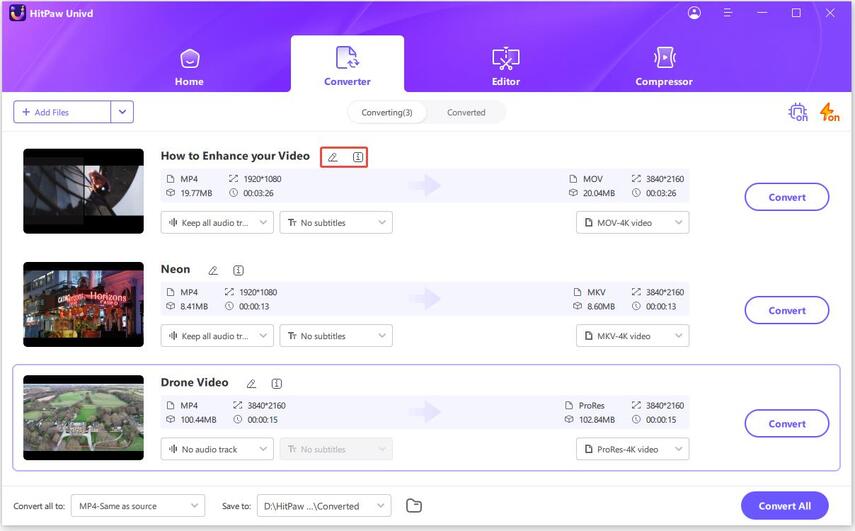
To modify your video's details, click on the file name to edit the title.
Step 3: Select the Output Format
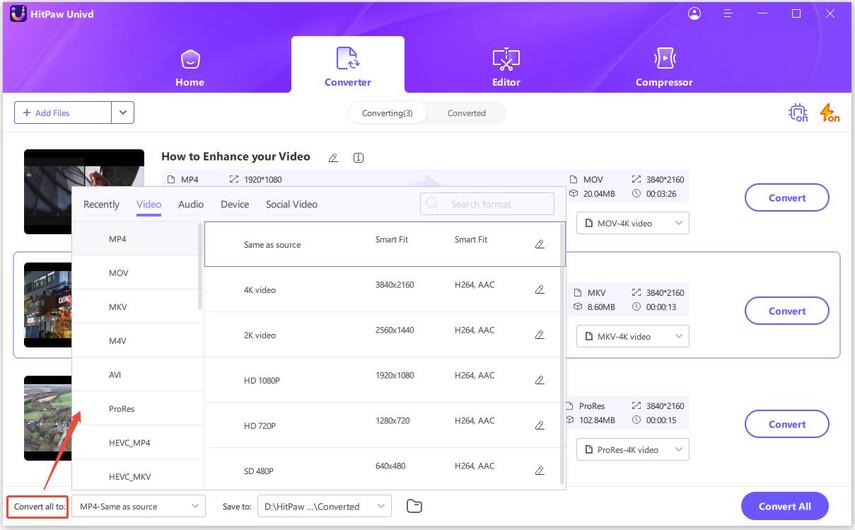
Select the desired output format for each file by clicking the downward triangle icon in the bottom right corner.
Step 4: Start Conversion
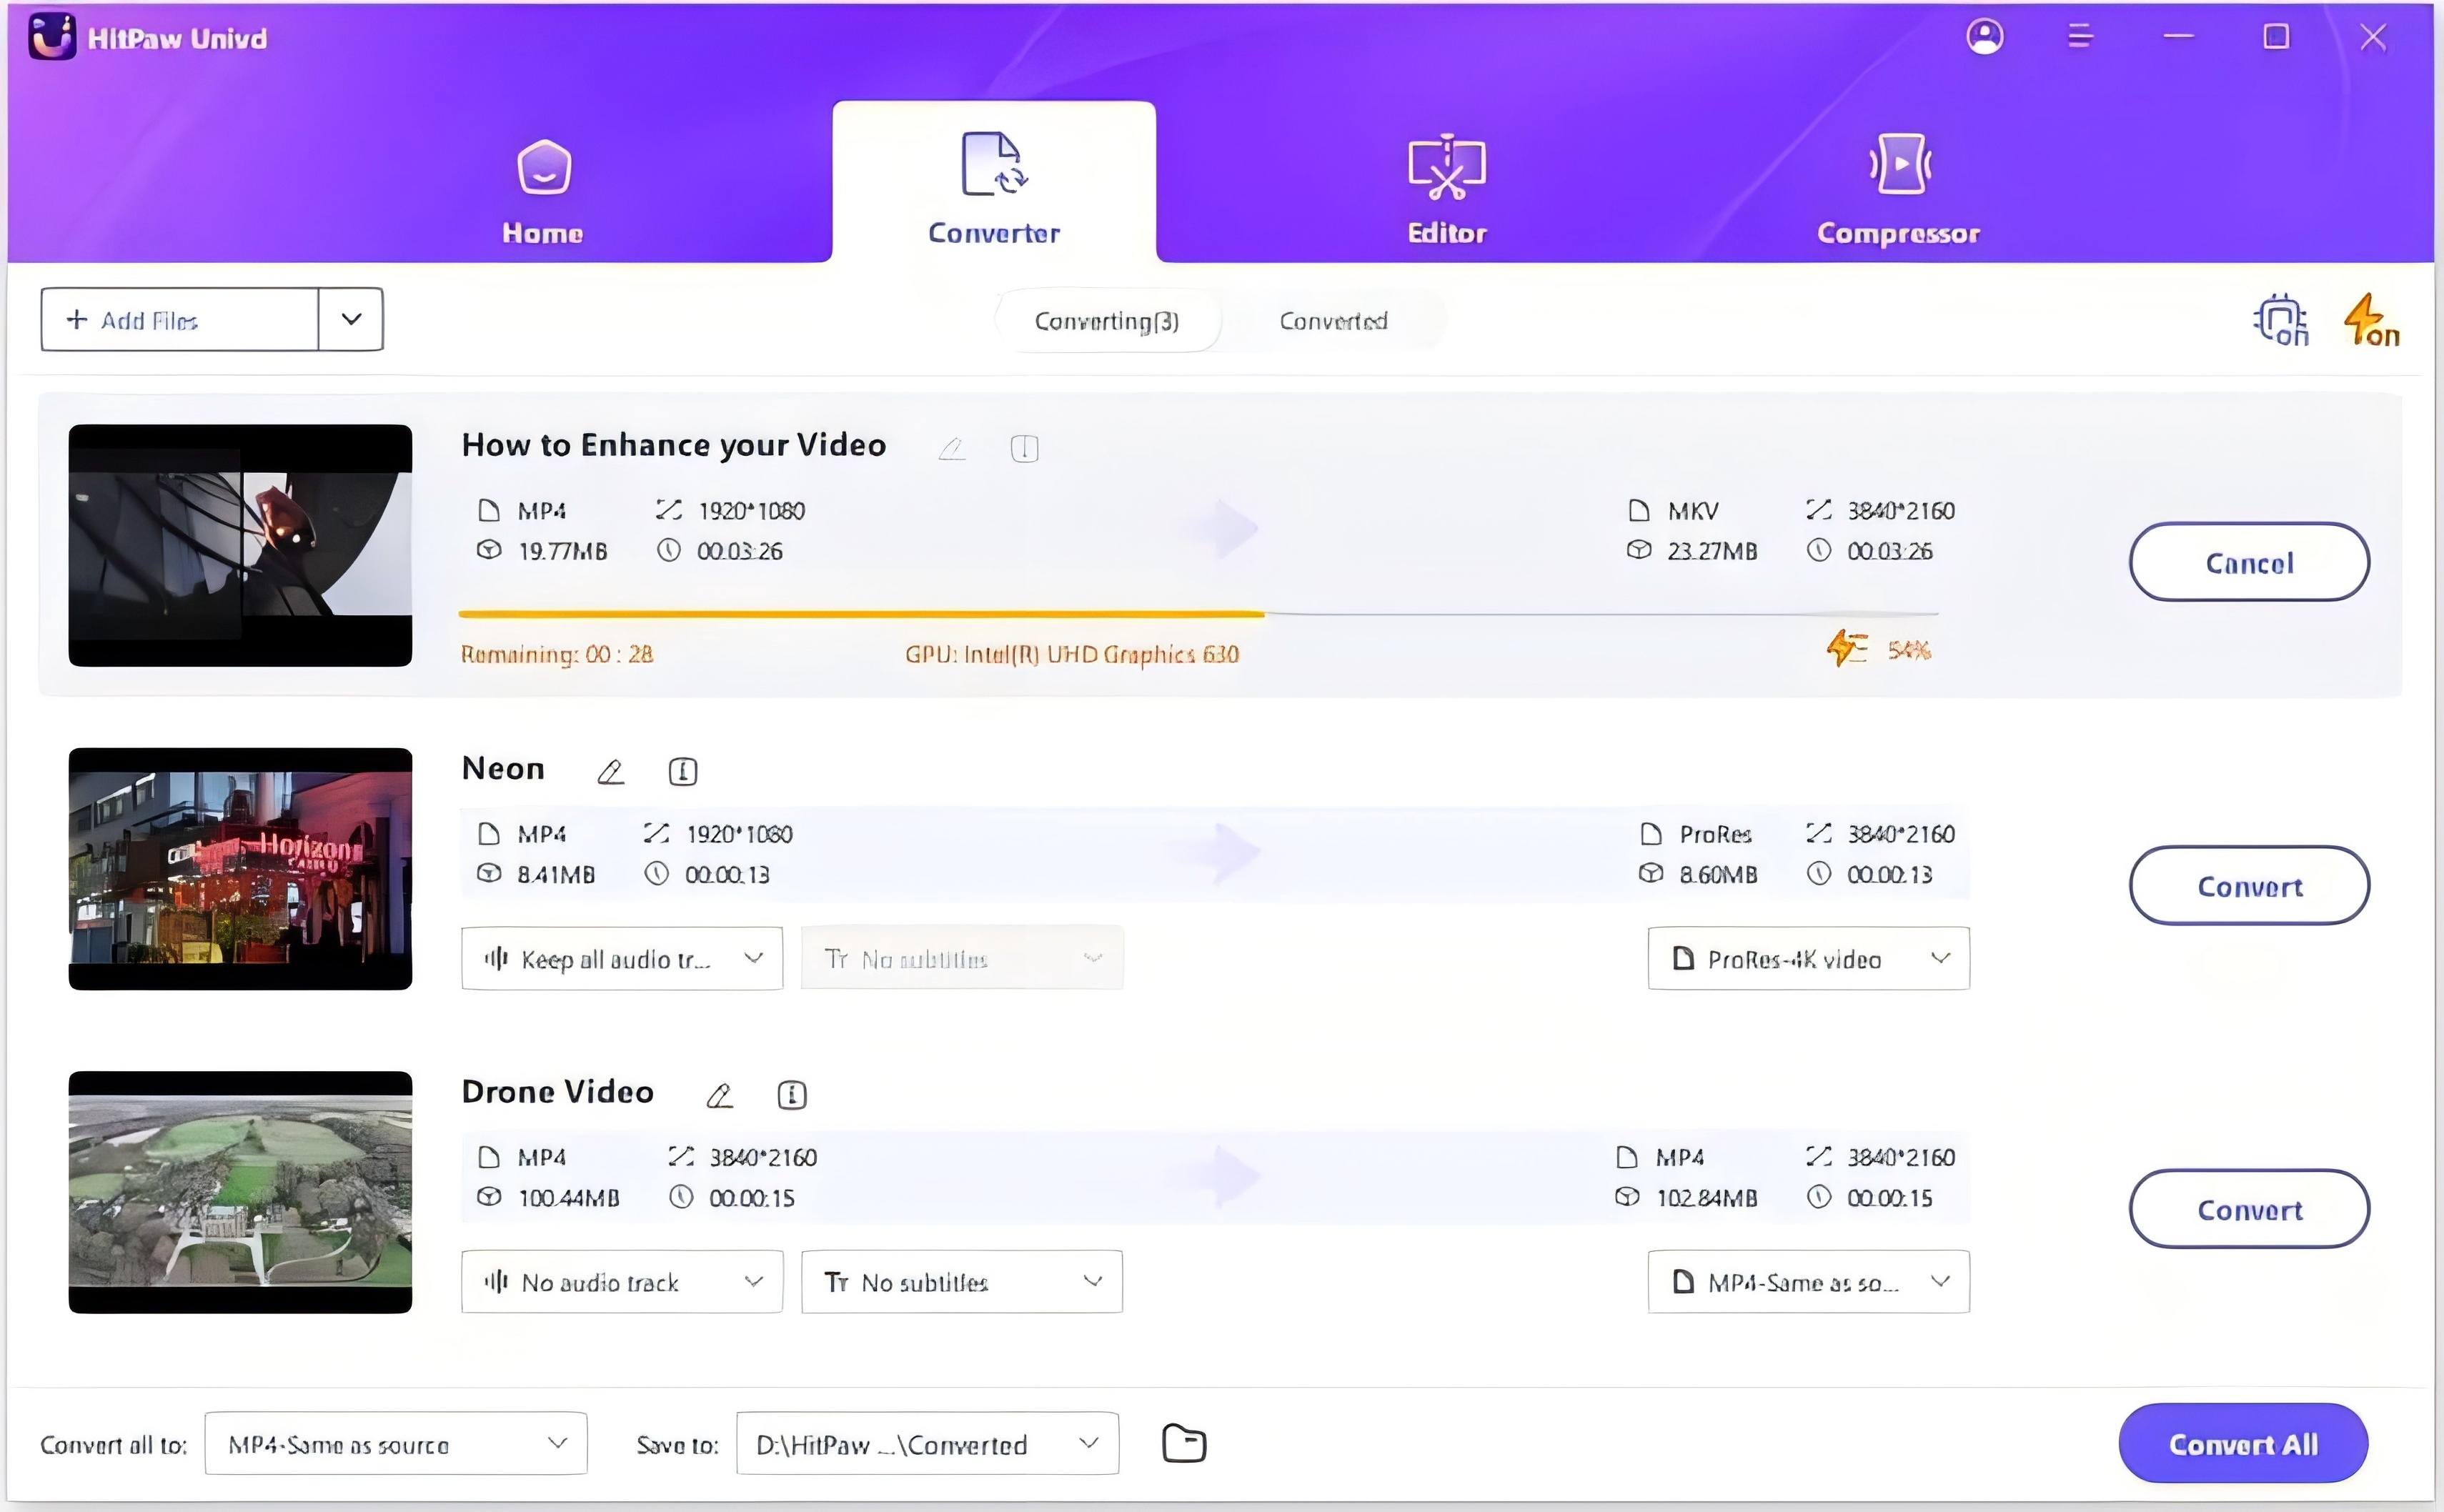
Choose a destination folder from within the interface and click "Convert" to start the video conversion process.
Watch the following video to learn more details:
2. Leawo
Leawo Video Converter is a comprehensive tool that supports various video formats, ensuring compatibility across devices and platforms. It offers features like video editing, 2D-to-3D conversion, and batch processing, making it a versatile choice for casual users and professionals seeking quality conversions.
Steps to use Leawo:
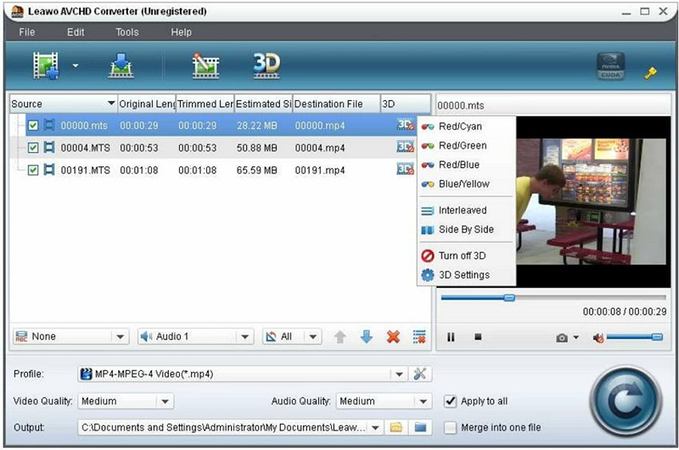
Step 1: Open the Leawo Video Converter and load your videos by clicking "Add Video."
Step 2: If necessary, edit the video using the built-in editing tools. Then, select the preferred format from the format list.
Step 3: Choose the output folder and tap "Convert" to begin the conversion process.
3. AVCHD Video Converter: Aiseesoft
Aiseesoft AVCHD Video Converter handles AVCHD files, offering optimized device presets and high-quality conversions. It provides powerful editing tools, such as clipping, merging, and adding watermarks, tailored for users who need precise control over video output.
Steps to use Aiseesoft AVCHD Video Converter:
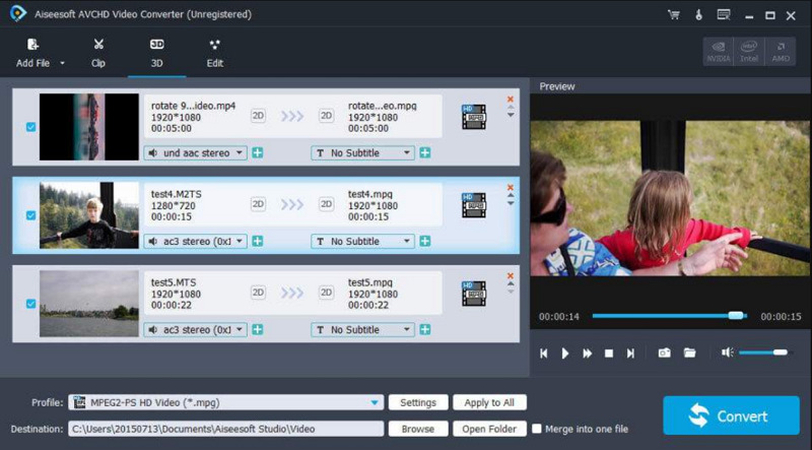
Step 1: Launch Aiseesoft AVCHD Video Converter and import your AVCHD files.
Step 2: Use editing features to tailor your video to your needs. Choose your output format and settings tailored to your device or platform.
Step 3: Hit "Convert" to convert your AVCHD files to the chosen format.
Part 4. FAQs of AVCHD and Premiere Pro
Q1. How do I ensure smooth playback of AVCHD in Premiere Pro?
A1. Use Premiere Pro's proxy workflow to seamlessly edit high-definition AVCHD files, enhancing performance and smooth playback.
Q2. Can I lose quality when converting AVCHD files?
A2. Minimal quality loss occurs when converting AVCHD files using reliable converters like HitPaw Univd with the correct settings.
Q3. Is AVCHD better than MP4 for editing in Premiere Pro?
A3. AVCHD provides higher quality and is better for editing; however, MP4 might be preferred for its broader compatibility and smaller file size.
Bottom Line
Mastering AVCHD in Premiere Pro can significantly enhance your video editing projects. For those encountering format or compatibility challenges, this guide offers three superb tools to choose from. However, the HitPaw Univd is highly recommended.
Its ability to maintain high quality while converting files ensures your AVCHD footage is ready for any professional editing workflow. It streamlines your video production process and unlocks new creative possibilities. Try it today and experience the difference in editing efficiency and output quality.


 HitPaw Univd (Video Converter)
  HitPaw Univd (Video Converter)
  HitPaw VikPea (Video Enhancer)

Share this article:
Select the product rating:
Daniel Walker
Editor-in-Chief
My passion lies in bridging the gap between cutting-edge technology and everyday creativity. With years of hands-on experience, I create content that not only informs but inspires our audience to embrace digital tools confidently.
View all ArticlesLeave a Comment
Create your review for HitPaw articles