How to Reduce Background Noise on Mic
Nothing can be more frustrating in audio clarity than unwanted background noise infiltrating your microphone. Background noise is a common adversary whether you're working from home, recording audio, or engaging in crystal-clear conversations. But fret not! You don't need a degree in audio engineering to conquer this challenge.
If your microphone insists on picking up everything but your voice, it's time to take action. While completely banishing ambient noise might be a lofty goal, you can certainly diminish its interference. This guide will show you how to reduce background noise on your mic, making your voice the show's star.

Part 1. The Different Types of Background Noise
Background noise can be a significant challenge in audio recording and communication situations. Understanding the various types of background noises is essential to address and minimize their impact effectively. This section will explore the different categories of background noise that can disrupt your recordings or conference calls.
Impulse Noises: These are sudden, short-lived, high-frequency sounds, often manifesting as pops or clicks. They can be quite bothersome but are usually brief.
Broadband Noise: Broadband noise covers various frequencies, including buzzing sounds. It can be continuous and persistent, affecting audio quality.
Narrow Band Noises: These noises are often related to specific signals, such as humming or whining. They remain relatively steady and can be distracting.
Electrical Noises: Originating from recording equipment or other technology, electrical noises can be a persistent issue in audio recordings. They often result from interference or poor grounding.
Irregular Noise: Encompasses a broad spectrum of sounds, from talking and traffic to dramatic interruptions like thunder or rain. These interruptions can disrupt communication and recordings unpredictably.
Recognizing these background noise types is the first step in addressing and mitigating their impact on your audio quality. Developing an action plan for ambient noise ensures your recordings and conferences remain clear and professional.
Part 2. Basic Tips for Noise Cancelling on Microphone
Fear not when you want to get crystal clear audio recording; it can be manageable. You can take some basic and easy steps to minimize those unwanted sounds.
Before we delve into the intricacies of software features, let's start with some simple preliminary checks and basic tips to create a quieter recording environment.
- Ensure your headphones are properly plugged into the computer and microphone jack. This simple action ensures a stable audio connection.
- Turn off any noisy culprits in your vicinity, such as ceiling fans, televisions, or blaring music. Close doors and windows to keep external sounds at bay.
- Check for electrical cables crossing over your audio cables, like headphone wires. Electromagnetic interference can be the source of unwanted noise.
- Experiment with different power sockets to avoid the interference caused by electrical circuits.
- Speak directly into the microphone to evaluate if background noise is minimized during recording.
Additionally, consider these basic tips for clear audio recording:
- Wear headphones to prevent microphone pickup from your speakers, which can lead to echoes.
- Use a dedicated microphone or headset for improved audio quality compared to built-in laptop microphones.
- Be mindful of background noise and take steps to eliminate or move away from it. Closing windows, silencing noisy applications, and muting yourself when not speaking can make a big difference in your recording quality.
These simple steps and tips can create a quieter, more professional audio recording environment.
Part 3. How to Get Rid of Background Noise on Mic
This section will guide you through four processes of enabling Noise Suppression, a handy feature that can significantly improve your audio quality.
Method 1. Enable Noise Suppression in Windows
Windows 10 provides several integrated microphone options that vary depending on your PC's sound hardware and audio drivers from the manufacturer.
To access these options, you won't find them in the new Settings app; they are tucked away in the traditional Control Panel. Here's how to enable Noise Suppression:
1.Open the Control Panel from the Start menu.
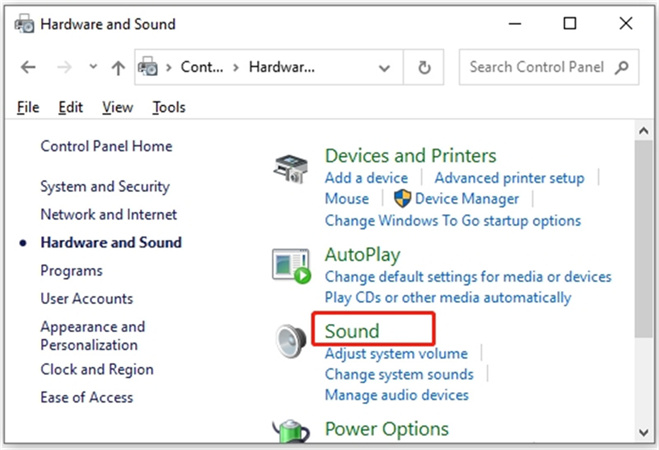
2.Navigate to "Hardware and Sound" and then select "Sound."

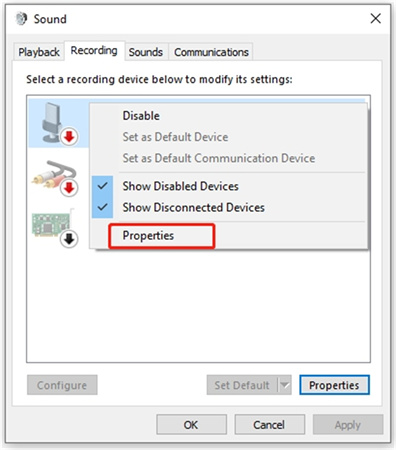
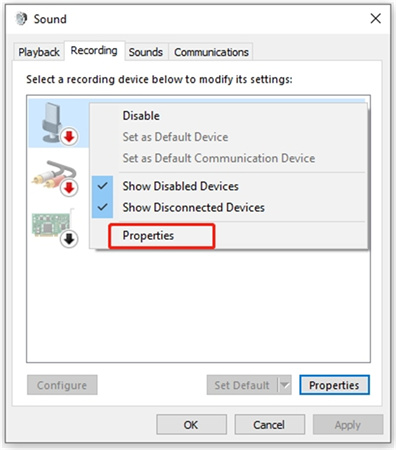
3.Click on the "Recording" tab in the Sound window and choose your microphone device. Then, click "Properties."

4.In the microphone device's properties window, go to the "Levels" tab.
5.If background noise is problematic, consider lowering the Microphone Boost setting from +20.0 dB to +10.0 dB. This reduces sensitivity to background noise.
6.Adjust the microphone volume to 100 to compensate for the reduced boost setting.

7.Click "Apply" after making these changes and test your microphone to see if the background noise is reduced.
8.If your PC supports it, go to the "Enhancements" tab and enable "Noise Suppression" or any other relevant noise reduction options.

9.Save your changes by clicking "OK" and closing the window.
Following these simple steps, you can enjoy a clearer audio experience and end background noise woes during your calls and recordings.
Method 2. Use Microphone Noise Cancelling Software
In a world where digital content creation is on the rise, achieving pristine audio quality is paramount. Whether you're recording a podcast, creating a video, or conducting an online meeting, background noise can be an unwelcome intruder, marring the clarity of your recordings.
Fortunately, there's a simple and effective solution at your fingertips: HitPaw Univd (HitPaw Video Converter), a powerful software equipped with the "Noise Remover" feature, harnessing the magic of AI to automatically eliminate unwanted background noise from your audio and video files.
HitPaw Univd is a user-friendly software that makes your audio and video editing tasks a breeze. The standout feature, "Noise Remover," is your secret weapon for achieving crystal-clear sound in your recordings.
This innovative tool employs advanced artificial intelligence algorithms to swiftly identify and remove background noise, ensuring that your audio or video content shines with professional quality.
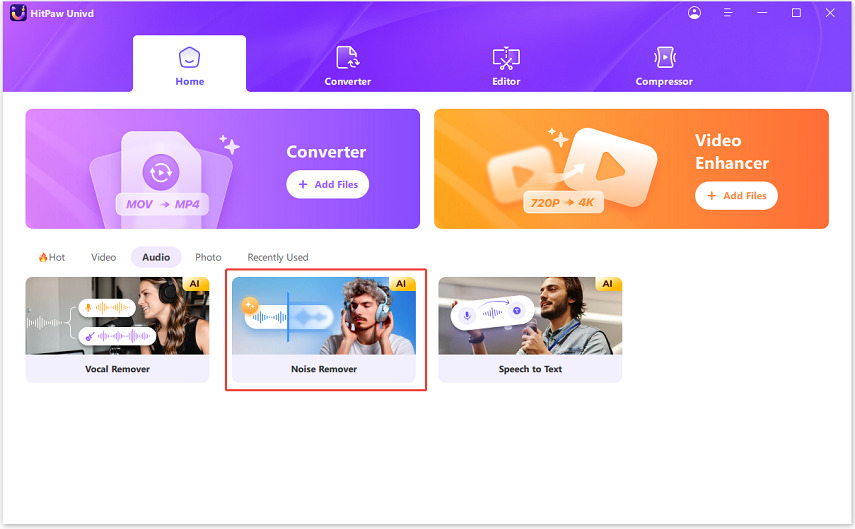
A Step-by-Step Guide to Removing Background Noise with HitPaw Univd:Step 1:To get started, have the HitPaw Univd installed on your computer. Once the software runs, navigate to the "Toolbox" section to download the "Noise Remover" feature. This crucial step lays the foundation for your noise-cancellation journey.

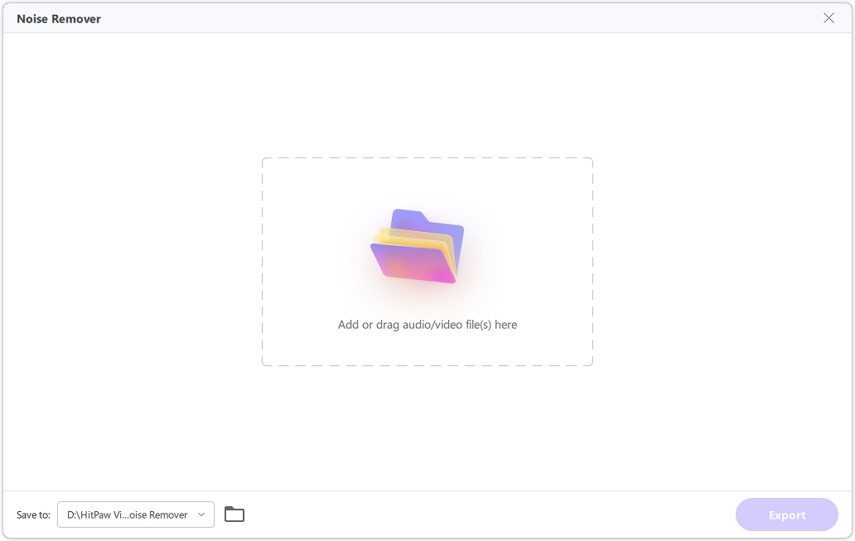
Step 2:After downloading the AI Noise Remover feature, you'll find yourself on the software's main screen. Here, you can effortlessly add your audio or video files. Simply click the "Add" button to select your file or drag and drop it directly onto the program. This software supports 1000+ video and audio formats.

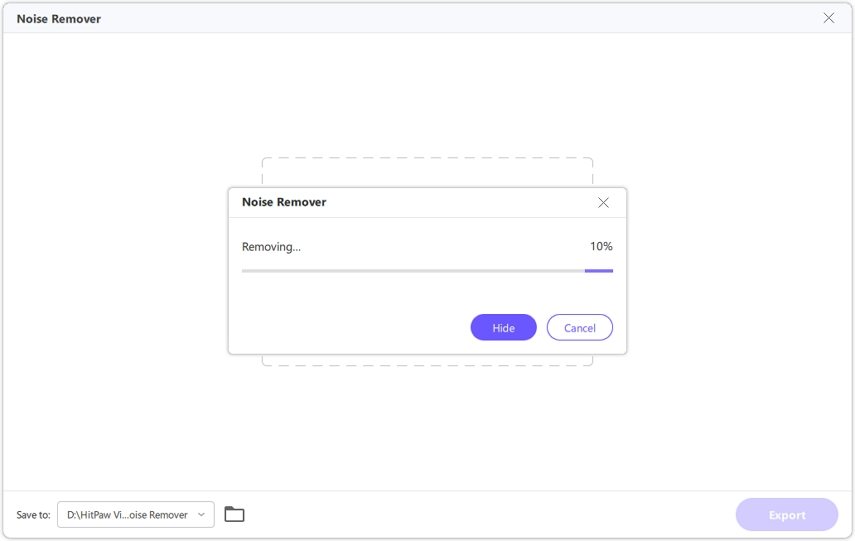
Step 3:Once you've added your file, HitPaw Univd's AI-powered Noise Remover will swing into action automatically. The software's cutting-edge algorithms will swiftly detect and remove background noise, leaving your audio or video crisp and clear.
The best part? You don't need specialized audio editing skills; the software handles everything.
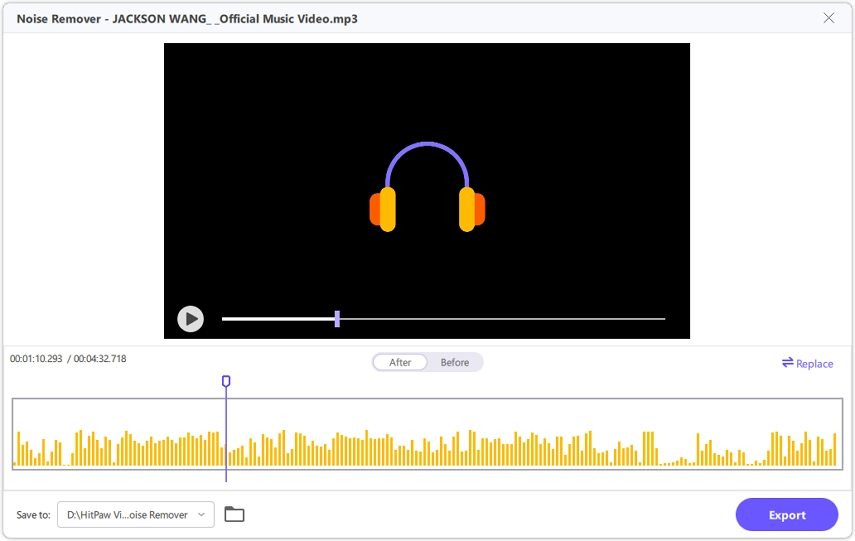
Step 4:As the AI Noise Remover works its magic, you can sit back and relax. After completing the process, you can preview and compare the effects before and after noise removal.

This step ensures that you are satisfied with the results. Once content with the outcome, hit the "Export" button to save your file without distracting background noise. If you wish to work on another file, the "Replace" button is at your fingertips, making your editing journey as seamless as possible.
Method 3. Consider a Noise-Canceling Microphone
When it comes to improving your audio quality and preventing your microphone from picking up annoying background noise, one highly effective method to consider is using a noise-canceling microphone. Investing in a better microphone could be your solution if all else fails.
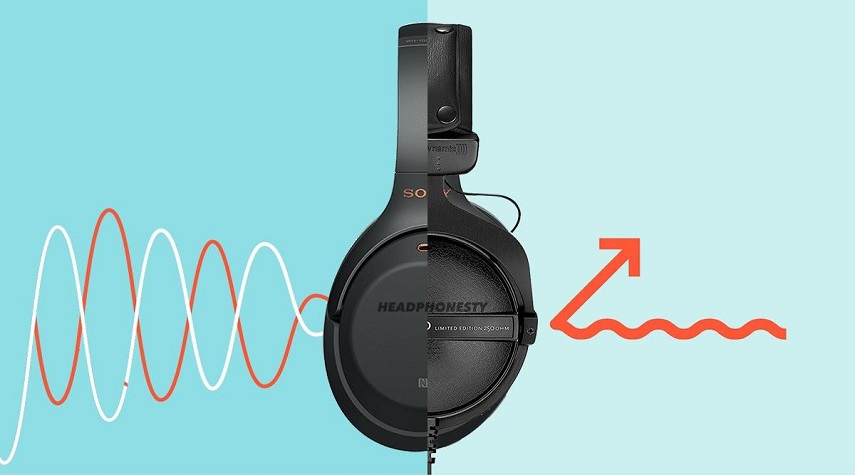
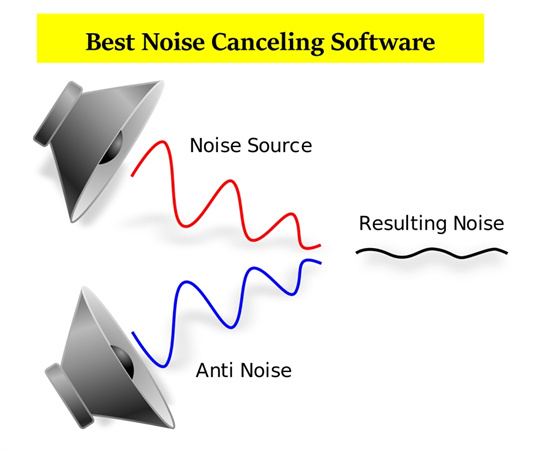
Some microphones are specially designed to tackle the issue of ambient noise interference. These microphones often feature two built-in microphones - a primary one to capture your voice and a secondary one to record the surrounding ambient noise. The magic happens when these microphones work harmoniously to filter unwanted background noise. These microphones are commonly marketed as "noise-canceling microphones."
Even if you don't opt for a dedicated noise-canceling microphone, upgrading to a higher-quality microphone can make a world of difference in audio quality compared to relying on your laptop's built-in microphone or dusting off an old headset from your drawer.
Related read: Are Noise Cancelling Headphones Safe
Method 4. Use Noise Reduction Accessories
In addition to enabling sound suppression, using noise reduction accessories is another effective approach to prevent your microphone from capturing background noise. These accessories can enhance the performance of your microphone in various ways, ensuring your audio recordings are crisp and clear.
Here are some commonly used noise-reduction accessories:
Mic Preamplifier: A mic preamplifier serves as a bridge between your microphone and other recording devices. It simplifies the connection and can improve audio quality.
Shock Mounts: Placing your microphone on shock mounts can significantly reduce unwanted noise caused by vibrations, ensuring your recordings remain disturbance-free.
Power Adaptors: These devices are particularly useful for reducing static noise, especially when using multiple recording equipment simultaneously. They can help maintain a clean and noise-free audio signal.
Wind Shield: A windshield is designed to fit over your microphone's head, effectively eliminating wind interference. This accessory is essential for outdoor recordings or in environments with drafts.
The Bottom Line
Minimizing background noise on your microphone is essential for clearer audio during recordings or calls. Following our shared tips, you can enjoy better sound quality without much hassle.
Remember to find a quiet space, use noise-canceling software, and invest in a good-quality microphone. HitPaw Univd is the top recommended noise remover tool driven by AI technology. It removes all kinds of noises automatically.




 HitPaw VikPea
 HitPaw Edimakor


Share this article:
Select the product rating:
Daniel Walker
Editor-in-Chief
My passion lies in bridging the gap between cutting-edge technology and everyday creativity. With years of hands-on experience, I create content that not only informs but inspires our audience to embrace digital tools confidently.
View all ArticlesLeave a Comment
Create your review for HitPaw articles