Audacity Vocal Remover: How to Remove Vocals in Audacity
Vocals are one of the important parts of an audio file. And people might feel the need to get rid of these vocals for various reasons. Audacity, one of the most popular and easiest tools in the market, can be a right candidate to remove vocals. But is the Audacity remove vocals task too tough? This article features different ways to help remove vocals from songs using Audacity. In addition to this, we will also have a brief look at an ideal alternative to Audacity vocal remover. Keep reading to know more.
Part 1. Remove Vocals in Audacity Using Vocal Reduction and Isolation
This section talks about how to remove vocals Audacity using the Reduction and Isolation feature. Read below for better understanding.
1. When to Use Vocal Reduction and Isolation?
Vocals in the middle: Most songs are mixed in this way, with the voice in the center, or just slightly to the left or right, with instruments around them, creating the stereo effect.If the vocals are placed at the center of a track, then Vocal Reduction and Isolation can be effective by getting rid of what is common in both tracks.
2. Advantages and Disadvantages of Vocal Reduction and Isolation
Advantages:
- This method can be used for almost most songs
- You can alter the frequency and pitch of your soundtrack
Disadvantages:
- Removal of the vocals can often be incomplete leaving artifacts behind
- May also lose other elements of the audio apart from vocals
3. How to Remove Vocals with Audacity by Vocal Reduction and Isolation?
Audacity is a great software for beginners and professionals alike, thanks to its intuitive interface. Follow the below steps to know how to remove vocals with Audacity using this feature.
1. Open Audacity on your device and navigate to File >> Import to upload your soundtrack from which you wish to remove vocals.
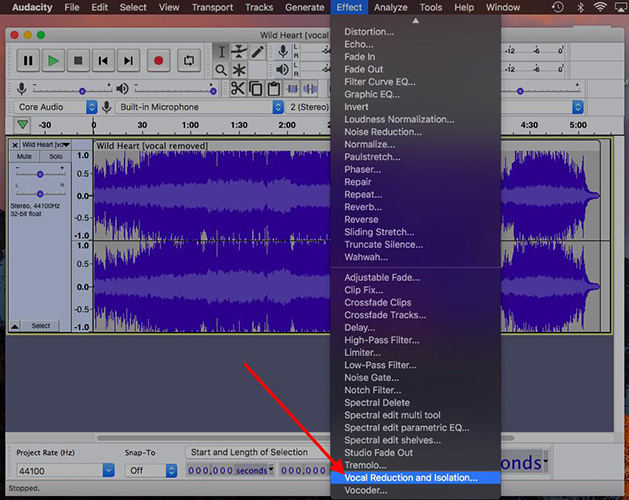
2. Next, choose the track and navigate to Effects tab shown on top. From here, click the Voice Reduction and Isolation option.

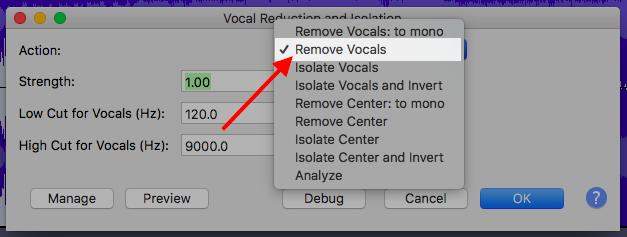
3. A small pop up will be shown on your screen. Click the Drop Down menu and select Remove Vocals option to proceed to Audacity how to remove vocals process.

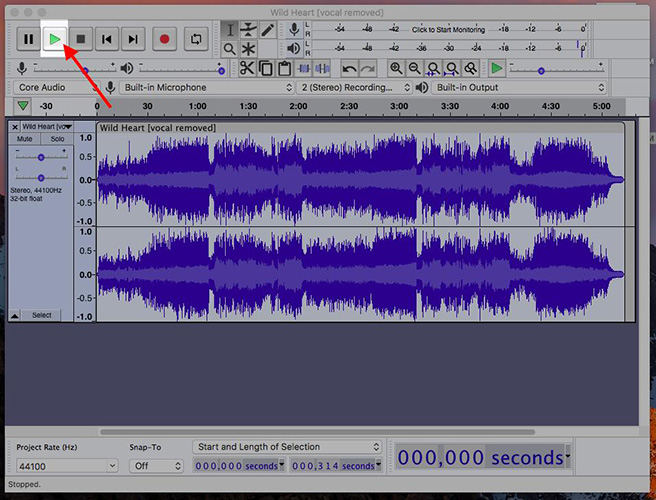
4. Let Audacity to erase the vocal from the audio file. Next, tap on ''Play'' to listen to the audio without vocals.

Part 2. Remove Vocals with Audacity Using the Invert Split Stereo
This section talks about removing vocals Audacity with the Invert Split Stereo feature. Read below for better understanding.
1. When to Use Invert Split Stereo?
Vocals in one channel: Typically songs from the 1960s use this approach, when stereophonic sound was still being explored in the studio.
There might be times when you need to remove vocals from a complex and unusual stereo track. In such case, vocals are mixed into one channel and every other element are mixed in other channel. To isolate the vocals, rather than remove them, delete the other channel.
2. Advantages and Disadvantages of Invert Split Stereo
Advantages:
- Easy to perform the Audacity remove vocal process as compared to the one mentioned above
- Does not delete other elements and only gets rid of vocals
Disadvantages:
- This method is suitable only for tracks that were created earlier. Modern-day tracks cannot be operated using this method
3. How to Remove Vocals on Audacity by the Invert Split Stereo?
Follow the below steps to know how to remove vocals in Audacity using this feature.
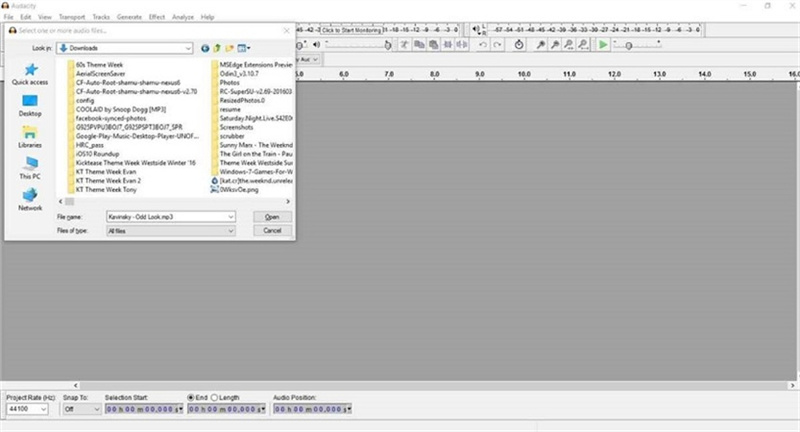
1.Open Audacity on your device and navigate to File >> Import to upload your soundtrack from which you wish to remove vocals.

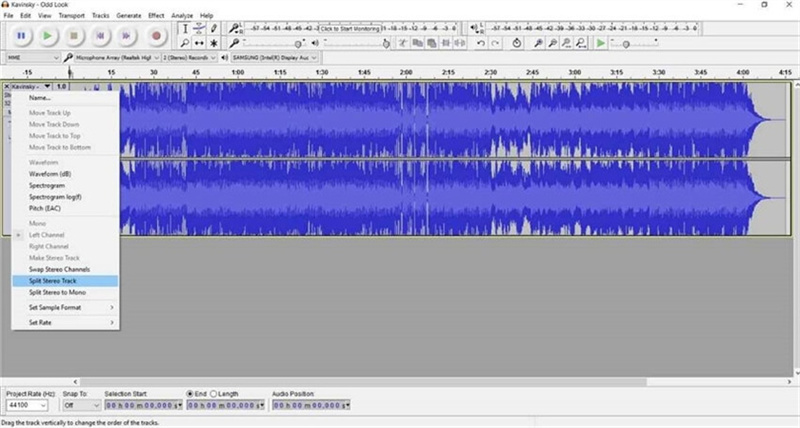
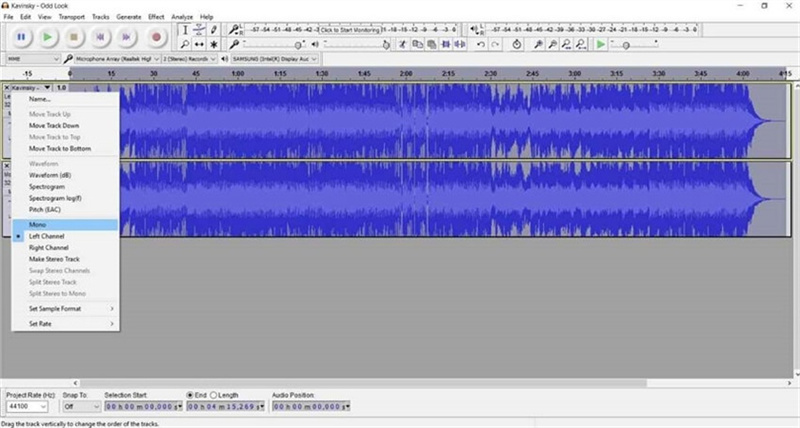
2.Now, click the Split Stereo Track option by navigating to the track's drop-down menu.

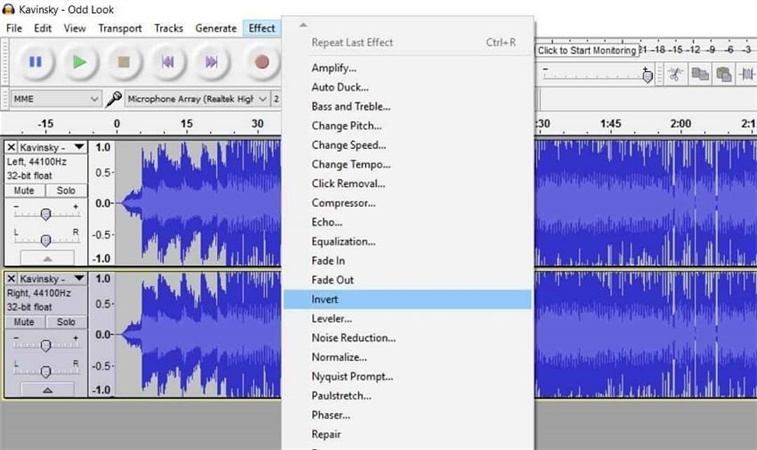
3.Once the track is separated into two channels, invert the bottom channel by tapping Invert option present in the Effects menu.

4.Tap the drop-down menu of the top track and choose the Mono option.

5.Perform the same steps for the bottom track. This is how you remove vocals with Audacity. All you need to do is save the audio file.
Part 3. Audacity Remove Vocals Not Working, How to Fix?
Now that you know how to remove vocals on Audacity, here are some solutions that can be helpful if Audacity remove vocals does not work for you.
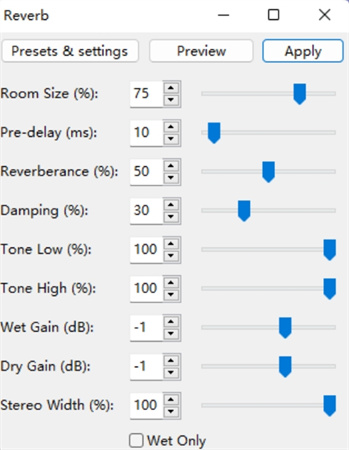
1. Check the Reverb Settings
To being with, users need to check the reverb setting on their audio if they are not able to remove vocal in Audacity. This can be done by going to Effects >> Reverb option. Tweak the parameters here and see if the problem is solved or not.
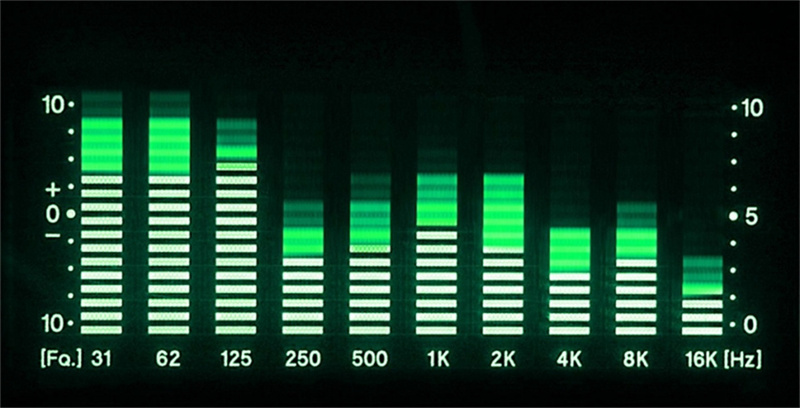
2. Check and Adjust Frequencies
The location of the vocal in the track can also be responsible for the issue you are facing. Vocals are usually placed in the center of any track and hence users need to be careful while deleting them. At such times, it is better to use better vocal remover tools such as HitPaw Univd (HitPaw Video Converter) to get rid of such vocals.
3. Reinstall the Latest Version of Audacity
One of the finest and easiest solution for any problem is to uninstall the app or software and install the latest version again. This can be applied to Audacity as well. Works Every Time!!!
4. Effect Parameters
Another probable solution that can help you solve the issue is adjusting effect parameters of low cut for vocals, strength, and high cut for vocals. These 3 settings can be regulated as per preference to get better results while vocal removing.
Go to "Effects" > "Special" > "Vocal Reeducation and Isolation…" to adjust the strength, low and high cut for vocals.
Part 4. Best Audacity Alternative to Remove Vocal Easily and Quickly with AI
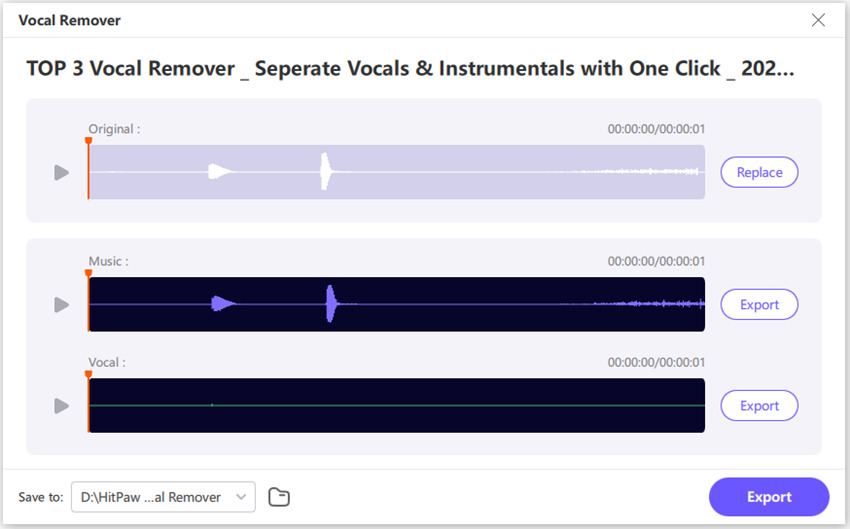
Even though Audacity is a nice way to remove vocals, it might be sometime tedious job to do so. Hence, the need for an alternative tool is obvious and this is where we come to your rescue. HitPaw Vocal Remover is one such fine tool that can help you get rid of vocals with just a few clicks and that too easily. Below are some features of this tool that might seem helpful.
- Best alternative to Audacity with enhanced AI support
- Analyze and delete vocals in a precise manner
- Delete vocals from both videos and audio
- Flawless and blazing-fast processing speed
- Maintain the overlays and quality of the media file
You do not need any technical knowledge to operate this tool. Follow the below steps to know how to use this tool.
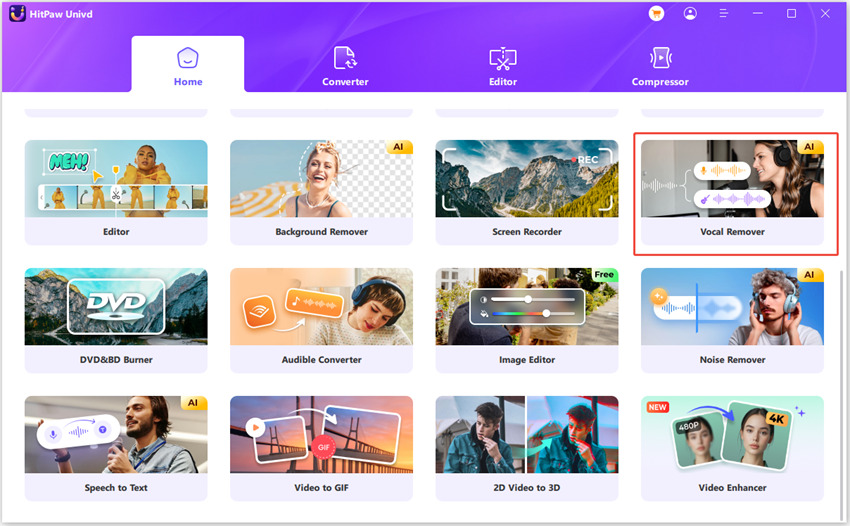
Step 1: Download, install, and launch HitPaw on your device. Navigate to Toolbox >> Vocal Remover option.

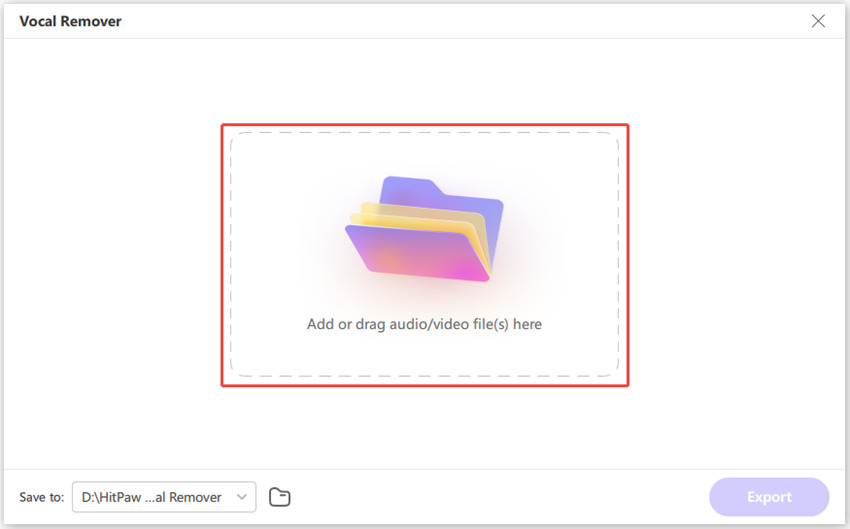
Step 2: Now, add your audio or video by dragging the files into Vocal Remover.

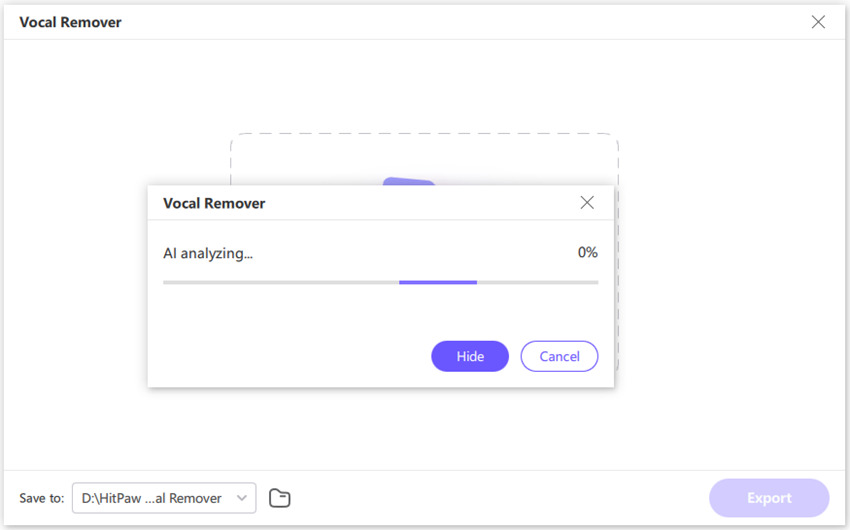
Step 3: Next, the AI will start analyzing the file automatically.

Step 4: Once the analysis is done by the tool, there are two audio tracks—vocal track and instrumental track. You can export either once them, or both of them.

Conclusion
With that being said, it is easy to remove vocals in Audacity. The article showed different methods to use Audacity to remove vocals. You can use the Vocal Reduction and Isolation or Invert Split Stereo method feature to get rid of vocals. These methods has their own set of pros and cons. Hence, it is better to use HitPaw Univd. The tool helps you get rid of vocals with just a single click and that too easily.




 HitPaw VikPea
 HitPaw Screen Recorder


Share this article:
Select the product rating:
Daniel Walker
Editor-in-Chief
My passion lies in bridging the gap between cutting-edge technology and everyday creativity. With years of hands-on experience, I create content that not only informs but inspires our audience to embrace digital tools confidently.
View all ArticlesLeave a Comment
Create your review for HitPaw articles