How to Remove Background Noise with Final Cut Pro
Capturing clean audio is crucial for any video production, but unwanted background noise can easily sneak into your shots and muddy up the sound. Things like wind, traffic, crowds, and HVAC systems often get picked up by your camera's microphone, distracting viewers from the dialog and voiceovers you want them to focus on. Fortunately, Final Cut Pro provides powerful audio editing tools that make it easy to clean up these annoyances and deliver noise-free sound.
In this article, I'll walk you through the steps for removing background noise in Final Cut Pro, using the built-in tools for noise reduction, equalization, and adaptive noise cancellation. Whether you simply need to mute some hum or tackle more pervasive noise issues, these Final Cut Pro filters can help restore clarity to your audio. With a few simple tweaks, you can have your video sound crisp, clear, and professional. Read on to master the methods for AI audio noise reduction Final Cut Pro.
Part 1. Can I Remove Background Noise in Final Cut Pro?
Absolutely. Final Cut Pro is equipped with powerful audio editing tools that make it easy to clean up unwanted background noise in your video clips. The key advantages of removing noise are improving the overall audio quality, enhancing speech intelligibility so dialogue and voice overs are clearer, and ensuring a professional sound that won't distract or annoy viewers. If your footage suffers from hissing, rumbling, static, wind noise, or other unwanted sounds, you can make your audio crisp and focused again within Final Cut Pro.
Now that you know Final Cut Pro is up to the task, let's dive in to the specific steps and techniques for reducing or eliminating different types of background noise from your footage. First we'll cover using the standard built-in filters, then explore some advanced options and specialty plugins. With some simple tweaks, you'll be able to capture superbly clean audio takes.
Part 2. Remove Noise from Audio in Final Cut Pro (Two Ways)
There are two methods to proceed with Final Cut Pro remove background noise. Let's take a look at the two steps in detail.
Method 1: Remove Noise from Audio in Final Cut Pro Using Audio Enhancements
Step 1 - Import the Video
The first step of Final Cut Pro remove background noise is to import the source file. Import your video clip into a Final Cut Pro project and add it to the timeline. Locate the clip in the browser or media library and drag it onto the timeline.

Step 2 - Add Audio Enhancements in Final Cut Pro
Click on the clip in the timeline to select it. Then go to Modify > Enhance Audio or press Command+A. This will open the Audio Enhancements window. By using that, you can proceed with Final Cut pro background noise removal.
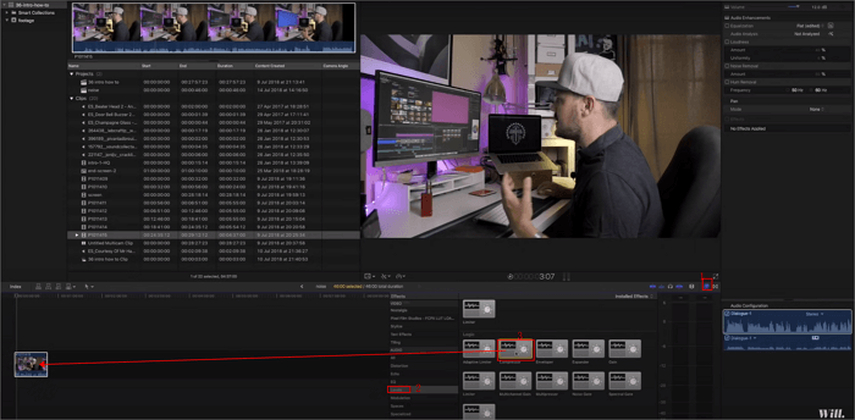
Step 3 - Fine Tune Background Noise Removal Settings
In the Audio Enhancements window, experiment with the sliders for Background Noise Removal, Hum Removal, and other options to reduce unwanted sounds. The Background Noise Removal works well for general ambient noise. Listen after each adjustment to monitor the changes.
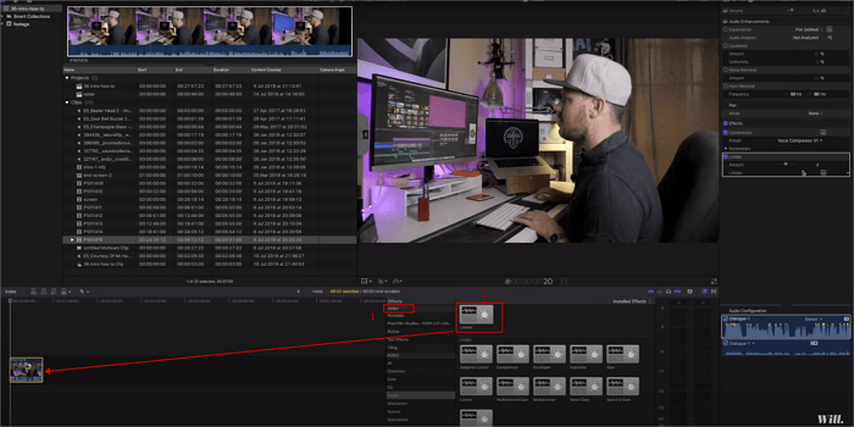
Step 4 - Export Video to Apply Cleaned Up Audio
When you find the right balance of noise removal without affecting the dialogue, music, and other audio you want to keep, export your video by going to File > Export > Master File. Choose settings suitable for your needs and export to apply the cleaned up audio. At the end of this Final Cut pro noise removal step, you will be able to get perfect results.
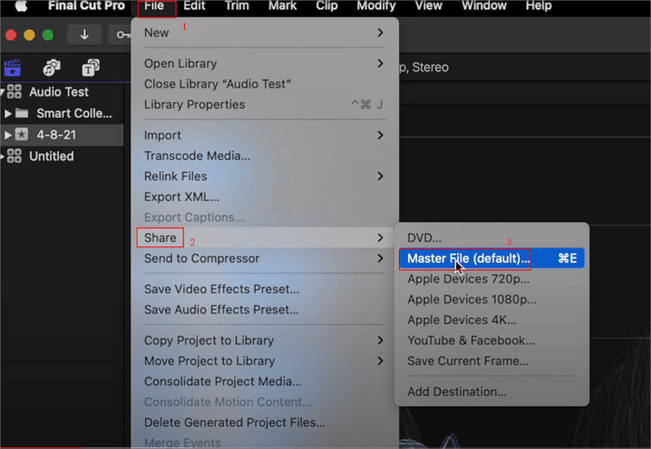
Method 2: Remove Noise from Audio in Final Cut Pro Using Denoiser
Step 1 - Add Denoiser Effect to Clip
With your video clip in the Final Cut Pro timeline, click the Effects button at the top right or press Command+5. Scroll and find the Denoiser effect. Drag it directly onto the audio portion of your clip.

Step 2 - Adjust Key Denoiser Parameters
In the Denoiser controls, you can leave it on the default reduction preset or customize the settings. Adjust the Threshold slider to target the level of noise you want to eliminate.
Step 3 - Smooth Out Remaining Artifacts
Increase the Reduce slider until the background noise is sufficiently minimized without introducing too many audio artifacts. Use the Smoothing sliders to fine tune.
Step 4 - Export Video with Noise-Reduced Audio
Play back your clip monitoring the audio. When you achieve the optimum noise reduction, export your video from the File > Export menu to apply the cleaned up audio from the Denoiser effect.
Part 3. How does FCP AI audio Noise Reduction Works?
Final Cut Pro leverages cutting-edge artificial intelligence to provide incredibly effective background noise reduction capabilities. Rather than just applying a blanket filter that can degrade audio quality, Final Cut Pro uses AI-powered algorithms that dynamically adapt to analyze and remove noise in your video clips.
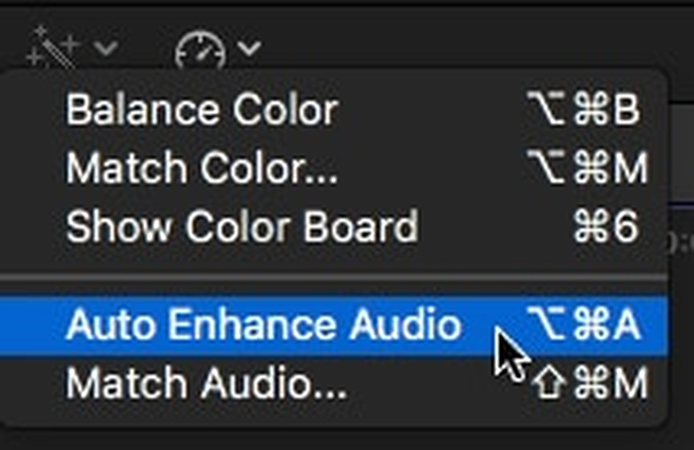
This machine learning approach allows Final Cut Pro to develop a deep understanding of the characteristics that distinguish desirable audio like dialogue, music, and sound effects from undesirable ambient noise. As you adjust the Background Noise Removal slider, Final Cut Pro's AI works to separate the signal from the noise, selectively eliminating interference without compromising the audio integrity you wish to preserve.
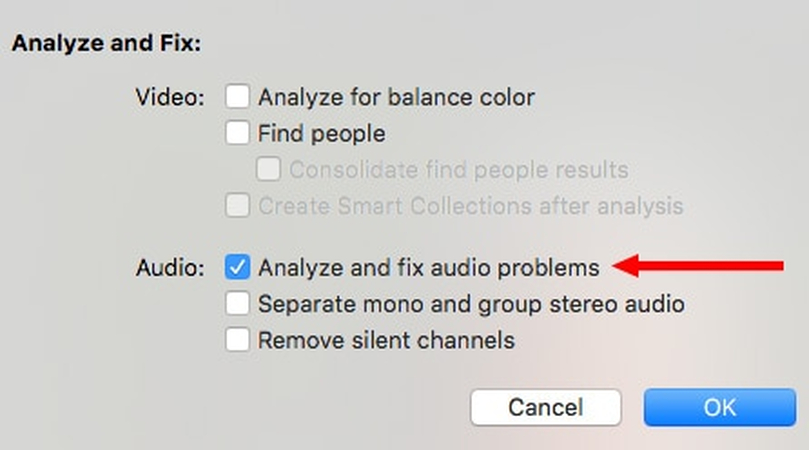
The more samples of speech, instruments, and noise the AI model trains on, the better it becomes at recognition and subtraction. So Final Cut Pro gets smarter and delivers continually improving noise reduction performance over time. Harnessing AI power enables precision filtering unattainable with traditional noise removal, opening new creative possibilities for clean, professional-grade audio right within Final Cut Pro. The future of intelligent sound editing is here.
Part 4. Best Final Cut Pro Alternatives for Removing Background Noise
If you find Final Cut Pro lacking in advanced background noise removal capabilities, check out HitPaw Univd (HitPaw Video Converter) as a featured-packed alternative. This video editing software goes beyond basic noise reduction tools by integrating cutting-edge AI to clean up your audio.
At the core of HitPaw is state-of-the-art artificial intelligence that digs deeper to remove unwanted background noise more intelligently. The AI algorithm of HitPaw is lightyears ahead, leveraging advanced machine learning that can dynamically profile various noise types and adapt settings automatically to mute just the unwanted sounds. This preserves the audio integrity of the dialogue, music, sound effects and other details you wish to retain.
HitPaw Univd - All-in-one Video Solutions for Win & Mac
Secure Verified. 254,145 people have downloaded it.
- HitPaw Univd uses artificial intelligence to deeply analyze audio and selectively mute just the unwanted background noise while preserving all the audio details you wish to keep.
- The AI algorithm automatically detects hiss, hum, echos, and other disturbances and adapts to effectively eliminate them while retaining speech, music, and intentional sounds.
- You can apply the exceptional AI audio cleanup to multiple files at once, saving time when working on large video projects.
- HitPaw noise reduction works like an automated sound engineer, delivering studio-level clarity without degrading the quality of your tracks.
- Once you start using HitPaw, you will get the opportunity to stay away from the time you spend on re-cording or purchasing expensive sound-blocking microphones.
Secure Verified. 254,145 people have downloaded it.
Guide to Remove Background Noise from Video/Audio
Step 1: Install the AI Background Noise Remover
Open HitPaw Univd and select the "Toolbox" tab, where you'll find the AI Background Noise Remover downloadable feature. Click install and this will automatically integrate state-of-the-art machine learning algorithms into HitPaw for exceptional audio denoising capabilities leveraging artificial intelligence. Once enabled, you'll be able to harness this premium tool to effortlessly strip background noise from media files with a few clicks.

Step 2: Import Target Media to Clean Up
With the AI Background Noise Remover feature installed, import the specific video or audio files containing unwanted ambient sound that you want to process through noise reduction. Drag and drop files directly into the media library or hit the "+" button to add clips from your computer's storage. Queue up all problematic footage with background noise contaminating the audio channel so it's ready for deep AI-powered cleansing.

Step 3: Let the AI Work Its Magic
Now simply enable the "AI Background Noise Removal" toggle at the top of the audio settings module on the right. As soon as it's activated, HitPaw's revolutionary AI algorithm will begin scanning your media files to identify sections containing undesirable background noise. It dynamically profiles the noise print across frequencies, learning the acoustic characteristics of what needs to be eliminated while preserving speech, music and intentional sounds.
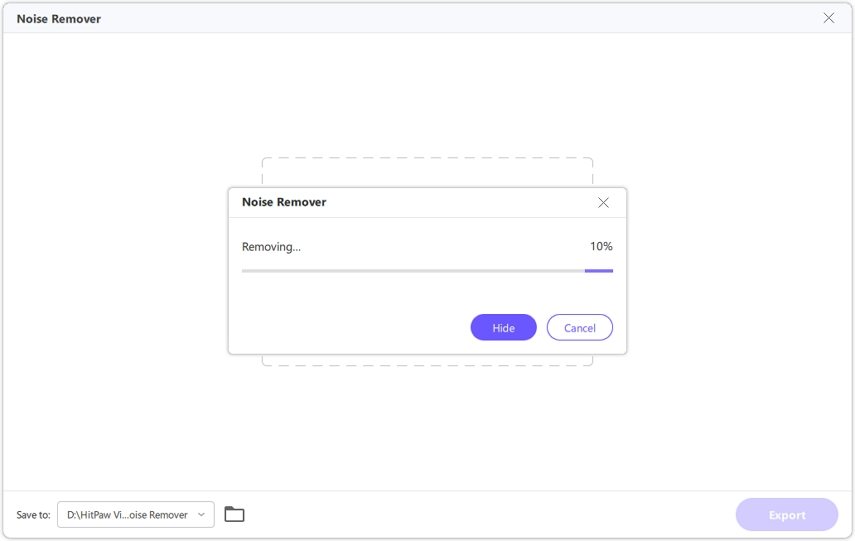
Step 4: Exports Clear Audio File
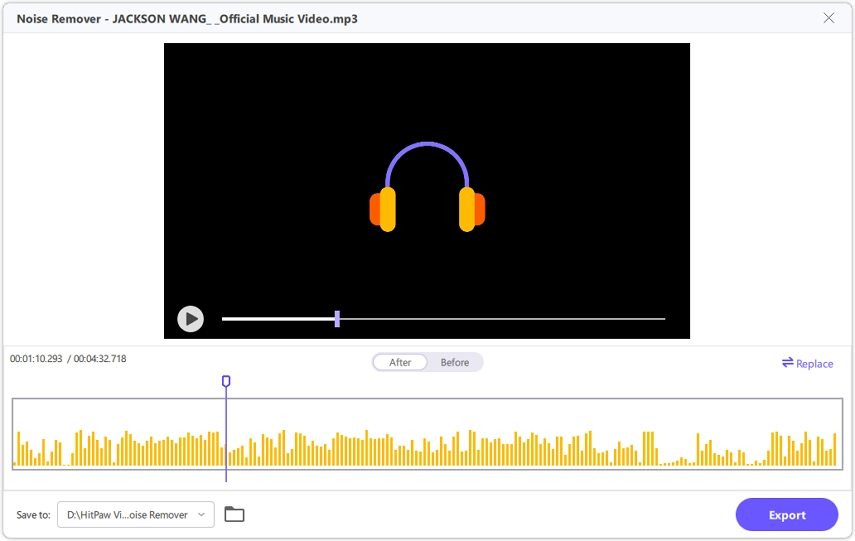
Within minutes, the AI will complete optimizations and detailed noise removal tailored to your media. Visually monitor the waveform or listen to before/after previews to experience the remarkable noise filtering results first-hand. Finally, export your media files with studio-quality audio - crystal clear and free of unwanted background noise without any loss of original fidelity thanks to HitPaw's state-of-the-art AI. Share or use the enhanced files in creative projects!
FAQs about Noise Reduction in Final Cut Pro
Q1. How do I remove voice from audio in Final Cut Pro?
A1. You can remove voice from audio clips in Final Cut Pro using the Equalizer tool under Audio Enhancements. Lower the Vocal Range frequencies between 300-900Hz to diminish vocals. Adjust the strength and narrow bands to target the fundamental pitch of speech content you wish to mute.
Q2. How do I remove background noise in Final Cut Pro?
A2. Enable the Background Noise Removal slider in the Audio Enhancements menu, accessible by going to Modify > Enhance Audio. Raise the amount until ambient noise like air conditioning hum, traffic sounds, wind etc. is sufficiently reduced while preserving the audio elements you wish to keep. You can also add a Denoiser effect from the Effects browser.
Q3. Can Final Cut Pro remove audio from video clips?
A3. Yes, Final Cut Pro allows you to completely detach and delete audio from any video clip. Right click the clip in the timeline and select "Detach Audio". The video remains while the audio component is removed. You can also mute clips which silences the audio but leaves it attached.
Conclusion
As you can see, Final Cut Pro provides very capable built-in tools for tackling common audio noise reduction challenges. Enable Audio Enhancements for broad ambient sound removal and vocal isolation. Add Denoiser for focused frequency targeting options. While these features deliver decent results for basic cleanup, HitPaw Univd takes it to the next level with advanced AI perfectly erasing background noise from media files automatically. If you deal with lots of problem audio, leverage HitPaw's machine learning and batch processing to save endless hours of tedious manual editing.


 HitPaw VoicePea
  HitPaw VikPea (Video Enhancer)
 HitPaw FotorPea


Share this article:
Select the product rating:
Daniel Walker
Editor-in-Chief
My passion lies in bridging the gap between cutting-edge technology and everyday creativity. With years of hands-on experience, I create content that not only informs but inspires our audience to embrace digital tools confidently.
View all ArticlesLeave a Comment
Create your review for HitPaw articles