How to Fix Premiere Pro Clips No Sound
Working on an important project in Adobe Premiere Pro only to find that your Premiere Pro clips no sound can be highly frustrating. This issue is a major roadblock for editors and creators alike.
In this guide, practical fixes for when the audio is not playing in Premiere Pro will be discussed, along with common causes and solutions that anyone can follow.
Part 1. Why Is There No Sound in Premiere Pro?
Before addressing solutions, it is important to understand why the issue occurs. Identifying the root cause often makes fixing the problem quicker and more effective. Here are some common reasons:
- Muted Audio Tracks: Audio tracks may be muted accidentally within the timeline. This often happens during multitasking or when working with multiple layers of audio.
- Media Cache Corruption: Corrupted cache files can disrupt audio playback. Overloaded cache folders may also slow down your overall editing process.
- Unsupported File Formats: Some audio file formats may not be compatible. For instance, uncommon codecs can lead to playback issues in Premiere Pro.
- Software Glitches: Bugs in the software can occasionally cause audio issues. Regular updates are crucial to minimize such problems.
- Hardware Configuration: Incorrect audio device settings in Premiere Pro. This could be related to your input/output device settings or external hardware like headphones.
Understanding these causes makes it easier to tackle the issue effectively. Addressing these issues not only fixes the sound but also improves the performance of Premiere Pro overall.
Part 2. How Do I Get Audio Back in Premiere Pro?
Each method outlined below is designed to address specific causes and will guide you step-by-step to restore your audio. These solutions are easy to follow.
1. Erasing the Media File Cache
Over time, Premiere Pro's media cache can become overloaded, causing issues like audio not playing in Premiere Pro. Clearing the cache often resolves this problem. Additionally, this process can improve the speed and efficiency of your project.
- Open Edit > Preferences > Media& Disk Cache.
- Click on Delete under the Media Cache Management section.
- Restart Premiere Pro and check if the audio is working.
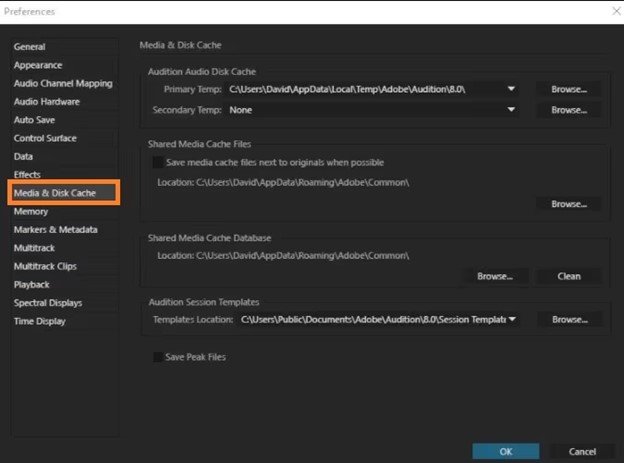
Clearing the cache doesn't delete your actual media files, so it's a safe and effective way to troubleshoot.
2. Changing the Name of Media Cache Folder
Another quick fix is to rename the folder where Premiere Pro stores its media cache files. This forces the software to rebuild the cache, often eliminating sound problems caused by corruption.
- Close Premiere Pro.
- Navigate to the media cache folder on your computer.
- Rename the folder to something like "Media Cache Backup".
- Reopen Premiere Pro and test the audio.
This method is simple yet effective and can resolve multiple issues at once. It's a handy trick to keep in your troubleshooting toolkit.
3. Shifting the Video to a New Folder
Moving your media files to a new location can help Premiere Pro re-index them, potentially fixing any sound issues. This is especially helpful if the original folder is corrupted or inaccessible.
- Create a new folder on your computer.
- Move the video files to this folder.
- Reimport the files into Premiere Pro.
This solution works best for projects with fewer files. It ensures a clean start and allows Premiere Pro to reconnect with the files properly.
Part 3. How to Fix Premiere Audio Not Playing
Several factors can lead to audio not playing in Premiere Pro, whether on the timeline or through headphones. If the previously mentioned solutions don't resolve the issue, try these additional workarounds. Follow these steps to address the audio playback problem in Premiere Pro.
1. Check the File in a Media Player
First, ensure the issue isn't with the imported file itself. You can use any media player, such as VLC, to verify that the audio plays correctly and isn't muted or at a low volume.
For Mac users, installing QuickTime Player might help resolve the "no audio" issue with MP4 files in Adobe Premiere. Simply install QuickTime Player, close it, and then re-import the video into Premiere to potentially fix the problem.
2. Toggle Solo and Mute Buttons
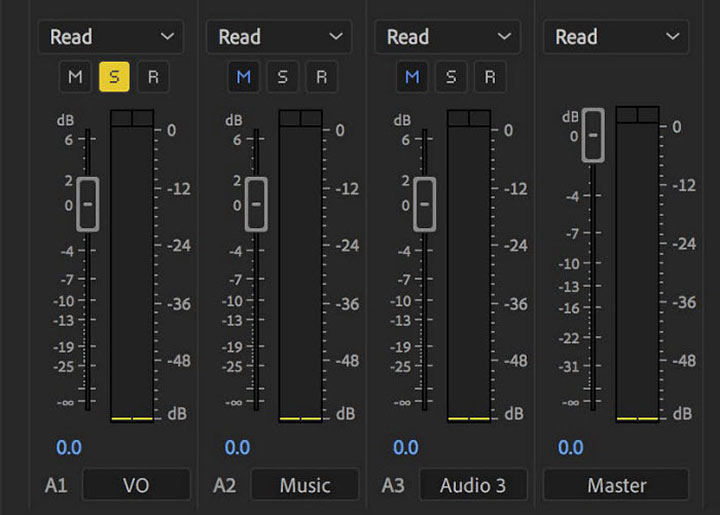
Audio issues in Premiere Pro can sometimes be caused by the Mute or Solo buttons. These buttons allow you to isolate or silence tracks temporarily.
Make sure to toggle the Solo and Mute buttons on and off for each track to ensure none were accidentally selected. Also, check the master volume panel and disable the Solo button (S) if it's activated unintentionally. This can help resolve the issue of videos playing without audio.
3. Import Media via the Media Browser
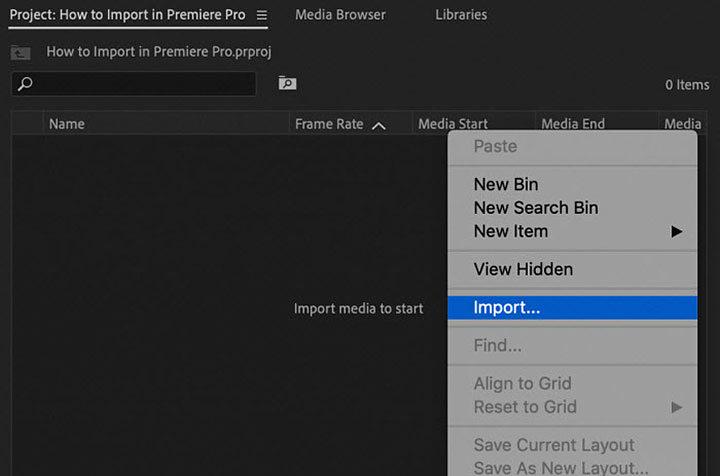
Certain file formats like MTS, MOV, and MP4 can store video and audio tracks in separate directories. If you use the standard import dialog, Premiere might load the video from one directory and miss the corresponding audio from another, causing the audio to not work.
To fix this, delete the clip and re-import it using the Media Browser instead of the Import Dialog. This method often restores the missing audio.
Part 4. Pro Tips: Add Audio to Video with No Sound
If the above methods don't work, consider using a reliable tool like HitPaw Univd (HitPaw Video Converter) to add audio to video. With its AI-powered technology and user-friendly interface, it's a great alternative for fixing Premiere Pro no sound problems. It also serves as a versatile tool for other editing needs.
Features of HitPaw Univd
HitPaw Univd - All-in-one Video Solutions for Win & Mac
Secure Verified. 254,145 people have downloaded it.
- Supports 1000+ audio and video formats.
- 120X faster video conversion speeds.
- Compresses videos to the desired size without compromising quality.
- Features an advanced smartvideo editor to trim, cut, merge, add watermarks, etc.
- Includes an AI-powered subtitle editor for effortlessly adding subtitles to tutorial videos.
- Supports adding audio tracks to video.
- Batch processing for multiple files.
Secure Verified. 254,145 people have downloaded it.
Step-by-Step Guide to Add Audio to Video
Adding audio to a video doesn't need to be challenging. By following these steps, you can easily fix the issue and create a polished final product:
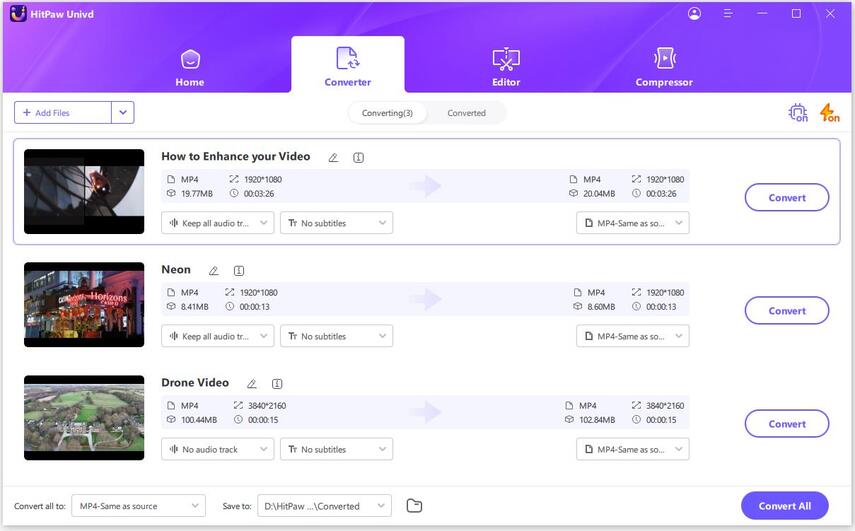
Step 1: Open HitPaw Univd and Add Files
Start by launching the HitPaw Univd on your Windows or Mac device. Click on "Add Video" to import your files or drag and drop the video directly into the program.
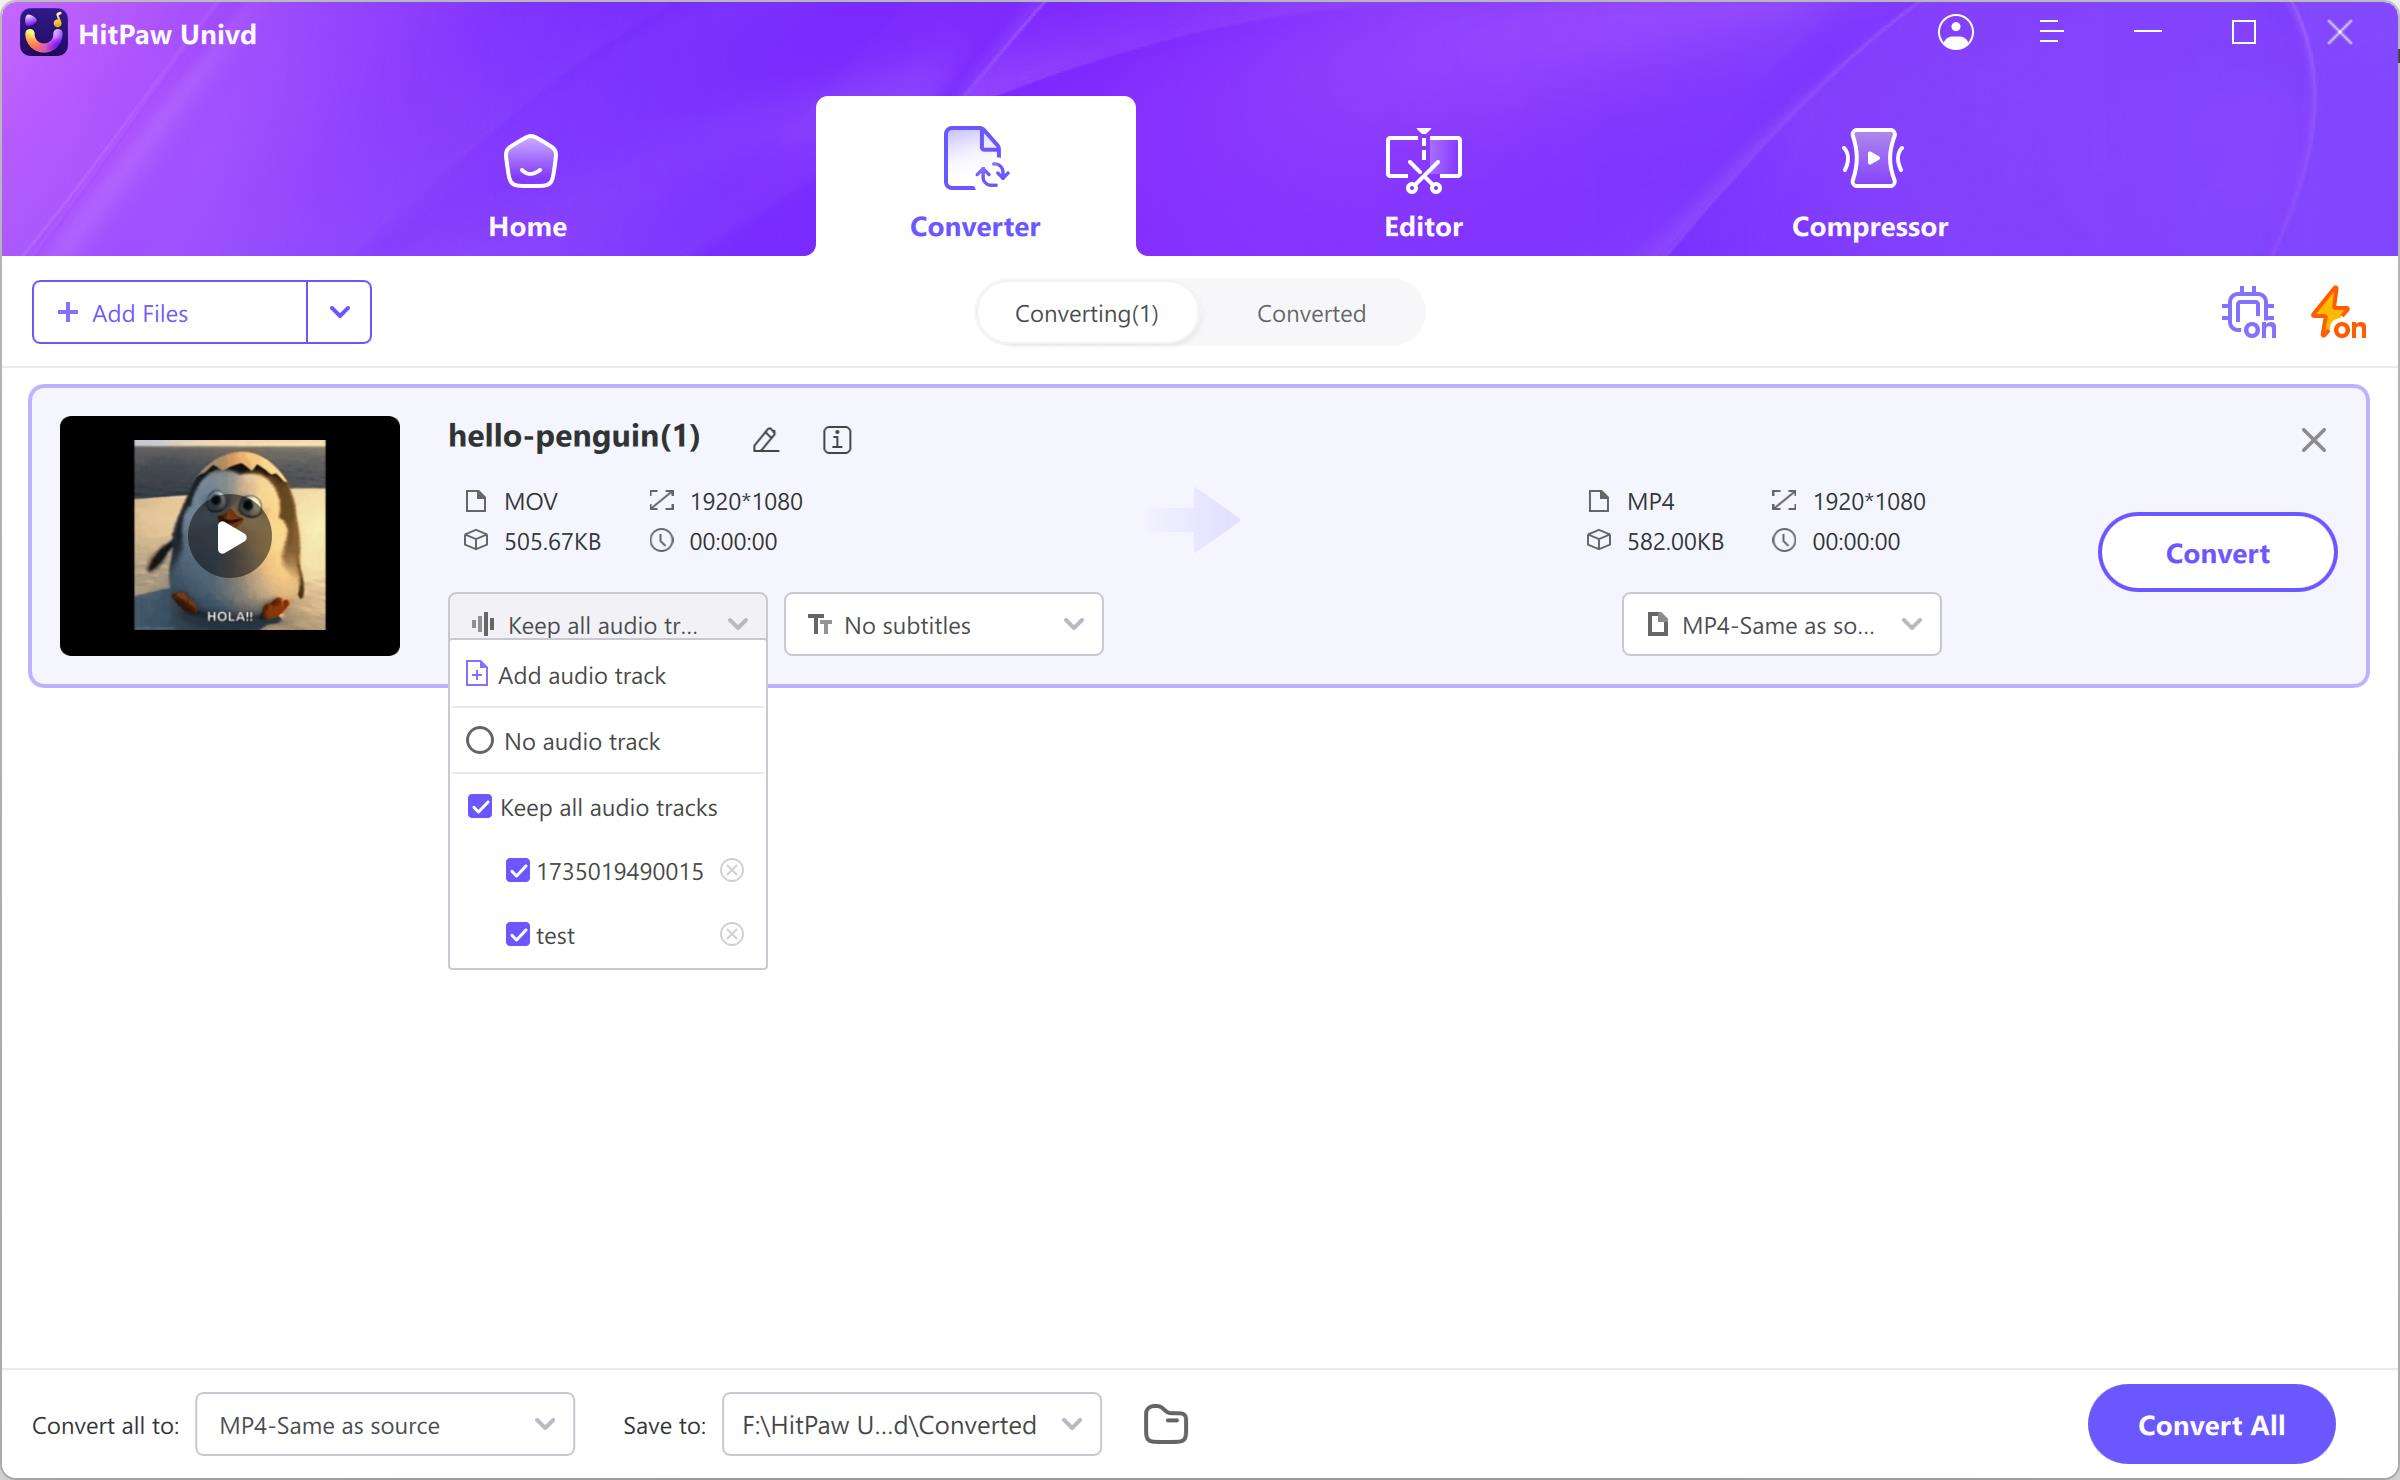
Step 2: Add an Audio Track
In the audio section of the video info, click on "Add audio track" to import a new audio file. Select the desired track and adjust its settings, such as volume and synchronization, to fit the video perfectly.
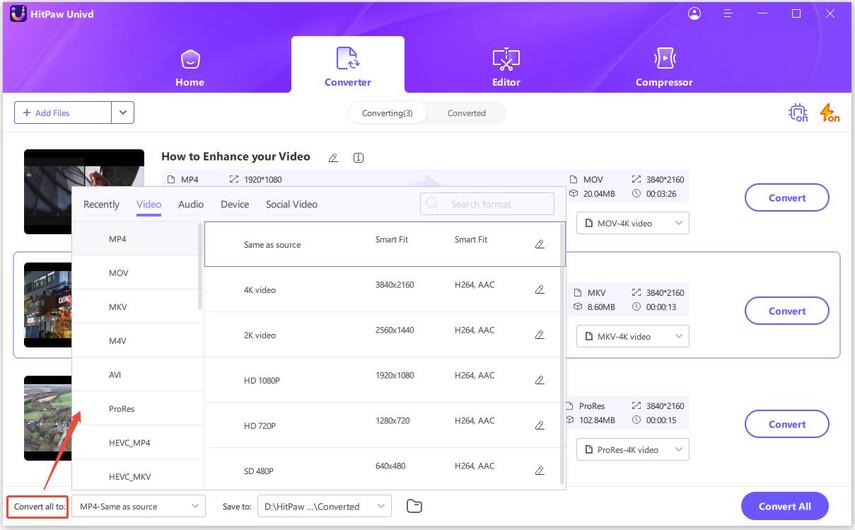
Step 3: Select an Output Format
Choose the desired output format for your video by clicking the inverted triangle icon. For batch processing, select "Convert All To" for a unified format.
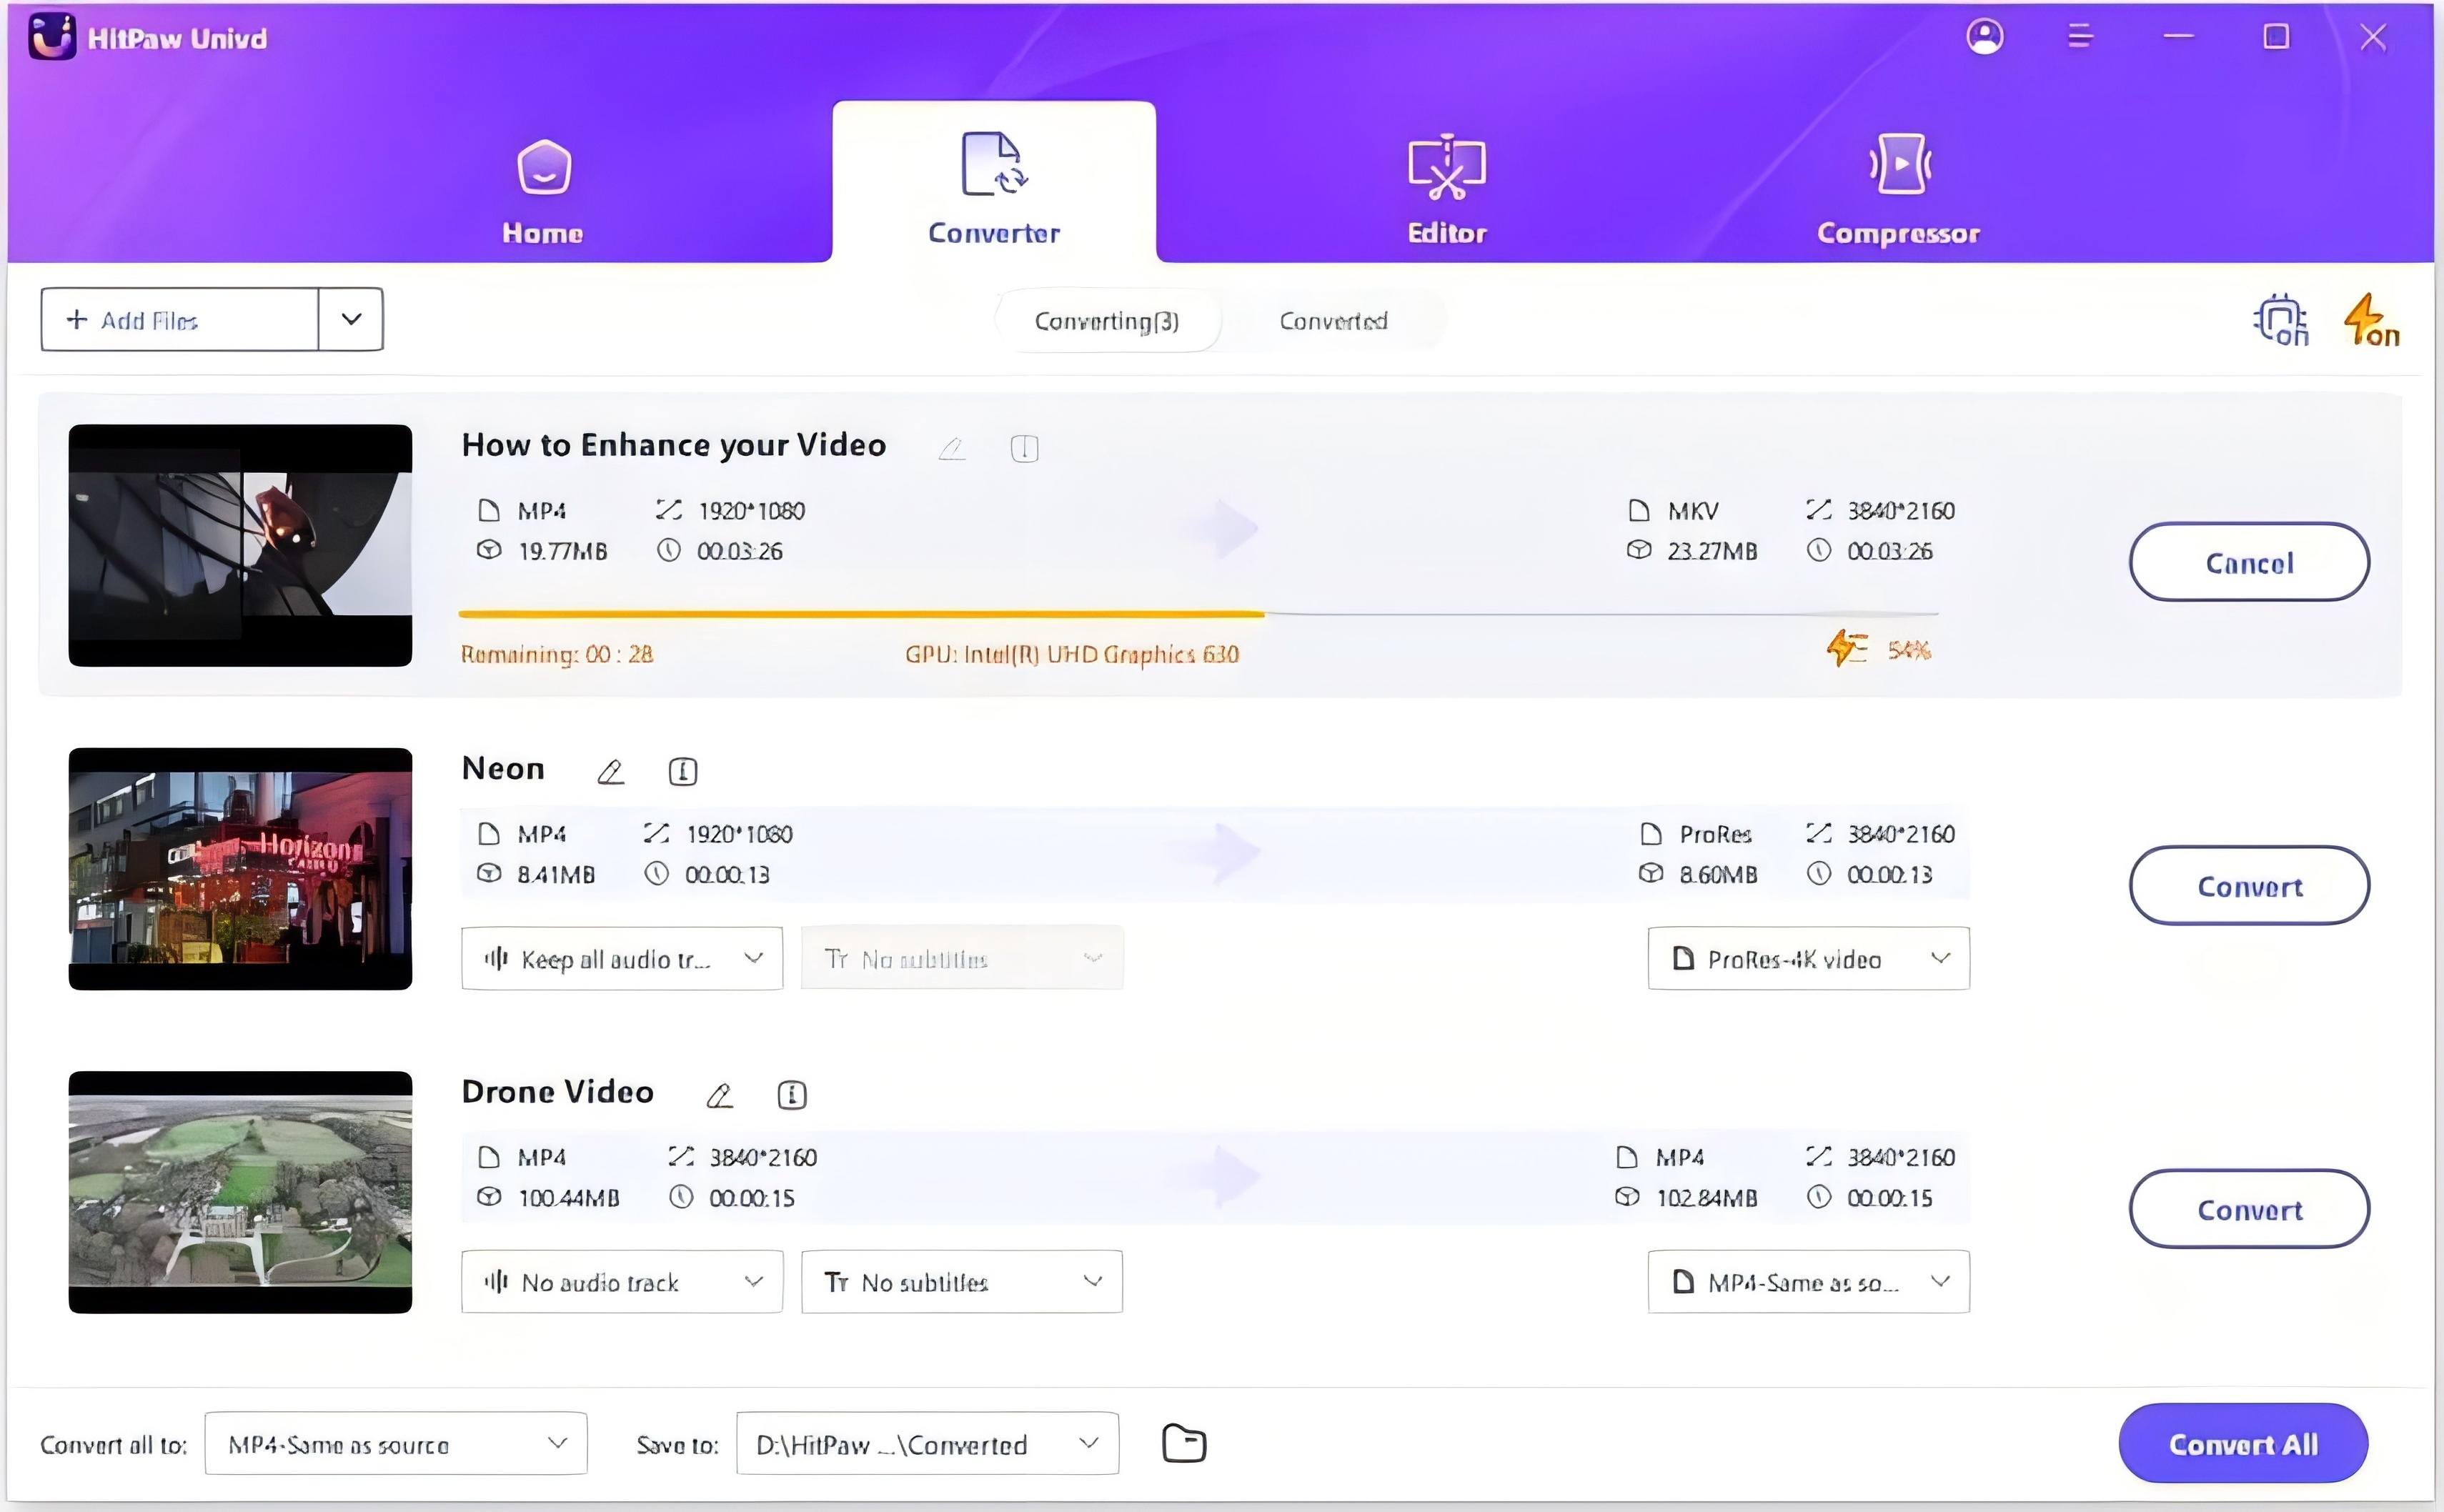
Step 4: Convert the Video
Click the "Convert" (or "Convert All" for multiple files) to start the conversion process.
Step 5: Access the Converted Files
After the conversion is complete, navigate to the "Converted" tab to access your files. Click "Open Folder" to view the finished files, ready for further editing or sharing.
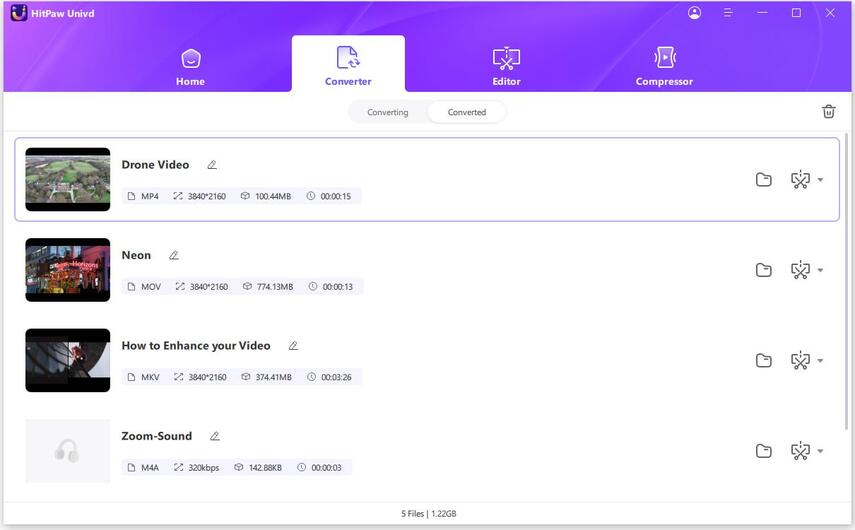
This straightforward yet powerful process ensures your video and audio are perfectly synced, making the HitPaw Univd an indispensable tool for video creators.
Conclusion
Audio issues in Adobe Premiere Pro can be annoying, but they are not insurmountable. By following the steps outlined above, you can resolve problems like "Why is there no sound in Premiere Pro?" and "How do I get audio back in Premiere Pro?" Whether it's clearing the cache, renaming folders, or using tools like HitPaw Univd, there are solutions for every situation.
With these fixes, you can ensure that your workflow remains uninterrupted and your projects meet their deadlines. Take control of your editing workflow today and keep your projects running smoothly. Remember, troubleshooting these issues can even enhance your skills as a video editor!


 HitPaw VoicePea
  HitPaw VikPea (Video Enhancer)
 HitPaw FotorPea


Share this article:
Select the product rating:
Daniel Walker
Editor-in-Chief
My passion lies in bridging the gap between cutting-edge technology and everyday creativity. With years of hands-on experience, I create content that not only informs but inspires our audience to embrace digital tools confidently.
View all ArticlesLeave a Comment
Create your review for HitPaw articles