[Latest!] How to Wrap Text in Photoshop with 2 Different Modes
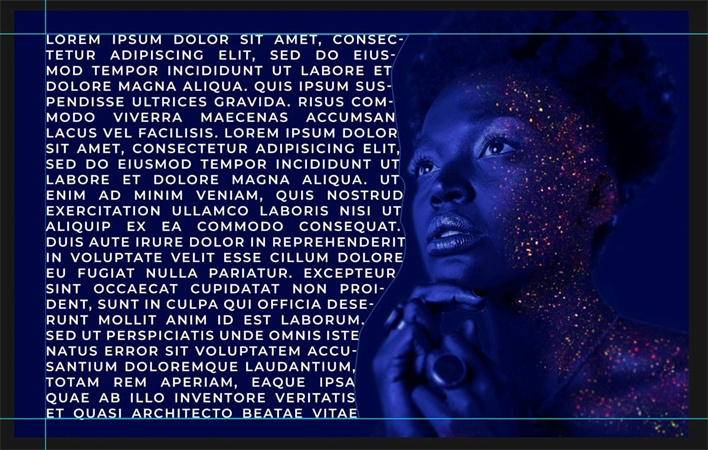
Wrapping text around images or shapes is a common task in Photoshop design work. In this latest Photoshop tutorial, we'll cover the two main text wrap modes - wrap around bounding box and wrap around shape.
Understanding the difference between these two modes gives you greater flexibility and control when working with text. We'll also go over the settings you can adjust to fine-tune text wrapping. This guide will help you master text wrapping in Photoshop. Read on to learn how to wrap text in photoshop.
Part 1. Wrap Text in Photoshop in 2 Ways
1. Use the ‘Pen Tool'
The Pen Tool provides precise control for wrapping text in Photoshop. By creating a custom path around an object, you can make text flow neatly around any shape. This does take some extra time upfront to trace a path, but the results are worth it.
Here are the steps for photoshop wrap text using the Pen Tool in Photoshop:
1.Press P to select the Pen Tool or find it in your toolbar.

2.Use the Pen Tool to trace an outline around the shape or object you want the text to wrap around. Click to add anchor points and drag to curve the path.

3.Add guides by clicking on the rulers and dragging them out. Position the guides where you want your text box to be.

4.Use the Pen Tool again and trace along the guides to create a uniform box for your text.

5.Select the Text Tool (T) and click inside the path to start typing. The text will wrap within the box around the shape.

2. Define the Area
The second method for photoshop text background utilizes Photoshop's selection tools to define the wrap area. By making a selection around your desired shape, expanding it slightly, and converting it into a work path, you create a custom text wrap boundary.
This technique doesn't require tracing an outline by hand with the Pen Tool. With just a few steps, you can leverage Photoshop's intelligent selection capabilities to automatically wrap text around subjects in your images. Read on for a quick guide to wrapping text by defining a wrapping area with selections and work paths.
Here is how to wrap text in Photoshop:
1.Open your image in Photoshop.

2.Go to Select > Subject to automatically select the main subject.

3.Expand the selection by going to Select > Modify > Expand. Use a value of around 20 pixels.

4.Smooth the selection with Select > Modify > Smooth. Use a Sample Radius of about 30 pixels.

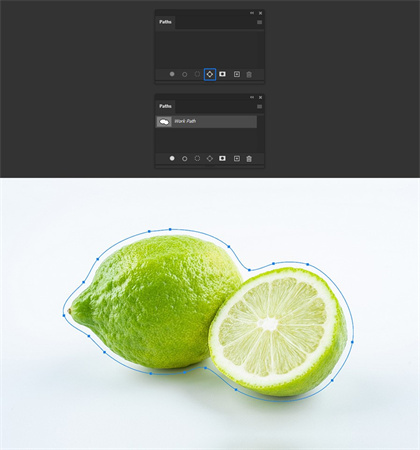
5.Convert the selection into a path by going to Window > Paths and clicking "Make work path from selection."

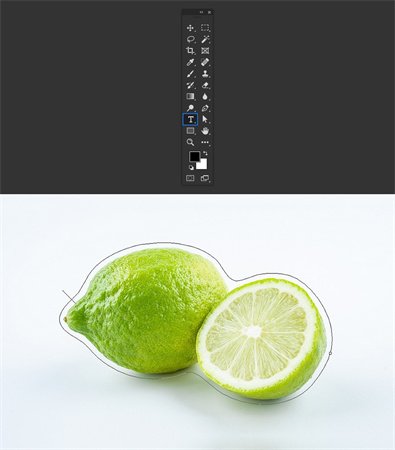
6.Select the Horizontal Type Tool and click on the new work path to add text.

7.Type your text normally using desired fonts and sizes.

8.Edit the text as needed, changing fonts, colors, sizes, etc. The text will wrap within the defined work path.

Part 2. The Best Tool to Add Text to Videos with HitPaw Edimakor
Wrapping text in Photoshop takes precision and practice. For adding text directly onto videos, a dedicated video editing program can save time and effort. One excellent option is HitPaw Edimakor, an AI-powered video editor with outstanding features.
HitPaw Edimakor brings powerful video editing tools together in one intuitive interface. The AI capabilities like automatic speech-to-text for subtitles streamline your workflow.
You can easily enhance videos with audio effects, stylish filters, customizable stickers, and animated text. Whether you're a beginner looking to spice up family videos or a professional producer, HitPaw Edimakor has you covered.
Key features:- AI speech-to-text automatically generates subtitles
- Audio visualizers create cool effects for music videos
- A large library of filters, text options, stickers, and more for creative editing
- Export presets optimized for different social platforms
- User-friendly interface designed for all skill levels
Step 1:Download and install HitPaw Edimakor on your computer.

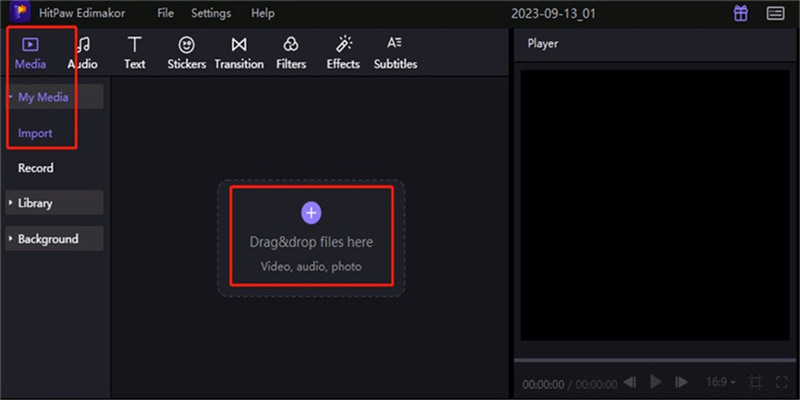
Step 2:Import the video you want to add text to into the software.

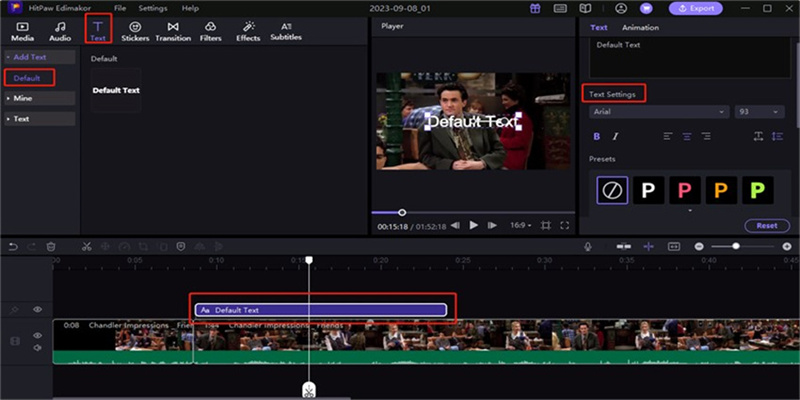
Step 3:Click "Text" in the media panel and drag the "Default Text" onto your video timeline. You can freely move and resize the text box in the preview window.

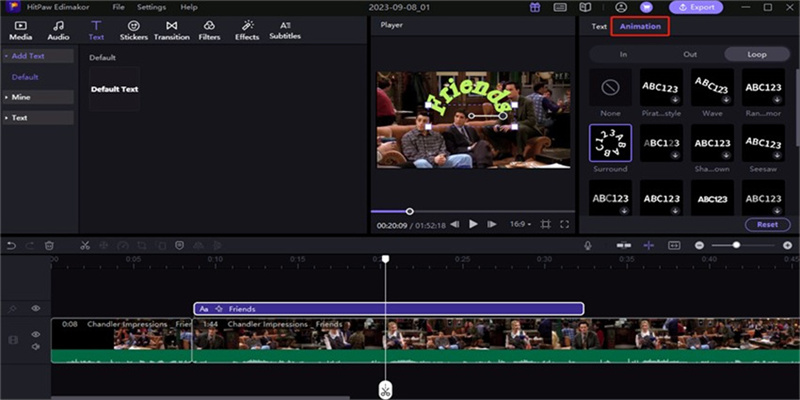
Step 4:Use the text property panel to change the font, size, color, opacity, rotation, and other formatting. Apply preset text styles for quick styling. Animate text motions like fade in/out, fly in/out, typewriter, etc, using the built-in effects in the properties panel.

Step 5:Once satisfied with the results, export your video with wrap text in it.

Part 3. FAQs of Photoshop Wrap Text
Q1. How do I wrap text around a logo in Photoshop?
A1. To wrap text around a logo in Photoshop, use the Pen Tool to trace a path around the logo shape. Add guides to create a text box next to the logo. Click inside the path with the Text Tool to start typing. The text will wrap around the logo within the defined path.
Q2. What is meant by wrapping text around objects?
A2. Wrapping text around objects means shaping text to flow and conform around images, shapes, or other graphics in a design. The text contours to the edges of the objects, creating a tight, clean layout instead of just a rectangular text box.
Takeaways
Text wrap in Photoshop takes patience but yields professional results. The Pen Tool offers precision wrapping around complex shapes. Convert selections into work paths for quick text wrapping.
For text overlays on videos, HitPaw Edimakor provides powerful yet accessible editing tools. The AI speech-to-text, animations, and stylized text presets unlock creativity. With the right techniques, you can craft elegant text layouts in both images and videos.







 HitPaw Univd (Video Converter)
  HitPaw Watermark Remover
  HitPaw VikPea (Video Enhancer)


Share this article:
Select the product rating:
Daniel Walker
Editor-in-Chief
My passion lies in bridging the gap between cutting-edge technology and everyday creativity. With years of hands-on experience, I create content that not only informs but inspires our audience to embrace digital tools confidently.
View all ArticlesLeave a Comment
Create your review for HitPaw articles