How to Render Video as Images in Blender?
Rendering a video as separate images opens up new possibilities in editing which allows you to edit, modify and repurpose each frame with precision. If you use Blender, you're in luck because this flexible program makes the process straightforward and very adaptable. But where should you begin?
Whether you're making high-quality visual effects, producing animations or requiring image frames for other creative tasks, this guide wil provide you with a step-by-step process of rendering videos into image sequences in Blender. Continue reading.
Part 1. Why Render Video as Images?
Rendering a video as separate image frames may seem to be an additional step, but it provides powerful advantages to enhance your creative process. Here's why splitting a video into frames can become a game-changer for your projects.
1. Frame-by-frame editing
When you convert a video to images, each frame becomes an editable unit. This is perfect for making small modifications like retouching, color correction, or adding special effects. Working frame-by-frame provides unmatched control, whether you're polishing an animation or resolving minor flaws.
2. Post-Processing Flexibility
Images provide additional possibilities for post-processing. You can use specialist software to adjust frames individually or in batches to ensure uniformity. This adaptability is especially useful in sectors like VFX, where individual frames frequently demand thorough attention.
3. Compatibility
Not all devices or workflows can handle video formats well, whereas picture files such as PNG and JPEG are globally compatible. Rendering videos into images ensures easy integration with graphic design tools, editing software and web platforms that do not natively handle video files.
4. Higher-quality outputs
Rendering frames as images enables greater resolution and quality settings. You can save each frame in lossless format to assure the highest quality for subsequent processing. This is essential for applications that require precision and clarity such as professional animations or print-ready images.
Tips
Remember to upscale video to 4k before rendering into image
Part 2. Steps to Render Video as Images in Blender
Rendering videos as images in Blender can greatly increase your creative possibilities. It supports frame-by-frame editing to produces high-quality outputs, and integrates seamlessly with other post-production tools. Here's a step-by-step tutorial for accomplishing this.
Step 1: Set up your blender Project
Start by launching Blender and setting up your project workspace:
Go to the Video Sequencer workspace.
Import your video clip by dragging it into the timeline or selecting Add > Movie.
To avoid distortion or timing issues, ensure that the project's resolution and frame rate match those of your video.
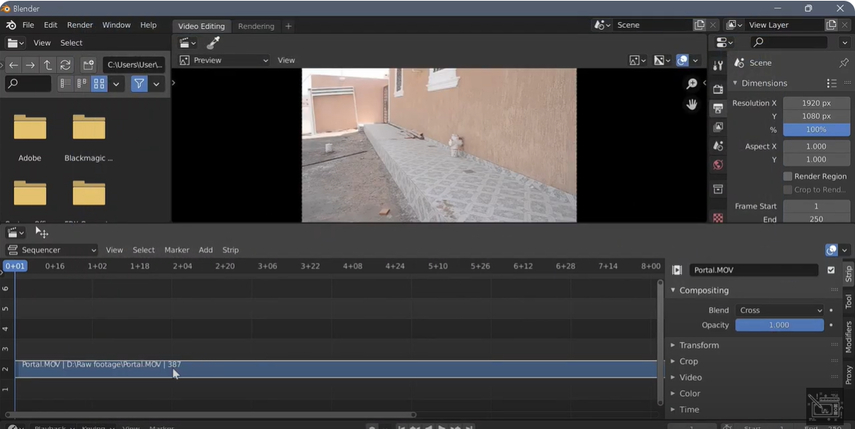
Step 2: Set Output Settings To turn your video into individual frames:
Go to the Output Properties tab in the right-hand side properties panel.
In the Output section, specify the folder where the rendered image files will be saved.
Select your file format from the dropdown menu. PNG for lossless quality and JPEG for reduced file sizes are both recommended formats.
Set the Color Depth to get accurate image details (e.g., 8-bit for most applications, greater for professional demands).
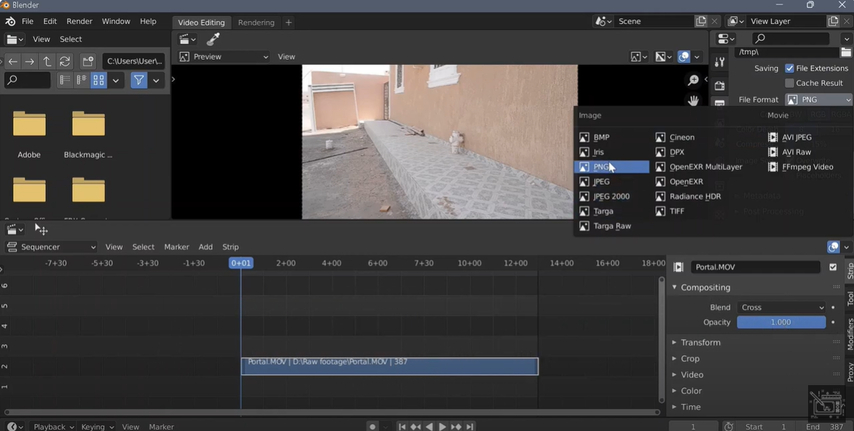
Step 3: Define Frame Range
Focus on a specific segment of your video:
In the timeline, set the Start and End Frames to match the video segment you wish to export.
To focus on a specific sequence or reduce processing time, adjust the frame settings as appropriate.
Step 4: Select Render Settings
Blender has two rendering engines: Cycles and Eevee.
- Cycles: cycles are ideal for photorealistic renderings with precise lighting and shading.
- Eevee: A quicker solution ideal for projects that require real-time rendering.
Adjust the lighting, anti-aliasing, and other settings in the Render Properties tab to ensure that the frames satisfy your quality requirements.
Step 5: Render the frames
Finally, convert your video into an image sequence:
Render > Render Animation can be accessed using the top menu or the F12 keyboard shortcut.
Blender will process each frame, transforming it into a separate image file and save it to the chosen directory.
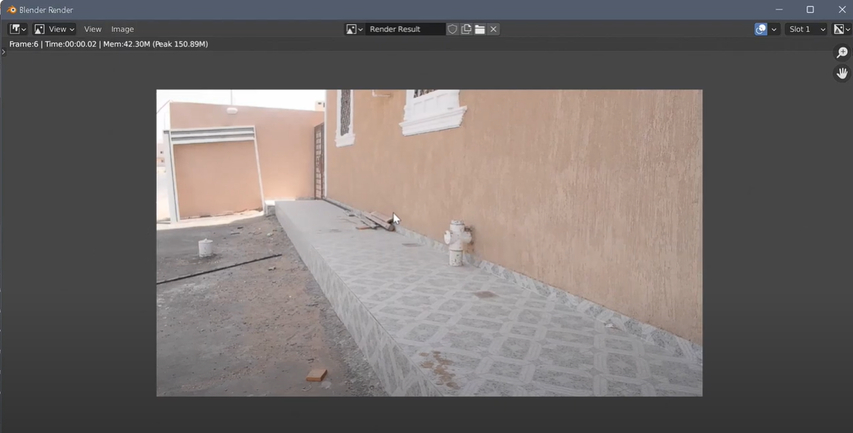
Track the render progress in the Info box to ensure completion.
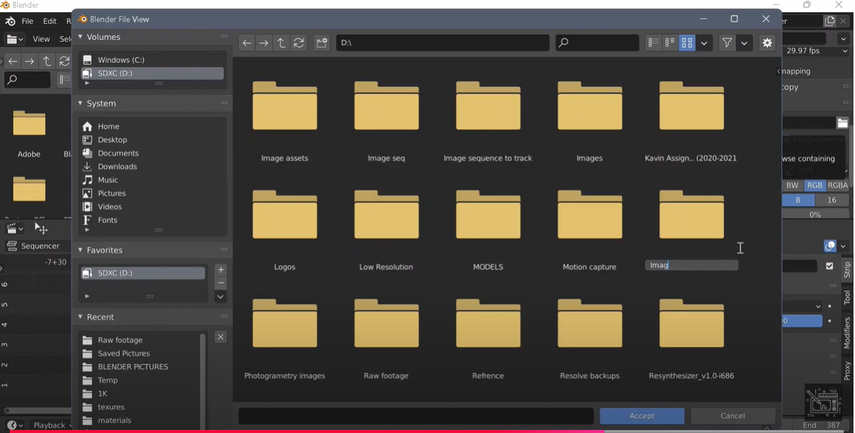
Part 3. Pro-Tips. Best HDR Video Enhancer Free Try
If you want to improve your video quality after rendering, using an HDR video enhancer is a game changer. HitPaw VikPea (formerly HitPaw Video Enhancer) is a dependable tool for producing visually appealing, high-quality videos with little effort. It simplifies difficult tasks, making it popular among both beginners and pros. Here's what sets HitPaw VikPea apart and how to use it efficiently.
Features of HitPaw VikPea
- Resolution and Sharpness: Automatically ensures better resolution and sharpness for crisper, clearer images.
- Color Accuracy: Vibrant and natural tones are offered by enhanced hues and saturation.
- Noise Reduction: Removes grain and pixelation, particularly in low-light conditions.
- Dynamic Range Balancing: Balances brightness and contrast, which reveals fine details in shadows and highlights.
- HDR Conversion: Transforms SDR videos to HDR-like quality, providing professional-grade finish.
Steps to Enhance Video
1. Download and Install
Visit the HitPaw's official website and download the software on your computer.
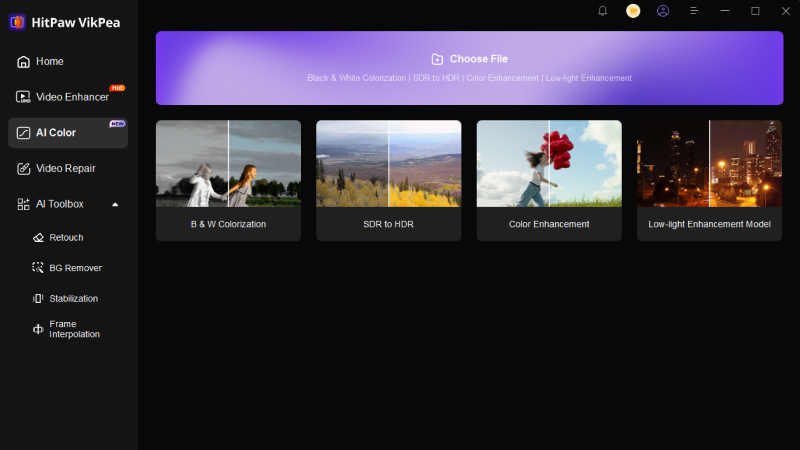
2. Choose SDR to HDR Model
Select the video that you want to improve and click on Upload. Depending on your requirements, you can choose between AI Upscaling and HDR Enhancement.
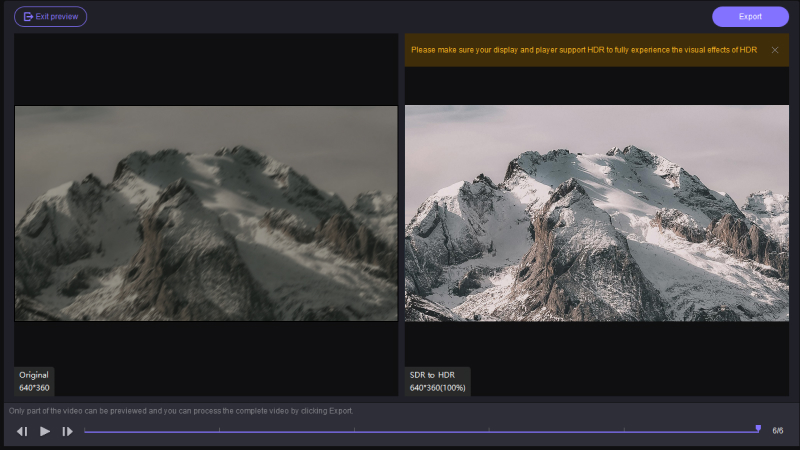
3. Preview and Export
Once you are satisfied, save the enhanced video in the format of your choice in desired location.
Learn More about HitPaw VikPea
Conclusion
The article explains how to render a video as individual images in Blender. It covers the steps to set up the scene, choose the file format, and adjust render settings. It also discusses how to manage the output and ensure high-quality image sequences for video processing or editing.
For a more streamlined and efficient approach, I highly recommend HitPaw Vikpea. With its easy-to-use interface and versatile editing tools, it's an excellent choice for users seeking a faster and more intuitive video processing solution.


 HitPaw Univd (Video Converter)
 HitPaw VoicePea
  HitPaw FotorPea


Share this article:
Select the product rating:
Daniel Walker
Editor-in-Chief
My passion lies in bridging the gap between cutting-edge technology and everyday creativity. With years of hands-on experience, I create content that not only informs but inspires our audience to embrace digital tools confidently.
View all ArticlesLeave a Comment
Create your review for HitPaw articles