Guide to Record A Short Video with Blender
Do you want to make great short videos but don't know where you should start? Blender is a powerful and free 3D creation suite which has made it easier than ever to turn your creative ideas into reality. Whether you are a new or experienced Blender user, creating a short video can be a fun and satisfying experience. In this detailed blog post I will guide you through the steps of capturing a video using Blender, as well as how to enhance the footage with a 4K video enhancer for a more professional look.
So, if you're ready to take your video producing talents to the next level, keep reading our article and explore the world of Blender!
Part 1. What Is Blender?
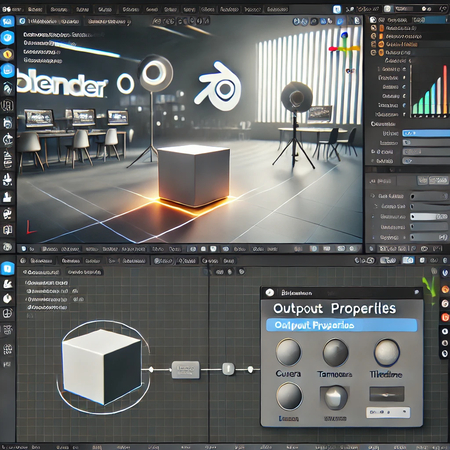
Blender is a sophisticated and adaptable open-source tool for 3D modeling, animation, rendering, and video editing. Blender offers a variety of tools to help you bring your creative ideas to life, whether you're working on animated films, visual effects, or 3D modeling. Professionals and enthusiasts use it for purposes such as:
- 3D Modeling and Sculpture
- Skills include animation, rigging, video editing, post-production, rendering, and simulation.
- Game design
Part 2. Steps to Record A Short Video with Blender
Blender is a robust 3D creation package that lets you animate, model, render, and even make videos. Blender has the tools you need to create videos, whether they be 3D animations or basic motion graphics.in this part I will guide you through the steps of recording a short video with Blender, from scene setup to final render.
Steps to Record a Short Video using Blender
Step 1: Set Up Your Scene
Before you can record anything, you need to set up your scene in Blender.
- Open the blender: Launch Blender and either use the default scene or create a new one.
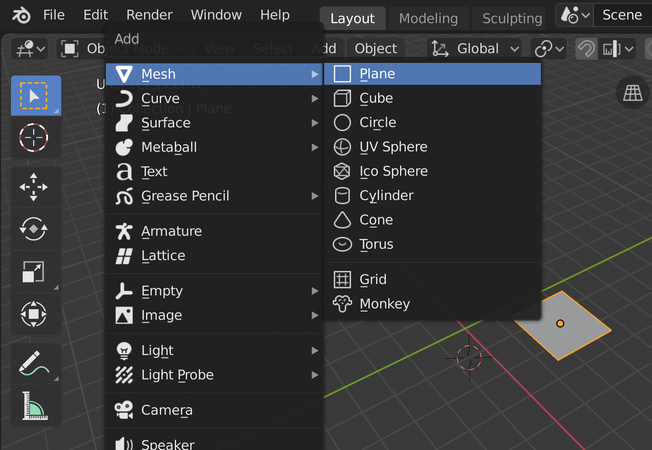
- Add Objects: To insert objects such as cubes, spheres, or cameras, select "Add" from the 3D viewport menu. Position and scale them to fit your preferred configuration.
- Lighting: Use lights (such as a point light or an area light) to illuminate your environment and improve visibility.
Step 2: Setting Up the Camera and View
To record a video, first set up the camera that will catch your scenario.
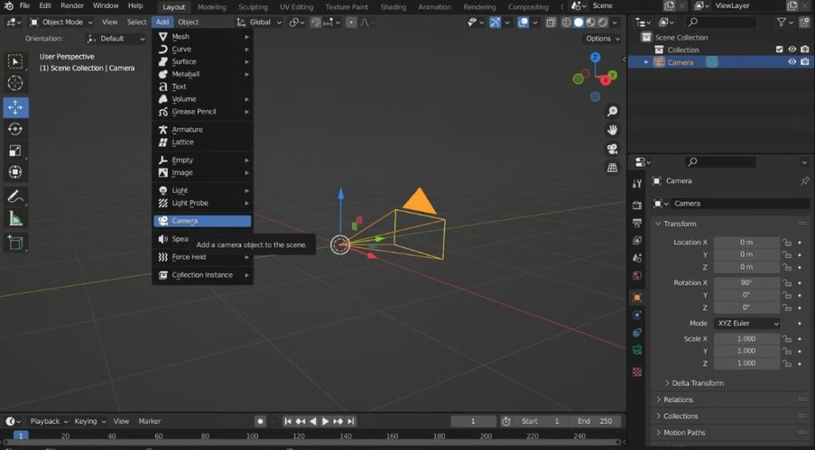
- Add Camera: If there isn't one currently in the scene, choose "Camera" from the Add menu.
- Position the Camera: Select the camera and utilize the 3D viewport to position it. You may also use the "View" option (key N) to match the camera with the viewport.
Step 3: Set the Timeline
The timeline is where you'll animate the scene.
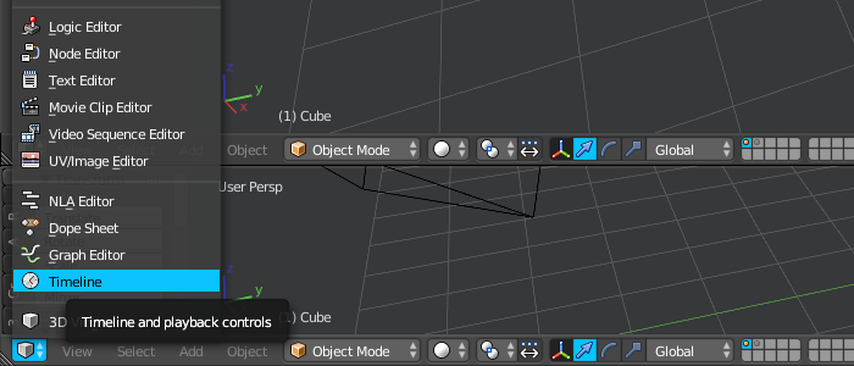
- Open the Timeline Panel. Make sure the Timeline is accessible near the bottom of the Blender UI.
- Set frame rate: Select your preferred frame rate (e.g., 24fps or 30fps) from the Output Properties tab.
- Keyframes: To animate objects, place keyframes along the timeline.
Step 4: Preview your animation
Before recording, check the animation to verify it appears good.
- Play Animation: Press the spacebar to initiate the animation and observe the movement of your objects.
- Adjust as Needed: If something does not seem right, change the position, lighting, or timing of the keyframes.
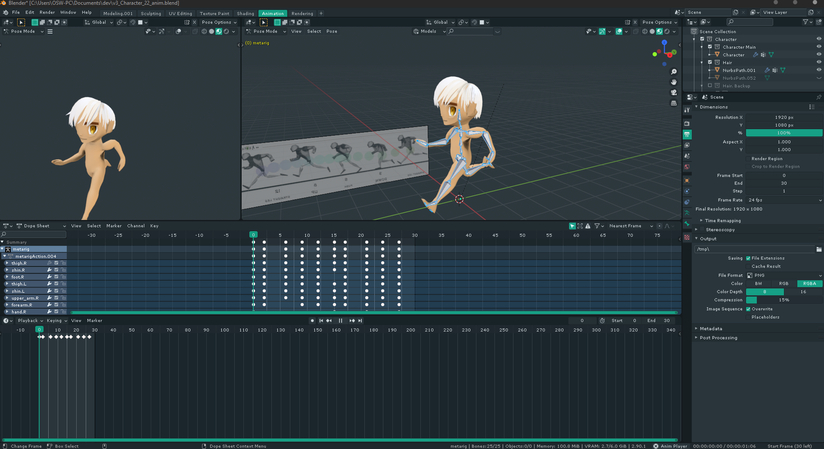
Step 5: Record and render the video
- Set Output Settings: Under the Output Properties tab, select the video's resolution, file type (e.g., MP4), and destination folder.
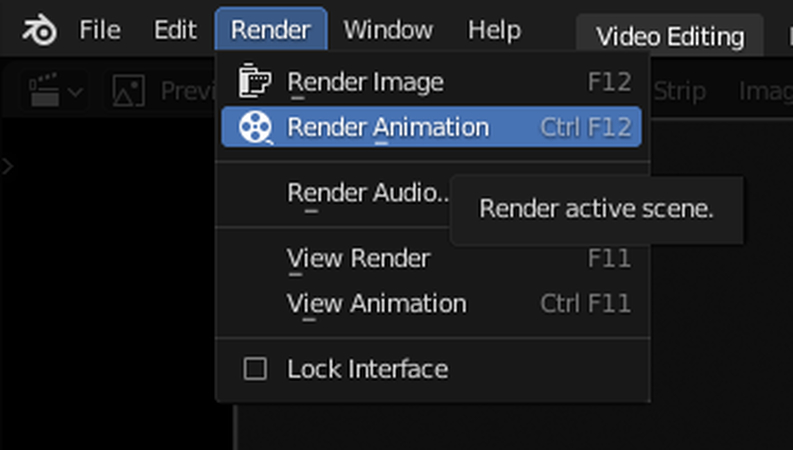
- Render the animation. To begin recording the video, choose "Render" in the top menu and then pick "Render Animation". Blender will create the frames and save them to a video file.
Part 3. Best 4K Video Enhancer to Make Video Smooth Free Try
Improving video quality has become essential in the current digital era to provide engaging material, particularly in 4K resolution. Having the appropriate tool to polish and smooth the videos can make all the difference, regardless of your level of experience as a professional filmmaker or as an amateur content creator. HitPaw VikPea (formerly HitPaw Video Enhancer) is an AI-powered video enhancer that can easily and effectively modify your videos, and is one such amazing option.
Features of HitPaw VikPea
- Ensures clear details and brilliant colors by upscaling low-resolution videos to breathtaking 4K quality.
- Produces clearer, sharper images by automatically eliminating noise from videos.
- Improves frame rates to remove motion blur and stutters for more clear playback.
- Modifies saturation, contrast, and brightness to improve the visual attractiveness of your videos.
- Specifically created for fans of anime, this tool enhances anime-style videos with striking clarity and detail.
Steps to Enhance Video
Step 1.Download HitPaw VikPea from the official website. Follow the instructions and install the software.
Step 2.Launch HitPaw VikPea and upload your video file by dragging it into the interface or using the "Add File" option.

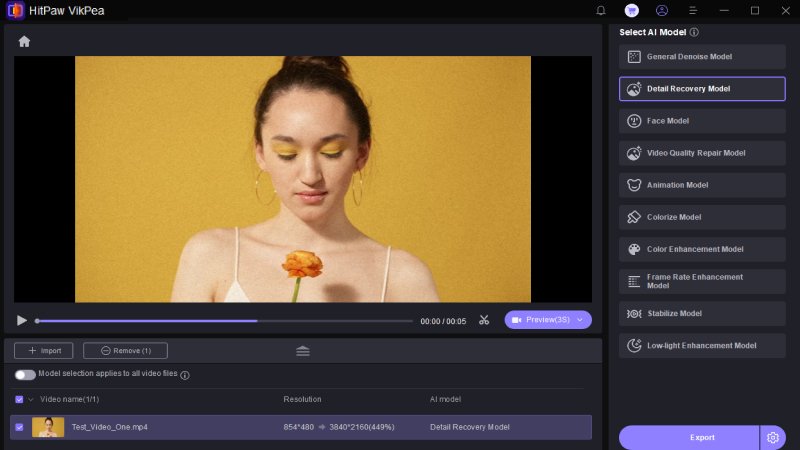
Step 3.Select the most appropriate AI enhancement model. Change the resolution (for example, upscale to 4K) and apply any other upgrades.

Step 4.Once the improvement is finished, export and save your high-quality videos to your desired location.

Learn More about HitPaw VikPea
Part 4. FAQs of Record A Short Video with Blender
Q1. Why Is Blender Saving My Videos in MKV?
A1. When the file output is set to FFmpeg, Blender saves videos in the MKV format by default. By going to the "Output Properties" tab, choose "File Format," and then selecting an alternative format, such as MP4, you can modify this.
Q2. Can Blender be used for video editing?
A2. You may clip, splice, add effects, and edit videos using Blender's integrated Video Sequence Editor (VSE). It's a flexible tool for both making and modifying 3D animations and films.
Conclusion
Blender is a flexible video recording and editing program, and HitPaw VikPea improves video quality with AI-powered capabilities like as 4K upscaling and noise removal. Mastering Blender's features and employing software such as HitPaw VikPea allows you to easily create professional, smooth, and visually appealing videos.




 HitPaw Univd (Video Converter)
 HitPaw VoicePea
  HitPaw FotorPea



Share this article:
Select the product rating:
Daniel Walker
Editor-in-Chief
My passion lies in bridging the gap between cutting-edge technology and everyday creativity. With years of hands-on experience, I create content that not only informs but inspires our audience to embrace digital tools confidently.
View all ArticlesLeave a Comment
Create your review for HitPaw articles