Guide to Change Minecraft Video Settings Menu Mod
Are you fed up being restricted by Minecraft's default video settings? The Minecraft Video Settings Menu Mod can completely transform your gaming experience, whether you wish to maximize visuals or maintain enjoyable gameplay on an older system. It offers a wide range of personalization choices along with complete control over gameplay, performance, and graphics.
You can follow our guide to completely know about the process of downloading, installing, and modifying the mod to create the ideal Minecraft configuration. Let's get started now!
Part 1. What is Minecraft Video Settings Menu Mod?
Minecraft video settings menu mod is an easy and powerful method. This mod enhances the default video settings menu of the game and provides more customization choices for players to adjust the graphics, performance and visual effects.
This is Perfect for players looking to improve their gaming experience and can provide a perk that will boost performance on an older system or unlock stunning visuals on a high-end PC. It has an advantage because it allow for more control over features such as render distance, lighting and frame rates.
This mod makes sure you can customize Minecraft to your tastes by extending options in the default settings menu to ensure the game runs smoothly, is better looking and more pleasant to play to all types of players.
Part 2. How to Get Minecraft Video Settings Menu Mod?
To get Minecraft Video Settings Menu Mod is simple and easy even for beginners. You can download, install and customize your game toward the ultimate experience with just few easy steps. Here is how to get started.
General Steps to Get the Mod:
Step 1. Check Your Minecraft Version
Determine which version of Minecraft you are playing so that you know whether it is compatible or not with your mod.
Step 2. Download a Mod Loader
Install a popular mod loader like Forge or Fabric which is essential to run most Minecraft mods.
Step 3. Find a Trusted Source
Visit trusted mod websites to download the Video Settings Menu Mod safely.
Step 4. Download the Mod File
Select the version that matches your Minecraft and mod loader version and then proceed to download the file.
Step 5. Install the Mod
Put the downloaded mod file into the appropriate "mods" folder in your Minecraft directory.
Step 6. Open Minecraft
Open Minecraft with the mod loader selected and go check if the mod is working by exploring the updated video settings menu.
Step 7. Customize your settings
Start to adjust the settings to optimize visuals and performance according to your preferences.
Part 3. How to Reset Minecraft Video Settings Menu Mod?
If you have modified your Minecraft Video Settings Menu Mod and want to return to default settings, don't worry it is easy process. Resetting gives you an opportunity to start from scratch when customized settings seem to be causing performance problems or simply to try out new setups. This part outlines general steps and important elements to guarantee an effective reset.
General Steps in Resetting the Mod
1. Access Modded Settings in Minecraft
Open the game and go to the video settings menu of the mod.
2. Find the Reset Button
Locate a "Reset to Default" or similar option in the settings menu.
3. Delete Mod Config Files
If all other steps fails, you may need to delete or edit the mod's configuration files in the file system itself.
4. Reinstall the Mod
In some cases especially for the stubborn ones, uninstalling and reinstalling the mod will reset everything.
Other Imp Steps
1. Clear Mod Config Files
Sometimes, resetting from the menu does not fully remove the custom settings. To manually delete the configuration files, follow the steps given below:
- Find the Minecraft Directory: Go to your Minecraft game folder. The location on most systems is inside AppData > Roaming > minecraft.
- Open the Mods Folder: Inside .minecraft directory, find the config folder where the mod stores its configurations.
- Delete or Edit Config Files: Look for files related to the Video Settings Menu Mod (the name often matches the mod). A file can be deleted to reset to default or opened with a text editor to manually adjust specific settings.
2. Reinstallation of the Mod
If the above steps did not work, then your best option is to reinstall the mod.
- Remove the Mod: Go to the mods folder in the .minecraft directory and delete the mod's .jar file.
- Reinstall Fresh Files: Download the latest version of the mod from a trusted source, ensuring it's compatible with your Minecraft version and mod loader.
- Restart Minecraft: Launch the game to verify the settings are fully reset.
By doing so, it is very easy to simply reset the Minecraft Video Settings Menu Mod and revert back to default. This is one way to have a clean slate in terms of optimizing game-play.
Part 4. Best 4K Video Enhancer Free Try
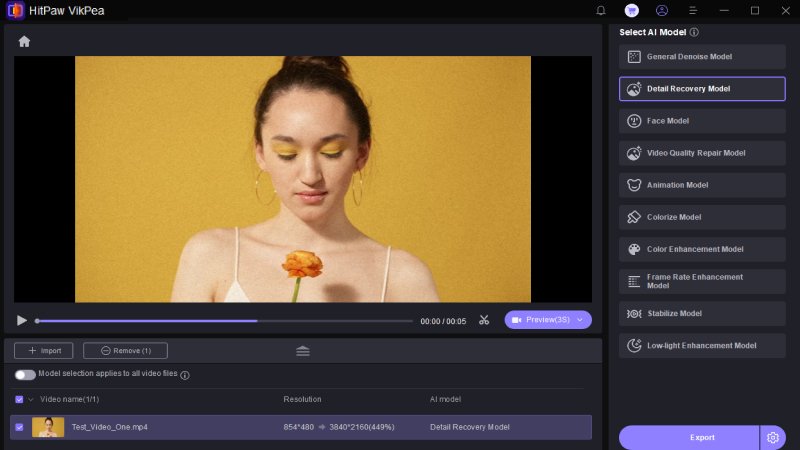
Improving the quality of your videos to 4k with HitPaw VikPea (formerly HitPaw Video Enhancer) is now easier. It is the best option for users who want to easily improve their video material. HitPaw Vikpea enhances your videos, whether you're improving your gameplay recordings in Minecraft or producing eye-catching images. They provide free trials and are perfect for trying out 4K upgrades and enhancing your creative or gaming content.
Why Choose HitPaw Vikpea
- AI Video Enhancement: Utilizes powerful AI technology to automatically increase video quality with no effort.
- 4K quality Support: Easily converts videos to crystal-clear 4K quality for a sharp and clear visual experience.
- User-Friendly Interface: The design is straightforward and intuitive, which make it ideal for both beginners and professionals.
- Batch Processing: This feature allows you to enhance numerous films at once to saving you time and effort.
- Noise Reduction: Effectively reduces grainy textures and blurriness to restore video clarity.
Steps to Enhance Video
1.Visit HitPaw or Vikpea's official websites and download the version that is best suited to your system.
2.Launch the app and drag your Minecraft video or 4K footage into the workspace or choose "Add File" from the menu.

3.Choose the enhancement mode that best meets your requirements. To highlight in-game details in Minecraft clips, you may want to improve clarity, colors, or resolution.

4.Adjust settings such as brightness, sharpness, and noise reduction to get more exact results.
5.If you are done with enhancement, preview it before finalizing it. Export your improved video in the format and resolution that you like. You may now share your enhanced Minecraft gameplay or 4K film in stunning detail.

Learn More about HitPaw VikPea
Conclusion
Enhancing your video material is just as vital as improving your gameplay in order to make your Minecraft experience better. HitPaw Vikpea is a great option for this. This robust program makes it easy to enhance your 4K videos and produces beautiful results.
HitPaw Vikpea is a must-try because of its user-friendly features and free trial, regardless of whether you're optimizing your gameplay clips from Minecraft or any other type of video. Transform your videos into eye-catching masterpieces to elevate your material to a new level right now!


 HitPaw Univd (Video Converter)
 HitPaw VoicePea
  HitPaw FotorPea


Share this article:
Select the product rating:
Daniel Walker
Editor-in-Chief
My passion lies in bridging the gap between cutting-edge technology and everyday creativity. With years of hands-on experience, I create content that not only informs but inspires our audience to embrace digital tools confidently.
View all ArticlesLeave a Comment
Create your review for HitPaw articles