What Is Render Video?
Have you ever wondered how animations and video edits transform into the stunning, polished videos you see on your screen? That magic is known as video rendering! Whether you're a video developer or just interested in the behind-the-scenes process, rendering is an important step in converting raw files into watchable output.
In this article, we will explain render video meaning, how to render a video in blender, how to render video in premiere pro, and why it is necessary for producing high-quality videos. Continue reading to explore the fascinating realm to render video!
Part 1. What Does It Mean to Render A Video?
Are you wondering what does render a video mean? Rendering a video is like bringing your creative vision to life. It is the process of converting raw footage, animations, or edited clips into a finished, playable version. Video Render combines all of the parts together including effects, transitions, music,and visuals, to create an appealing video clip that can be viewed on a variety of devices.
During rendering, your editing program applies the adjustments you've made frame by frame to produce a seamless, completed product. This stage ensures that all of your editing efforts result in a polished and professional-looking video that is ready for sharing or viewing.
Part 2. How to Render A Video in Blender?
Rendering videos as images in Blender can greatly increase your creative possibilities. It supports frame-by-frame editing to produces high-quality outputs, and integrates seamlessly with other post-production tools. Here's how to render video in blender:
Step 1: Set up your blender Project
To start working on your Blender project, launch Blender and go to the Video Sequencer workspace. Import your video by dragging it into the timeline or selecting Add > Video from the menu. To ensure smooth playback and accurate timing, match the project's resolution and frame rate with your video settings
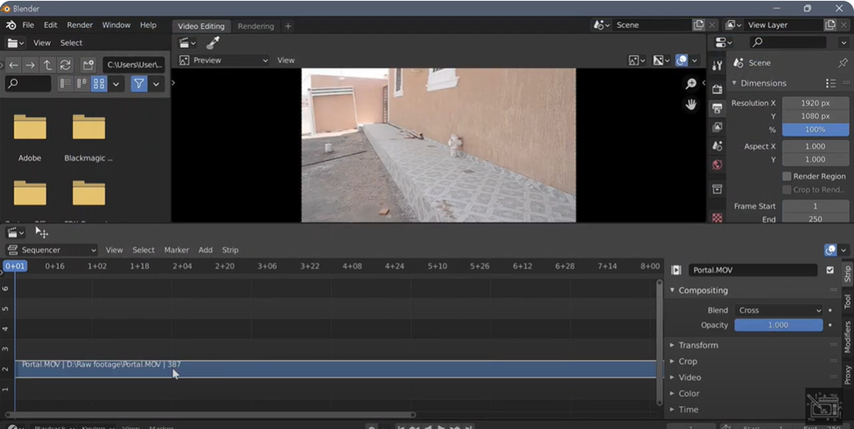
Step 2: Set Output Settings To turn your video into individual frames:
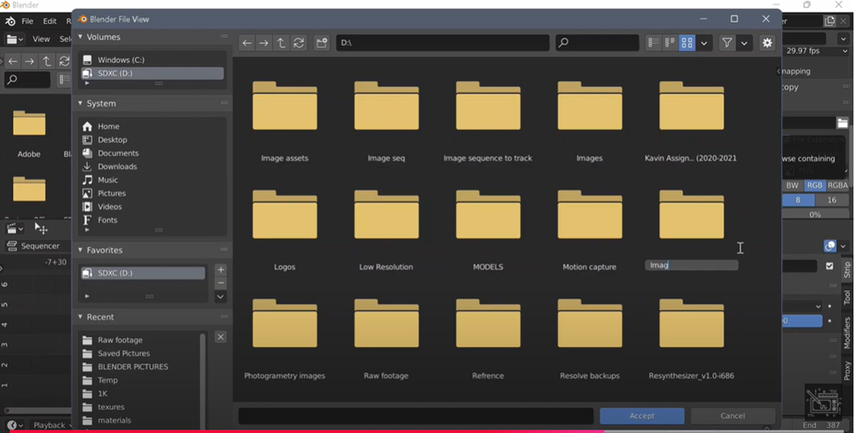
Once your video is set up, adjust the output settings by going to the Output Properties tab. Here, select a folder to save the rendered frames and choose a file format like PNG for high-quality results or JPEG for smaller file sizes. Adjust the Color Depth for precise image details, depending on your project needs.(e.g., 8-bit for most applications, greater for professional demands).
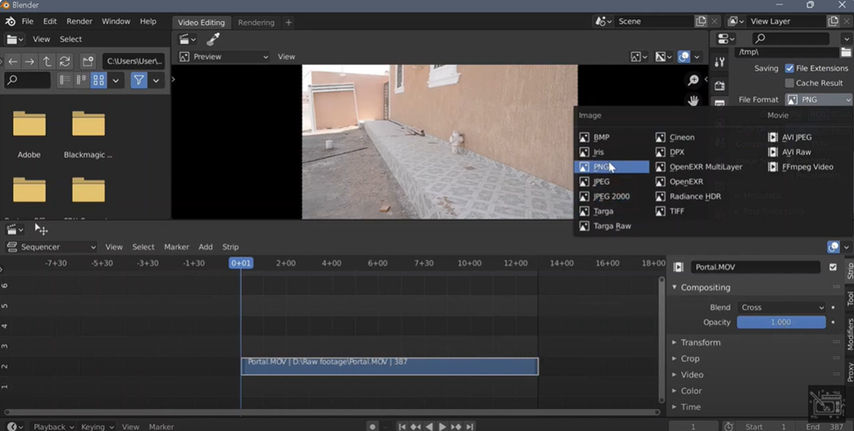
Step 3: Define Frame Range
Next, define the specific part of your video you wish to render by setting the Start and End Frames in the timeline. This helps focus on particular sequences or reduces rendering time for lengthy projects.
Step 4: Select Render Settings
Blender has two rendering engines: Cycles and Eevee.
- Cycles: cycles are ideal for photorealistic renderings with precise lighting and shading.
- Eevee: A quicker solution ideal for projects that require real-time rendering.
Adjust the lighting, anti-aliasing, and other settings in the Render Properties tab to ensure that the frames satisfy your quality requirements.
Step 5: Render the frames
Finally, start rendering your video into an image sequence by selecting Render > Render Animation from the menu or pressing F12. Blender will process each frame individually and save the files to your chosen directory. You can monitor progress in the Info Box to ensure everything renders smoothly.
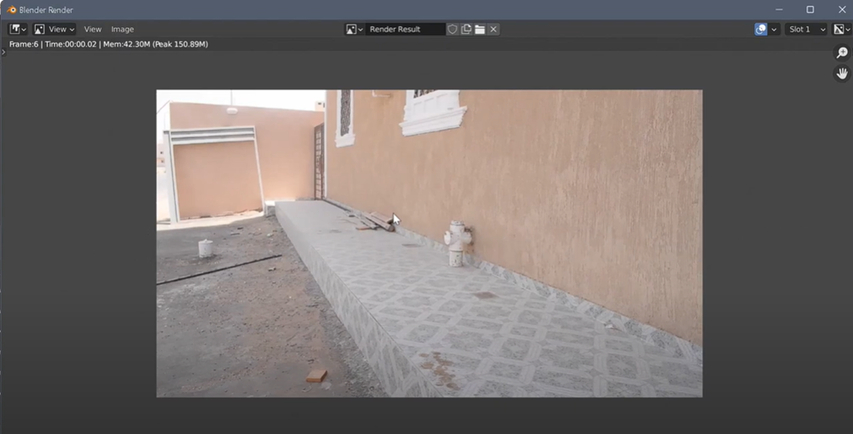
You can monitor progress in the Info Box to ensure everything renders smoothly.
Part 3. How to Render Video in Premiere Pro?
Rendering a video in Premiere Pro is an important step for ensuring smooth playback and completing your edits into a professional video. The procedure involves setting up a timeline, adjusting export settings, and rendering the project to a high quality result. Here is a step-by-step process on how to render video in premiere Pro:
1. Set Up Your Timeline
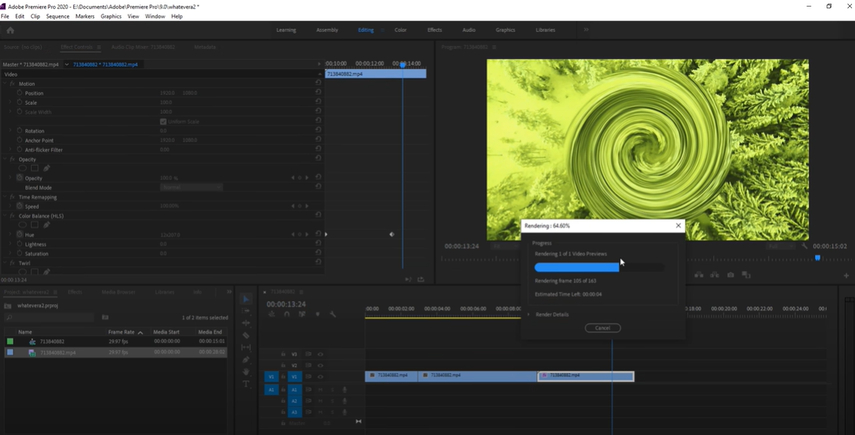
Before rendering, ensure that your video clips, transitions, and effects are properly organized in the timeline. To optimize the playback, render in/out points:
Set the Work Area by dragging the in/out points above your timeline to mark the area you wish to produce.
Go to Sequence > Render In/Out. This pre-renders effects-heavy parts, allowing for smoother editing.
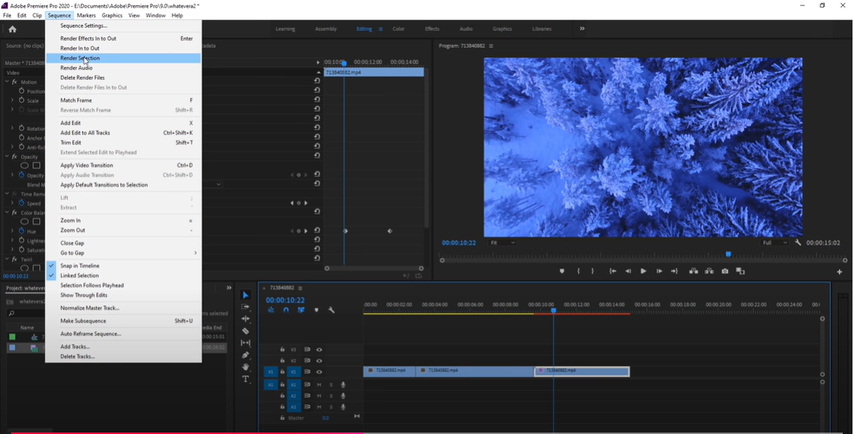
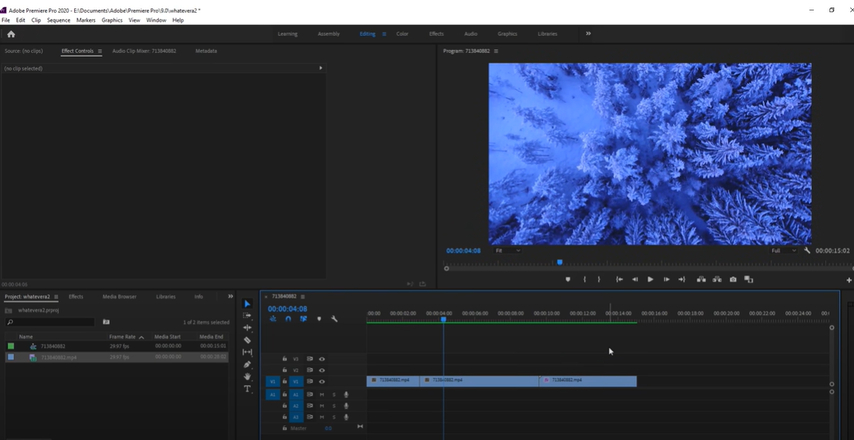
2. Access Export Settings
When your project is prepared for final rendering:
Select File > Export > Media, or press Ctrl+M (Windows) / Cmd+M (Mac).
This opens the Export Settings dialog.
3. Select the output format from the Export Settings
Choose a format. H.264 is the most used format for web and general playback.
Choose a preset, such as YouTube 1080p, or adjust the resolution, frame rate, and bitrate.
4. Set the output location
To pick where to save your file, click the file name next to the Output Name.
5. Start rendering
Click Export to begin rendering, or select Queue to send the project to Adobe Media Encoder for background rendering.
Part 4. Pro-Tips. Best Video Enhancer Free Try
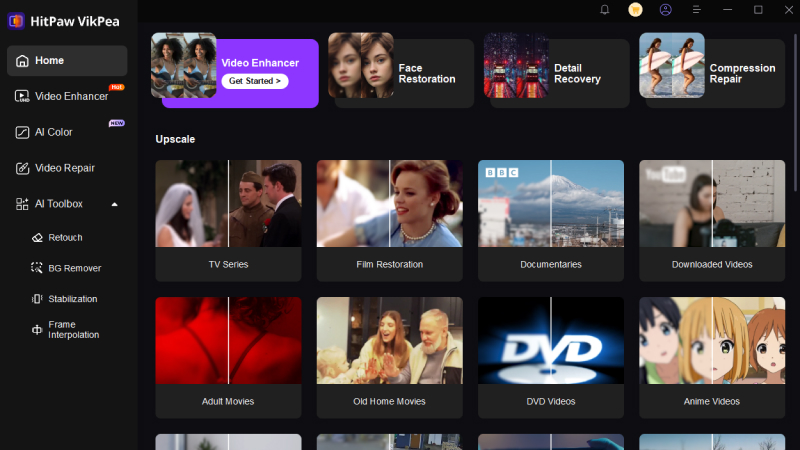
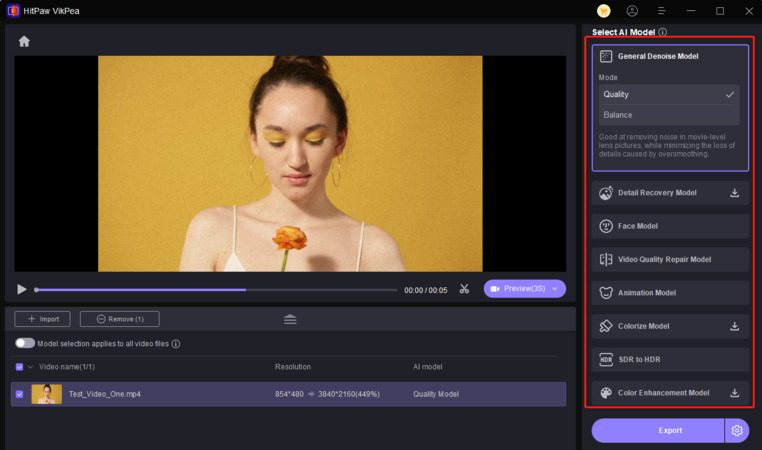
Looking for an easy way to improve your video quality? HitPaw VikPea (formerly HitPaw Video Enhancer) is a cutting-edge, AI-powered tool for precise and easy video enhancement. It includes all of the capabilities you need to make your videos seem professional, from resolution improvement to noise reduction. Whether you're a content creator, editor, or someone working on personal projects, this tool will provide outstanding outcomes.
Features of HitPaw VikPea
- Utilizes powerful AI technology to automatically improve video resolution.
- Eliminates undesired grain and noise, resulting in a cleaner visual experience.
- Smooths videos by boosting frame rates to 60 fps.
- Improves color grading to make your videos more bright and realistic.
- Improves the clarity of edges and textures.
Steps to Enhance Video
1.Go to the official website of HitPaw VikPea and download it on your computer.
2.Launch the app and click the Upload icon. Select the rendered video file you want to improve and add it to the workspace. You can do it by simply dragging or dropping the file.

3.Select AI Upscaling options for better resolution or HDR Enhancement to improve brightness, contrast, and dynamic range.

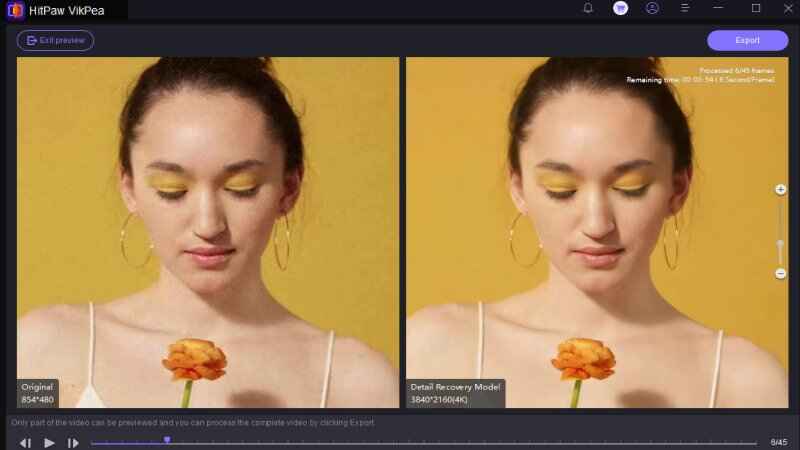
4.Use the 'preview' option to compare the original video to the upgraded one. Make any necessary modifications for best results. Once you are satisfied with the enhancements, select the 'export' to save the enhanced video in the desired location on your computer.

Learn More about HitPaw VikPea
Conclusion
In this article, we explored the process of render video in tools like Blender and Premiere Pro. We highly recommend HitPaw VikPea as an excellent free tool for enhancing video quality with AI-powered features like resolution upscaling, noise reduction, and color optimization. Try it now to enhance your video watching experience.



 HitPaw Univd (Video Converter)
 HitPaw VoicePea
  HitPaw FotorPea


Share this article:
Select the product rating:
Daniel Walker
Editor-in-Chief
My passion lies in bridging the gap between cutting-edge technology and everyday creativity. With years of hands-on experience, I create content that not only informs but inspires our audience to embrace digital tools confidently.
View all ArticlesLeave a Comment
Create your review for HitPaw articles