A Comprehensive Guide to Video Skin Retouching Techniques and Tools
In digital image editing, video skin retouching is one of the most important operations for achieving a photorealistic result. So, if you are a photographer, graphic designer, or even an influencer, then getting control of retouching skin can elevate your work at hand. With the right tools and techniques, you can achieve flawless radiant skin that grabs the attention of the viewer.
In this article, we will discuss skin retouching in detail, providing you with the most valuable expert techniques and tools for getting perfect results.
Part 1. What is Video Skin Retouching
A. Importance of skin retouching in video production
Video skin retouching is an important step in editing because it removes blemishes, wrinkles, and uneven skin tone, making the subject appear smooth and flawless. In professional video production, whether for films, beauty content, or social media, this adds an additional layer of polish to the entire image, making the subjects appear finished and camera-ready. It guarantees that irregularities in lighting or cosmetics are not visible while also achieving uniformity throughout images which is especially important with close-ups or high-definition videos where skin details are more evident.
B. Overview of common software used for skin retouching
Many video editing software tools are available that specialize in skin retouching. Here are some of them:
1. DaVinci Resolve Skin Retouching: Skin retouching DaVinci Resolve is a powerful tool when it comes to color grading. Some of its advanced color grading features have been shared for skin retouching under its "Face Refinement" section, with the provisions for automatic detection and smoothing of skin skin tone adjustment softening of textures.
2. Premiere Pro Skin Retouching: Adobe Premiere Pro has a few different built-in tools as well as some third-party plugins for skin retouching. The "Unsharp Mask" effect really softens skin textures. For more professional-looking effects, the Premiere Pro Face Retouch technique by applying Beauty Box can be used which automatically spot faces and then apply a very natural and even-smoothing effect to the skin.
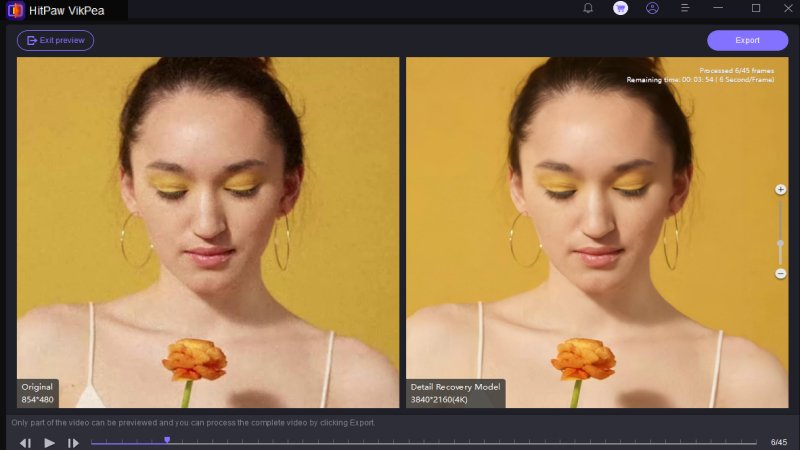
3. HitPaw VikPea: This is AI-based software that performs fast retouching of skin with rapid automatic detection of surrounding areas of the face to make the skin smooth.
Part 2. Skin Retouching Techniques in Premiere Pro
A. Step-by-step guide to skin retouching in Premiere Pro
Here is a step by step guide of skin retouching in premiere pro:
1. Import Your Footage: Launch Premiere Pro and import the video you want to retouch. Drag it onto the timeline to start editing.
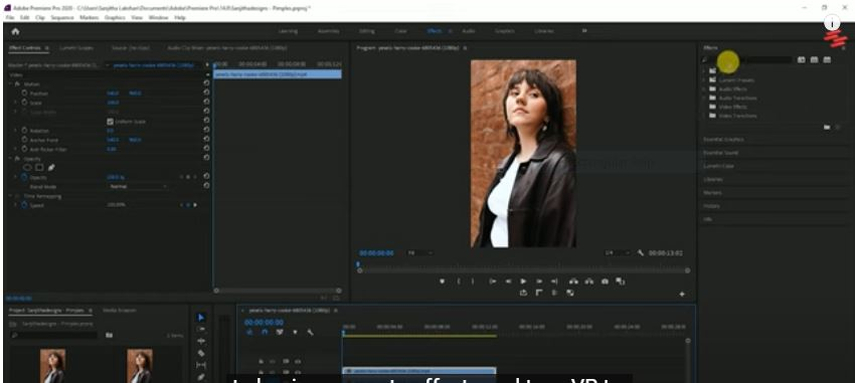
2. Apply the 'Unsharp Mask' Effect: You'll be in the "Effects" panel, so go ahead and search for the "Unsharp Mask." Drag this effect onto the clip to start working on skin texture.
3. Adjust the Settings: In the Effect Controls panel, alter the Amount and Radius of the Unsharp Mask so that it still maintains the details but smooths out the skin. Lower the sharpness so that the blemishes are softer; take extreme care not to overdo it.
4. Use Lumetri Color for Skin Tones: Open up "Lumetri Color." Under the "HSL Secondary" tab, you can use an eyedropper to select skin tones in your footage. Use Hue, Saturation, and Luminance to further refine color; it helps skin tone come out more even.
5. Add Masks: Mask only those regions of the face or body that need more nuanced skin retouching with Premiere Pro's masking tools. Apply a feathered mask to avoid any harsh edges.
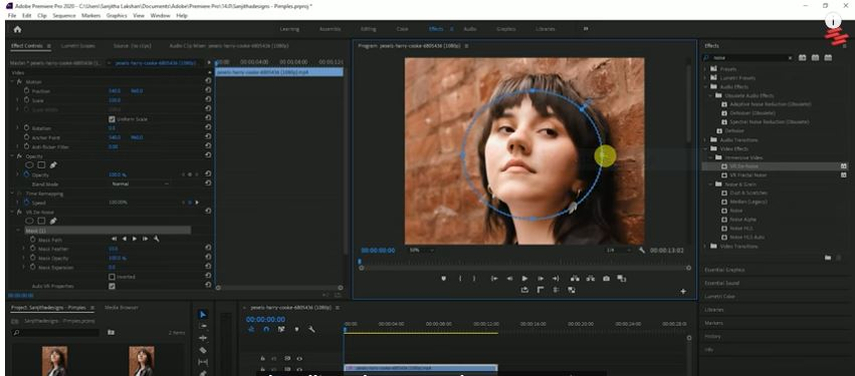
6. Refine Results: To achieve a more natural finish, adjust the blend modes or opacity. The skin should appear smooth but not overly processed.
B. Utilizing Premiere Pro face retouch features for optimal results
Premiere Pro also contains advanced features, such as extensive face retouching capabilities through third-party plugins.
- Beauty Box Plugin: One of the most popular auto-face-detection and face-smoothing plugins, Beauty Box produces satisfactory results. Using face detection, it applies skin retouching only where necessary, maintaining information about the eyes and lips while smoothing skin textures in general. To achieve the desired results, simply apply the plugin and fine-tune the "Smoothing Amount" and "Mask Radius".
- Adjustment Layers: adjustment layers apply the effect to the clip using an adjustment layer rather than directly. This can make skin retouching considerably more flexible and allow easier adjustments across many clips or parts of a scene.
C. Tips for achieving natural-looking skin retouching in Premiere Pro
- Subtlety is key: Make the fewest adjustments as possible. Too much smoothing produces an unrealistic, "plasticky" impression. Instead, make modifications that preserve as much skin texture while minimizing defects and irregularities.
- Multiply your impacts: Use multiple effects, but not all at the same time. Start the process by lightly smoothing out the skin to color correction to equalize the skin tones.
- Blend with Opacity: It is added to effects and adjustment layers in your retouching work to regulate how intense the retouching will be. When you reduce the opacity, the retouched areas will blend in with the rest of the footage to give it a nice and smooth look.
By following these steps along with using Premiere Pro skin retouching features, you will end up with professional-looking natural results in video production.
Part 3. Advanced Skin Retouching in DaVinci Resolve
A. Overview of skin retouching capabilities in DaVinci Resolve
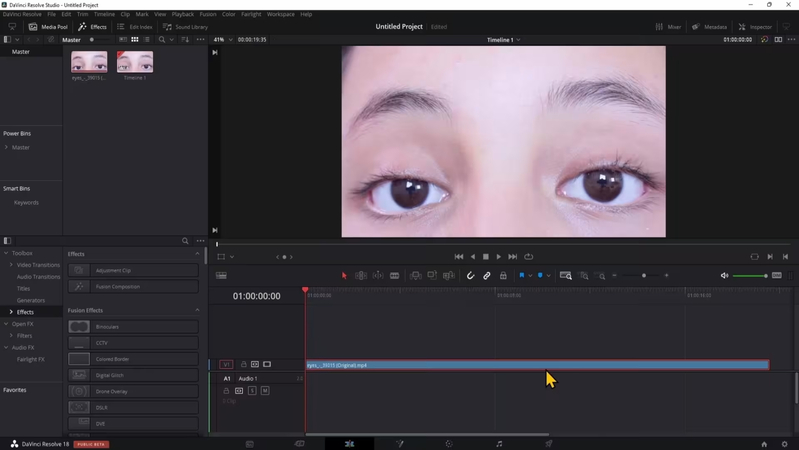
DaVinci Resolve offers very powerful skin retouching especially with its color grading and facial refinement features. For example, Face Refinement, available in the Color tab can auto-detect faces so that the softness of the skin, brightness and even tone can be changed. Advanced masking and tracking in Resolve make possible adjustments to face parts or body areas-a task that necessitates very accurate changes thus,skin retouching can look seamless and professional.
B. Techniques for effective skin retouching in DaVinci Resolve
- Face Refinement Tool: Automatically detects faces and allows fine-tuning of skin texture and tone.
- HSL qualifiers: Are used to isolate and adjust skin tones for precise color correction.
- Midtone Detail: Smoothen the skin and eliminate detail loss with minimum amount of smoothening.
C. Comparison of skin retouching methods: Premiere Pro vs. DaVinci Resolve
Premiere Pro: Premiere Pro uses third-party Beauty Box plugins to retouch faces, making it a good choice for quick results. However, the difference is less sharp and precise compared to more advanced tools, such as the highly effective Unsharp Mask, which can smooth even the roughest skin. Professional retouching may require more complex plugins.
DaVinci Resolve: Skin retouching DaVinci Resolve is more advanced. It has totally built-in tools, such as Face Refinement for an automatic face detection with precise adjustments of the skin. It's extremely powerful combined with Resolve's color grading and tracking at a very professional level, so it is at the very top tier for big projects.
Part 4. Exploring Skin Retouching in Final Cut Pro X
A. Introduction to skin retouching tools in Final Cut Pro X
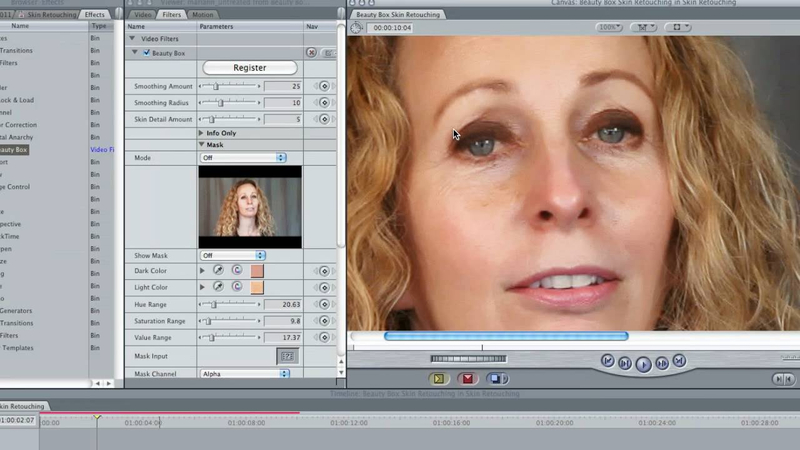
There are lots of built-in effects in Final Cut Pro X like Skin Smoothing and third-party plugins like Color Finale and Beauty Box which help help remove blemishes while creating soft skin as well as maintaining significant facial features for a more natural look. So skin retouching final cut pro x is not a complicated process due to built-in features.
B. Best practices for retouching skin in Final Cut Pro X
- Utilize the Skin Smoothing Effect: This is one of those effects that's native to reduce blemishes using a balance of not losing natural texture.
- Adjust Color Corrections: Apply Final Cut's color grading tools so that you can fine-tune the skin tones for that even, vibrant look.
- Apply Masks: Masks allow you to isolate the face and actually target specific areas that need a bit of extra help without affecting the shot as a whole.
C. Integrating skin retouching techniques across different video editing platforms
- Premiere Pro: For basic smoothing, use Beauty Box or Unsharp Mask in Premiere Pro.
- DaVinci Resolve: For advanced skin retouching and color grading, use Face Refinement in DaVinci Resolve.
- Final Cut Pro X: In Final Cut Pro X, combine built-in effects with color correction and masking for natural skin retouching.
Each platform has its own strengths, and integrating these techniques allows for flexibility across video editing workflows.
Part 5. Step-by-Step Guide Video Retouching Using HitPaw VikPea
HitPaw VikPea (formerly HitPaw Video Enhancer) is a very powerful AI-based tool designed for video quality enhancement. Advanced features of this HitPaw VikPea make the retouching a seamless process. Its Face Model relies on AI technology to automatically smooth out blemishes and wrinkles while allowing the natural look of the subject. It is an excellent choice for anyone who has a need to retouch skin in video for high-quality results, whether it is a professional video production or a personal endeavor.
Features
- Uses advanced AI to automatically enhance the quality and sharpness of faces in videos.
- It allows you to access a wide range of enhancement models, from extra sharp face retouching to noise removal and resolution upscaled.
- Easy interface and user-friendly design makes it very easy to import videos and apply enhancements.
- It offers the preview feature where users can see the enhancement effects before finally making changes.
- It supports multiple formats and resolutions to export video into the right quality for its platforms.
Steps
Step 1. First, download the HitPaw VikPea from the official website and install it on your computer. When installing, when the installation is complete, launch the software.
Step 2. Click on the "Choose File" button or drag and drop the video that needs retouching into the software interface.

Step 3. HitPaw VikPea has multiple AI models. Use the "Face Model" to automatically smooth the skin with its goal of enhancing facial details.

Adjust your resolution, brightness, or contrast; you'll also preview the effects the retouching will have on your video.
Step 4. You would then click "Preview" to view the result before making the changes. If happy with the retouching look, you just click "Export" to save the retouched video.
Learn More about HitPaw VikPea
Conclusion
Skin retouching is very essential to acquire a high-quality video. Whether you are beginners or an experienced video editor, HitPaw VikPea makes it really easy to enhance facial details and yet look natural. Try HitPaw VikPea now and take your video production to new heights!


 HitPaw Edimakor
 HitPaw VoicePea
  HitPaw FotorPea


Share this article:
Select the product rating:
Daniel Walker
Editor-in-Chief
My passion lies in bridging the gap between cutting-edge technology and everyday creativity. With years of hands-on experience, I create content that not only informs but inspires our audience to embrace digital tools confidently.
View all ArticlesLeave a Comment
Create your review for HitPaw articles