Mastering Noise Reduction in Final Cut Pro
Video quality includes not only good sights but also clean audio. Background noise, such as hums, traffic sounds, or static, might distract the viewer and make your project appear unprofessional. The good news is that Final Cut Pro has sophisticated tools for reducing unwanted noise and improving sound quality. In this guide, we'll walk you through some practical strategies for noise reduction final cut pro to clean up audio and make your project sound amazing. Let's get started with noise reduction so you can improve the quality of your audio even more.
Part 1. Introduction to Noise Reduction in Final Cut Pro
A. Importance of audio clarity in video production
Clear audio is required for all high-quality video creation. When viewers hear clean, crisp sound, they are drawn into the story; yet poor audio quality can break immersion, distract, and degrade the overall professional sense of the project. Prioritizing audio clarity can significantly improve audience engagement and perception of your work.
B. Overview of noise issues commonly faced in video editing
Video editors frequently encounter undesired background noise such as hums, static, and ambient sounds like traffic or wind, which can degrade the clarity of the main audio recording. These difficulties are widespread and can detract from the desired the soundtrack, consequently it is important to address them during the editing stage.
C. Introduction to Final Cut Pro as a powerful editing tool
Final Cut Pro is known for its editing capabilities: advanced noise reduction, which makes it easy to clean up background sound, allows editors to polish audio to a professional quality. Navigating these tools is easy, and the results are of the highest quality for editors.
Part 2. Understanding FCPX Noise Reduction Features
A. Overview of built-in noise reduction tools in Final Cut Pro
Several tools have been designed within Final Cut Pro to assist the editor in removing unwanted sounds. The FCPX Noise Reduction is found within the audio effects menu. It enables users to modify customizable settings to counter noise problems. These are user-friendly and easy for editors to apply and make necessary adjustments for the clearest sound possible.
B. Explanation of the FCPX noise reduction workflow
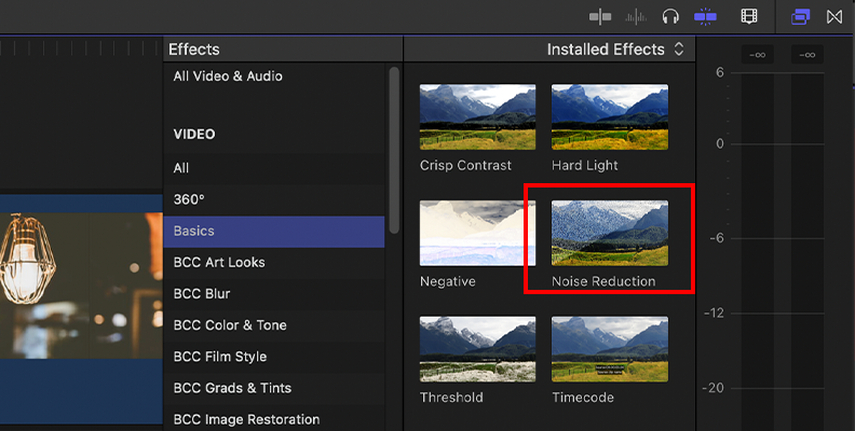
To apply FCPX noise removal, select the audio clip you want to alter and then apply the noise reduction effect from the audio effects panel. You will have controls within the effect for adjusting parameters such as amount and sharpness. The FCPX Denoiser allows you to fine-tune the balance between clarity and subtle noise reduction to help keep the natural quality of the audio while removing distractions.
C. Key benefits of using FCPX for denoise in Final Cut Pro
- Seamless integration: The noise reduction tool in FCPX is completely linked with Final Cut Pro, resulting in a seamless transition from audio to video edit.
- Instant previews: By displaying the actual change in seeing, editors may fine-tune and alter noise reduction in real time, without any rendering delays.
- Friendly interface: It is simple to use and comes with user navigation tools for noise reduction control.
- Compatibility Guarantee: FCPX reduces compatibility difficulties that may develop when utilizing external third-party applications, ensuring that workflows remain efficient and hassle-free.
- Consistent Quality Continuity: Integrated noise reduction technologies enable constant audio throughout the project, which helps in sustaining high production levels.
D. Comparison with other noise reduction software
FCPX noise reduction works significantly better in Final Cut Pro than independent noise reduction software. Although iZotope RX and Audacity provide excellent independent noise reduction features, Final Cut Pro's FCPX Denoiser is the ideal option for editors who wish to use noise reduction tools fast and easily without leaving the editing environment. Finally, other tools, such as HitPaw VikPea, can provide video and audio changes, improving the quality of your final result.
Part 3. Step-by-Step Guide to Denoise in Final Cut Pro
Here is a step-by-step guide to denoise in final cut pro:
A. Importing your video and accessing the audio settings
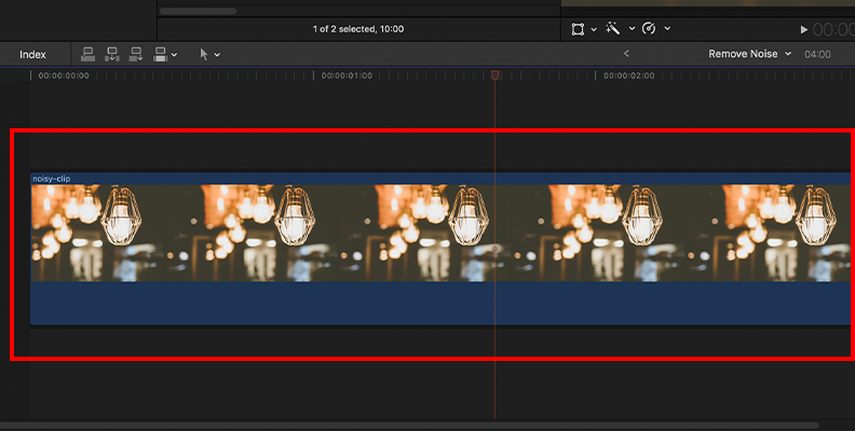
1. First, import your video into Final Cut Pro. Drag and drop the file into the timeline for easy access.

2. Click on the video clip, and navigate to the audio settings. You can access all tools available here, such as the FCP denoiser that reduces noise.
B. Utilizing the FCPX denoiser tool effectively
1. Find the denoiser of FCPX in your Audio Effects panel. Once you're ready, drop the effect on your audio track in order to start using this tool.

2. On applying a denoising tool, set some initial preferences so you can begin cleaning up noise; this specific tool is of great usage when it is about eliminating noise reduction: ambient kinds like hum or static signals, or distant traffic could be removed nicely.
C. Adjusting settings for optimal fcpx noise removal
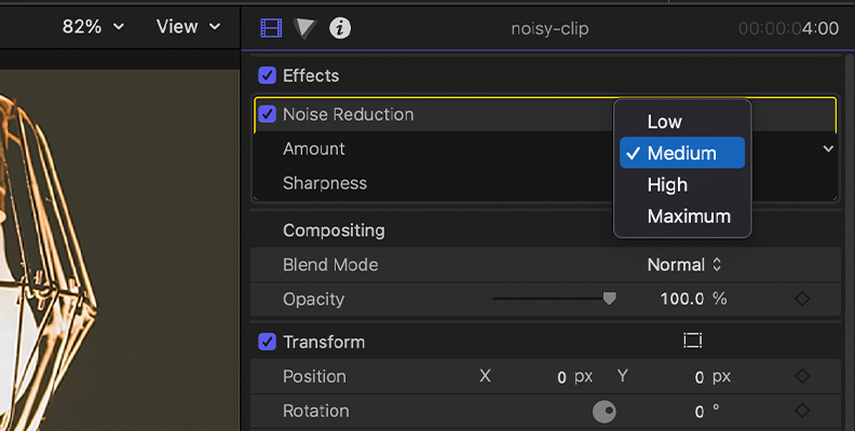
1. Apply the FCPX noise reduction tool and fine-tune to your best noise reduction level.

2. Refine the results by adjusting parameters using sliders for the amount, sharpness, and frequency. Every change impacts the overall clarity of the audio track so therefore must be balanced.
D. Tips for previewing and fine-tuning noise reduction
- Use Final Cut Pro's real-time preview to test your changes as you make them. Play again the audio to confirm that noise reduction in FCP is successful without sacrificing audio clarity.
- Fine-tune settings gradually, test minor changes to achieve the best results. This method preserves high-quality audio while reducing unnecessary noise.
- Don't be afraid to adjust the noise reduction parameters as needed until your music achieves the desired clarity.
Part 4. Alternative-Tips: Denoise Video with HitPaw VikPea
HitPaw VikPea (formerly HitPaw Video Enhancer) is an effective choice for editors looking for noise reduction options beyond Final Cut Pro. HitPaw VikPea is designed to improve both audio and video quality by automatically detecting and reducing undesirable background noise, making it a perfect option for individuals looking for efficient noise reduction without a lot of human labor.
Features
- Removes the unwanted background noise to let it have a clear audio output.
- It improves resolution and video clarity for each upscaling.
- Allows multiple files at the same time to reduce your processing time in handling very large projects.
- The intuitive design, navigation, and easy alterations makes it easy to use for beginners.
- Videos of all formats can easily play under it.
- One-click preset filters and effects that automatically bring professional results.
Steps
Step 1: Download and install HitPaw VikPea to your PC or Mac. Once you have installed it, launch the software and upload the video that you would like to denoise by choosing it from your files.
Step 2: In HitPaw VikPea, select one of the AI models specifically designed for denoising. To generally remove noise, select "General Denoise Model." You can even select an AI model to upscale your video resolution besides denoising it if you want.

Step 3: Preview your enhanced video, click the "Export" button to save your denoised video for further use.

Learn More about HitPaw VikPea
Bottom line
Effective noise reduction techniques can improve the quality of your video projects by providing clear and professional audio. Denoise final cut pro allows you to easily decrease background noise. For those seeking even more powerful AI-driven noise reduction, HitPaw VikPea is a good option. Its powerful AI models not only optimize but also improve video quality, making it an excellent alternative for users looking for a simple and efficient solution. Try HitPaw Video Enhancer to easily achieve high-quality audio and video.


 HitPaw Edimakor
 HitPaw FotorPea
 HitPaw Univd (Video Converter)


Share this article:
Select the product rating:
Daniel Walker
Editor-in-Chief
My passion lies in bridging the gap between cutting-edge technology and everyday creativity. With years of hands-on experience, I create content that not only informs but inspires our audience to embrace digital tools confidently.
View all ArticlesLeave a Comment
Create your review for HitPaw articles