Understanding Neat Video Denoiser for Superior Video Quality
Unwanted noise, grain, or flicker in your films affects the overall quality and, of course, the perception of professionalism. In this case, Video editors can only work on reducing it to get a clean finish. And here comes Neat Video Denoiser, a program used by professionals for its ability to eliminate noise while also boosting video clarity. This guide covers all you need to know about Neat Video, from its prominent features to step-by-step noise reduction processes.
Part 1. What is the Neat Video Denoiser
A. Overview of Video Noise and Its Impact on Quality
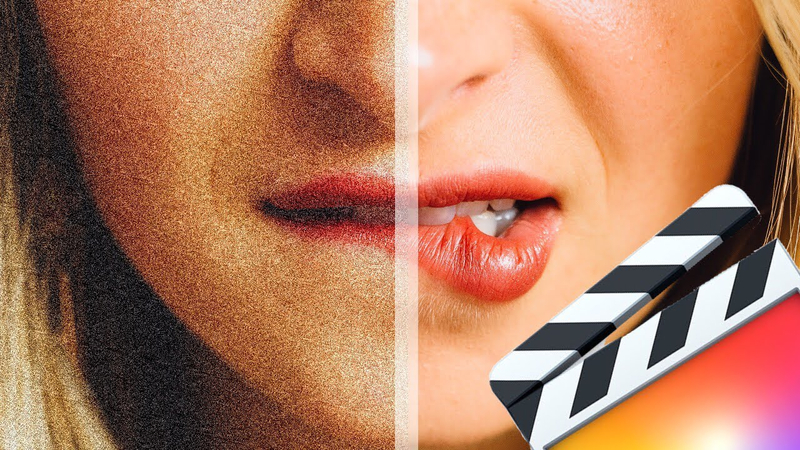
Video noise is generally an unwanted grain, static or flicker and can significantly degrade the quality of any footage. It's created by a number of sources including low-light conditions, high ISO settings or even older recording equipment. It creates a rough, distracting texture over the video. If it is left unaddressed, video noise can deprive content of its sense and polish even the best-shot footage to look fuzzy and uninteresting. It is important to clean and sharp image in video editing, therefore, denoising is one of the crucial elements for a high-quality professional look.
B. Importance of Denoising in Video Editing
One of the most basic denoising techniques in video editing involves getting rid of all forms of visual imperfections. Thus, the clean image produces a smooth image enhancing viewership and clarity. It becomes evident that the details will appear clear while giving the resultant output more refined and polished. For anyone who looks at upgrading the quality of videos, whether professional or personal, a quality noise reduction tool is highly essential in ensuring a smoother presentation that will be visually attractive.
C. Introduction to Neat Video Denoiser as a Solution
The Neat Video Denoiser is a very powerful and efficient tool designed specifically for getting rid of noise in video material, often referred to as the "denoise Neat Video" or "denoiser Neat Video" plugin. Neat Video has widely gained praise and is effective in the smoothing out of grain and flicker noise. It enables really comprehensive, advanced-setting capabilities by which users are free to tune the applied level of noise reduction suited to their unique requirements relating to unique footage. Therefore, Neat Video stands for the inevitable choice for any video editor wishing to result in high-quality video output.
Part 2. Features of Neat Video Denoiser
A. Advanced Noise Reduction Techniques
Neat Video Denoiser comes out with advanced noise removal technology which can sense and remove various types of noises without compromising video quality. It can detect noise patterns like grain, flicker and sensor noise in even challenging low-light or high-ISO footage.With neat video noise reduction technology, it can effectively detect and remove noise patterns, ensuring your footage retains its critical details.
B. User-Friendly Interface for Seamless Editing
Neat Video Denoiser has an intuitive interface that is supposed to make the process of denoising simple and easy to use. It allows users to easily navigate through the settings with a quick adjustment of the noise reduction parameters to fit the needs of their footage. With clear controls and useful presets, the results are achieved quickly, making effective solutions for editors at all levels.
C. Compatibility with Various Video Editing Software
Among other fantastic characteristics, Neat Video can be compatible with the best of video editing software such as Adobe Premiere Pro, Final Cut Pro, DaVinci Resolve and lots more. It is therefore an easy step to perfectly suit Neat Video to one's workflow because one can use it in virtually every work environment, professional or a beginner.
Part 3. How to Use Neat Video Denoiser Effectively
A. Step-by-Step Guide to Denoise Neat Video
Here is a step by step guide to neat denoise video:
1. Download and install: download and install the Neat Video plugin on your video editing software that is compatible with your program.
2. Add the Effect to Your Footage: Take your video into the edit suite and then add the effect of Neat Video to the clip you are going to denoise.
3. Open Neat Video and Analyze Noise: Open the Neat Video panel and then select a uniform part of the video to be used for noise analysis. The Neat Video would then automatically analyze the patterns of noise in that particular area.
4. Adjust Noise Reduction Settings: Use sliders and other controls for further fine-tuning in Noise Reduction. It can adjust the basic level using options and an advanced, for more complex ones with greater control over each filter, Neat Video can adjust the noise removal process as per requirement.
5. Preview and Apply: Preview the effect to see if the adjustment will give you a satisfactory result. If so, then apply the effect and render the video to finish the denoising procedure.
B. Tips for Optimal Settings and Adjustments
- Begin with Default Settings: Begin with default settings and increase from there to avoid over-smoothing.
- Preserve Detail: Avoid excessive noise reduction levels and preserve necessary textures and organic detail.
- Use Sharpening Wisely: Apply the least sharpening necessary to keep your image sharp without introducing artefacts.
- Preview Frequently: Preview the correction frequently to get the best result for several parts of your footage.
- Balanced, Low-Light: Videos balanced for low light eliminate noise but retain key information.
C. Common Mistakes to Avoid When Using Neat Denoiser
- Over-Denoising: Over-denoising will give your footage a very unnatural and over-smooth look. Try to avoid pushing the settings too high in order to maintain the original detail.
- Skipping Noise Analysis : If the noise analysis step of Neat Video is skipped from your project, your results will not work well.
- Changes applied without previewing: changes applied without previewing can bring undesirable effects. Previewing changes to effects applied on various parts of the footage would result in achieving uniformity.
- Ignoring compatibility requirements: Ensure Neat Video works perfectly with the version of editing software that you're using to prevent performance or functionality issues.
Part 4. Alternative-Tips: Denoise Video with HitPaw VikPea
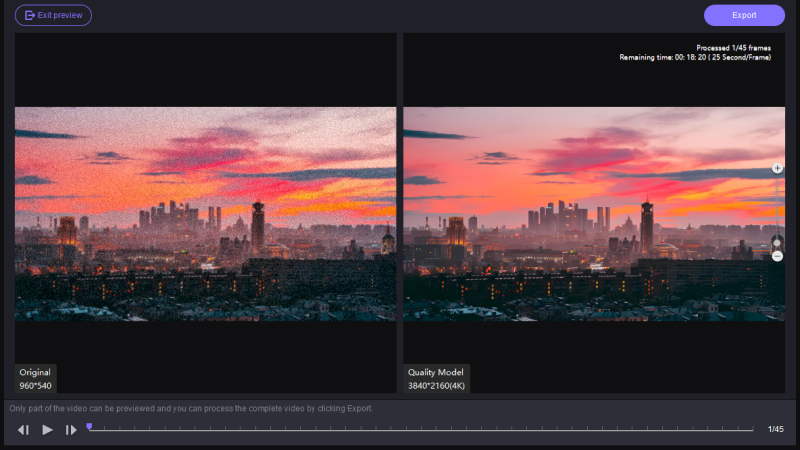
HitPaw VikPea (formerly HitPaw Video Enhancer) is a great alternative to Neat Denoiser. It provides you a powerful and versatile tool so that you can easily denoise the video with such high quality. HitPaw Video Enhancer helps users to reduce noise while using AI and may result in improving the clarity of the video especially video taken in low light and grainy. Its highly advanced algorithms are very capable of reducing noise without losing important details, so it serves as a good option both for beginners and professionals.
Features
- AI-Powered Denoising: This feature uses advanced AI methods to remove noise automatically.
- Video Quality Enhancement: Increases resolution and clarity, particularly in low-quality material.
- Batch processing: Batch processing allows you to process numerous files at once, saving you time.
- User-Friendly Interface: An easy-to-use design suitable for users of all experience levels.
- Wide Format Compatibility: Supports a variety of video formats, increasing workflow flexibility.
- Fast Processing Speed: Effectively enhances videos without requiring lengthy processing times.
Steps
Step 1. Download the HitPaw VikPea, open it, and follow instructions to install the software on your computer.
Step 2. Click "Choose File" to import the video you want to enhance. HitPaw VikPea supports a variety of video formats, so importing noisy or low-quality footage is easy.

Step 3. Choose the AI-powered denoise mode to remove grain, flicker, or other types of noise. HitPaw also provides options for upscaling and color enhancement, which can further enhance video quality.

Step 4. Previewing the output so you could see how it will come out after you make adjustments. Once satisfied, export it so you can save an enhanced, noise-free version of your video.

Learn More about HitPaw VikPea
Conclusion
Neat Video Denoiser is an innovative program that uses advanced ways to remove unwanted noise and improve the overall clarity of your video. However, for those looking for an alternative, HitPaw VikPea is an outstanding choice due to its AI-powered denoising capabilities and user-friendly UI. Using Neat Denoiser or HitPaw VikPea, you may significantly improve video quality and generate professional-looking footage that will attract your viewers. Explore these tools to improve your editing skills today!


 HitPaw Edimakor
 HitPaw FotorPea
 HitPaw VoicePea


Share this article:
Select the product rating:
Daniel Walker
Editor-in-Chief
My passion lies in bridging the gap between cutting-edge technology and everyday creativity. With years of hands-on experience, I create content that not only informs but inspires our audience to embrace digital tools confidently.
View all ArticlesLeave a Comment
Create your review for HitPaw articles