Discovering Video FPS on MacOS
Understanding the video's frame rate, or frame per second (FPS), is essential when editing and even playing back. This can be a daunting task for Mac users, especially those not equipped with the right tools and skills.
However, obtaining a video's frame rate on a MacOS device is just as simple if you have the file path. In this comprehensive tutorial, you will learn how to find fps of a video on mac and thus achieve a higher level of video management and optimization without any difficulty.
Part 1. What is Video FPS
The number of frames per second (FPS) in the video decides the motion and quality of the video during a video playback session. A lower FPS value increases the stiffness of the flow, and a high FPS value indicates better flow. It is required in both the action and the standard video.
Part 2. How to Find FPS of a Video on Mac
Frame rate, or FPS, is essential in video editing, defining poor playback and increasing the general video quality on MacOS through different approaches and software.
A. Utilizing QuickTime Player to Find Video FPS

One of the simplest ways to determine how to find fps of video file on mac is through a MacOS default application known as QuickTime Player. Here’s how it works:
Steps
Step 1. Open QuickTime Player from the Applications folder or the Spotlight Search.
Step 2. It will open the file directory; click on the File in the top menu bar, then choose Open File to search and launch the video you wish to analyze.
Step 3. Once your video is opened, go to the Window on the topmost menu bar and select the Movie Inspector.
Step 4. In the Movie Inspector window, you will find information about the video, including FPS, in the “Format” tab under “Frame Rate” or “FPS. ”
Benefits
- QuickTime Player is located in the operating system as a built-in application.
- It is a way of accessing important video information in the shortest time possible.
- Features such as the simplicity of the GUI and the possibility of using the program with different types of videos.
B. Alternative Methods to Find Out FPS of Video Files on Mac
Some alternative ways are also available on how to find out fps video on mac.
1. Using VLC Media Player

VLC Media Player also provides another way to determine the video's FPS. Here’s how it works:
Step 1. If you do not have a VLC Media Player, download it from the official VLC website and install it on your Mac.
Step 2. Open the VLC media player, go to the Media option, and select ‘Open File.’ from the menu bar.
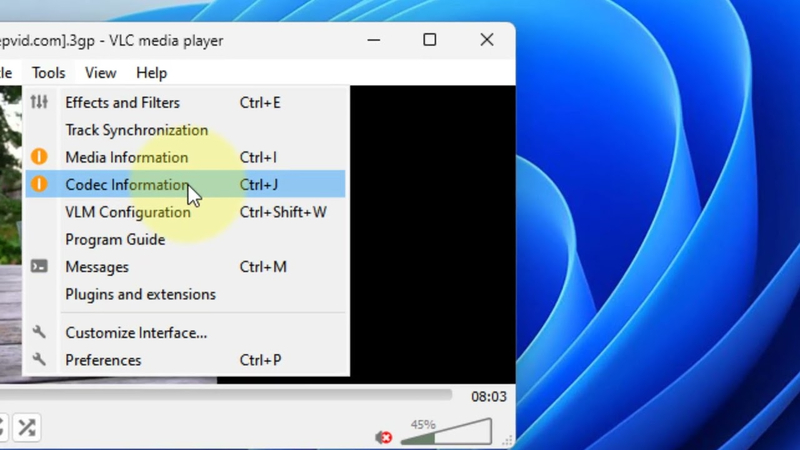
Step 3. On the Mac version, go to the ‘Window’ option in the toolbar and select ‘Codec Information.’
Step 4. To access the Media Information window, switch to the Codec Details tab. The frame rate is under the “Frame rate” or “FPS” tab.
2. Other Third-Party Applications
Several other third-party applications can assist you in searching for fps of Video on Mac. Programs like IINA and MediaInfo are popular choices:
IINA

This media player for the modern computer supports most of the known media formats and shows detailed video data such as FPS.
MediaInfo

Installing and launching MediaInfo is simple. It offers details on media-type files, including bit rate and frame rate.
Part 3. Find Out FPS of GoPro Video on Mac
MacOS provides different ways to find out fps gopro video mac, making them perfect when playing and cutting fast-moving action.
A. Specific Steps for Analyzing GoPro Footage
To determine the FPS of GoPro footage on a Mac, follow these steps:
Step 1. Import Your Footage: Use the USB cable to transfer videos from your GoPro to your Mac and copy the video files to another folder, or move the SD card to the Mac card reader to copy the video files.
Step 2. Open the Video File: To view the file, use the QuickTime Player or VLC Media Player to play the video file.
Step 3. Access Video Information:
- By Using QuickTime Player: To view the FPS, open QuickTime Player, go to Window, and finally click Movie Inspector.
- By Using VLC Media Player: In VLC, open on the desktop, open video through Media > Open Multiple Files, and go to Media Information in the Codec Details tab for FPS information.
B. Tools and Software Recommendations for GoPro Videos
For analyzing GoPro footage on mac find out fps of video, you can use the following tools:
1. GoPro Player

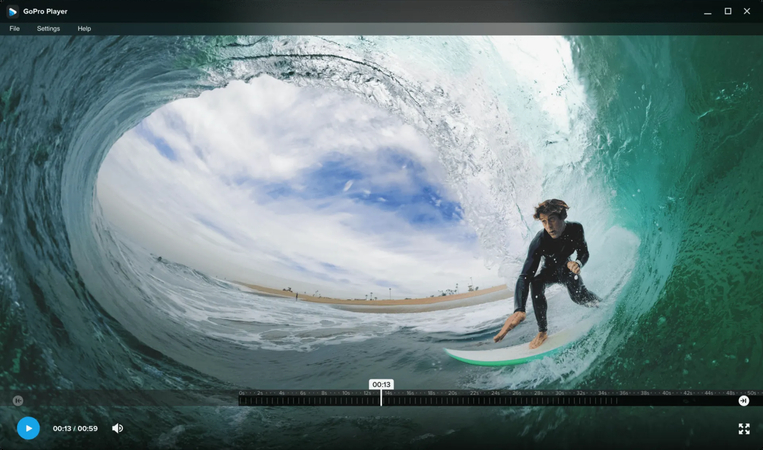
It is the official GoPro player for playing, handling, and analyzing GoPro files. It also provides detailed metadata, such as Frame Per Second.
2. MediaInfo

This tool provides detailed information about video files, such as the FPS, and works with the formats used in GoPro cameras.
3. Adobe Premiere Pro

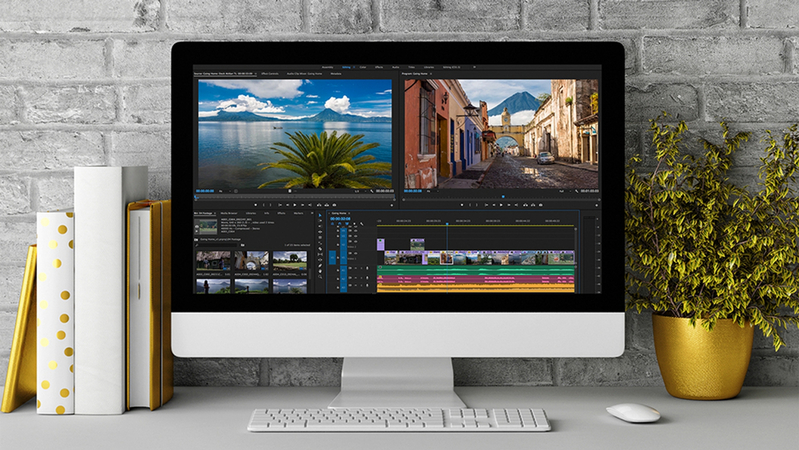
Other professional video editing software, such as Adobe Premiere Pro, also shows video metadata, such as the frame rate, and is ideal for more complicated editing on mac video find fps.
C. Importance of FPS in Action Footage
GoPro videos require FPS to maintain stability and to perform slow-motion play in explicit detail. The precise FPS information enhances the editing process, the alteration of settings, and the best results of dynamic action scenes.
Part 4. Mac Video Find FPS: Advanced Techniques
Advanced techniques are also available when finding the FPS of a video file on a Mac.
A. Using Terminal Commands to Find FPS
If a user is familiar with using the command-line interface, then Terminal is an excellent way to find the FPS of a video. Here’s how to use Terminal commands:
Step 1. The terminal can be located in Applications > Utilities or searched through Spotlight.
Step 2. ffmpeg is useful for handling multimedia data and can easily be installed by Homebrew, a package manager for MAC OS.
Step 3. Use the command ffmpeg -i /path/to/your/video. mp4, replacing /path/to/your/video. mp4 and paste the path of the video file.
B. Analyzing Video Metadata for FPS Information
Another sophisticated approach is the identification of the metadata of the given video. Tools like MediaInfo provide detailed metadata, including frame rate:
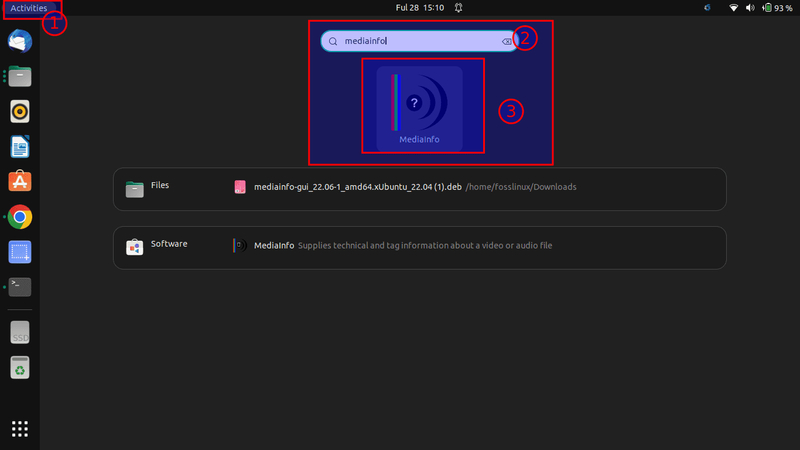
Step 1. Download MediaInfo from its official site and launch this application on your Mac.
Step 2. Open your video file and launch the application MediaInfo.
The frame rate of the video is presented in the MediaInfo main interface along with all its details.
C. Comparison of Different Methods for Accuracy
QuickTime and VLC provide simple information for FPS analysis, while ffmpeg and MediaInfo provide rich and accurate information. It all depends on the level of detail a user requires in their analysis; ffmpeg best suits technical analyses, while MediaInfo best suits user-friendly analyses.
Part 5. Pro-tips: Best Enhancing Tool for Video FPS
With AI-based upscaling and file repair solutions, HitPaw VikPea (formerly HitPaw Video Enhancer) is a potent tool for improving frame rate and video quality up to 8K. It has an easy-to-use interface, no watermarks for editing, and frame interpolation and stabilization.
Key Features
HitPaw VikPea - The Best 8K Video Enhancer with Only 1 Click
Secure Verified. 349,500 people have downloaded it.
- Improves display quality to 8K.
- Reconstructs damaged or low-quality videos to make them visually pleasant and appealing.
- Leverages highly advanced AI algorithms for the best quality of videos.
- Has frame interpolation to make the video sequences appear more fluid and Stabilization to achieve more stable footage.
- It has a neat interface that would not confuse users when navigating the site.
- Lets you preview the changes made without the use of watermarks.
Secure Verified. More than 120,860 people have purchased it.
Specific Steps for Using HitPaw VikPea
Step 1. Start by downloading and installing HitPaw VikPea on your Mac.
Step 2. Import the desired video by selecting the file or dragging and dropping the option.

Step 3. According to your needs, Select the appropriate AI model, such as an interpolation or stabilizer Model, from the seven available AI models.

Step 4. After the video has been upscaled and processed, preview it, and then click Export to save the improved version of the video.

Learn More about HitPaw VikPea
Conclusion
Understanding video FPS on Mac is critical for editing and playing back videos. Hence, it is much more convenient to do so using QuickTime, VLC, or other third-party apps. For the most premium improvements, there’s HitPaw VikPea, where advanced AI options include upscaled and stabilized videos for the best quality of footage smoothly and effortlessly. Try HitPaw VikPea today for exceptional and higher-upscaling results!


 HitPaw Edimakor
 HitPaw FotorPea
 HitPaw Univd (Video Converter)

Share this article:
Select the product rating:
Daniel Walker
Editor-in-Chief
My passion lies in bridging the gap between cutting-edge technology and everyday creativity. With years of hands-on experience, I create content that not only informs but inspires our audience to embrace digital tools confidently.
View all ArticlesLeave a Comment
Create your review for HitPaw articles