A Comprehensive Guide to Deinterlace in Davinci Resolve 18
Are you having trouble with unstable, old-fashioned interlaced footage? Whether you are working with broadcast content, recovering old recordings or handling footage from older cameras, having understanding of deinterlacing can be essential for producing results that look seamless and professional.
We will show you how to easily deinterlace DaVinci Resolve 18 which is one of the most powerful video editing and post-production tools. This article will help you turn unstable interlaced recordings into beautiful and flawless images regardless of your level of experience.
Part 1. Introduction to Deinterlacing in Davinci Resolve 18
A. Definition of Deinterlacing
Deinterlacing is a process of transforming interlaced video into progressive format that shows the whole image in each frame, as opposed to interlaced video that shows half the image per frame.This method is essential for enhancing video quality particularly when working with older videos or broadcast television content.
B. Importance of Deinterlacing in Video Editing
Deinterlacing is essential in video editing to produce visually appealing and polished footage. Interlaced video mostly looks blurry or hazy especially on modern screens. Smoother playback, clearer images and compatibility with modern screens and streaming services are all guaranteed by proper deinterlacing. This stage can improve your finished product and makes it appropriate for audiences with high standards.
C. Overview of Davinci Resolve 18 Features
A number of strong tools are provided by DaVinci Resolve 18 to streamline and improve the deinterlacing procedure. Resolve makes deinterlacing easy for beginners and professionals alike with its sophisticated motion estimation algorithms, adaptable settings, and smooth integration into your editing process. The program produces excellent results, guaranteeing that your video keeps its resolution and originality.
Part 2. Understanding Interlaced Video and its Challenges
A. Explanation of Interlaced Video Formats
Interlaced video formats were actually invented to improve broadcast bandwidth and compatibility with CRT (cathode-ray tube) TVs. In interlaced video, every frame is split into two fields: odd-numbered lines and even-numbered lines. This would essentially double the perceived frame rate and improve motion at lower bandwidths. Examples of interlaced formats are 480i, 576i, and 1080i. The "i" stands for "interlaced."
B. Common Issues Faced with Interlaced Footage
Although interlaced video was effective on older TVs, it causes serious problems for modern screens and workflows:
- Uneven Edges: Objects moving quickly have jagged edges, which reduces their visual clarity.
- Motion Artifacts: During slow-motion editing or frame analysis, interlaced frames may cause flickering or blurring.
- Incompatibility: Because progressive displays like LCDs, LEDs, and OLEDs are now widespread, interlaced content may not play back correctly without conversion.
- Reduced Perceived Quality: For viewers used to HD and 4K resolutions, interlaced video may appear outdated and unprofessional when contrasted with progressive films.
C. The Need for Deinterlacing in Modern Video Production
Deinterlacing has become essential in today's digital environment to guarantee cross-platform compatibility and quality. Sharp, clear images are necessary for modern productions in order to meet the demands of social media, streaming services, and large-scale displays. Editors may improve the viewing experience, make their content secure for a range of devices, and restore the charm of older or interlaced videos by deinterlacing it.
Part 3. Step-by-step Guide to Deinterlace in Davinci Resolve 18
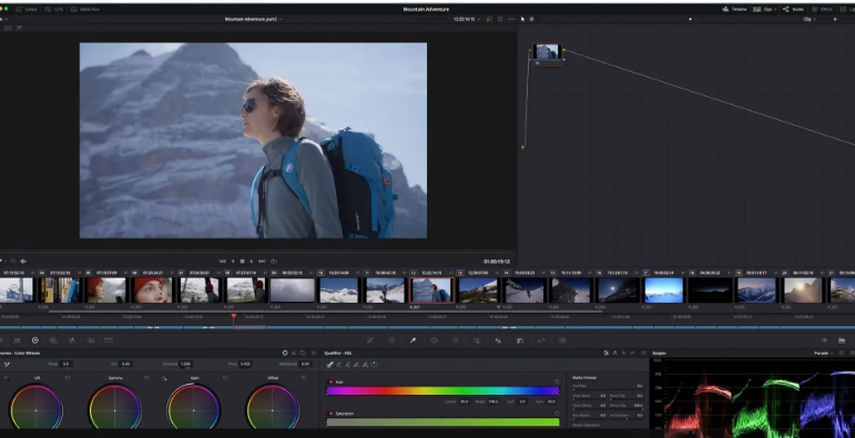
A. Importing interlaced footage into Davinci Resolve 18
1. Start a new project: Launch DaVinci Resolve 18 and start a new project or edit an existing one.
2. Import Footage: On the Edit screen, go to the Media Pool and drag your interlaced footage into the project.
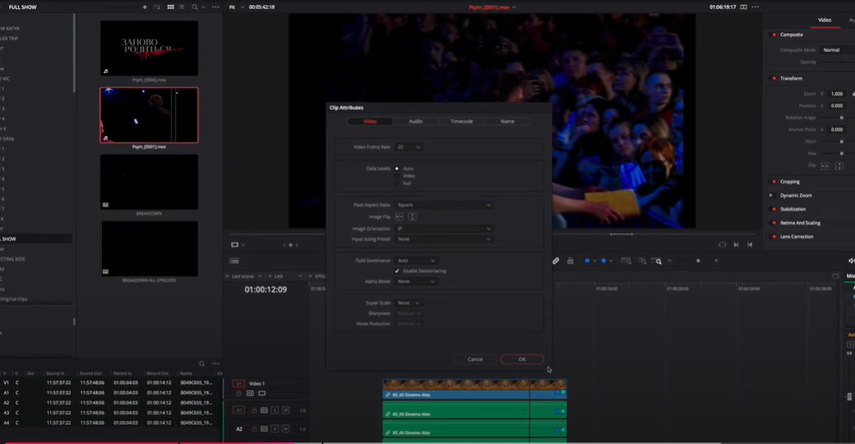
3. Check clip attributes: Right-click the imported film, then select Clip Attributes. Check the Field Dominance (Upper or Lower). Adjust as needed to ensure proper deinterlacing.
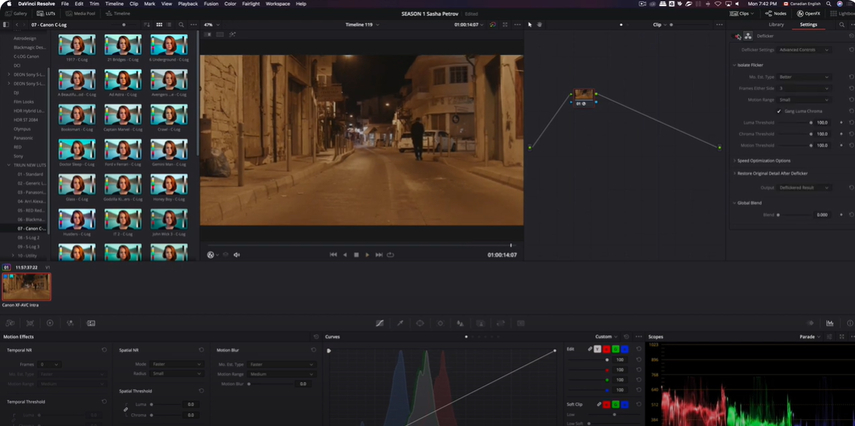
B. Accessing the Deinterlace settings
1. Select the clip: Drag the interlaced film from the Media Pool into the Timeline.
2. Open Clip Settings: Scroll down in the Inspector panel (upper-right corner) until you see the Deinterlace option.
3. Enable deinterlacing: Toggle the switch to turn on deinterlacing for the selected clip.
C. Applying Deinterlace techniques and tools
1. Select Deinterlace Mode:Fast Mode provides speedy results through basic processing.
For enhanced motion-adaptive deinterlacing, which produces smoother and cleaner results, select high-quality mode.
2. Using the Fusion Page for Advanced Users:Add a Deinterlace Node to the Fusion tab to have exact control over the operation.
For difficult footage, adjust settings such as motion estimation and field blending accordingly.
3. Optical Flow Settings:Go to Project Settings > Playback Settings and enable Optical Flow to improve frame interpolation.
4. Deinterlace via color tab:To deinterlace in the Color Tab, create a new node and use the Deinterlace OFX plugin to make precise adjustments.
D. Tips for optimizing Deinterlaced video Quality
- Preview on a regular basis: Use the timeline viewer to verify your deinterlaced movie for artifacts or missing frames.
- Optimize Motion Settings: In High-Quality Mode, fine-tune motion estimate settings to achieve better results with fast-moving objects.
- Add Noise Reduction: Use Resolve's built-in noise reduction capabilities to remove any visual noise created during deinterlacing.
- Export using progressive formats: Save the final video in 1080p or 4K format to ensure compatibility with contemporary displays.
Part 4. Enhancing Video Quality After Deinterlacing in Davinci Resolve 18
Deinterlacing is only the first step toward transforming your film into a professional-quality video. After removing interlacing artifacts, improving overall video quality provides a polished end result. DaVinci Resolve 18 includes a variety of features for color correction, noise reduction, and sharpening. But, modern tools like HitPaw VikPea (formerly HitPaw Video Enhancer) can improve your productivity by providing simple alternatives for professional video modification.
Features
- AI-Powered Deinterlacing: Automatically refines interlaced video for smoother playing and higher quality.
- Video Upscaling: Increases resolution to 4K or higher to meet modern display standards.
- Noise Reduction: Uses advanced AI methods to remove artifacts and noise created during deinterlacing.
- One-Click Enhancements: Includes quick adjustments for easily altering brightness, contrast, and sharpness.
- Detail Restoration: Sharpens and restores fine details in deinterlaced videos, making them appear professional and polished.
Steps to enhance video
Step 1. Go to the website to download and install the application on your device.
Step 2. Open HitPaw VikPea and drag the interlaced or blurry video into the enhancement workspace.

Step 3. Select the AI mode for upscaling, and thus the 4K option for resolution. HitPaw offers 7 AI models, and you can select the one that best suits you.
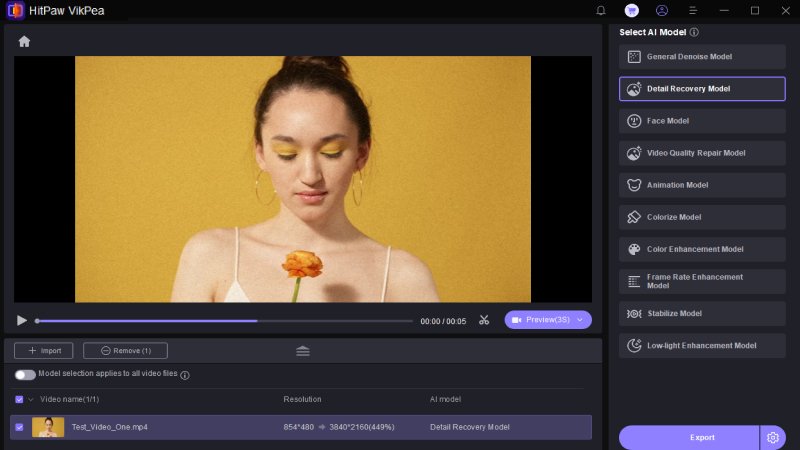
Step 4. Preview the quality of video output after enhancement before saving.
Step 5. Export your enhanced video in 4k resolution to your folder of choice once you are satisfied.

Learn More about HitPaw VikPea Video Enhancer
Conclusion
Deinterlacing in DaVinci Resolve 18 converts interlaced material into smooth, progressive videos, making it compatible with moderen displays. This guide covers importing videos, using deinterlacing tools, and improving quality with color grading, noise reduction, and sharpening. HitPaw VikPea is a useful tool for further refinement, including AI-driven upscaling, noise reduction, and detail restoration. Its user-friendly features make it an ideal choice for achieving professional-grade video quality with ease.


 HitPaw Edimakor
 HitPaw FotorPea
 HitPaw Univd (Video Converter)

Share this article:
Select the product rating:
Daniel Walker
Editor-in-Chief
My passion lies in bridging the gap between cutting-edge technology and everyday creativity. With years of hands-on experience, I create content that not only informs but inspires our audience to embrace digital tools confidently.
View all ArticlesLeave a Comment
Create your review for HitPaw articles